

The Ultimate Homemade Sweet and Sour Chicken (Better Than Takeout!)
Let’s be honest for a second. We all have those nights where the craving for takeout hits hard. You know the feeling—you’re exhausted, it’s been a incredibly long day, and the idea of sticky, savory, crispy comfort food sounds like an absolute dream. For the longest time, my go-to solution was picking up the phone and ordering my favorite Sweet and Sour Chicken from the local spot down the street. But let me tell you a little secret: making it at home is not only entirely possible, but it actually tastes a million times better.
When I first started trying to recreate that magical takeout experience in my own kitchen, I was super intimidated. I thought I’d need a massive deep fryer and a laundry list of hard-to-find ingredients. Boy, was I wrong! This homemade Sweet and Sour Chicken recipe has completely transformed our dinner routine. It is wonderfully crispy, perfectly tangy, and has that glorious sticky sauce we all obsess over. Grab your apron, because we are about to make some serious dinner magic together!
What Is Sweet and Sour Chicken?
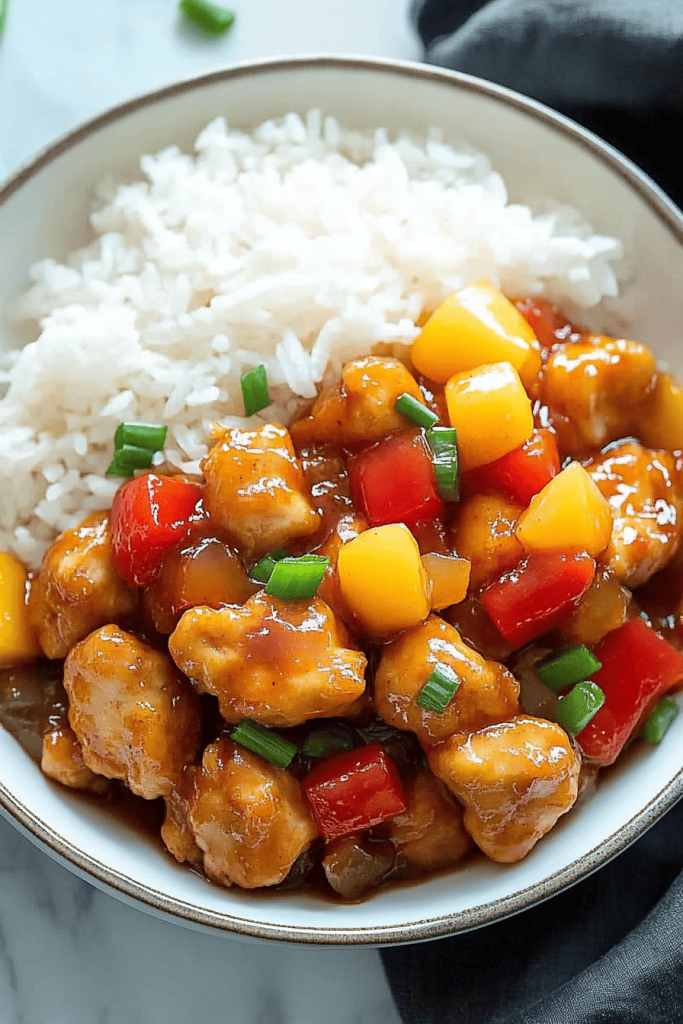
If you’ve somehow never experienced the joy of this classic dish, let me paint a delicious picture for you. Sweet and Sour Chicken is a beloved staple at Chinese-American restaurants across the globe. At its core, the dish consists of bite-sized pieces of chicken that are battered or dredged, fried until beautifully golden and crunchy, and then tossed in a vibrant, glossy sauce.
That signature sauce is where the real magic happens. It walks a beautiful tightrope between sweet and tangy, usually relying on a mix of sugar, vinegar, ketchup, and fruit juice to hit all those complex flavor notes. While restaurant versions are notoriously heavy and often deep-fried in vats of oil, our homemade version takes a slightly lighter approach. We use a simple cornstarch and flour dredge and a shallow pan-fry method. You still get that unbelievable crunch that stands up to the sticky sauce, but without the heavy, greasy feeling afterward. It’s the absolute best of both worlds, bringing that iconic restaurant flavor right to your dining room table.
How to Make Sweet and Sour Chicken
Quick Overview
Making this dish might look like it has a lot of steps, but I promise it moves incredibly fast once you get going. The process is broken down into three simple phases. First, we’ll prep and dredge our chicken pieces to get them ready for the pan. Next, we do a quick shallow fry in batches until everything is golden and crispy. Finally, we build that mouthwatering, sticky sauce right in the same skillet. Because everything cooks so quickly, my biggest piece of advice is to have all your ingredients chopped, measured, and ready to go before you even turn on the stove. This little bit of prep work will make the whole cooking experience completely stress-free and genuinely fun!
Ingredients
- Chicken & Marinade: 3 chicken breasts (diced into 1-inch cubes), 5 tbsp cornstarch
- Dredging Station: 2 eggs, 1/2 cup flour, 1 tsp salt, 1/2 tsp pepper, 1 tsp paprika, 1 tsp granulated garlic
- For Frying: 4 tbsp olive oil (plus a little extra if needed)
- Veggies & Aromatics: 1.5 cups diced colored bell peppers, 1 finely chopped onion, 2 minced garlic cloves, 1 tbsp ginger puree
- The Sauce: 1 can diced pineapple (keep the juice!), 6 tbsp ketchup, 2 tbsp apple cider vinegar, 2 tbsp brown sugar
Step-by-Step Instructions
Place your diced chicken breasts into a bowl and sprinkle in the cornstarch. Cover the bowl and give it a really good shake until every single piece is beautifully coated. This cornstarch layer is our secret weapon for maximum crispiness!
Grab two more bowls. In the first one, beat your eggs with a fork until they’re nice and frothy. In the second bowl, whisk together the flour, salt, pepper, paprika, and granulated garlic. Dip each cornstarch-coated chicken piece into the egg, and then toss it in the flour mixture until fully covered.
Heat your olive oil in a large skillet over medium-high heat. Cook the chicken in batches to avoid crowding the pan—usually 2 to 3 minutes per side is all it takes to get them gorgeously golden brown. Transfer the cooked chicken to a plate lined with paper towels to drain any excess oil.
Wipe out any burnt bits from the skillet if necessary, and leave about a tablespoon of oil. Toss in your chopped bell peppers and onion, sautéing on low heat for 3 to 4 minutes until they just start to soften. Stir in the minced garlic and ginger puree, cooking for one more minute until your kitchen smells absolutely heavenly.
Pour the entire can of diced pineapple (including all that sweet juice!), ketchup, apple cider vinegar, and brown sugar right into the skillet with the veggies. Bring the mixture to a gentle simmer and let it bubble away on low heat for about 5 minutes. The sauce will start to thicken and look incredibly glossy.
Add your crispy chicken back into the skillet. Gently fold everything together until the chicken is completely coated in that sticky, beautiful sauce. Let it heat through for 2 to 3 minutes, then remove from the heat. You’re ready to eat!
What to Serve It With
Half the fun of making takeout at home is setting up the perfect sides! Here are my absolute favorite ways to serve this dish:
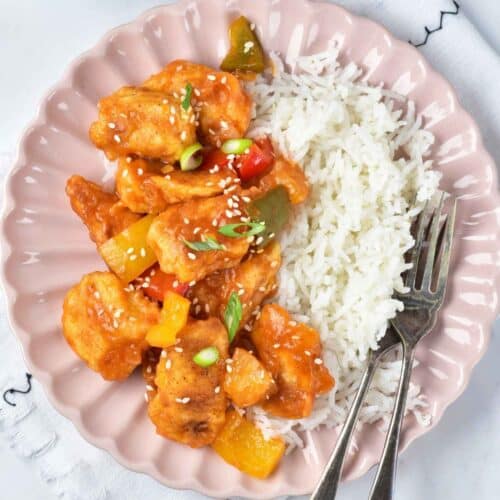
- Classic Takeout Style: You can never go wrong serving this over a fluffy bed of steamed white or jasmine rice. The rice soaks up all that extra sweet and tangy sauce beautifully.
- With Fried Rice: If you want to go all out, pair it with some homemade egg or vegetable fried rice. It really completes the restaurant-at-home vibe.
- Lower-Carb Option: Skip the grains entirely and serve your chicken over a bed of steamed broccoli, snap peas, or cauliflower rice. The sauce makes the veggies taste incredible!
- Noodle Night: Try spooning this over lo mein or simple buttered rice noodles for a fun twist that kids absolutely love.
Top Tips for Perfecting Your Sweet and Sour Chicken
Over the years of making this recipe, I’ve picked up a few handy tricks to make sure it comes out flawlessly every single time:
- Don’t crowd the pan: When you’re frying the chicken, give the pieces space to breathe. If you pack them in too tightly, they’ll steam instead of fry, and you’ll miss out on that essential crunch.
- Keep the pineapple juice: I can’t stress this enough—do not drain your canned pineapple! That juice is the base of our sauce and provides the perfect natural sweetness to balance the tangy vinegar.
- Prep ahead: This recipe moves fast once the chicken hits the pan. Having your sauce ingredients measured out and your veggies chopped beforehand will save you from scrambling at the stove.
Storing and Reheating Tips
If you somehow end up with leftovers (which is a rare occurrence in my house!), this Sweet and Sour Chicken stores surprisingly well. Keep it in an airtight container in the fridge for up to 3-4 days.
When it comes time to reheat, step away from the microwave! Microwaving will turn that beautiful crispy coating to mush. Instead, pop the leftovers into a skillet over medium heat with a tiny splash of water, or throw them in the air fryer at 350°F for about 5 minutes. The air fryer works absolute wonders for bringing back that day-one crunch!
Frequently Asked Questions
Final Thoughts
And just like that, you’ve mastered restaurant-quality Sweet and Sour Chicken right in your very own kitchen! I honestly believe that once you see how simple and incredibly flavorful this homemade version is, you’ll have a really hard time going back to the takeout menus. It’s crispy, it’s tangy, and it’s made with love and fresh ingredients.
I really hope this becomes a regular in your dinner rotation just like it has in mine. Cooking should be fun, and sharing a meal like this with your favorite people is what it’s all about. If you give this recipe a try, please let me know how it turned out for you! I’d love to hear your thoughts, see your photos, or answer any questions in the comments below. Happy cooking, friends!
Sweet & Sour Chicken
Ingredients
Main Ingredients
- 4 tbsp olive oil
- 3 chicken breasts diced into 1-inch cubes
- 1.5 cups coloured bell pepper diced
- 5 tbsp cornstarch
- 1 can diced pineapple with juice
- 1 tbsp ginger puree
- 2 cloves garlic minced
- 1 onion finely chopped
- 0.5 cup flour
- 2 eggs
- 2 tbsp apple cider vinegar
- 2 tbsp brown sugar
- 1 tsp salt
- 0.5 tsp pepper
- 6 tbsp ketchup
- 1 tsp paprika
- 1 tsp granulated garlic
Instructions
Preparation Steps
- Place the diced chicken in a bowl and add the cornstarch. Cover and shake until each piece is coated.
- In another bowl, beat the eggs with a fork. In a third bowl, mix flour, salt, and spices. Dip each chicken piece in the egg, then coat with the flour mixture.
- Heat olive oil in a skillet and cook the chicken in batches, 2-3 minutes per side, until golden brown. Add more oil if needed.
- Place the cooked chicken on paper towels to absorb excess oil.
- In the same skillet, heat 1 tbsp of oil and sauté the bell pepper for 3-4 minutes on low heat. Add garlic and ginger, cook for 1 more minute.
- Add pineapple with juice, ketchup, apple cider vinegar, and brown sugar to the skillet.
- Bring to a simmer and cook on low heat for 5 minutes.
- Add the chicken to the sauce and gently stir. Heat for 2-3 minutes.
- Serve and enjoy!
Featured Comments
“Impressed! Clear steps and family favorite results. Perfect for busy nights.”
“New favorite here — crowd-pleaser. crowd-pleaser was spot on.”
“Super easy and turned out amazing! My family asked for seconds. Saving this one.”
“This sweet treat was absolutely loved — the hearty really stands out. Thanks!”
“Made it tonight and wow — family favorite! Will definitely make Sweet and Sour Chicken: Best 7 Tips for a Perfect Dish Every Time again.”
“Packed with flavor and so simple. Exactly what I wanted from Sweet and Sour Chicken: Best 7 Tips for a Perfect Dish Every Time.”


