

You know those recipes that just instantly transport you back to your grandma’s kitchen, the kind that smell like pure comfort and happiness? This banana caramel cake is one of those for me. It’s funny, I used to think baking a cake with swirls and a decadent caramel topping was this complicated, intimidating thing. But then, I stumbled upon this gem, and let me tell you, it’s a total game-changer. It’s the kind of cake that makes everyone ask for the recipe, and they’re always surprised when I tell them how surprisingly simple it is. This banana caramel cake has become my go-to for birthdays, potlucks, or honestly, just when I need a little bit of edible sunshine. It’s not quite as fussy as a layer cake, but it delivers all the same wow-factor, with a moist, tender crumb and that irresistible caramel drizzle that just sings. It’s honestly my secret weapon for when I want to impress without spending all day in the kitchen.
What is banana caramel cake?
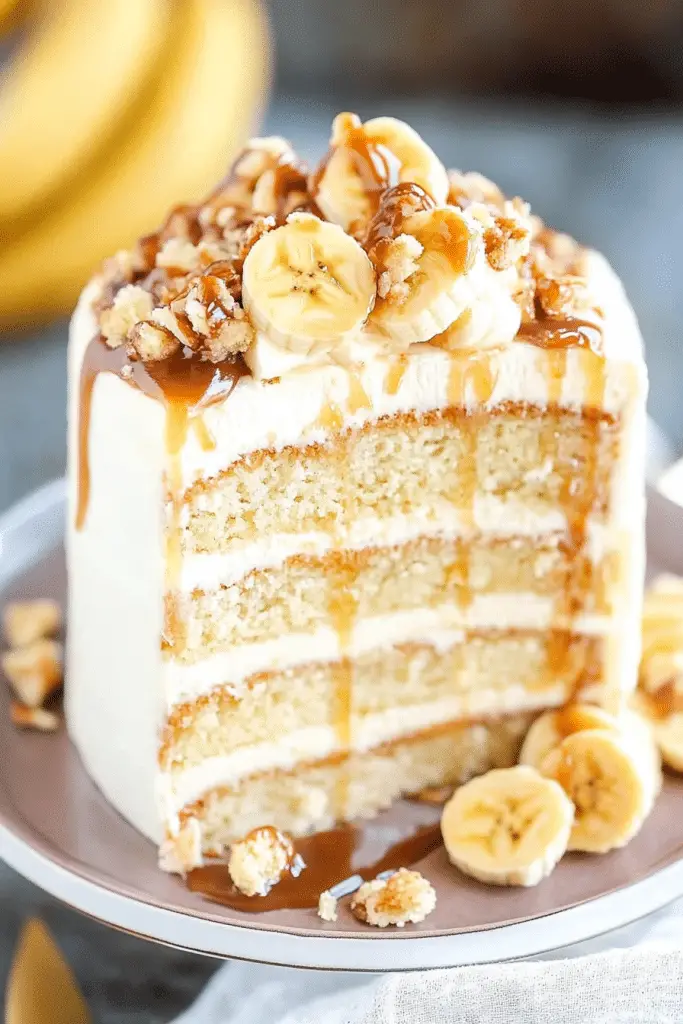
So, what exactly *is* this magical creation? Think of it as the most comforting, soul-warming hug you can bake into a cake. At its heart, it’s a wonderfully moist and tender banana cake, packed with that sweet, familiar flavor that we all adore. But here’s where it gets really special: we’re swirling in ribbons of luscious, homemade caramel right into the batter before it hits the oven. It’s not a separate frosting, mind you, but a gooey, caramel-y goodness that bakes right into the cake itself, creating these beautiful, unpredictable pockets of caramel magic in every single bite. And then, just when you think it can’t get any better, we add a final drizzle of even more caramel on top. It’s essentially a celebration of all things banana and caramel, perfectly balanced and utterly delicious. It’s the kind of dessert that feels both rustic and elegant at the same time.
How do you make banana caramel cake?
Quick Overview
Making this banana caramel cake is really a joy because it’s so straightforward. You’ll mash your ripe bananas, whisk together the wet and dry ingredients, swirl in a quick homemade caramel into the batter, bake it until it’s golden and fragrant, and then finish it off with a little extra caramel drizzle. The beauty of this method is that the caramel bakes right into the cake, creating those gorgeous, gooey pockets without any fuss. It’s a one-pan wonder for the most part, and the resulting cake is incredibly moist and flavorful. It’s seriously that easy to achieve bakery-worthy results at home.
Ingredients
For the Main Batter:
You’ll need about 3 medium-sized very ripe bananas, mashed until they’re practically liquid. The riper, the better – that’s where all the natural sweetness and moisture comes from! Make sure to mash them really well so there are no big lumps. Then, we’ve got 1 and 3/4 cups of all-purpose flour. I’ve tried using whole wheat pastry flour before, and it worked but made it a touch denser, so stick with all-purpose for that classic tender crumb. For leavening, we’re using 1 teaspoon of baking soda and half a teaspoon of baking powder – this duo ensures a nice lift. A pinch of salt (half a teaspoon) is crucial to balance all that sweetness. And for that sweet foundation, 3/4 cup of granulated sugar and another 3/4 cup of packed light brown sugar. Using both sugars gives it a wonderful depth of flavor and extra moisture. Don’t forget 2 large eggs, at room temperature; they help bind everything together beautifully. And 1/2 cup of melted unsalted butter, cooled slightly – this adds richness and flavor. Finally, a teaspoon of pure vanilla extract, because it just enhances all those lovely flavors. If you want to get fancy and add a bit more banana punch, I sometimes add a tablespoon of mashed banana liqueur, but it’s totally optional!
For the Filling:
This is the heart of our caramel swirl! You’ll need 1 cup of packed light brown sugar – this is key for that classic caramel flavor. Then, half a cup (1 stick) of unsalted butter, cut into cubes. A quarter cup of heavy cream is what makes it beautifully smooth and pourable. And a teaspoon of pure vanilla extract for that extra layer of deliciousness.
For the Glaze:
This is essentially a thinner version of our filling, just to get that perfect drizzly consistency. You’ll need about 1/2 cup of the caramel filling mixture, or you can quickly make a small batch with 1/4 cup packed light brown sugar, 2 tablespoons unsalted butter, and 1-2 tablespoons of heavy cream, whisked until smooth. The key is getting it to a pourable, but not watery, consistency.
Step-by-Step Instructions
Step 1: Preheat & Prep Pan
First things first, preheat your oven to 350°F (175°C). This is a standard temperature that works like a charm for most cakes. Now, grab a 9×13 inch baking pan. You want to make sure your cake doesn’t stick, so grease it really well with butter or baking spray. Then, I like to dust it lightly with a bit of flour, tapping out any excess. This creates a barrier that guarantees easy release every single time. Some people like to line the bottom with parchment paper too, which is an extra layer of insurance for a perfect cake release.
Step 2: Mix Dry Ingredients
In a large mixing bowl, whisk together the 1 and 3/4 cups of all-purpose flour, 1 teaspoon baking soda, 1/2 teaspoon baking powder, and 1/2 teaspoon salt. Just a good whisking until everything is evenly distributed. You want to make sure the leavening agents are spread throughout so your cake rises evenly. This step prevents those dreaded dense spots and ensures a light, fluffy texture. Give it a good minute of whisking.
Step 3: Mix Wet Ingredients
In a separate medium bowl, take your 3 mashed ripe bananas and add in the 3/4 cup granulated sugar, 3/4 cup packed light brown sugar, 2 large eggs (make sure they’re at room temperature – this helps them emulsify better!), 1/2 cup melted butter (cooled slightly so it doesn’t cook the eggs), and 1 teaspoon vanilla extract. Whisk this mixture together until it’s all well combined and looks smooth. The brown sugar will give it a slightly darker, richer hue, which is exactly what we want.
Step 4: Combine
Now, it’s time to bring those wet and dry ingredients together. Pour the wet banana mixture into the bowl with the dry ingredients. Using a spatula or a wooden spoon, gently fold everything together until *just* combined. Seriously, do not overmix! A few streaks of flour are okay. Overmixing develops the gluten in the flour, which can lead to a tough, dense cake. We’re aiming for tender and moist, so stop as soon as you don’t see any dry flour pockets. It should look like a lovely, thick batter.
Step 5: Prepare Filling
While your main batter is ready, let’s whip up that amazing caramel swirl. In a small saucepan over medium heat, combine 1 cup packed light brown sugar, 1/2 cup (1 stick) unsalted butter (cubed), and 1/4 cup heavy cream. Stir constantly until the butter is melted and the sugar is dissolved. Let it simmer gently for about 2-3 minutes, stirring continuously. It will thicken slightly. Remove from heat and stir in 1 teaspoon of vanilla extract. This should result in a thick, gooey caramel sauce. If it seems too thick to swirl, add another tablespoon of cream. If it seems too thin, simmer for another minute or two.
Step 6: Layer & Swirl
Pour about half of your banana cake batter into your prepared 9×13 inch pan and spread it out evenly. Now, spoon about half of your warm caramel filling over the batter, dolloping it around. Don’t worry about making it perfect! Then, pour the remaining cake batter over the caramel layer. Finally, spoon the rest of the caramel filling over the top. Now for the fun part: take a knife or a skewer and gently swirl the caramel into the batter. You don’t want to mix it completely; you’re just creating beautiful ribbons and pockets of caramel throughout the cake. Aim for about 5-6 swirls.
Step 7: Bake
Pop that pan into your preheated oven. Bake for 30-40 minutes, or until a wooden skewer or toothpick inserted into the center of the cake comes out clean or with just a few moist crumbs attached. The exact time will depend on your oven, so start checking around the 30-minute mark. The top should be golden brown and the edges should be pulling away slightly from the sides of the pan. Avoid opening the oven door too often, as this can cause the cake to sink.
Step 8: Cool & Glaze
Once it’s baked, carefully remove the cake from the oven and let it cool in the pan on a wire rack for at least 20-30 minutes. This is crucial for the cake to set properly. While the cake is cooling, prepare your glaze. If you saved some of the filling, gently warm it up until it’s pourable. If making a fresh batch, whisk together the ingredients until smooth. Once the cake has cooled slightly, but is still warm, drizzle the caramel glaze evenly over the top. The warm cake will help the glaze spread beautifully. Let it cool a bit more before slicing.
Step 9: Slice & Serve
Once the cake has cooled sufficiently (you can serve it warm or at room temperature), slice it into squares. The caramel swirls will make each piece look a little different and extra special. This banana caramel cake is absolutely divine on its own, but it’s also amazing served with a dollop of whipped cream or a scoop of vanilla bean ice cream. The contrast of warm cake and cold ice cream is just heavenly!
What to Serve It With
This banana caramel cake is so wonderfully versatile, it fits right in at almost any occasion. For breakfast, imagine a warm slice with your morning coffee. It’s like a sweet treat to start the day without being overly heavy. I sometimes toast a thin slice lightly in a toaster oven for an extra crispy edge, which my kids absolutely adore. For a more leisurely brunch, it’s fantastic alongside some fresh fruit salad and perhaps some crispy bacon. The sweetness of the cake is a lovely counterpoint to savory breakfast meats. For dessert, well, this is where it truly shines. It’s gorgeous on its own, but a scoop of good quality vanilla ice cream or a dollop of lightly sweetened whipped cream takes it to another level. A sprinkle of chopped toasted pecans on top adds a lovely crunch and nutty flavor that complements the caramel perfectly. And for those cozy, after-school or late-night snack attacks? It’s perfect served simply as is, maybe with a tall glass of cold milk. My family often requests this when we have a movie night – it’s the ultimate comfort food pairing. I’ve also found it’s a hit at potlucks because it travels so well and always gets rave reviews. Seriously, you can’t go wrong!
Top Tips for Perfecting Your Banana Caramel Cake
Over the years, I’ve learned a few things that really help make this banana caramel cake absolutely perfect every time. First, for the bananas: make sure they are *super* ripe. I’m talking about bananas that have turned completely brown, almost black, on their skins. They will be mushy and smell intensely sweet – that’s exactly what you want! They provide the best flavor and moisture. If your bananas aren’t quite ripe enough, you can even pop them in a low oven for about 10-15 minutes to help them along. When it comes to mixing the batter, my biggest piece of advice is: do NOT overmix! Once you add the wet ingredients to the dry, mix only until *just* combined. A few small streaks of flour remaining are perfectly fine. Overmixing develops the gluten in the flour, leading to a tough, dense cake, and we want this one to be wonderfully tender and moist. For that gorgeous caramel swirl, don’t be afraid to get a little artistic! You don’t need a perfect pattern. Just dollop the caramel onto the batter and swirl gently with a knife or skewer. The more rustic, the better, in my opinion. It creates these beautiful, unpredictable pockets of caramel goodness. If your caramel seems too thick to swirl easily, just stir in another tablespoon of heavy cream until it reaches a more pliable consistency. For baking, every oven is a little different, so I always recommend starting to check for doneness around the 30-minute mark. A toothpick inserted into the center should come out with moist crumbs, not wet batter. If the top is browning too quickly before the inside is cooked, you can loosely tent the cake with aluminum foil. Ingredient swaps: While this recipe is pretty perfect as is, I have experimented with almond milk or oat milk for the cream in the caramel, and it works, though the caramel might be slightly less rich. For an added layer of flavor, I sometimes add a teaspoon of cinnamon or nutmeg to the dry ingredients, which is lovely with the banana and caramel. And when it comes to the glaze, consistency is key. You want it pourable but not runny. If it’s too thick, a tiny splash of cream will loosen it up; if it’s too thin, let it simmer for another minute or two.
Storing and Reheating Tips
One of the best things about this banana caramel cake is how well it keeps its moisture and flavor. If you’re planning on enjoying it over a couple of days, storing it at room temperature is perfectly fine for up to 3 days. Just make sure to cover it tightly with plastic wrap or place it in an airtight container. This prevents it from drying out. If it’s particularly warm where you are, or if you live in a humid climate, the refrigerator might be a better option to keep it fresh longer. When storing in the fridge, keep it in an airtight container, and it will stay delicious for up to 5 days. Just a heads-up: refrigeration can sometimes slightly firm up the caramel, so you might want to let it sit at room temperature for about 20-30 minutes before serving if you’ve kept it chilled. For longer storage, this cake freezes beautifully! Let the cake cool completely, then wrap it tightly in a layer of plastic wrap, followed by a layer of aluminum foil, or pop it into a freezer-safe container. It can be stored in the freezer for up to 2-3 months. To thaw, simply remove it from the freezer and let it come to room temperature on your counter. The caramel will soften up again as it thaws. Regarding the glaze, it’s best applied when the cake is still slightly warm and then allowed to cool. If you’re storing the cake unfrosted, you can warm up the leftover glaze gently and drizzle it over individual slices as needed. If you’ve frozen the cake, it’s usually best to glaze it *after* it has thawed. This way, the glaze stays nice and fresh and adheres well to the cake. For reheating individual slices, you can pop them in a microwave for about 10-15 seconds for a warm, gooey treat, or gently warm them in a toaster oven if you prefer a slightly crisped edge.
Frequently Asked Questions
Final Thoughts
Honestly, this banana caramel cake has become such a staple in my home, and I really hope it becomes one in yours too. It’s more than just a dessert; it’s a little piece of joy that’s surprisingly easy to bring into your kitchen. The way the banana and caramel flavors meld together is just pure magic, and that moist, tender crumb is something you’ll dream about. It’s proof that you don’t need complicated techniques to create something truly spectacular. If you’re a fan of banana bread or love anything with caramel, this cake is an absolute must-try. It’s the perfect balance of comfort, sweetness, and a little bit of indulgence. For those who adore this recipe, you might also want to check out my Spiced Apple Crumble Pie for another cozy, seasonal treat, or perhaps my Decadent Chocolate Lava Cakes when you’re craving something intensely rich. I truly can’t wait to hear what you think of this banana caramel cake. If you make it, please leave a comment below and share your experience, or even your own little twists and turns on the recipe – I love hearing how it turns out for you all! Happy baking, and enjoy every single delicious bite!
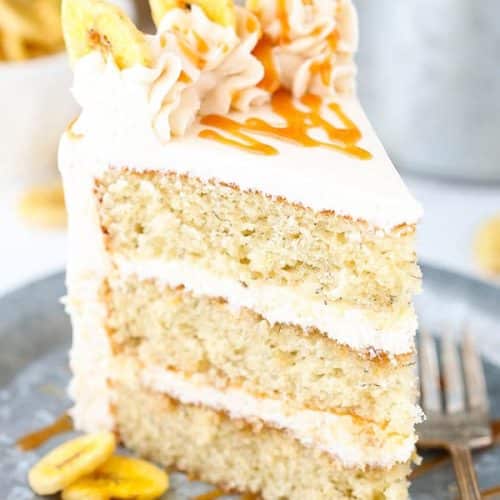
Caramel Banana Layer Cake
Ingredients
Cake Ingredients
- 310 g sugar
- 168 g unsalted butter, room temperature
- 0.5 tsp vanilla extract
- 173 g sour cream
- 45 ml vegetable oil
- 3 large eggs
- 1 large egg white
- 325 g all purpose flour
- 2 tsp baking powder
- 0.5 tsp baking soda
- 0.5 tsp salt
- 240 ml mashed bananas (2-3 medium sized bananas)
Caramel Sauce
- Caramel Sauce*
Caramel Frosting Ingredients
- 336 g salted butter, room temperature
- 237 g shortening
- 1208 g powdered sugar
- 2 tsp vanilla extract
- 7 tbsp caramel sauce (above), room temperature
- 3 tbsp water
Garnish
- Banana chips
Instructions
To Make the Cake
- Grease three 8 inch round cake pans and preheat oven to 350°F (176°C).
- Beat the butter and sugar until light and fluffy, about 3-4 minutes. Do not skimp on this step. Cream the butter for the full 3-4 minutes.
- Add vanilla, sour cream and vegetable oil and mix until well combined.
- Add eggs and egg white in two batches, mixing until well combined.
- Combine dry ingredients in another bowl. Add half of the dry ingredients to the batter and mix until well combined.
- Add the mashed bananas and mix until well combined.
- Add remaining dry ingredients and mix until well combined.
- Divide batter evenly between the cake pans and bake 24-26 minutes or until a toothpick inserted comes out with a few crumbs.
- Remove cakes from oven and allow to cool for 3-4 minutes, then remove to cooling rack to cool completely.
When the Cakes Are Cool, Make the Frosting
- Beat the butter and shortening together until smooth.
- Slowly add about half of the powdered sugar, mixing until smooth.
- Add the vanilla extract and the caramel sauce and mix until smooth.
- Slowly add the remaining powdered sugar and mix until smooth.
- Add the water (or additional caramel sauce), as needed, and mix until smooth.
To Layer and Frost the Cake
- Use a large serrated knife to remove the domes from the tops of the cake layers so that they are flat.
- Place the first layer of cake on your serving plate or on a cardboard cake circle.
- Add 5-6 tablespoons of caramel sauce to the top of the cake layer and spread evenly over the cake.
- Add about 1 cup of frosting on top of the caramel sauce and spread into an even layer.
- Add the second layer of cake on top of the frosting.
- Add another 5-6 tablespoons of caramel sauce to the top of the cake layer and spread evenly over the cake. Add another cup of frosting on top of the caramel sauce and spread into an even layer.
- Top the cake with the remaining layer of cake.
- Frost the outside of the cake with the remaining frosting. For help getting a smooth finish, refer to my tutorial on how to frost a smooth cake with buttercream.
To Finish Off the Cake
- Place banana chips around the bottom edge of the cake.
- Use the remaining caramel sauce to drizzle around the edges of the cake.
- Use the remaining frosting to pipe swirls of frosting around the top edge of the cake. I used Ateco tip 844.
- Place a few banana chips around the top of the cake.
- Because of the caramel sauce, you may want to refrigerate this cake. I recommend storing it in an air-tight container. Cake is best served at room temperature. Cake is best for 2-3 days.
Notes
Featured Comments
“Impressed! Clear steps and absolutely loved results. Perfect for busy nights.”
“New favorite here — super easy. crowd-pleaser was spot on.”
“Super easy and turned out amazing! My family asked for seconds. Saving this one.”
“This sweet treat was absolutely loved — the bright really stands out. Thanks!”
“Made it tonight and wow — spot on! Will definitely make Sweet Banana Caramel Cake How to Bake again.”
“Packed with flavor and so simple. Exactly what I wanted from Sweet Banana Caramel Cake How to Bake.”


