

There’s something magical about that first bite of Cherry Puppy Chow. Maybe it’s the burst of bright, tart cherry flavor paired perfectly with sweet, crunchy cereal—the kind of snack that’s crunchy, sticky, and just a little bit addictive. I remember my mom making something similar when I was a kid, but honestly, I’ve tweaked it over the years into my own little favorite. This version with cherry flavor? It’s become a go-to on busy afternoons, a quick treat to satisfy that sweet tooth, or even a special surprise for the holidays. It’s one of those recipes that’s so simple but impressively delicious, kind of like a grown-up version of the classic puppy chow (which, don’t get me wrong, I love too). Trust me, once you try this, it’ll disappear in minutes at my house—and I bet it will at yours, too. It’s perfect for sharing, snacking, or just making your kitchen smell like a friendly cherry orchard. So grab a big bowl—I promise, you’ll want to make this again and again!
What is a cherry pug puppy chow?
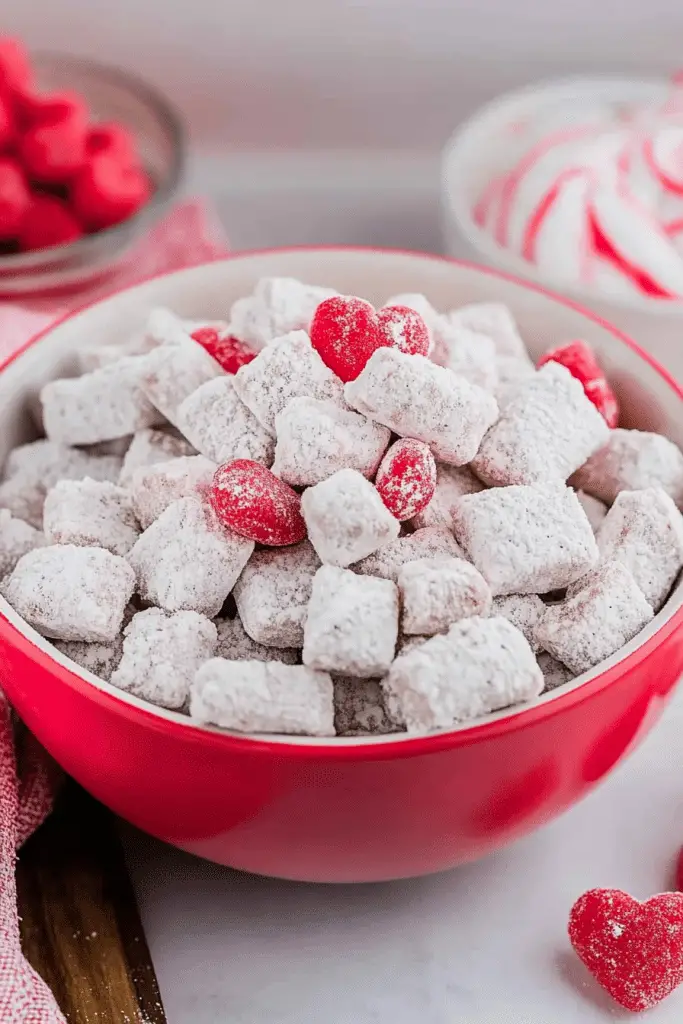
Think of Cherry Puppy Chow as a twist on the beloved puppy chow—often made with peanut butter, chocolate, and Chex cereal—but with a vibrant cherry flavor that adds a zing of freshness and a bit of nostalgia. It’s essentially crunchy cereal coated in a sweet, sticky glaze infused with cherry extract and dried cherries—think of it as a burst of summer in every bite. The name “puppy chow” originates from its resemblance to little “dog biscuits” coated in a sweet mixture, but don’t worry—no actual dog treats here! This treat is all about flavor, fun, and ease. It’s the kind of recipe you can toss together in minutes, perfect for when you’re craving that sweet crunch but want something a little different from the usual. The best part? It’s incredibly versatile—you can swap out ingredients, add your favorite nuts or dried fruit, and even make it in different shapes or sizes if you’d like. It’s a homemade treat that’s perfect for sharing with family or neighbors, or just keeping in your snack stash for those days you need a little pick-me-up.
How do I make a delicious Puppy Chow?
Quick Overview
This recipe is honestly a breeze. It starts with crunchy cereal—usually Chex—and then you melt together cherry preserves, chocolate, and a splash of vanilla to create a glossy, flavorful coating. Once that’s ready, you gently toss your cereal in the mixture, add some dried cherries for a burst of flavor, and spread it out to cool. When it’s set, you can drizzle a little extra melted chocolate on top or toss some edible glitter for fun. It’s a no-bake, quick-to-assemble snack that’s ready to enjoy in under 30 minutes. I love how flexible it is—once you get the basic method down, you can customize it endlessly. And trust me, the hardest part is waiting for it to cool because honestly, I keep sneaking bites while it’s still a little sticky. The secret to perfect Cherry Puppy Chow is in gentle mixing and patience—it’s all about that glossy coating and crispy crunch.
Ingredients
For the Main Batter:
- 4 cups Chex cereal (or rice/maize cereal for a different crunch)
- 1/2 cup cherry preserves or cherry jam (for that authentic cherry flavor)
- 1 cup semi-sweet chocolate chips (or dark chocolate if you prefer a richer taste)
- 1 teaspoon vanilla extract
- 1 tablespoon unsalted butter (optional, for extra richness)
For the Filling:
- 1/2 cup dried cherries (preferably tart, but sweet ones work too)
- Optional: chopped nuts, white chocolate chips, or sprinkles for texture and appearance
For the Glaze:
- Additional melted chocolate for drizzling
- Powdered sugar or edible glitter for extra decor (if you’re feeling fancy!)
Step-by-Step Instructions
Step 1: Preheat & Prep Pan
No oven needed for this one, but line a large baking sheet with parchment paper or a silicone baking mat. This is where you’ll spread the finished mixture to cool and set. If you’re adding a drizzle of melted chocolate, keep your utensils handy. The key here is organization — gather your ingredients and set everything within reach. When I do this, I often double the recipe so I can snack on some while I work. Easy, quick, and totally worth it.
Step 2: Mix Dry Ingredients
Set aside your cereal in a large mixing bowl. Make sure it’s gently tossed to avoid breaking the cereal—this helps it stay crispy. Dry ingredients are simple here, just cereal and dried cherries. The cherries will get coated later, but it’s best to mix them in beforehand so they distribute evenly. Sometimes I chop my cherries into smaller pieces if I want more cherry flavor in every bite, but whole dried cherries look pretty when you’re serving it in a clear bowl.
Step 3: Mix Wet Ingredients
In a microwave-safe bowl, combine the chocolate chips, cherry preserves, and butter if you’re using it. Microwave in 20-second bursts, stirring after each, until everything’s melted and glossy. It’s so satisfying to watch it come together—kind of like a silky sauce. Once melted, add the vanilla and mix well. That vanilla really amplifies the cherry-chocolate combo. Trust me, don’t skip that step!
Step 4: Combine
Pour the melted mixture over the cereal and cherries. Gently fold with a spatula or large spoon—no need to be aggressive, or you’ll break the cereal. Coat everything evenly—this is where patience pays off. If some pieces look a little sticky, just give it a few more gentle tosses until all the cereal is shiny and coated. If it feels too thick, add a tiny splash of cream or milk to loosen it up just a little—I tested almond milk, and it actually made it even creamier.
Step 5: Prepare Filling
Now, if you want, stir in chopped dried cherries, nuts, or even white chocolate chips. It’s all about customizing it to your taste. I love adding extra cherries for more pop, but sometimes I sprinkle in a handful of chopped almonds or pistachios for crunch. Let this sit for 5 minutes so everything can meld together nicely.
Step 6: Layer & Swirl
If you’re feeling fancy, transfer half of the coated cereal to your prepared pan, layer with some of the dried cherries or sprinkles, then add the rest on top. Use a skewer or a toothpick to swirl the coating gently—this creates a pretty marbled effect when it sets. I love doing that because it makes the final treat look like a little work of art, even if it’s super simple to make.
Step 7: Bake
Actually, this one’s a no-bake! Just let it sit at room temperature or pop it in the fridge for 20-30 minutes if you want to speed up the setting. The chocolate coating will firm up nicely, giving you that perfect crunch. If you prefer yours really crispy, you can refrigerate longer or even bake it at a low temperature—though I prefer the fresh, chewy consistency of just chilling and setting.
Step 8: Cool & Glaze
Once set, drizzle extra melted chocolate on top for that glossy finish if you like a more decadent look. I sometimes add a pinch of sea salt or sprinkle some edible glitter for festive flair. Let everything cool completely before breaking into pieces. If you’re in a rush, stick it in the fridge for 10 minutes—it firms up faster that way.
Step 9: Slice & Serve
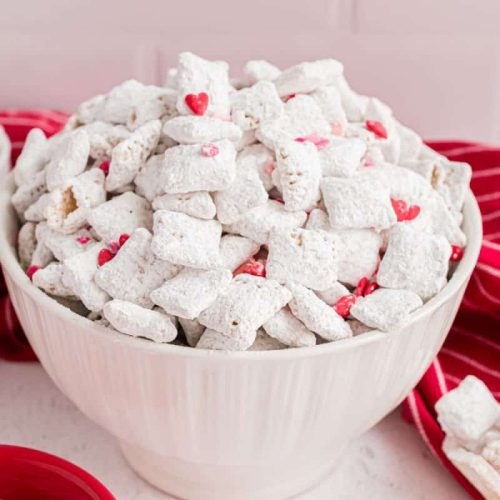
Use a sharp knife to cut into bars or squares. I love drizzling a little more chocolate over the edges for a fancy touch. Serve in bowls or fancy cupcake liners—either way, it’s a showstopper. The chewy cherries, crunchy cereal, and smooth chocolate are all what make this so addictive. And honestly, it gets better after a day or two—if it lasts that long! Usually, I package it up in airtight containers, and it keeps for about a week, though it rarely lasts that long at my house.
What to Serve It With
This Cherry Puppy Chow is such a versatile treat. For breakfast, I’ll throw a handful in with Greek yogurt and berries—it’s a fun, sweet crunch that makes mornings special. On brunch days, I like to serve it alongside coffee or hot cocoa, especially if I’ve added some festive sprinkles for holiday brunches. As a dessert, it’s perfect for stacking on a platter during family gatherings—fingers go in quick! I also love packing it into little clear bags or tins to give as gifts—perfect for neighbors or teachers. And it’s a total hit as a casual snack at movie nights or cozy evenings by the fire, because it’s portable, addictive, and just enough sweetness to satisfy that craving. Honestly, I’ve made this for potlucks, picnics, and random weekdays—every time, it’s gone so fast!
Top Tips for Perfecting Your Cherry Puppy Chow
Here’s what I’ve learned after making this dozens of times:
- Zucchini Prep: Well, not zucchini here, but dried cherries! Make sure they’re patted dry so they don’t soggy up the mix. Sometimes, I microwave dried cherries for 10 seconds to soften them up, which makes mixing easier.
- Mixing Advice: Be gentle when coating—the cereal can break if you toss too hard. Use a spatula or large spoon and fold carefully. The secret to a glossy coating is melting your chocolate slowly and stirring steadily.
- Swirl Customization: After layering, use a chopstick or skewer to create marbled swirls—this makes it look more artistic. Don’t overdo it, or you’ll lose the pretty layered effect.
- Ingredient Swaps: No cherry preserves? Try strawberry or raspberry jam. Want more crunch? Add pretzels or crushed graham crackers. I’ve experimented with coconut flakes too—they add extra flavor and texture.
- Baking Tips: Since this is a no-bake, just cool in the fridge or at room temp. But if you want it extra crispy, spread it out on a baking sheet and bake at 200°F for about 15 minutes—then let it cool fully before eating.
- Glaze Variations: For a different flavor kick, mix a spoonful of caramel sauce or peanut butter into your melted chocolate before drizzling. That way, you get a richer, more complex taste.
My biggest lesson? Patience is key—wait for the coating to set fully before serving. Sometimes, I get impatient and try to dive in early, but it’s so much better once it’s had time to chill. And don’t forget—you can totally customize this to suit your taste buds. That’s part of the fun!
Storing and Reheating Tips
Keeping Cherry Puppy Chow fresh is easy, but a few tips help it stay crispy and delicious. Once cooled, store it in an airtight container or zip-top bag. At room temperature, it will stay crispy for about 2-3 days—just make sure it’s in a dry, cool place. If your house tends to be humid, pop it in the fridge — it’s fine for up to a week, but the texture might soften slightly. For longer storage, freeze it tightly wrapped, and it’ll keep for up to 3 months. Just thaw at room temperature for a few minutes before serving again.
If you’re planning to add extra glaze or drizzles later, wait until right before serving or reheating. I find that the glaze stays crispest if applied just before eating. When reheating, avoid the microwave — just let it sit at room temp or gently re-crisp in a low oven for 5-10 minutes. That way, you keep the crunch and the cherry flavor intact.
Frequently Asked Questions
Final Thoughts
I could go on and on about how much I adore this Cherry Puppy Chow—every batch is met with happy squeals and eager hands reaching for more. It’s one of those recipes that never fails to impress, whether I’m gifting it to friends, bringing it to a picnic, or just sneaking a handful late at night. The combination of tart cherries, gooey chocolate, and crunchy cereal is pure comfort, packed into one delightful bite. Plus, it’s so adaptable—you can add extra nuts, swap the fruit, or sprinkle on some festive decorations for holidays. I hope you give this a try, because I truly think you’ll love how easy and delicious it is. Happy baking, and I’d love to hear how yours turns out—leave a comment or share your favorite variations!
Cherry Puppy Chow
Ingredients
Main Ingredients
- 8 cups Rice Chex cereal
- 1 package Vanilla almond bark (16 ounce)
- 0.3 ounce Sugar Free JELL-O cherry gelatin mix
- 1.75 cups powdered sugar
- sprinkles
Instructions
Preparation Steps
- In a microwave-safe dish, melt the vanilla almond bark for one minute. Stir, then microwave for an additional 30 seconds until smooth. Mix in the cherry gelatin mix.
- Pour the melted vanilla mixture over the cereal in a large bowl. Stir until the cereal is evenly coated.
- Transfer the coated cereal into a large gallon-sized bag or container with the powdered sugar. Seal and shake vigorously until evenly coated with sugar.
- Spread the coated cereal onto a baking sheet lined with parchment paper. Add sprinkles on top. Let set until cool and hardened. Store in an airtight container.
Notes
Featured Comments
“Impressed! Clear steps and quick weeknight win results. Perfect for busy nights.”
“New favorite here — creamy. crowd-pleaser was spot on.”
“Super easy and turned out amazing! My family asked for seconds. Saving this one.”
“This sweet treat was absolutely loved — the bright really stands out. Thanks!”
“Made it tonight and wow — so flavorful! Will definitely make Sweet Cherry Puppy Treats How To Make Them again.”
“Packed with flavor and so simple. Exactly what I wanted from Sweet Cherry Puppy Treats How To Make Them.”


