

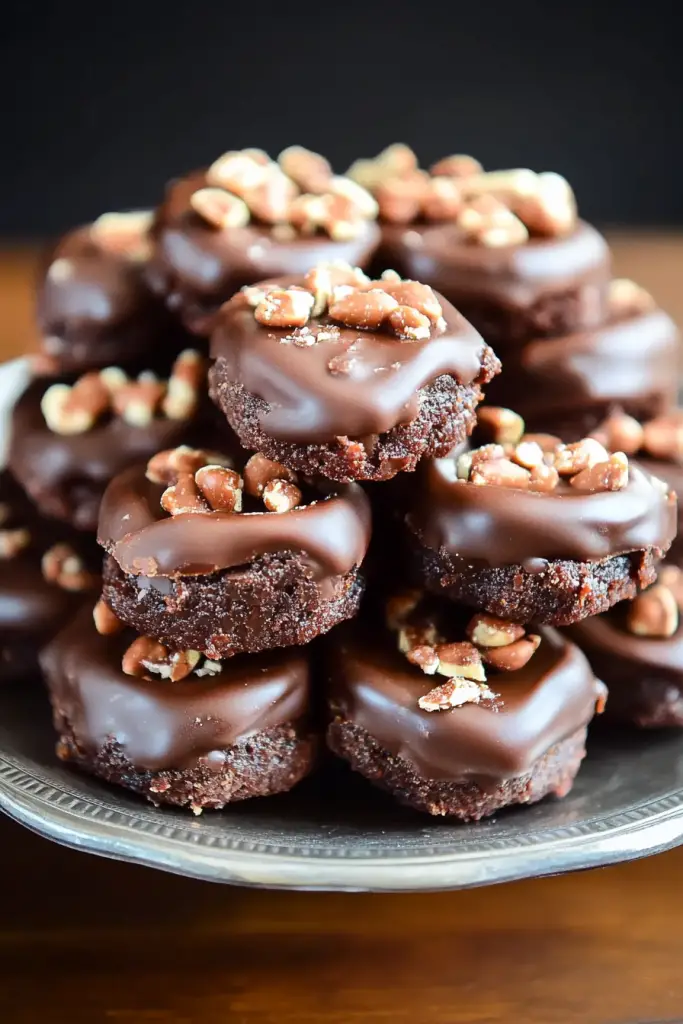
Oh, where do I even begin with these? Sweet Georgia Browns. Just saying the name out loud brings back a flood of memories. They’re not just a dessert to me; they’re the smell of Sunday afternoons at my grandma’s house, the star of every potluck I ever hosted in college, and, honestly, my secret weapon when I need a serious comfort food fix. You know those moments when you just crave something deeply satisfying, something that feels like a warm hug from the inside out, but you *really* don’t want to spend hours in the kitchen? This is it. Forget those fancy, complicated desserts that look pretty but take forever. These Sweet Georgia Browns are the real deal – incredibly moist, bursting with flavor, and surprisingly simple to whip up. They’re like the perfect blend of a coffee cake and a rich, decadent brownie, but with a texture that’s uniquely its own. If you’ve ever had a really good, classic marble cake, imagine that, but somehow even more exciting. They’re a guaranteed crowd-pleaser, and I’ve lost count of how many times people have begged me for the recipe after just one bite. I’m so excited to share this with you!
What are sweet Georgia browns?
So, what exactly are these magical things called Sweet Georgia Browns? Well, think of them as a delightful mashup of comforting baked goods. They’re not quite a cake, not quite a cookie, and definitely not a typical brownie, though they share some of that rich, dense goodness. The name itself is a little whimsical, and while I’ve heard a few origin stories, for me, it just conjures up images of warmth and sweetness, much like the famed peaches from Georgia. Essentially, it’s a wonderfully moist, often slightly denser batter that’s swirled with a rich, chocolatey mixture, creating those beautiful marbled patterns that give it its name. The magic really happens with the texture – it’s this incredible balance of soft, tender crumb with pockets of gooey, chocolatey goodness. It’s the kind of dessert that feels both familiar and excitingly new with every bite. It’s the perfect thing to have sitting on your counter when that craving hits, you know?
How do I make Georgia browns?
Quick Overview
The whole process is really quite straightforward. You’ll basically mix up a simple, moist batter, whip up a quick chocolate swirl mixture, and then marble them together before baking. The key is not to overmix, and the result is a beautifully patterned, incredibly flavorful treat that’s ready to be devoured. It’s a lifesaver when you need a quick, impressive dessert that tastes like you slaved over it for hours!
Ingredients
For the Main Batter:
You’ll want good quality all-purpose flour here. I usually grab a standard brand, nothing fancy needed. Make sure your baking soda and baking powder are fresh; it makes a world of difference in how fluffy your bake turns out. For the sugar, I use a mix of granulated and brown sugar – the brown sugar really adds that lovely moisture and depth of flavor that’s crucial for these. And unsalted butter is my go-to; it gives you more control over the saltiness. As for the eggs, large ones are standard. And Vanilla Extract? Don’t skimp here; a good quality pure vanilla extract really elevates the flavor. The secret to that amazing moisture? Unsweetened applesauce! I’ve tried it with plain yogurt before, but applesauce gives it a tenderness that’s just *chef’s kiss*. And for the liquid, I usually go with whole milk, but I’ve had great success with even a plant-based milk like almond or oat milk if that’s what you have on hand.
For the Filling:
This is where the magic happens! You’ll need some unsweetened cocoa powder – I prefer Dutch-processed for a richer, darker chocolate flavor, but natural cocoa works too. Again, granulated sugar and a touch of brown sugar for sweetness and texture. A little bit of melted unsalted butter to make it spreadable and luscious. And a splash of milk (or even strong coffee, if you’re feeling adventurous – it really intensifies the chocolate flavor!) to get it to the right consistency. Some people like to add a pinch of salt here to really make the chocolate pop.
For the Glaze:
This is optional, but I highly recommend it! It adds an extra layer of sweetness and visual appeal. You just need powdered sugar, a little bit of melted butter, some milk (or cream for extra richness!), and a good dash of vanilla extract. You can also add a tiny bit of cocoa powder to this glaze if you want an even more intense chocolate experience. The key is getting the consistency just right – thick enough to coat, but thin enough to drizzle.
Step-by-Step Instructions
Step 1: Preheat & Prep Pan
First things first, get that oven preheating to 350°F (175°C). It’s so important to have your oven at the right temperature *before* your batter goes in. I usually use a 9×13 inch baking pan for this. Now, the pan prep is crucial for easy cleanup and to prevent sticking. I like to generously grease it with butter or cooking spray, and then I dust it with a bit of flour, tapping out any excess. Some people like to line it with parchment paper, which is also a great idea if you want to lift the whole thing out in one go! Just make sure the parchment overhangs a bit on the sides.
Step 2: Mix Dry Ingredients
In a large bowl, whisk together your all-purpose flour, baking soda, baking powder, cinnamon (if using – I love a hint of cinnamon!), and salt. Whisking them all together really well ensures that the leavening agents and spices are evenly distributed. This is important so you don’t get pockets of just baking soda or flavor!
Step 3: Mix Wet Ingredients
In a separate, medium-sized bowl, cream together your softened unsalted butter and both granulated and brown sugars until they’re light and fluffy. This usually takes a few minutes with an electric mixer, or a bit longer by hand. Then, beat in your eggs one at a time, making sure each one is incorporated before adding the next. Stir in your vanilla extract and the unsweetened applesauce. If you’re using milk, stir that in too. It should look smooth and creamy.
Step 4: Combine
Now, it’s time to bring them together! Gradually add your dry ingredients to your wet ingredients, mixing on low speed (or gently by hand) until *just* combined. The trick here is not to overmix! Overmixing can lead to a tough cake. You want to stop as soon as you don’t see any more dry streaks of flour. A few small lumps are okay. It’s better to have a slightly lumpy batter than a tough cake!
Step 5: Prepare Filling
While your batter is resting for a moment, let’s whip up that chocolate swirl. In a small bowl, combine your unsweetened cocoa powder, granulated sugar, and brown sugar. Then, stir in the melted butter and milk (or coffee!) until you have a smooth, thick paste. It should be spreadable but not too runny.
Step 6: Layer & Swirl
Pour about half of your main batter into your prepared baking pan and spread it out evenly. Dollop spoonfuls of the chocolate filling mixture over the batter. Then, pour the remaining batter over the chocolate filling. Now for the fun part! Take a knife or a skewer and gently swirl the chocolate mixture into the batter to create those beautiful marbled patterns. Don’t overdo it, or you’ll just end up with a brown cake. A few gentle passes are all you need!
Step 7: Bake
Pop that pan into your preheated oven. Bake for about 30-40 minutes, or until a wooden skewer or toothpick inserted into the center comes out clean (or with just a few moist crumbs attached, not wet batter). Baking times can vary depending on your oven, so keep an eye on it after about 30 minutes. If the top starts browning too quickly, you can always loosely tent it with foil.
Step 8: Cool & Glaze
Once it’s done, take the pan out of the oven and let it cool in the pan on a wire rack for about 15-20 minutes. This allows it to set up properly. While it’s cooling, you can whip up the glaze if you’re using it. Just whisk together the powdered sugar, melted butter, milk, and vanilla until smooth. Once the cake has cooled slightly in the pan, you can either drizzle the glaze over the top while it’s still warm, or let it cool completely and then frost it. I like to glaze it while it’s still a little warm so it seeps into the top a bit.
Step 9: Slice & Serve
Once it’s cooled (or warm, if you prefer!), slice it into squares. I find a sharp knife works best. Serve them up and watch them disappear! They are absolutely divine on their own, but even better when served warm.
What to Serve It With
These Sweet Georgia Browns are so versatile, you can truly enjoy them any time of day. For a truly decadent breakfast, I love serving a warm square with a dollop of whipped cream or a scoop of vanilla bean ice cream. It’s like having dessert for breakfast, and who doesn’t love that? For a more elegant brunch spread, I’ll cut them into smaller, bite-sized pieces and arrange them on a pretty platter. They pair wonderfully with fresh berries and a glass of mimosas or a good quality coffee. As a dessert, they are simply perfect. I often serve them slightly warm, with a dusting of powdered sugar or that lovely simple glaze I mentioned. They’re also fantastic with a scoop of chocolate or Coffee Ice Cream. And for those cozy, no-reason-needed snacks? A thick slice with a big mug of hot chocolate or a strong cup of tea is pure bliss. My kids especially love them warmed up with a glass of cold milk after school – it’s a guaranteed way to get them to sit still for five minutes!
Top Tips for Perfecting Your Sweet Georgia Browns
Over the years, I’ve learned a few things that make a big difference in getting these just right. First, when you’re combining the wet and dry ingredients, it’s really about that *gentle touch*. Seriously, resist the urge to beat it into submission. Overmixing develops the gluten in the flour, which is what makes baked goods tough. Just mix until you don’t see dry flour anymore. If you’re adding in any extras like nuts or chocolate chips to the main batter (which you totally can!), fold them in gently at the very end. For the chocolate swirl, I find that using a skewer or a thin butter knife and making just a few figure-eights or S-shapes through the batter gives you the prettiest marbling without muddying the colors too much. Don’t be tempted to over-swirl! My biggest personal learning curve was probably with the baking time. Ovens can be so finicky, right? So, instead of relying solely on the timer, I always do the toothpick test. If it comes out with wet batter, it needs more time. If it has a few moist crumbs, it’s perfect. If it comes out completely dry and clean, it might be just a *tad* overbaked, but still delicious. I’ve also found that using room temperature ingredients for the batter really helps everything emulsify properly, leading to a smoother, more tender crumb. If I forget to take my butter out, I’ll pop it in the microwave for about 10-15 seconds, just until it’s softened but not melted. And for the glaze consistency, it’s always a bit of an art! Start with the base amounts, and then add the milk just a teaspoon at a time until you reach that perfect drizzling consistency. Too thin and it runs everywhere; too thick and it’s hard to spread.
Storing and Reheating Tips
One of the best things about these Sweet Georgia Browns is how well they keep. If you’re planning on eating them within a day or two, you can simply store them at room temperature. Just make sure they’re completely cooled first, then cover the pan tightly with plastic wrap or transfer them to an airtight container. They’ll stay nice and moist for about 2-3 days. If you think they might last longer, or if your kitchen is on the warmer side, the refrigerator is your best bet. Again, let them cool completely and store in an airtight container. They’ll keep well in the fridge for up to a week, though I’ll admit they rarely last that long in my house! If you want to keep them for longer, freezing is a fantastic option. You can freeze the whole pan or cut them into individual squares first. Wrap each square tightly in plastic wrap, then place them in a freezer-safe bag or container. They’ll keep in the freezer for up to 2-3 months. When you’re ready to enjoy them, you can thaw them at room temperature for a few hours, or pop them in the microwave for about 15-30 seconds for a warm, gooey treat. If you’ve glazed them, I usually prefer to add the glaze *after* reheating, especially if I’m reheating a frozen portion, just to keep the glaze nice and fresh.
Frequently Asked Questions
Final Thoughts
So there you have it – my beloved Sweet Georgia Browns! I really hope you give this recipe a try. It’s one of those treats that brings so much joy, both in making it and in sharing it. The incredible aroma that fills your kitchen while it bakes is just the beginning. It’s the perfect balance of moist, tender cake and rich, chocolatey swirls that makes it so utterly irresistible. Whether you’re looking for a quick weeknight dessert, a showstopper for a gathering, or just a little something to brighten your day, these Sweet Georgia Browns are the answer. They’re proof that you don’t need complicated steps or fancy ingredients to create something truly special and delicious. If you love this, you might also enjoy my recipe for a simple Lemon Pound Cake – another classic that’s always a winner! I can’t wait to hear how yours turn out, so please leave a comment below and tell me what you think! Happy baking!
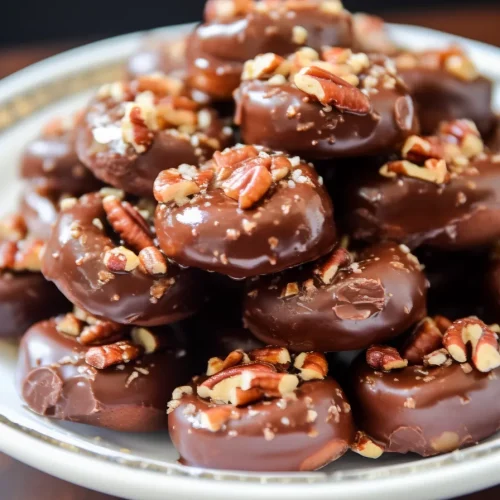
Sweet Georgia Browns
Ingredients
Main Ingredients
- 1.5 cups pecans halved or whole
- 1 cup granulated sugar
- 0.5 cup light corn syrup
- 0.25 cup butter unsalted, cut into pieces
- 1 teaspoon vanilla extract
- 0.5 teaspoon sea salt
Instructions
Preparation Steps
- Line a baking sheet with parchment paper or a silicone baking mat.
- In a medium saucepan, combine the granulated sugar, corn syrup, and butter. Cook over medium heat, stirring constantly, until the sugar is dissolved and the butter is melted.
- Bring the mixture to a boil and cook, without stirring, until it reaches 300°F (150°C) on a candy thermometer. This will take about 10-15 minutes.
- Remove the saucepan from the heat and stir in the vanilla extract and sea salt. Be careful, as the mixture will bubble up.
- Quickly stir in the pecans, coating them evenly with the caramel mixture.1.5 cups pecans
- Drop spoonfuls of the pecan mixture onto the prepared baking sheet, forming individual candies.
- Let the candies cool completely at room temperature until firm, about 30 minutes.
- Store in an airtight container at room temperature.
Notes
Featured Comments
“Impressed! Clear steps and family favorite results. Perfect for busy nights.”
“New favorite here — spot on. crowd-pleaser was spot on.”
“Super easy and turned out amazing! My family asked for seconds. Saving this one.”
“This sweet treat was absolutely loved — the cozy really stands out. Thanks!”
“Made it tonight and wow — quick weeknight win! Will definitely make Sweet Georgia Browns again.”
“Packed with flavor and so simple. Exactly what I wanted from Sweet Georgia Browns.”


