

There’s something about biting into a warm, gooey marshmallow cookie that instantly transports me back to carefree afternoons at Grandma’s house. The smell alone—sweet, buttery, with just a hint of vanilla—always makes my mouth water. I remember sneaking a few cookies before dinner, promising myself I’d eat just one, but of course, I couldn’t resist. This recipe is one I’ve perfected over the years, and honestly, it’s become a family favorite. It’s incredibly simple, but the end result? Pure magic—soft, chewy cookies with melty marshmallow goodness in every bite. If you’re a fan of s’mores, cozy nights, or just a quick sweet fix, then trust me on this one: marshmallow cookies are a game-changer. They disappear in minutes at my house, and I’ve learned a few tricks along the way I can’t wait to share. So, let’s bake some happiness together!
What is Marshmallow Cookies?
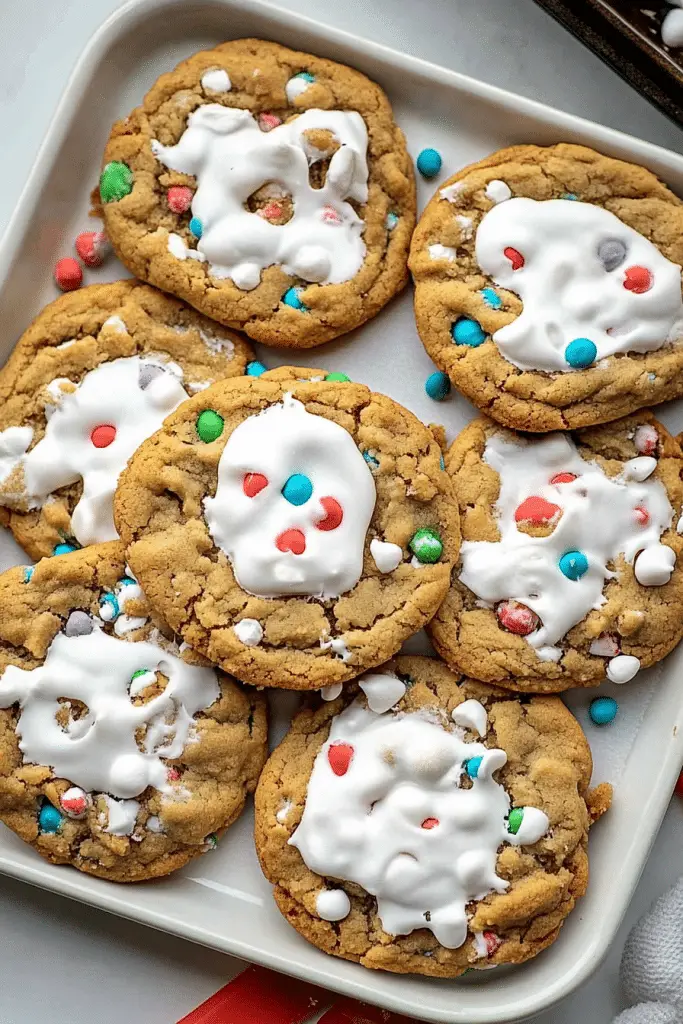
Think of marshmallow cookies as a delightful hybrid of a classic cookie and gooey s’mores in every bite. It’s essentially a soft, chewy cookie dough — often buttery and lightly sweetened — filled or topped with gooey marshmallows. Sometimes, you’ll find variations with chocolate chunks or a dusting of powdered sugar, but the heart of it is that irresistible marshmallow melt. The name gets straight to the point: these cookies are all about that marshmallow magic. The best part? You can enjoy them warm straight out of the oven or cooled down for a sweeter, more caramelly flavor. They’re perfect for almost any occasion, whether you’re craving a comforting snack or looking for something crowd-pleasing to share with friends. And trust me, once you make these, they’ll become a go-to recipe — because truly, who doesn’t love a cookie that’s part dessert, part hug?
How do I make Marshmallow cookies?
Quick Overview
This recipe is as straightforward as it gets. You’ll start by creating a simple, buttery cookie dough, then carefully fold in or layer marshmallows before baking. The magic happens during baking, when the marshmallows melt into luscious pools of sticky sweetness, encased in soft, golden cookies. The key is to make sure the marshmallows soften without overcooking the cookies — so I recommend baking at a moderate temperature and keeping an eye on them. The end result is a cookie that’s crispy around the edges but still soft and marshmallowy inside. And trust me, once you see that gooey center, you’ll be hooked!
Ingredients
For the Main Cookie Dough: For the Main Cookie Dough: For the Main Cookie Dough: For the Main Cookie Dough: For the Main
- 2 ½ cups all-purpose flour (I always opt for unbleached, but plain is fine)
- ½ teaspoon baking soda
- ½ teaspoon salt
- 1 cup unsalted butter, softened (trust me, softened butter makes the best cookies)
- ¾ cup granulated sugar
- ¾ cup packed brown sugar (adds depth and that molasses-y sweetness)
- 2 large eggs
- 1 teaspoon vanilla extract (fresh vanilla makes all the difference)
For the Marshmallow Filling:
- 2 cups mini marshmallows (or large marshmallows cut into pieces, whatever you have)
- Optional: Chocolate chips or chunks for extra indulgence
For the Glaze or Topping:
- Powdered sugar mixed with a splash of milk for a light drizzle (or melted chocolate if you’re feeling decadent)
- Extra marshmallows for topping in the last few minutes if you want a toasted effect
Step-by-Step Instructions
Step 1: Preheat & Prep Pan
Set your oven to 350°F (175°C) and line a baking sheet with parchment paper. I always do this because sticky cookies are such a pain to clean up! Plus, parchment ensures the cookies bake evenly and slide right off once cooled. Get your marshmallows ready—if you’re using large ones, chop them into smaller chunks to fit comfortably into the cookie dough.
Step 2: Mix Dry Ingredients
In a medium bowl, whisk together the flour, baking soda, and salt. This keeps everything evenly distributed and prevents clumping. I’ve made the mistake of skipping this step, which results in uneven baking or clusters in the dough—trust me, do this first.
Step 3: Mix Wet Ingredients
In a large mixing bowl, beat the softened butter with both sugars until fluffy—about 2-3 minutes. I always use a hand mixer because it’s quick and very satisfying. Beat in the eggs one at a time, then stir in the vanilla extract. The mixture should look light and creamy, almost like whipped caramel. If your mixture looks greasy or separates, don’t worry—just keep mixing, and it’ll come together.
Step 4: Combine
Gradually add the dry ingredients to the wet, stirring gently. Use a spatula or low speed on your mixer—overmixing can make the cookies dense. Stop once just combined; this keeps them tender. The dough will be soft but firm enough to scoop.
Step 5: Prepare Filling
If you’re using large marshmallows, cut them into smaller bits. For mini marshmallows, just measure. I love adding a handful of chocolate chips here—it’s a secret richness that makes these cookies even more addictive. Stir the marshmallows and optional chocolate into the dough gently, ensuring even distribution.
Step 6: Layer & Swirl
I like to scoop spoonfuls of dough onto the baking sheet, then gently press a few marshmallow pieces into the top. If you’re feeling fancy, you can swirl some extra marshmallows into the dough before baking, but honestly, just pressing them in works perfectly. The key is not to overload—one or two marshmallows per cookie is enough to deliver that gooey goodness without burning the marshmallows during baking.
Step 7: Bake
Pop the cookies in the oven and bake for 10-12 minutes. Keep a close eye around the 10-minute mark—once the edges turn golden and cookies still look slightly soft in the center, they’re ready. The marshmallows will be melting and bubbly, so don’t overbake or they’ll burn. Use a toothpick to check don’t worry if the centers are a little soft—these cookies are supposed to be ultra-chewy!
Step 8: Cool & Glaze
Let the cookies sit on the baking sheet for about 5 minutes before transferring them to a wire rack. This allows the marshmallow centers to set just enough. If you want that shiny glaze, whisk powdered sugar with a splash of milk and drizzle over the cookies once they’re cooled slightly. If you’re adding toasted marshmallows on top, I recommend doing it in the last 2 minutes of baking for that perfect golden brown touch.
Step 9: Slice & Serve
These cookies are best enjoyed slightly warm, with the marshmallows melty and the edges just crispy enough. I like cutting them into big squares for a neat presentation or smashing them into halves when serving family-style. They’re fabulous with a cold glass of milk or a hot cup of coffee—perfection in every bite.
What to Serve It With
Honestly, these marshmallow cookies are pretty flexible—they’re practically a dessert, snack, or even breakfast if you’re really craving sweetness. For breakfast, try serving one with your morning cup of coffee or tea—nothing beats that melt-in-your-mouth feeling to start the day. When I make them for brunch, I love pairing them with fresh berries and whipped cream, kind of like mini-dessert pancakes. They’re amazing after dinner, alongside a scoop of vanilla ice cream or a drizzle of caramel sauce. And on cozy nights, just a simple glass of milk or hot cocoa does the trick. My kids ask for these all the time—especially when they’re in cookie mode—and I always keep a batch handy. Plus, they reheat beautifully in the microwave for a quick treat. These cookies are also fantastic for potlucks or bake sales—they’re crowd-pleasers for sure. Honestly, I don’t think I’ve ever met anyone who didn’t love a warm marshmallow cookie—trust me, they disappear fast!
Top Tips for Perfecting Your Marshmallow Cookies
Too many times I’ve gone into baking these and learned a few lessons the hard way. First, always use fresh marshmallows—stale ones won’t melt properly and can make your cookies look weird. I tested this with different brands, and the softer, fresher marshmallows gave the best melt and gooeyness. When it comes to mixing, don’t overdo it! Overmixing the dough makes the cookies tough and dense. Just combine until the ingredients are barely incorporated—that’s key for a tender crumb.
Swirling marshmallows into the dough before baking can create gorgeous marbled patterns, but be gentle—don’t overmix, or the marshmallows will streak evenly through the dough and you’ll lose that look. If you want a more uniform gooey center, I recommend pressing marshmallows into each cookie after shaping the dough—this ensures a perfect melt every time. For ingredient swaps, I’ve experimented with coconut sugar instead of brown sugar for a subtle caramel flavor or used dark chocolate instead of milk for a richer taste. Just remember, the sweetness level can be adjusted by reducing the sugar a bit, but keep in mind, the marshmallows add sweetness too!
When baking, oven temperature matters. I’ve found that middle rack placement yields the most even baking—hot spots can cause marshmallows to burn before the cookies are done. A quick tip: if your marshmallows brown too quickly, lower the oven temp slightly and bake a minute or two longer—patience is key. As for glazing, a simple powdered sugar drizzle is my favorite, but feel free to experiment with melted chocolate or caramel for a different flair. Whichever way you go, these cookies will turn out just right with a little bit of love and attention to detail.
Storing and Reheating Tips
Leftovers? Believe it or not, these marshmallow cookies stay just as soft and gooey for days if stored properly. Keep them in an airtight container at room temperature for up to 3 days—just don’t cover them too tightly if they’re still warm, or they’ll get soggy. If you want to keep them longer, pop them into an airtight container and freeze for up to a month. To reheat, I simply microwave for about 10-15 seconds until warm and melty again—that’s my secret to that just-baked feel.
If you added glaze or toppings, keep in mind that they’re best eaten relatively fresh—the glaze might soften or slide off if left for too long. For added freshness, rewarm cookies covered with foil in a low-temp oven (around 300°F) for a few minutes. When it comes to marshmallows, I find that freezing can change their texture slightly, so I prefer the fridge or room temperature storage for those gooey bits. Just trust your nose and taste—if it still smells warm and sweet, they’re good to go!
Frequently Asked Questions
Final Thoughts
If you’re anything like me, baking these marshmallow cookies will become a beloved ritual—whether it’s a cozy weekend treat or a quick indulgence after a long day. There’s nothing quite like biting into a warm cookie, feeling the gooey marshmallow stretch and melt in your mouth. I’ve made these countless times, tweaking ingredients here and there, but the core magic remains the same: simple ingredients, extraordinary comfort. I highly Encourage you to experiment—add nuts, swap out marshmallows for vegan options, or decorate with colorful sprinkles—whatever makes it special for you. These cookies remind me to slow down, enjoy the little moments, and savor the sweet surprises in life. I can’t wait to hear how yours turn out! Happy baking!
marshmallow cookies
Ingredients
Main Ingredients
- 1 cup unsalted butter
- 1 cup creamy peanut butter
- 1.5 cups light brown sugar
- 2 large eggs
- 2 cups all-purpose flour
- 1 cup old-fashioned oats
- 1 teaspoon baking soda
- 0.5 teaspoon kosher salt
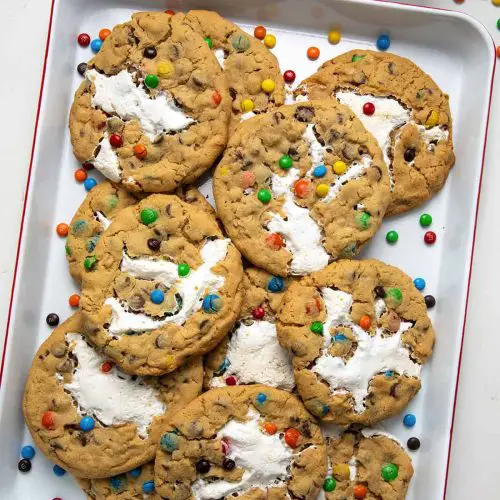
- 1.5 cups plain M&M candies
- 1.5 cups semi-sweet chocolate chips
- 7 oz marshmallow fluff
- optional mini M&M candies for topping
Instructions
Preparation Steps
- Preheat the oven to 350°F. Line baking sheets with parchment paper. Set aside.
- In the bowl of a stand mixer with a paddle attachment, beat the butter until smooth, about 1 minute.
- Add the peanut butter and beat for about 2 minutes until smooth.
- Add brown sugar and mix until smooth, about 2 minutes.
- Add eggs one at a time, mixing for 30 seconds after each addition. Scrape down the sides if necessary.
- Add flour, oats, baking soda, and salt. Mix on low until just combined.
- Add M&M candies and chocolate chips, mix until incorporated.
- Use a 2-tablespoon scoop to drop dough onto prepared baking sheets. Flatten each into a disk.
- Add about 1 tablespoon of marshmallow fluff onto each disk. Cover with a second disk and seal edges.
- Top with mini M&M candies if desired.
- Bake for 15-16 minutes, until edges are golden brown. Cool completely before serving.
Notes
Featured Comments
“Impressed! Clear steps and comforting results. Perfect for busy nights.”
“New favorite here — quick weeknight win. crowd-pleaser was spot on.”
“Super easy and turned out amazing! My family asked for seconds. Saving this one.”
“This sweet treat was absolutely loved — the hearty really stands out. Thanks!”
“Made it tonight and wow — perfect for busy nights! Will definitely make Sweet Gooey Monster Cookies Recipe again.”
“Packed with flavor and so simple. Exactly what I wanted from Sweet Gooey Monster Cookies Recipe.”


