Oh my goodness, have I got a treat for you today! You know how sometimes you wake up with a serious craving for something decadent, something that tastes like pure indulgence, but the thought of actually *baking* a whole tiramisu feels like a marathon? Yeah, me too. That’s where this absolute game-changer, my Tiramisu Overnight Oats, swoops in like a delicious superhero. It’s got all that classic coffee-kissed, creamy mascarpone goodness, but in a breakfast-friendly, make-ahead format that’s frankly, a lifesaver on busy mornings. I’ve been tweaking this for ages, trying to get that perfect balance, and let me tell you, this one’s it. It’s like a little piece of Italy waiting for you in the fridge, ready to brighten your day. Forget those bland bowls of plain oats; this is how you start your morning feeling like you’ve won the flavor lottery. If you love the idea of a dessert for breakfast without the actual dessert guilt, you’re going to adore these Tiramisu overnight oats.
What is Tiramisu Overnight Oats?
So, what exactly are Tiramisu overnight oats? Think of it as your favorite Italian dessert, deconstructed and reimagined for your breakfast bowl. It’s essentially a no-cook oat preparation that gets to soak in the fridge overnight, transforming simple rolled oats into a creamy, pudding-like texture. The magic happens with the flavors. We’re talking about the deep, rich notes of coffee, the subtle sweetness that reminds you of ladyfingers, and a creamy, almost cheesecake-like element that comes from a bit of dairy or dairy-free magic. It’s not just oats; it’s an experience! It’s inspired by the beloved Italian Tiramisu, aiming to capture that iconic flavor profile – that hint of espresso, the sweetness, and that luxurious creaminess – but in a way that’s perfectly acceptable (and encouraged!) to eat before noon. It’s essentially a grab-and-go breakfast that tastes like a fancy treat.
How do I make Tiramisu Overnight Oats?
Quick Overview
Making these Tiramisu overnight oats is ridiculously easy. You’ll simply combine your base ingredients like oats, milk, and a touch of sweetener, then stir in the key flavor elements like coffee and a hint of cocoa. The magic really happens when you let it sit overnight in the fridge, allowing the oats to soften and absorb all those delicious flavors, creating a thick, creamy consistency. You might even do a little swirl with some creamy goodness on top before serving. It’s all about minimal effort for maximum flavor payoff, and the result is a breakfast that tastes like a gourmet treat!
Ingredients
For the Main Batter:
- 1/2 cup rolled oats (old-fashioned, not instant) – These give the best texture; instant oats can get a bit too mushy for my liking.
- 1 cup milk of choice (dairy, almond, oat, soy all work great!) – I’ve found almond milk makes them extra creamy!
- 1 tablespoon chia seeds – These help thicken everything up and add a nutritional boost.
- 1-2 tablespoons sweetener (maple syrup, honey, agave) – Adjust to your personal preference. I usually start with 1.5 tablespoons.
- 1 tablespoon unsweetened cocoa powder – For that classic chocolatey depth.
- 1 tablespoon strong brewed coffee or espresso, cooled – This is where the tiramisu flavor really kicks in! Make sure it’s cooled down so it doesn’t cook the oats prematurely.
- 1/4 teaspoon vanilla extract – A little goes a long way for warmth.
- Pinch of salt – It really does enhance all the other flavors.
For the Filling/Creamy Swirl (Optional but Highly Recommended!):
- 2 tablespoons mascarpone cheese (or thick Greek yogurt/coconut yogurt for dairy-free) – This is what gives it that signature creamy, slightly tangy richness.
- 1 teaspoon milk – To thin out the mascarpone slightly for easier swirling.
For the Topping:
- A dusting of unsweetened cocoa powder – For that final, beautiful finish.
- A few coffee beans (optional) – For a visual pop and a hint of aroma.
Step-by-Step Instructions
Step 1: Preheat & Prep Pan
This step isn’t really about preheating a pan for this recipe, as it’s no-cook! What we’re doing instead is prepping our vessel. Grab a jar, a glass, or a small airtight container – something you can seal up and pop into the fridge. Make sure it’s large enough to hold all your ingredients comfortably. I love using mason jars; they’re perfect for on-the-go breakfasts!
Step 2: Mix Dry Ingredients
In your chosen jar or container, add the rolled oats, chia seeds, unsweetened cocoa powder, and that little pinch of salt. Give these dry ingredients a good stir with a spoon or a small whisk. This ensures the cocoa powder and chia seeds are evenly distributed throughout the oats, which will prevent clumps and give you a more consistent flavor and texture.
Step 3: Mix Wet Ingredients
In a separate small bowl or directly into the jar if you’re feeling brave and want fewer dishes, whisk together your milk of choice, your chosen sweetener, the cooled strong coffee or espresso, and the Vanilla Extract. Make sure the coffee is completely cooled! You don’t want it to start cooking the oats or affect the milk. Whisk it all together until well combined. The mixture should smell wonderfully like coffee and vanilla already.
Step 4: Combine
Now, pour the wet ingredients into the jar with the dry ingredients. Stir everything together really well. You want to make sure there are no dry pockets of oats or cocoa powder at the bottom. Keep stirring until it’s all nicely incorporated and looks like a thick, slightly liquidy mixture. Don’t overmix, but ensure everything is hydrated.
Step 5: Prepare Filling
If you’re opting for the creamy swirl (and I highly recommend it!), now’s the time to prep that. In another tiny bowl, gently combine the mascarpone cheese (or your chosen yogurt substitute) with about 1 teaspoon of milk. Stir just until it’s smooth and a little more pourable, but still thick. This is what will give you that luxurious, tiramisu-like creaminess on top. If you’re not doing the swirl, you can skip this step.
Step 6: Layer & Swirl
Once everything is mixed, if you’re doing the swirl, you can spoon about half of the mascarpone mixture on top of the oat mixture in the jar. Then, you can gently swirl it in with a toothpick or the tip of a spoon. Alternatively, you can just dollop it all on top at the end. If you’re skipping the swirl, just make sure the oat mixture is evenly distributed in your jar. Seal the jar tightly with its lid.
Step 7: Bake
This recipe is entirely no-bake! So, instead of baking, we’re going to let it chill. Place the sealed jar into the refrigerator. We’re aiming for at least 4 hours, but overnight is truly best. This allows the oats to soften completely and the flavors to meld together beautifully, creating that perfect pudding-like texture that’s characteristic of overnight oats and reminiscent of the soaked ladyfingers in tiramisu.
Step 8: Cool & Glaze
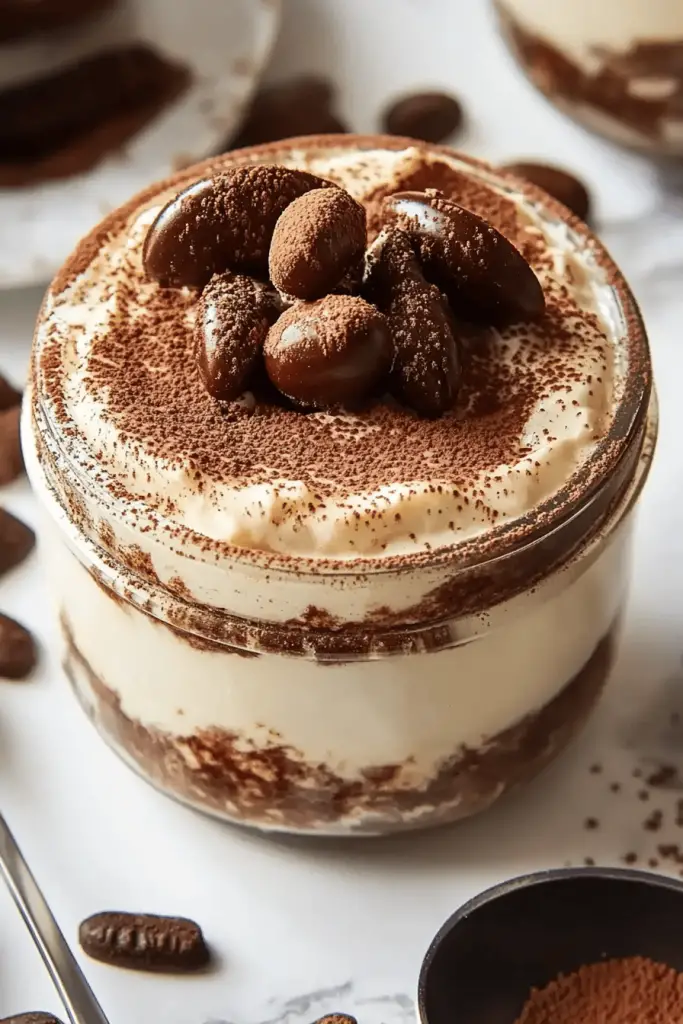
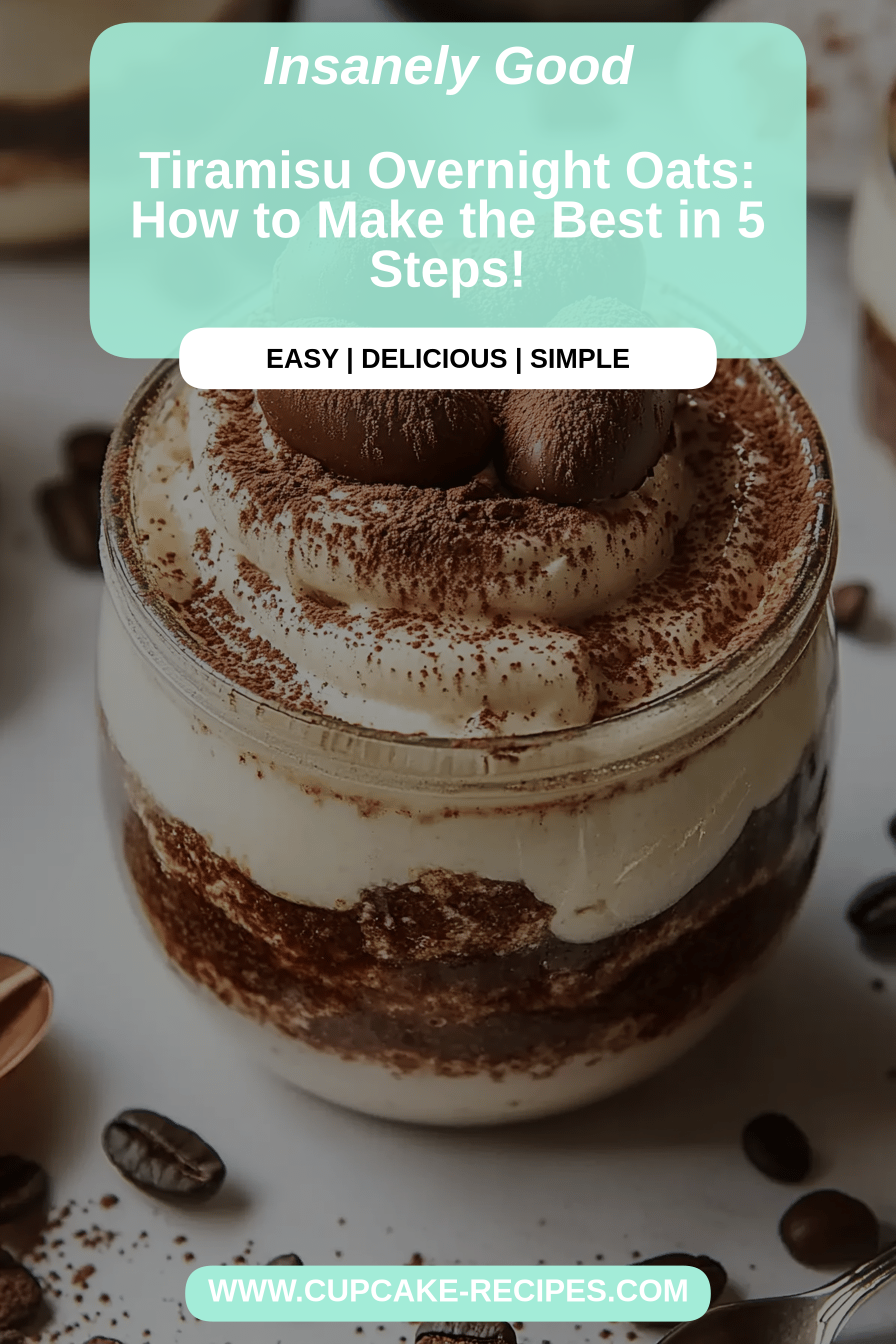
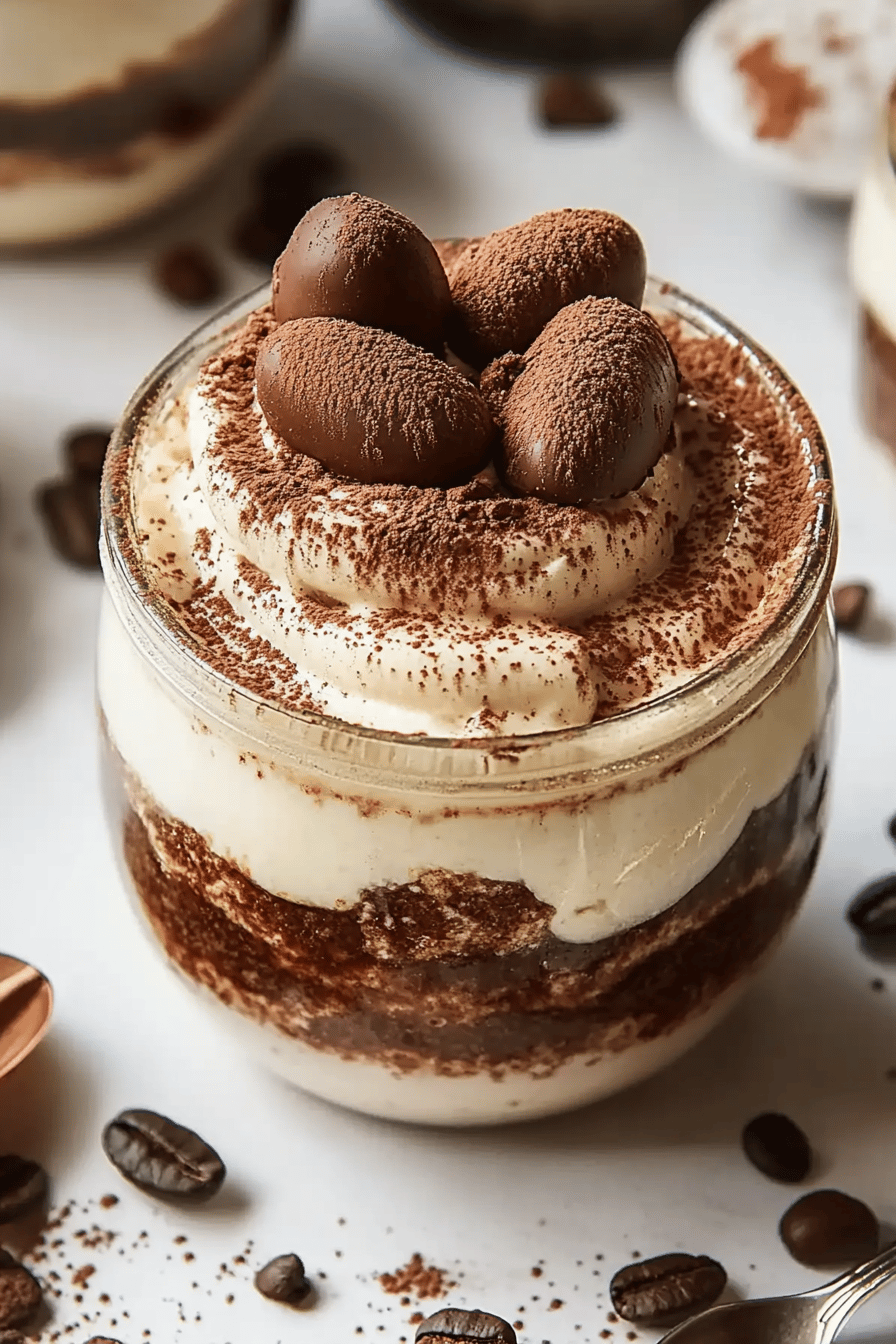
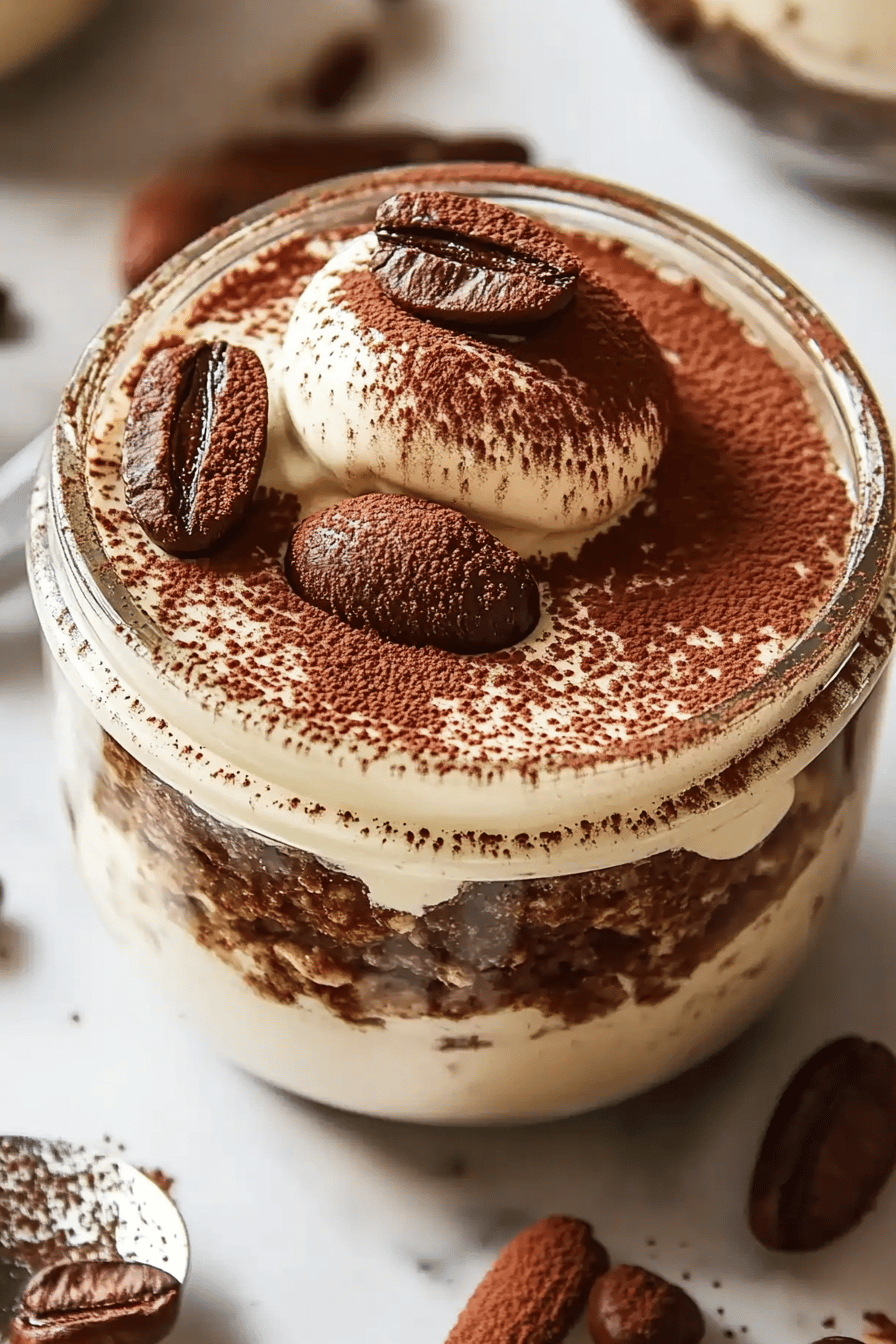
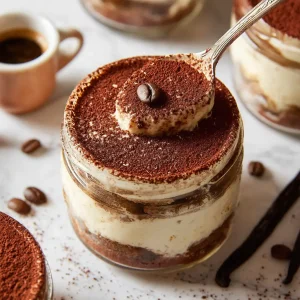
The oats are already “cooled” and set in the fridge overnight. In the morning, before serving, you’ll add your final touches. If you didn’t swirl the mascarpone in yesterday, now is the time to spoon it on top. Then, take a fine-mesh sieve and gently dust the top with unsweetened cocoa powder. This is the final visual cue that reminds you of that classic tiramisu dessert. You can also add a couple of whole coffee beans for decoration if you like.
Step 9: Slice & Serve
These Tiramisu overnight oats are typically eaten straight from the jar or spooned into a bowl. There’s no slicing involved! Just grab a spoon, dive in, and enjoy. They are best served chilled straight from the refrigerator. The combination of the creamy oats, the rich coffee flavor, and the velvety mascarpone topping is pure bliss. It’s a complete, satisfying breakfast that tastes like a luxurious treat.
What to Serve It With
While these Tiramisu overnight oats are a glorious standalone meal, there are definitely ways to elevate the experience depending on when and how you’re enjoying them. For a quick, satisfying breakfast on the go, they’re perfect as is. Just grab your jar and head out the door. If you’re having a more relaxed breakfast at home, I love pairing them with a really good cup of hot coffee – it just amplifies that tiramisu flavor profile beautifully. For a weekend brunch spread, these are fantastic. I’ll often make a few jars and present them alongside some fresh fruit like berries or a simple yogurt parfait. They add a touch of elegance and a delicious sweet counterpoint to savory brunch dishes like mini quiches or savory muffins. And for dessert? Absolutely! If you’re craving something sweet after dinner but don’t want to bake, these are perfect. Serve them in a pretty glass with an extra dollop of the mascarpone cream and maybe a few shaved dark chocolate curls. They are also fantastic for cozy snacks. On a rainy afternoon, a jar of these, a good book, and a cup of tea (or coffee, of course!) is pure comfort. My family absolutely adores these. My kids, especially, think it’s such a fun treat to have dessert for breakfast, and they love helping me dust the cocoa powder on top. I’ve found that pairing them with a simple Fruit Salad really balances the richness, making it a complete and utterly delightful meal any time of day.
Top Tips for Perfecting Your Tiramisu Overnight Oats
After making these more times than I can count (seriously, it’s my go-to when I need a quick win!), I’ve picked up a few tricks that I think will help you achieve Tiramisu overnight oats perfection every single time. For the oats themselves, always opt for old-fashioned rolled oats. Instant oats just don’t have the right structure; they turn into mush way too easily and you miss out on that satisfying, slightly chewy texture. If you prefer a thicker consistency, you can even reduce the milk by a tablespoon or two, or add an extra teaspoon of chia seeds. Don’t skip the chia seeds! They are essential for getting that lovely, pudding-like texture without needing to cook anything. When it comes to the coffee, use a good, strong brew or even espresso if you have it. It needs to be potent enough to really infuse that characteristic tiramisu flavor. Make sure it’s thoroughly cooled, though! I learned that the hard way once when I poured warm coffee in and ended up with slightly cooked oats, which wasn’t the ideal texture. The sweetener is also totally up to you. I usually use maple syrup, but honey or agave are fantastic too. Taste the mixture before you refrigerate it and adjust if needed – remember, the flavors will meld and intensify overnight. For the mascarpone swirl, don’t overmix it with the milk. You want it to be just slightly loosened so you can swirl it, but still maintain its luxurious thickness. If it gets too thin, it’ll just blend in completely, and you want those distinct creamy layers. If you’re going dairy-free, thick coconut yogurt or a good quality cashew cream works wonderfully as a substitute for mascarpone, giving you that creamy tang without the dairy. And finally, the cocoa powder dusting on top? Use a fine-mesh sieve for the most even, professional-looking finish. It really makes a difference in presentation and makes it feel so much more like the real dessert!
Storing and Reheating Tips
These Tiramisu overnight oats are a marvel of make-ahead magic, which is why I love them so much. You can store them in an airtight container or jar in the refrigerator for up to 3 days. I find that the texture is usually best on the second day, as the oats have had ample time to soften and absorb all those delicious coffee and cocoa flavors. After the third day, they can start to get a little too soft for my preference, though they’re still perfectly edible. If you’re planning to make a big batch for the week, I recommend making them in individual jars or containers so they’re easy to grab and go. For the creamy mascarpone swirl, I often like to add that fresh in the morning just before serving, rather than mixing it in the night before. This keeps it extra fresh and gives you that beautiful contrast. However, if you’re in a super rush, you can definitely add it the night before, and it will still be delicious, just perhaps a little more integrated. I don’t recommend reheating these; they are designed to be enjoyed cold. The whole beauty of overnight oats is that they are a no-cook, chilled treat. Trying to reheat them would likely result in a mushy, unappealing texture. Just take them out of the fridge, add your toppings, and enjoy!
Frequently Asked Questions
Final Thoughts
Honestly, if you’re looking for a breakfast that feels like a special occasion every single day, then you absolutely have to give these Tiramisu overnight oats a try. They’re the perfect blend of comforting and decadent, easy to make, and SO satisfying. It’s the kind of recipe that makes you feel like a kitchen wizard, conjuring up something truly delicious with minimal effort. It truly bridges the gap between a healthy breakfast and an indulgent treat, and I’m so excited for you to experience it. If you love this recipe, you might also enjoy my other no-bake breakfast ideas or my recipes for quick and easy desserts that satisfy that sweet craving! Give them a whirl and let me know what you think. I can’t wait to hear how yours turn out, and I’d love to see your beautiful creations if you share them online – just tag me! Happy making, and even happier eating!
Tiramisu Overnight Oats
Ingredients
Main Ingredients
- 0.5 cup rolled oats
- 1 cup milk or dairy-free alternative
- 0.5 tablespoon chia seeds
- 1 tablespoon Greek yogurt or coconut yogurt
- 1 teaspoon cocoa powder
- 0.5 teaspoon instant coffee granules
- 1 teaspoon maple syrup or other sweetener
Instructions
Preparation Steps
- In a jar or airtight container, combine the rolled oats, milk, chia seeds, Greek yogurt, cocoa powder, instant coffee granules, and maple syrup.
- Stir everything together until well combined. Make sure there are no clumps of cocoa powder or coffee.
- Cover the container and refrigerate for at least 4 hours, or preferably overnight.
- In the morning, stir the oats. If they are too thick, add a splash more milk.
- Optional: Top with a dusting of cocoa powder before serving.
Notes
Featured Comments
“Impressed! Clear steps and creamy results. Perfect for busy nights.”
“New favorite here — super easy. crowd-pleaser was spot on.”
“Super easy and turned out amazing! My family asked for seconds. Saving this one.”
“This sweet treat was absolutely loved — the rich really stands out. Thanks!”
“Made it tonight and wow — spot on! Will definitely make Tiramisu overnight oats again.”
“Packed with flavor and so simple. Exactly what I wanted from Tiramisu overnight oats.”