There are some recipes that just feel like home, aren’t there? The kind that, when you smell them baking, instantly transport you back to a cozy kitchen, maybe with your grandma humming in the background or your kids clamoring for a taste. For me, that recipe is Tiramisu. It’s not just a dessert; it’s an experience. It’s that perfect balance of creamy, coffee-kissed mascarpone, airy ladyfingers, and a whisper of cocoa that just makes everything feel right with the world. Honestly, if you’re ever in the mood for something truly decadent but surprisingly simple to whip up, this Tiramisu recipe is your golden ticket. Forget those overly complicated versions you might have seen; this one is my tried-and-true favorite, the one I’ve been making for years, and it never, ever disappoints. It’s almost as good as a slice of my mom’s apple pie, but with a completely different, yet equally amazing, kind of comfort.

What is Tiramisu?
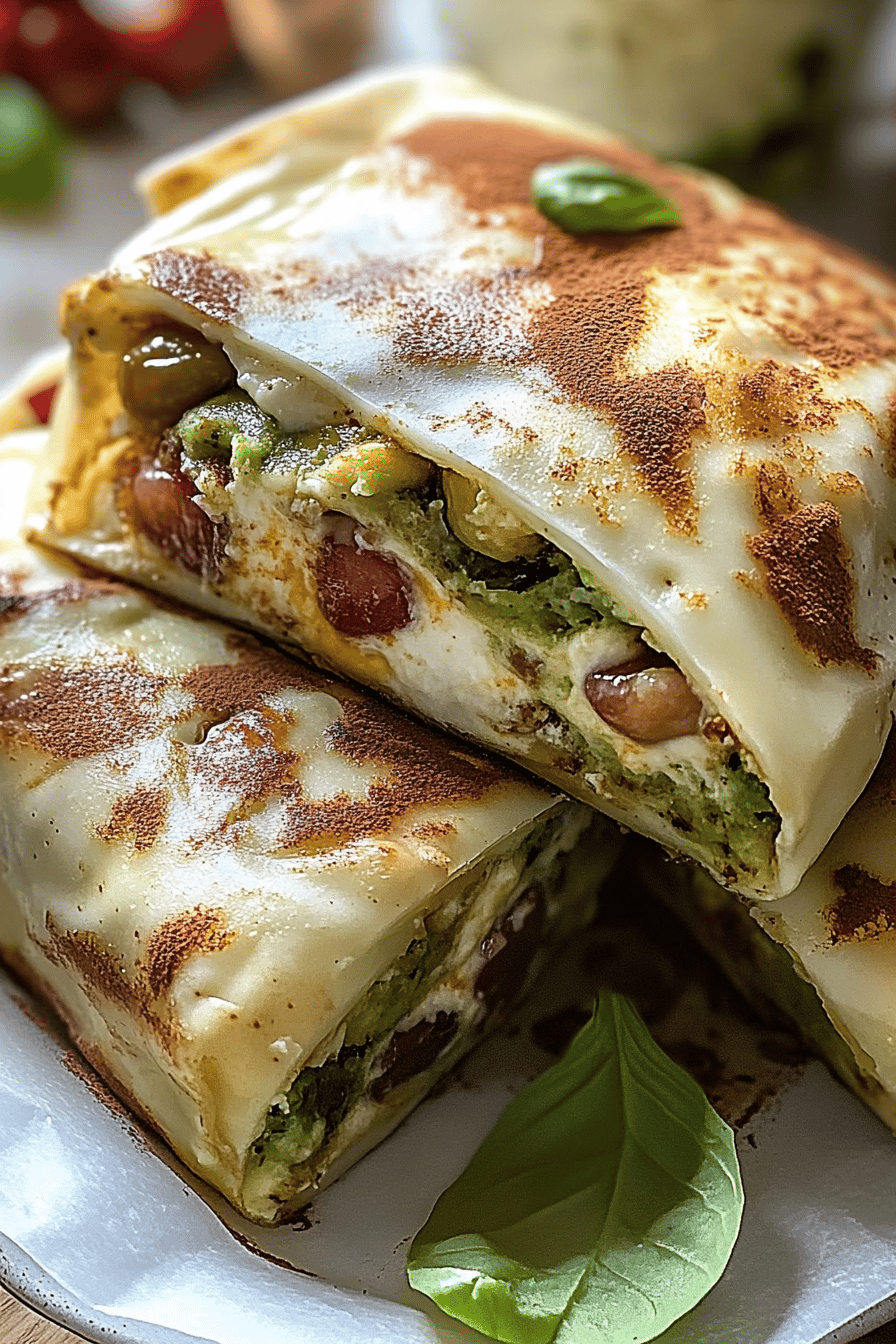
So, what exactly is this magical dessert we call Tiramisu? In Italian, it literally means “pick me up” or “cheer me up,” and let me tell you, it absolutely lives up to its name! It’s essentially a no-bake Italian dessert that’s built in layers. Think of it as a heavenly sandwich made with delicate ladyfinger cookies (savoiardi) that have been briefly dipped in strong coffee, stacked with a rich, creamy mixture of mascarpone cheese, eggs, and sugar, and then finished with a dusting of cocoa powder. It’s not a cake in the traditional sense, and it’s definitely not a pudding, though it has elements of both. It’s its own glorious thing, a symphony of textures and flavors that’s both sophisticated and incredibly comforting. It’s the kind of dessert that feels fancy enough for a dinner party but is also perfect for a quiet night in with a good book.
How do I make Tiramisu?
Quick Overview
Making this tiramisu is surprisingly straightforward! You’ll whip up a luscious mascarpone cream, quickly dip ladyfingers in coffee, and then layer them all together in a dish before letting it chill. The magic happens in the fridge as the flavors meld and the dessert sets. It’s this no-fuss approach that makes it so approachable, even for beginner bakers. You get all the amazing taste of a classic Italian dessert without any of the stress.
Ingredients
For the Main Batter (the Creamy Dream):
- 6 large egg yolks
- 3/4 cup granulated sugar
- 16 ounces (about 2 cups) mascarpone cheese, softened at room temperature
- 1/4 cup heavy cream (optional, for extra richness and stability)
- 1 teaspoon vanilla extract
For the Coffee Dip:
- 1 1/2 cups strong brewed coffee or espresso, cooled
- 2 tablespoons coffee liqueur or dark rum (optional, but highly recommended!)
For the Layers:
- About 24-30 ladyfingers (savoiardi cookies) – you might need a few extra, it depends on your dish size. I always buy an extra pack just in case!
For the Topping:
- Unsweetened cocoa powder, for dusting
Step-by-Step Instructions
Step 1: Preheat & Prep Pan
Okay, first things first! Grab your favorite serving dish. A 8×8 inch square dish or a similarly sized rectangular one works perfectly. You don’t need to grease or prepare it in any way for this recipe since it’s no-bake, but just make sure it’s clean and ready to go. Having it ready means you can move quickly once your cream is made.
Step 2: Mix Dry Ingredients
This step is for the mascarpone cream. In a medium bowl, whisk together the 6 large egg yolks and 3/4 cup granulated sugar until the mixture is pale yellow and slightly thickened. You’re looking for a ribbon consistency – when you lift the whisk, the mixture should fall back in a thick ribbon that stays on the surface for a moment before disappearing. This usually takes about 3-5 minutes of whisking. It’s important to get this light and airy; it forms the base of our creamy goodness.
Step 3: Mix Wet Ingredients
Now, gently fold in the softened mascarpone cheese and the Vanilla Extract into the egg yolk mixture. Be super gentle here! You want to incorporate the mascarpone without overmixing, which can sometimes make it a bit grainy or too loose. If you’re using the heavy cream for extra richness, whisk it into the mascarpone and egg yolk mixture now until just combined. The goal is a smooth, luscious cream. If you test this mixture with almond milk instead of heavy cream, it actually made it even creamier for me one time! Just a little kitchen experiment that worked out.
Step 4: Combine
This step is actually already done in Step 3. You’ve combined your wet ingredients (egg yolks and sugar) with the mascarpone. The key here is to be gentle. Don’t overwork it; you want it to be smooth and creamy, not tough. If it looks a little lumpy, that’s okay, the ladyfingers will help smooth things out.
Step 5: Prepare Filling
This is where the magic really starts to come together. Make sure your strong brewed coffee or espresso is completely cooled. Pour it into a shallow dish. If you’re using coffee liqueur or rum, stir it into the cooled coffee now. This is the mixture we’ll be dipping our ladyfingers into. It gives that lovely, deep coffee flavor that is so characteristic of tiramisu. Taste it – if you want it stronger, add a touch more liqueur or a splash of coffee. This is perfect when you’re craving something sweet at 10pm but don’t want to bake a whole cake.
Step 6: Layer & Swirl
Now for the fun part! Working one by one, quickly dip each ladyfinger into the coffee mixture. Be fast – just a quick dunk on each side! You don’t want them to get too soggy, or your tiramisu will be mushy. Arrange a single layer of these coffee-dipped ladyfingers in the bottom of your prepared dish. Once you have a solid layer, spoon about half of the mascarpone cream mixture over the ladyfingers and spread it evenly. Repeat with another layer of coffee-dipped ladyfingers, followed by the remaining mascarpone cream. You can smooth the top with a spatula, or for a more rustic look, just spoon it on. Some people like to do a little swirl on top with a fork for visual appeal, which is lovely!
Step 7: Bake
This is a no-bake dessert, so we skip the oven! No baking required here, which is one of the best parts. All the work is done on the stovetop and in the layering. Just a quick note: if you are making a baked version, it’s typically around 350°F (175°C) for about 25-30 minutes, but for this classic no-bake tiramisu recipe, we’re going straight to chilling.
Step 8: Cool & Glaze
Once everything is layered, cover the dish tightly with plastic wrap. Pop it into the refrigerator and let it chill for at least 4 hours, but overnight is truly best. This chilling time is crucial; it allows the ladyfingers to soften and absorb all those delicious flavors, and the cream to set up perfectly. Just before serving, dust the top generously with unsweetened cocoa powder. I usually use a fine-mesh sieve for an even coating. This is where you can really make it look professional!
Step 9: Slice & Serve
When it’s time to serve, take your chilled Tiramisu out of the fridge. If you want really clean slices, you can run a sharp knife under hot water and dry it before each cut. Gently slice into portions and serve immediately. The texture should be firm but creamy, with distinct layers. It’s a dessert that truly sings when served cold. The smell alone brings everyone to the kitchen, just waiting for that first bite!
What to Serve It With
This tiramisu is such a showstopper on its own, but pairing it with the right things can elevate the experience even further. For a special breakfast treat, I love serving a small slice with a strong, freshly brewed cup of Italian roast coffee. It’s decadent enough for a morning indulgence without being too heavy. For brunch, it’s absolutely divine alongside a glass of Prosecco or a light, crisp white wine. The bubbles cut through the richness beautifully. As a dessert, of course, it’s perfect after any meal. It pairs wonderfully with fruit dishes, but honestly, it’s so satisfying on its own that it doesn’t need much else. My family loves it as a simple after-dinner treat, often with just a glass of milk for the kids or a digestif for the grown-ups. For cozy snacks, a small portion with a hot chocolate is pure bliss on a chilly evening.
Top Tips for Perfecting Your Tiramisu
I’ve made this tiramisu recipe countless times, and I’ve picked up a few tricks along the way that I think make all the difference. First, about the eggs: while some recipes use raw eggs, I prefer to gently cook the yolks and sugar over a double boiler for a few minutes until thickened before cooling. This ensures food safety and gives the custard a lovely stability. Just whisk the yolks and sugar in a heatproof bowl set over simmering water (don’t let the bowl touch the water!) until it’s warm to the touch and has thickened. Then remove from heat and continue whisking until cool. It takes a little extra time, but it’s worth it for the peace of mind and texture. When it comes to the mascarpone, make sure it’s softened but not melted. If it’s too cold, it’ll be lumpy; too warm, and it might split. Gently fold it in; don’t beat it into submission! For the coffee dip, I always use freshly brewed, strong coffee. Instant coffee just doesn’t have the same depth of flavor. And for the liqueur, a good quality coffee liqueur like Kahlua or Baileys is fantastic, or a splash of dark rum adds a different kind of warmth. Don’t be afraid to experiment with the coffee strength – I like mine pretty bold! If your ladyfingers seem to be breaking apart too easily in the coffee, try dipping them even faster or using a slightly drier cookie. I learned this trick after years of making it: a very light touch is key with the ladyfingers. Lastly, patience is key for chilling. I know it’s tempting to dig in immediately, but letting it rest overnight truly transforms this tiramisu into something extraordinary. It allows all those wonderful flavors to meld and the texture to become perfectly creamy and set.
Storing and Reheating Tips
One of the best things about this tiramisu recipe is how well it keeps. If you have any leftovers (which is rare in my house!), you can store it covered tightly with plastic wrap in the refrigerator for up to 3 days. The flavors actually deepen and improve over that time. For longer storage, you can freeze it, although the texture of the ladyfingers might change slightly upon thawing. If you’re going to freeze it, I’d recommend dusting with cocoa powder *after* thawing to prevent the cocoa from getting damp. Wrap it well in a couple of layers of plastic wrap and then a layer of aluminum foil. It should last for about 1-2 months in the freezer. To thaw, move it from the freezer to the refrigerator for about 24 hours. I don’t recommend reheating it in the oven or microwave, as it’s designed to be served cold. For the glaze, I always wait until just before serving to dust with cocoa powder, especially if it’s been refrigerated for a while, to ensure it looks its best.
Frequently Asked Questions
Final Thoughts
There you have it – my absolute favorite tiramisu recipe. It’s the kind of dessert that makes people close their eyes with the first bite and ask for seconds (and sometimes thirds!). It’s proof that you don’t need to be a pastry chef to create something truly spectacular in your own kitchen. The combination of coffee, creamy mascarpone, and delicate ladyfingers is just perfection. It’s a hug in a dessert dish, a little piece of Italian sunshine that always brightens my day. If you loved this, you might also enjoy my classic chocolate lava cake for another decadent treat! Give this tiramisu recipe a try, and I promise, it will become a staple in your recipe collection too. I can’t wait to hear how yours turns out! Don’t forget to leave a comment below and share your own tips or any creative twists you tried. Happy baking, or in this case, happy assembling!
Classic Tiramisu
Ingredients
For the Mascarpone Cream
- 6 large egg yolks
- 0.75 cup granulated sugar
- 1 lb mascarpone cheese at room temperature
- 1.5 cup heavy cream cold
For Assembly
- 3 cup strong brewed espresso cooled
- 0.25 cup coffee liqueur (optional)
- 30 count ladyfingers
- 0.5 teaspoon unsweetened cocoa powder for dusting
Instructions
Preparation Steps
- In a heatproof bowl set over a saucepan of simmering water (double boiler), whisk together the egg yolks and granulated sugar. Continue whisking until the mixture is pale yellow and thickened, about 5-7 minutes. Remove from heat and let cool slightly.
- In a separate large bowl, beat the mascarpone cheese until smooth. Gently fold in the cooled egg yolk mixture until just combined.
- In another bowl, whip the cold heavy cream until stiff peaks form. Gently fold the whipped cream into the mascarpone mixture until evenly incorporated.
- In a shallow dish, combine the cooled espresso and coffee liqueur (if using).
- Quickly dip each ladyfinger into the espresso mixture, ensuring they are soaked but not soggy. Arrange a single layer of soaked ladyfingers in the bottom of an 8x8 inch baking dish.
- Spread half of the mascarpone cream mixture evenly over the ladyfingers.
- Repeat with another layer of soaked ladyfingers, followed by the remaining mascarpone cream mixture.
- Cover the dish with plastic wrap and refrigerate for at least 4 hours, or preferably overnight, to allow the flavors to meld and the tiramisu to set.
- Just before serving, dust the top of the tiramisu evenly with unsweetened cocoa powder.
Notes
Featured Comments
“Impressed! Clear steps and absolutely loved results. Perfect for busy nights.”
“New favorite here — absolutely loved. crowd-pleaser was spot on.”
“Super easy and turned out amazing! My family asked for seconds. Saving this one.”
“This sweet treat was absolutely loved — the hearty really stands out. Thanks!”
“Made it tonight and wow — turned out amazing! Will definitely make Tiramisu recipe again.”
“Packed with flavor and so simple. Exactly what I wanted from Tiramisu recipe.”