

Let me tell you, there’s something about biting into a perfect citrus cookie that just lifts your mood instantly. It’s like a little burst of sunshine—sweet, tangy, with that zing of citrus that makes everything feel a bit clearer. I remember the first time I made these during a rainy Saturday; my kitchen smelled like a citrus grove, and my family couldn’t get enough. They disappeared in minutes, I swear. I’ve tested this recipe countless times, tweaking the amount of citrus zest, adjusting baking times, and even trying it with different flours—each version feels like a warm hug. Honestly, these citrus cookies are my secret weapon for when I want something sweet but fresh, something that feels fancy yet totally doable on a weeknight. Whether you’re baking for friends or just craving a little pick-me-up, trust me on this one—these cookies will brighten your day, just like they do mine every time I bake them. So grab your citrus, and let’s get baking! You’re going to love this.
What are Citrus Cookies?
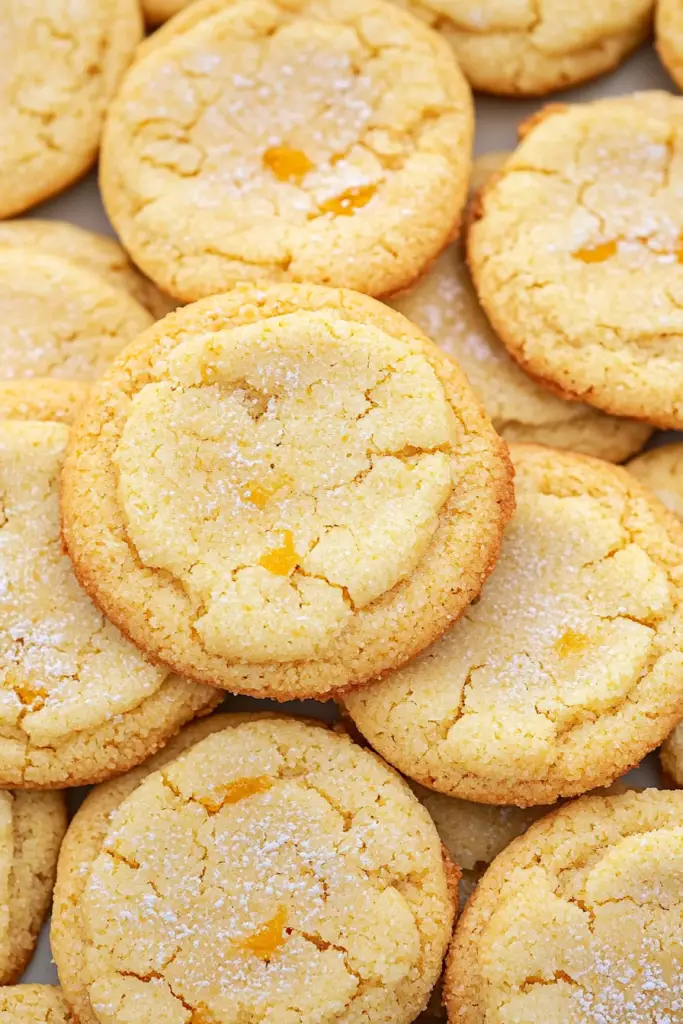
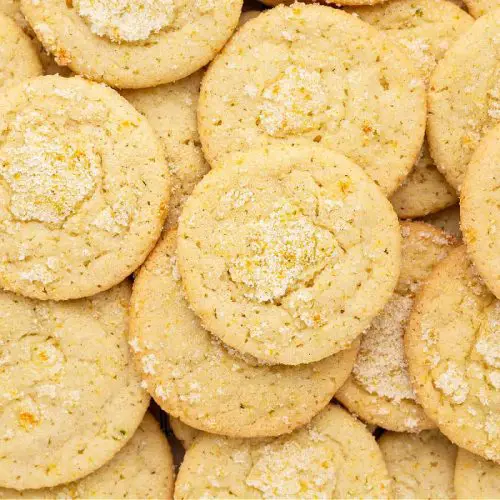
Think of citrus cookies as those delightful little treats that combine the best of both worlds: a buttery, tender cookie base with the refreshing punch of citrus in every bite. The idea is simple—using fresh lemon, lime, or even orange zest to infuse the dough with brightness. These cookies are essentially a more grown-up, zestier cousin to your classic sugar cookies, with a chewy center and crisp edges that make them addictive. The name “citrus cookies” might sound broad, but it’s really about celebrating the vibrant flavors of citrus fruit—both zest and sometimes juice—mixed right into the batter. I like to think of these as a bridge between a classic buttery cookie and a little bit of sunshine on a plate. They’re perfect for spring and summer but honestly, I can’t resist baking them any time of year. Once you try these, your usual cookie routine might just get a little more flavorful and a lot more cheerful.
How do you make Citrus Cookies?
Quick Overview
This recipe is about mixing buttery goodness with zingy citrus, then shaping the dough into cookies and baking until golden. What makes these cookies special is the way the zest and optional juice are folded into the dough—giving every bite a punch of flavor. It’s a straightforward process: whisk your dry ingredients, cream the butter and sugar, add the citrus, combine everything, and bake. I love how forgiving it is—overmixing won’t ruin these, so don’t stress. Once baked, they’re chewy in the middle but crispy on the edges, and the best part is how quickly they come together. Plus, I usually make a simple glaze or dust them with powdered sugar for an extra special look and flavor. Honestly, you’ll have these in the oven in under 30 minutes, and they will disappear just as fast! Perfect for a spontaneous sweet fix or a last-minute gift. Ready to brighten your day? Let’s do this!
Ingredients
[Organize ingredients by purpose with detailed explanations:]
For the Main Batter:
– 1 cup (226 g) unsalted butter, softened — I always use real butter for that rich flavor, but you can try high-quality margarine if you’re dairy-free. Make sure it’s soft but not melted.
– 1 cup (200 g) granulated sugar — classic sweetness, but I’ve tested with coconut sugar for a slightly caramel note that works beautifully.
– 1 large egg — room temperature makes a big difference.
– 1 teaspoon vanilla extract — vanilla just enhances everything.
– Zest of 1-2 lemons or limes — fresh is best, but use a microplane for a super fine zest that distributes evenly.
For the Filling (Optional or for topping):
– Lemon or lime curd, jam, or even flavored cream — I love a dollop of lemon curd hidden in the center or spread on top for extra citrus punch.
For the Glaze:
– Powdered sugar
– Fresh citrus juice
– Optional: a splash of milk or more citrus juice to adjust consistency
– A sprinkle of zest for garnish — makes them pretty and adds more brightness.
Step-by-Step Instructions
Step 1: Preheat & Prep Pan
Set your oven to 350°F (175°C). Line a baking sheet with parchment paper—this is key for easy cleanup and perfect cookies without sticking. I always do this first because I tend to get distracted, and burnt cookies are the worst.
Step 2: Mix Dry Ingredients
In a small bowl, whisk together 1 ½ cups (190 g) of all-purpose flour, ½ teaspoon baking soda, and a pinch of salt. This step ensures everything is evenly distributed so your cookies rise nicely and aren’t dense. Think of it as preparing a foundation for a good build.
Step 3: Mix Wet Ingredients
In a large mixing bowl, cream the softened butter and sugar using a hand mixer or stand mixer on medium speed. It should look fluffy and pale—trust me, this takes about 2-3 minutes. Beat in the egg, vanilla, and citrus zest. If you’re feeling adventurous, a tablespoon of citrus juice can add some extra zing, but I usually wait until just before baking.
Step 4: Combine
Gradually add the dry ingredients to the wet, mixing on low until just combined. Be careful not to overmix—think gentle folding. Overmixing can make the cookies tough instead of tender, and nobody wants that.
Step 5: Prepare Filling
If you’re adding a filling, scoop small spoonfuls of lemon curd or jam. For a swirl effect, you can gently press them into the cookie dough without overmixing, giving each cookie a surprise burst of citrus flavor inside.
Step 6: Layer & Swirl
For a marbled look, drop spoonfuls of dough and filling alternately, then use a toothpick or skewer to swirl. Don’t overdo it—just enough to create pretty ribbons of citrus goodness. I love this step because it turns simple cookies into something special.
Step 7: Bake
Pop them into the oven for about 10-12 minutes. Keep an eye on them—edges should be lightly golden. I like to do the “wiggle test”: if the middle looks set but slightly soft, they’re perfect. They’ll firm up a bit as they cool, so don’t wait until they’re completely hard from the oven.
Step 8: Cool & Glaze
Let the cookies cool on the baking sheet for 5 minutes, then transfer to a wire rack. Once fully cooled, drizzle with a simple citrus glaze—mix powdered sugar and citrus juice until smooth. I sprinkle a little more zest here for color and extra flavor.
Step 9: Slice & Serve
These cookies are best enjoyed within a day or two, but honestly, they’re so delicious that they rarely last that long! Serve them on a pretty plate, with a cup of tea or coffee, and enjoy that burst of sunshine in every bite.
What to Serve It With
These citrus cookies are versatile enough to shine in any setting. For breakfast, they’re fantastic with a steaming mug of black coffee or citrus-infused tea—I swear the zing wakes you right up. I often set a few on a pretty plate for brunch, paired with fresh fruit and a sparkling mimosa or citrusy cocktail, which makes everyone feel fancy. As a dessert, I like to serve them with a scoop of vanilla ice cream or a dollop of whipped cream, especially when I want that extra indulgence. They’re also perfect for cozy snacks on a rainy afternoon; my kids ask for them after school, and I love watching their faces light up when they bite into the chewy, citrus punch.
Over the years, I’ve found that these cookies brighten any occasion. They bring a little brightness to family gatherings or lunchboxes and make a simple coffee break feel special. My family loves to dip them in tea or even scatter some crushed pistachios on top for a little crunch—trust me on this one, it’s next-level good. They’re versatile, forgiving, and downright delicious. Once you make these, I bet they’ll become a staple in your dessert rotation too.
Top Tips for Perfecting Your Citrus Cookies
Having baked these a ton of times, I’ve picked up a few tricks that make all the difference. First, when grating citrus zest, go for a microplane—this gives you a fine, even zest that blends perfectly into the dough and doesn’t overpower. I learned the hard way that too much zest makes the cookies super bitter, so start small and taste test the dough if you’re unsure.
Overmixing is a common rookie mistake with cookies. I always mix just until everything comes together, then stop—I promise, your cookies will stay tender and chewy. If you want a more vibrant citrus flavor, add a splash of juice to the dough, but be careful—it can make the dough a little sticky. Chill the dough for about 20 minutes before baking; it helps prevent spreading and makes the cookies thicker and chewier.
Swirling the filling? Use a toothpick and go gently—think of it as painting with ribbons of flavor. For a more colorful marbling, keep the filling in the center and swirl from the outside inward. Want a different twist? Try adding a pinch of thyme or basil to the dough for an herbal kick that pairs beautifully with citrus.
When baking, remember every oven is different. I always rotate my tray halfway through and keep a close eye around the 10-minute mark. They should look just lightly golden around the edges but still soft in the center.
For the glaze, I like to keep it a little runny—just enough to drizzle easily but not so thin it slides off the cookies. You can flavor it with a splash of citrus or a hint of vanilla, depending on what mood I’m in. Honestly, I’ve tested all kinds of tweaks, and the simplest is usually the best, but don’t be afraid to experiment.
Storing and Reheating Tips
These cookies stay pretty fresh for about 2-3 days if stored properly. I keep them in an airtight container at room temperature, layered with parchment paper to prevent sticking. If you want to keep them longer, pop them in a zip-top bag in the fridge—they stay soft and moist, and the citrus flavor actually seems to deepen a bit. For freezing, wrap each cookie tightly in plastic wrap, then store in a zip-top bag for up to a month. They thaw quickly at room temperature, and I like to warm them up just slightly in the microwave for that just-baked feel. If you’re adding the glaze later, it’s best to do it fresh; otherwise, it can make the cookies a bit soggy if stored with the glaze on. Trust me, these little tips have saved me more than once when I wanted to enjoy leftovers that still tasted fresh and lemony.
Frequently Asked Questions
Final Thoughts
There’s something truly special about these citrus cookies—they’re like a little piece of sunshine wrapped in buttery, chewy goodness. I’ve shared them at countless family gatherings, tea parties, and rainy afternoons, and they always bring smiles. The beauty is in their simplicity, but the flavor punch from fresh citrus zest transforms an ordinary cookie into something memorable. Plus, they’re forgiving enough that even if you’re short on time or baking experience, you’ll handle these beautifully. Once you try them, I bet you’ll find yourself reaching for citrus zests more often, just looking for an excuse to make these again. They’re perfect for a quick treat, an afternoon pick-me-up, or even to impress guests with minimal effort. Happy baking—and don’t forget to share your own twists and additions. I’d love to hear how yours turn out! Now, go ahead and brighten your day with these lovely citrus cookies.
citrus cookies
Ingredients
Main Ingredients
- 0.75 cup unsalted butter (softened)
- 1.5 cup granulated sugar (divided)
- 1 large egg
- 2 cup all-purpose flour
- 1.5 teaspoon baking powder
- 0.5 teaspoon baking soda
- 1 orange orange (zested)
- 1 lemon lemon (zested)
- 1 lime lime (zested)
Instructions
Preparation Steps
- In a small bowl, zest all citrus fruits. Reserve about 2 teaspoons of zest to mix with 1/2 cup of sugar, then set aside. Mix the remaining zest into the sugar and set aside.
- In a mixing bowl, combine softened butter and 1 cup of sugar. Beat until creamy. Add the egg and mix well. Gradually add flour, baking powder, and baking soda, mixing until just combined. Stir in the citrus zest mixture.
- Preheat oven to 350°F. Line baking sheets with parchment paper. Roll cookie dough into 3/4 to 1-inch balls. Roll each ball in the remaining sugar and zest mixture, coating generously.
- Place balls on prepared baking sheets. Slightly flatten each with the bottom of a glass. Optional: sprinkle additional sugar on top.
- Bake for 10-12 minutes or until edges are golden. Remove from oven and let cool on wire racks. Store in a covered container for up to a week.
Notes
Featured Comments
“These cookies sound absolutely delicious! That zesty burst of citrus must be so refreshing—definitely making me want to bake a batch this weekend.”
“Impressed! Clear steps and super easy results. Perfect for busy nights.”
“New favorite here — perfect for busy nights. crowd-pleaser was spot on.”
“Super easy and turned out amazing! My family asked for seconds. Saving this one.”
“This sweet treat was absolutely loved — the balanced really stands out. Thanks!”
“Made it tonight and wow — perfect for busy nights! Will definitely make Zesty Citrus Cookies How to Bake Them again.”


These cookies sound absolutely delicious! That zesty burst of citrus must be so refreshing—definitely making me want to bake a batch this weekend.