What is something truly special?Gluten-free ladyfI know the name sounds fancy, almost intimidating. What are some of the easiest recipes to Make? Think of them as a cross between sponge cake and cookie. And honestly, they’re way more impressive (and tastier! ) than those store-bought gluten-free cookies that always seem a little dry. My grandmother used to make these for every special occasion, and the aroma would fill the entire house. I finally made a gluten-free version, and I’m so excited to share it with you! What is the best way to share it with you? What are the best ways to make tiramisu with coffee or tea?

What is [Recipe Name]?
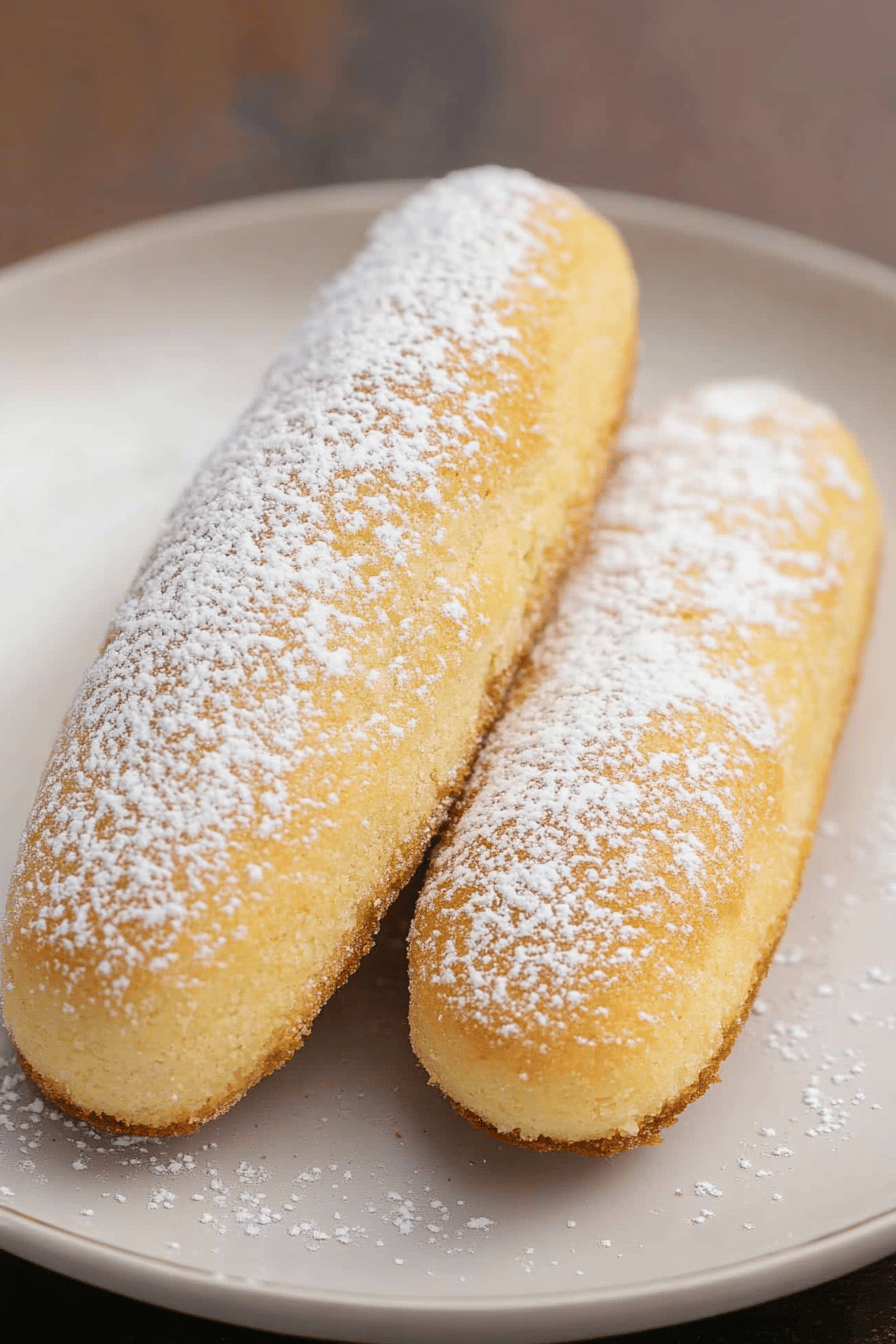
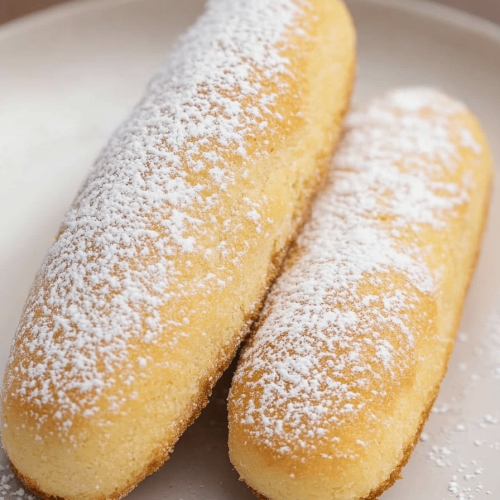
So, what *are* ladyfingers? They’re basically light and sweet sponge biscuits, shaped like… well, fingers! Traditionally, they’re made with flour, eggs, sugar, and sometimes a little bit of vanilla. They’re baked until they’re golden brown and slightly crispy on the outside, but still soft and airy inside. Think of them as the perfect vehicle for soaking up coffee in a tiramisu, or for enjoying with a dollop of Whipped Cream and fresh berries. It’s essentially a delicate, slightly sweet biscuit that adds a touch of elegance to any dessert (or afternoon tea!). The key thing about ladyfingers is that they’re meant to be light and airy, which is why the egg whites are so important. We’re whipping them up into a beautiful meringue, and that’s what gives these their signature texture.
Why you’ll love this recipe?
Where do I begin? First and foremost, the taste is just incredible. They have a delicate sweetness that’s perfectly balanced with hints of vanilla, and the texture is smooth. What are some of the best things about What are some of the reasons why I love this recipe?
- Is it easy to make these?I know they look fancy, but don’t let that fool you! What is the best way to bake a cake? If I can do it, you can too!
- Are they gluten free?Is it true that the original recipe is gluten free? What is gluten-free? What is a lifesaver for someone with allergies?
- They are incredibly versatile.Can you use them in tiramisu? ), but they’re also great with whipped cream and berries, dipped in chocolate, or even just plain plain. Can you enjoy a cup of coffee?
- What I love about this is… the memories.Every time I make these, I’m transported back to my grandmother’s kitchen. the warmth of her love and the aroma of baking. And now, I get to share that with my family.
Are these cookies better than store bought cookies? How do you make them yourself?
How do I make gluten-free Ladyfingers?
Quick Overview
What is the process? I’m basically whipping up a meringue, folding in some Almond Flour and some other key ingredients. We’re basically making this. piping the batter into those signature finger shapes, and baking them until they’re golden brown. What’s the best part? The entire process takes less than an hour! Is it easier than you think? What is the key to success here is patience when whipping the egg whites – you want them to form stiff, but not too hard? What gives the universe its name?Gluten-free ladyfThey have an airy texture.
Ingredients
How do I make these little beauties?
For the Ladyfingers: What
- 4 large eggs, separated by a slit
- 1/2 cup granulated sugar. 1/4 cup water
- 1 teaspoon vanilla extract. 1 tablespoon nutmeg
- 1/2 cup blanched almond flour (superfine is best)
- 1/4 cup tapioca starch (or arrowroot) ..
- What is 1/4 teaspoon salt?
- Powdered sugar, for dusting.
Optional Glaze:
- 1/2 cup powdered sugar for 1 cup.
- 1-2 tablespoons of milk (or almond milk): 1 tablespoon.
- 1/4 teaspoon vanilla extract. 1 teaspoon baking powder.
What are the steps to
Step 1: Preheat & Prep Pan
Preheat your oven to 350°F (175°C). Line a baking sheet with parchment paper. If you don’t use parchment, the ladyfingers will stick. I usually grease the parchment paper lightly too, just to be extra safe.
Step 2: Separate Eggs
How do I separate the eggs? Even a tiny bit of yolk can prevent the whites from whipping up properly. I like to separate them into two bowls and then transfer the whites to the mixing bowl once I’m sure they’re incorporated. I can’t get them out of the bowl without removing them from the mixer.
Step 3: Whip Egg Whites
In a clean, grease-free bowl, beat the egg whites with an electric mixer until soft peaks form. Remove from heat and set aside. Gradually add 1/4 cup of sugar and continue beating until stiff, glossy peaks form. Where does the magic happen? How do you turn a bowl upside down without the whites falling out?
Step 4: Beat Egg Yolks
In a separate bowl, whisk the egg yolks with the remaining 1/4 cup of sugar and Vanilla Extract. Set aside. Is it possible to make a dough until pale What is the best way to do this?
Step 5: Combine Mixtures
Gently fold the yolk mixture into the egg white mixture. Be careful not to deflate the whites! Use a light hand and fold until just combined.
Step 6: Add Dry Ingredients
In a separate bowl, whisk together the Almond Flour, tapioca starch, and salt. Set aside. Gradually fold the dry ingredients into the egg mixture, again being careful not to deflate the mixture. If you have streaks of flour, fold to combine.
Step 7: Pipe the Ladyfingers
Transfer the batter to a piping bag fitted with round tip. What is the best way to pipe 3-4 inch strips onto a baking sheet, leaving about an inch between each.
Step 8: Dust with Powdered Sugar
Dust the ladyfingers generously with powdered sugar. This helps them develop a nice crust. Let them sit for about 5 minutes, then dust with powdered sugar again.
Step 9: Bake
Bake for 10-12 minutes, or until golden brown. The edges should be slightly firm to the touch. Don’t overbake them, or they’ll be dry!
Step 10: Cool
Let the ladyfingers cool on the baking sheet for a few minutes before transferring them to a wire rack to cool completely.
Step 11: Glaze (Optional)
If you’re making the glaze, whisk together the powdered sugar, milk (or almond milk), and Vanilla Extract until smooth. Drizzle the glaze over the cooled ladyfingers.
Step 12: Serve
Enjoy your gluten-free ladyfingers on their own, with Whipped Cream and berries, or use them in your favorite tiramisu recipe! They are also fantastic dunked in coffee.
What to Serve It With
These gluten-free ladyfingers are incredibly versatile! Here are some of my favorite ways to enjoy them:
- For a classic dessert: Tiramisu! These ladyfingers are perfect for soaking up all that delicious coffee and cream.
- For a simple treat: Serve them with whipped cream and fresh berries. It’s a light and refreshing dessert that’s perfect for summer.
- For an elegant afternoon tea: Serve them alongside other delicate pastries and sandwiches. They add a touch of sophistication to any tea party.
- For a cozy snack: Dip them in melted chocolate or enjoy them with a warm cup of coffee or tea.
My personal favorite is dipping them in a rich, dark hot chocolate on a cold winter evening. It’s pure comfort food! I also love crumbling them over Ice Cream for a little added texture and flavor. Trust me, you can’t go wrong with these. My family loves them with a scoop of vanilla ice cream. I also love dipping them in chocolate.
Top Tips for Perfecting Your Gluten-Free Ladyfingers
Okay, I’ve made these gluten-free ladyfingers countless times, and I’ve learned a few things along the way. Here are my top tips for achieving ladyfinger perfection:
- Use superfine almond flour. This will give you the best texture. If your almond flour is too coarse, the ladyfingers will be gritty.
- Don’t overmix the batter. Overmixing will develop the gluten (even though we’re using gluten-free flour!), which will make the ladyfingers tough. Fold the ingredients together gently until just combined.
- Make sure your egg whites are stiff. This is crucial for achieving that light and airy texture. Beat the whites until they form stiff, glossy peaks.
- Dust generously with powdered sugar. This helps the ladyfingers develop a nice crust. Let them sit for a few minutes after dusting, then dust again.
- Don’t overbake. Overbaking will make the ladyfingers dry. Bake them until they’re golden brown and the edges are slightly firm to the touch.
- Let them cool completely before glazing. If you glaze them while they’re still warm, the glaze will melt and run off.
- Ingredient Swaps If you don’t have tapioca starch, arrowroot starch works just as well. I’ve also successfully used a gluten-free all-purpose flour blend, but the texture isn’t quite as delicate.
Honestly, the most important tip is just to have fun! Don’t be afraid to experiment and find what works best for you. And if you mess up, that’s okay! Just learn from your mistakes and try again. After all, that’s what baking is all about.
Storing and Reheating Tips
These gluten-free ladyfingers are best enjoyed fresh, but they can be stored for later. Here’s how:
- Room Temperature: Store them in an airtight container at room temperature for up to 2 days. They’ll start to dry out after that.
- Refrigerator Storage: Store them in an airtight container in the refrigerator for up to 5 days. They may become a little softer, but they’ll still be delicious.
- Freezer Instructions: Freeze them in a single layer on a baking sheet until solid, then transfer them to a freezer bag or container. They can be frozen for up to 2 months. Thaw them at room temperature before serving.
- Glaze Timing Advice: If you’re planning to store the ladyfingers, it’s best to glaze them right before serving. The glaze can become sticky during storage.
When I freeze them, I like to wrap them individually in plastic wrap before placing them in a freezer bag. This helps prevent freezer burn and keeps them fresher for longer. And when thawing, be sure to remove them from the freezer bag as soon as they’re thawed, to prevent them from becoming soggy.
Frequently Asked Questions
Final Thoughts
So there you have it: my recipe for gluten-free ladyfingers! I truly hope you give this recipe a try. It’s a labor of love, but so, so worth it. The delicate flavor, the airy texture, the memories… it’s all just magical. If you’re looking for a gluten-free treat that’s both elegant and easy to make, this is it. And if you love this recipe, be sure to check out my other gluten-free baking recipes! I have a gluten-free chocolate cake that is always a hit. Now go forth and bake some deliciousness! And please, let me know how yours turn out in the comments below. I can’t wait to hear about your experience. Happy baking!
gluten-free ladyfingers
Ingredients
Main Ingredients
- 4 large Eggs separated
- 1.75 oz Granulated Sugar
- 0.25 cup Gluten-Free Flour plus more for dusting
- 0.25 cup Powdered Sugar
- 0.25 teaspoon Vanilla Extract
Instructions
Preparation Steps
- Preheat oven to 350°F (175°C). Line a baking sheet with parchment paper and lightly dust with gluten-free flour.
- In a large bowl, beat egg yolks with half the granulated sugar until pale and thick. Stir in vanilla extract.
- In a separate clean and dry bowl, beat egg whites until soft peaks form. Gradually add the remaining granulated sugar and beat until stiff, glossy peaks form.
- Gently fold the egg whites into the egg yolk mixture in two additions. Be careful not to overmix.
- Sift the gluten-free flour over the mixture and gently fold in until just combined.
- Transfer the batter to a piping bag fitted with a large round tip. Pipe 3-inch long ladyfingers onto the prepared baking sheet, leaving space between each one.
- Dust the ladyfingers with powdered sugar.
- Bake for 10-12 minutes, or until lightly golden brown. Let cool completely on the baking sheet before removing.