What’s so magical about homemade cookies? What are some of the best Kiss Cookies? Isn’t chocolate like peanut butter blossoms? What melts in your mouth? Growing up, my grandma always made these around the holidays, and the smell of them baking would always be there. Just fill the whole house with warmth and happiness. They were always gone within a day! I’ve tweaked her recipe over the years, and I think I finally have perfecte.What are some of the best Kiss CookiesIs truly one that everyone in the family will adore. You’ll want to try it!

What is Kiss Cookies?
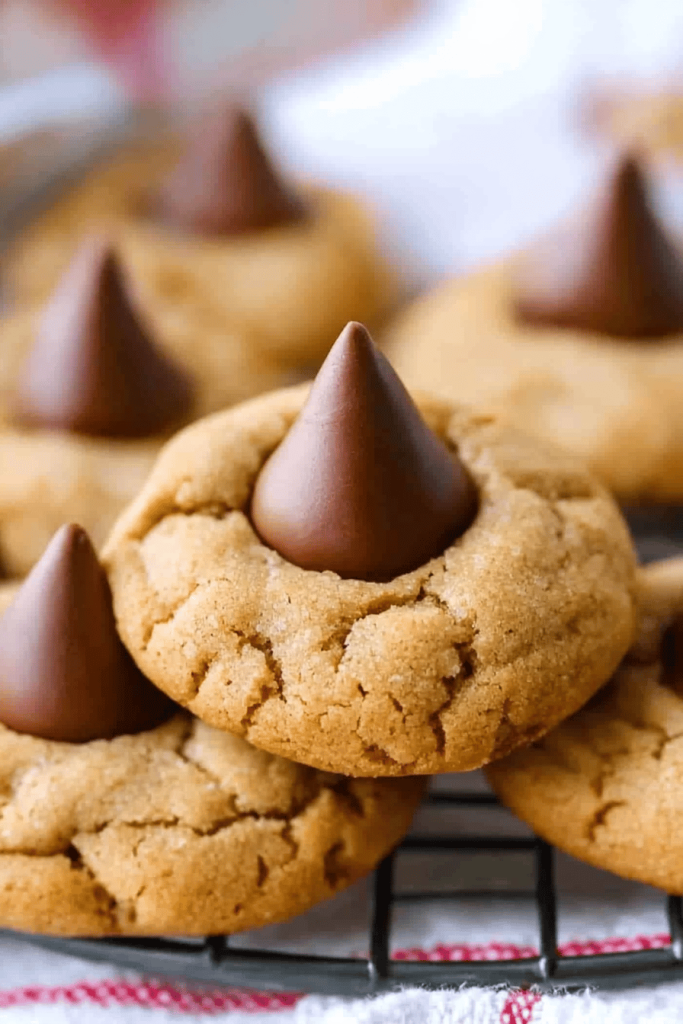
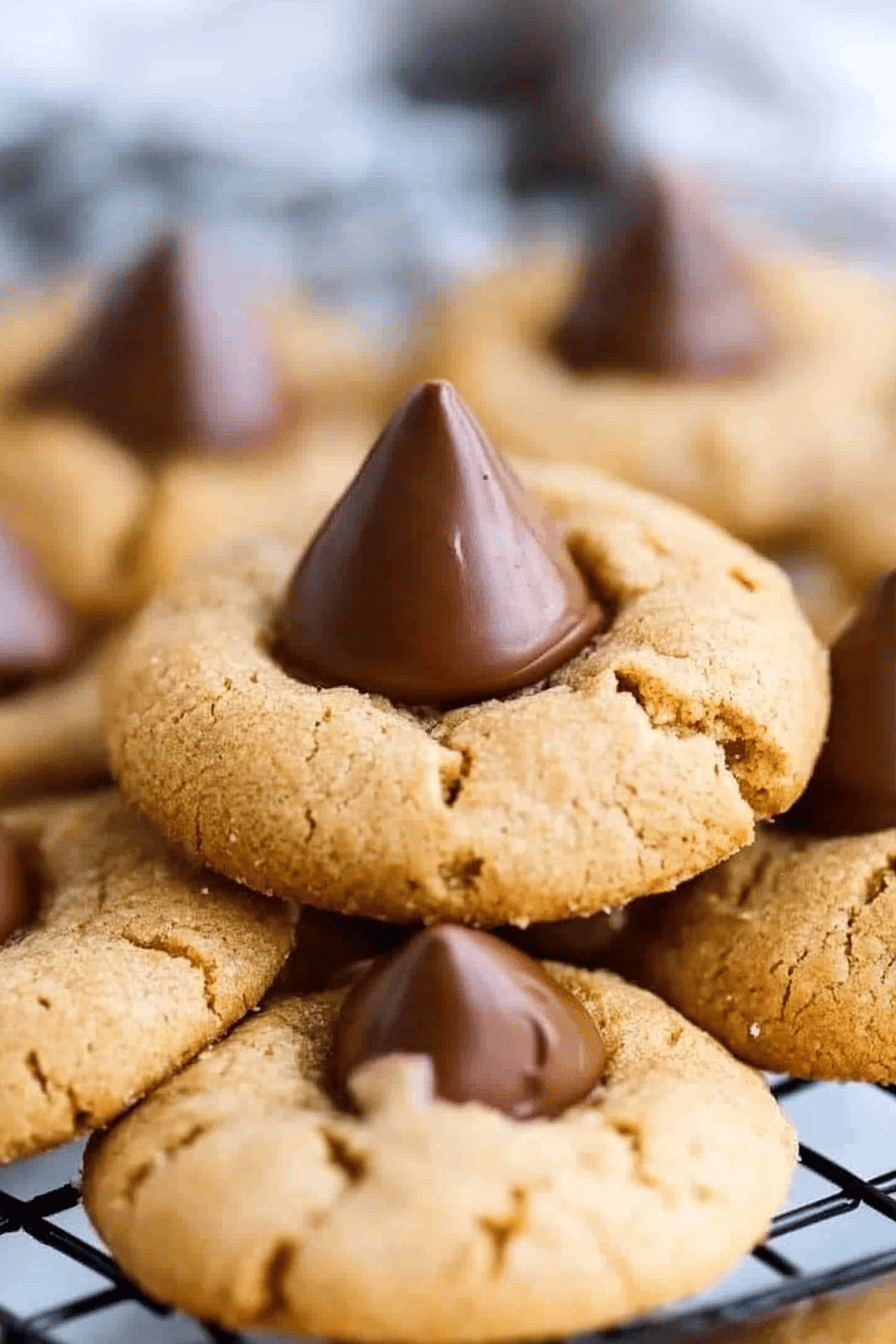
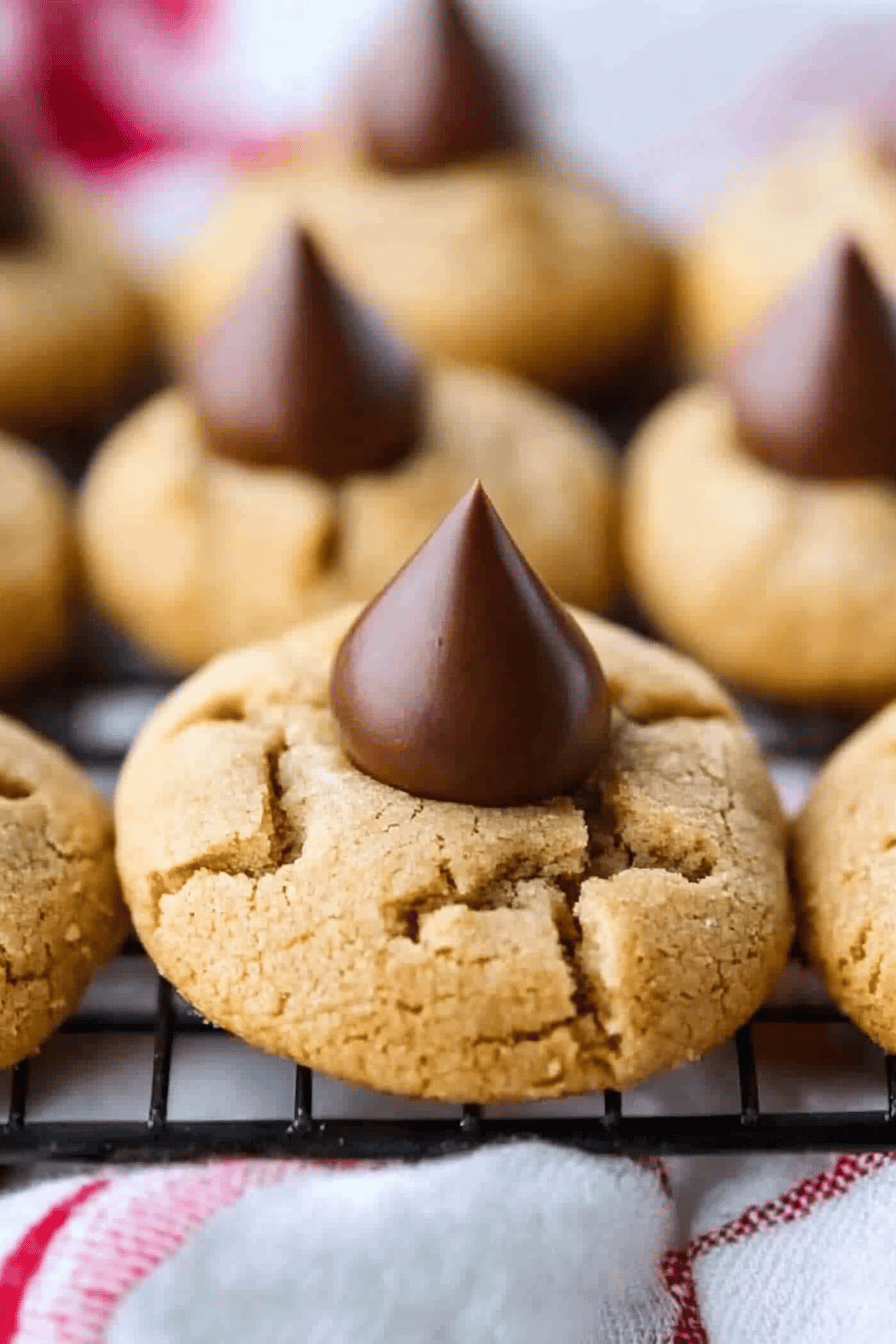
So, what exactly are Kiss Cookies? Think of them as little bites of happiness! They’re essentially a soft, chewy cookie base – in this case, a rich chocolate cookie – topped with a Hershey’s Kiss. The warmth from the freshly baked cookie gently melts the chocolate, creating this perfect little pocket of gooey goodness. The name comes from the obvious topping, but also (in my opinion) because they are so delicious, that you can’t help but kiss the baker! They’re super easy to make, totally customizable (more on that later!), and they always disappear in a flash whenever I bring them to a party. It’s essentially the easiest cookie recipe you will ever see.
Why you’ll love this recipe?
Okay, let me tell you why you’re absolutely going to fall head over heels for this.What is the recipe for Kiss Cookies?. First and foremost, the flavor is incredible. The combination of the fudgy chocolate cookie with the sweet and creamy Hershey’s Kiss is just pure perfection. I honestly can’t get enough of these! But beyond the taste, they’re also surprisingly easy to make. Don’t let the elegant look fool you – you can whip up a batch of these in under an hour, start to finish. Plus, the ingredients are super budget-friendly; you probably have most of them in your pantry already!
What I love most about this recipe is how versatile it is. You can easily swap out the Hershey’s Kisses for different flavors (caramel-filled are amazing!), add sprinkles for a festive touch, or even drizzle them with white chocolate after they’ve cooled. And if you’re looking for something similar but with a slightly different texture, you might also enjoy my classic peanut butter blossom cookies, but trust me, these are worth every second! They are so scrumptious that the entire family will ask for more.
How to Make Kiss Cookies
Quick Overview
Making these Kiss Cookies is seriously a breeze. You’ll start by whipping up a simple chocolate cookie dough, rolling it into small balls, and baking them until they’re just set. Then, while they’re still warm, you’ll press a Hershey’s Kiss into the center of each cookie. The heat from the cookie will melt the chocolate just enough to create that perfect, melty bite. Trust me, the hardest part is waiting for them to cool down enough to eat!
Ingredients
For the Cookie Dough:
* 1/2 cup (1 stick) unsalted butter, softened. Make sure it’s actually softened, not melted! It makes a difference.
* 1/2 cup granulated sugar
* 1/4 cup packed brown sugar. Light or dark brown sugar works, but I prefer the richer flavor of dark brown.
* 1 large egg
* 1 teaspoon vanilla extract. Use real vanilla extract, not the imitation stuff! It really elevates the flavor.
* 1 1/2 cups all-purpose flour. I haven’t tested this with gluten-free flour, but I suspect it would work fine.
* 1/4 cup unsweetened cocoa powder
* 1/2 teaspoon baking soda
* 1/4 teaspoon salt
For the Topping:
* About 48 Hershey’s Kisses, unwrapped. This is where you get creative! What are some of the best uses for milk chocolate, dark chocolate or caramel?
What are the steps to
Step 1: Preheat & Prep Pan
First, preheat your oven to 375°F (190°C). How do I use a baking sheet? I always do this first. This will prevent the cookies from sticking and make cleanup a breeze. What is worse than dough sitting around?
Step 2: Cream Butter & Sugars
In a large bowl, cream together the softened butter, granulated sugar, and brown sugar until light. Set aside. This usually takes about 2-3 minutes with an electric mixer. What do you like about the cookie mixture?
Step 3: Add Egg & Vanilla
Beat in the egg and vanilla extract until well combined. Make sure to scrape down the sides of the bowl to ensure everything is evenly mixed.
Step 4: Whisk Dry Ingredients
In a separate bowl, whisk together the flour, cocoa powder, baking soda, and salt. Set aside. Whisking helps to evenly distribute the dry ingredients and prevent any lumps.
Step 5: Combine Wet & Dry Ingredients
Gradually add the dry ingredients to the wet ingredients, mixing on low speed until just combined. Do not overmix cookies. Overmixing can lead to hard cookies! The dough will be thick and slightly sticky.
Step 6: Shape Cookies
Roll dough into 1-inch balls and place them on the prepared baking sheet, leaving about 2 inches between them. What is the difference between a cookie
Step 7: Bake
Bake for 8-10 minutes, or until the edges are set and the centers are still slightly soft. Don’t overbake them! They’ll continue to bake a little bit as they cool.
Step 8: Add Kisses
Remove the cookies from the oven and immediately press a Hershey’s Kiss into the center of each cookie. The heat from the cookie will melt the chocolate slightly, helping it to adhere.
Step 9: Cool & Enjoy
Let the cookies cool on the baking sheet for a few minutes before transferring them to a wire rack to cool completely. This will prevent them from breaking apart.
What should I serve it with?
These Kiss Cookies are amazing all on their own, but they’re also fantastic with a variety of other treats! Here are a few of my favorite pairings:
What are some great ideas for a holiday cookie tin: Arrange them alongside other festive cookies like gingerbread men, sugar cookies, and peanut butter blossoms.
With a Glass of Milk: What does it feel like?What’s better than a cold glass of milk and cookies?
What is better with a cup of coffee or hot chocolate? The rich chocolate flavor of the cookies pairs perfectly with a warm beverage.
As Part of a Dessert Bar: Include them in a dessert bar with other sweets like brownies, cupcakes, and fruit tarts. They are a perfect addition.
My family loves to have these during holiday gatherings, and they always disappear so fast! Last Christmas, my cousin even asked for the recipe so she could make them for her office party. They’re always a crowd-pleaser!
Top Tips for Perfecting Your Kiss Cookies Recipe
Want to take your Kiss Cookies to the next level? Here are a few of my top tips:
Don’t Overmix the Dough: Overmixing can lead to tough cookies. Mix the dry ingredients into the wet ingredients until just combined.
Use Softened Butter: Softened butter will cream together with the sugar more easily, resulting in a lighter, more tender cookie.
Don’t Overbake the Cookies: Overbaked cookies will be dry and crumbly. Bake them until the edges are set and the centers are still slightly soft.
Chill the Dough (Optional): If you have time, chilling the dough for 30 minutes before baking will help prevent the cookies from spreading too much in the oven.
Experiment with Different Hershey’s Kisses: Try using different flavors of Hershey’s Kisses, like caramel-filled or dark chocolate, for a fun twist.
Add Sprinkles: Before baking, sprinkle the cookies with festive sprinkles for a colorful touch.
I learned the hard way that overmixing is a big no-no with these cookies. The first time I made them, I ended up with hockey pucks instead of soft, chewy cookies! Now, I’m super careful not to overmix, and they always turn out perfectly.
Storing and Reheating Tips
If you happen to have any leftover Kiss Cookies (which is rare in my house!), here’s how to store them:
Room Temperature: Store them in an airtight container at room temperature for up to 3 days.
Refrigerator: Store them in an airtight container in the refrigerator for up to 1 week.
Freezer: Freeze them in an airtight container for up to 2 months. Let them thaw completely before serving.
To Reheat: If you want to warm them up a bit, you can microwave them for a few seconds or bake them in a preheated oven at 350°F (175°C) for a few minutes.
I usually just store them in a cookie jar on the counter, and they’re gone within a day or two. But if I’m making them ahead of time for a party, I’ll freeze them and thaw them out the day before. They taste just as good as freshly baked!
Frequently Asked Questions
Final Thoughts
So, there you have it – my go-to Kiss Cookies recipe! I truly believe that everyone should have this recipe in their repertoire. They’re easy to make, incredibly delicious, and always a hit with everyone. Plus, they’re so versatile that you can easily customize them to your own liking. If you loved this recipe, be sure to check out my other cookie recipes, like my classic chocolate chip cookies and my peanut butter blossom cookies. Happy baking, and I can’t wait to hear how yours turn out! Let me know in the comments if you make these, and don’t forget to rate this recipe if you like it! I’d love to see pictures of your creations, too – so feel free to share them on social media and tag me!

Kiss Cookies Recipe
Ingredients
Main Ingredients
- 1 cup butter, softened
- 0.5 cup granulated sugar
- 0.5 cup packed brown sugar
- 2 large eggs
- 1 teaspoon vanilla extract
- 2.5 cups all-purpose flour
- 1 teaspoon baking soda
- 0.5 teaspoon salt
- 24 Hershey's Kisses
Instructions
Preparation Steps
- Preheat oven to 375°F (190°C).
- Cream together the butter, granulated sugar, and brown sugar until smooth.
- Beat in eggs, then add the vanilla.
- Dissolve baking soda in hot water and add this to batter along with salt.
- Gradually add in the flour and mix until just combined.
- Roll dough into 1-inch balls and place on ungreased baking sheets.
- Bake for 8-10 minutes, or until edges are lightly golden.
- Immediately press a Hershey's Kiss into the center of each cookie.
- Let cool on baking sheets for a few minutes before transferring to a wire rack to cool completely.