

You know those recipes that just feel like a warm hug? The ones you return to again and again, not just because they taste amazing, but because they bring back a flood of happy memories? Well, for me, that’s this apple pie jam. It’s not just a condiment; it’s like bottling up the essence of autumn and Sunday dinners. I remember my grandma making something similar, though hers was more of a chunky apple butter. This version is a little more refined, a touch sweeter, and oh-so-perfectly spiced. It’s like if a classic apple pie decided to take a vacation and came back as the most convenient, spreadable delight. When people ask me for an easy way to get that iconic apple pie flavor without all the fuss of actually baking a pie, this apple pie jam is my go-to answer. It’s a lifesaver on busy mornings and a star player on cheese boards. Honestly, I’ve found myself spreading it on everything from toast to yogurt, and sometimes, dare I admit it, straight from the spoon!
What is Apple Pie Jam?
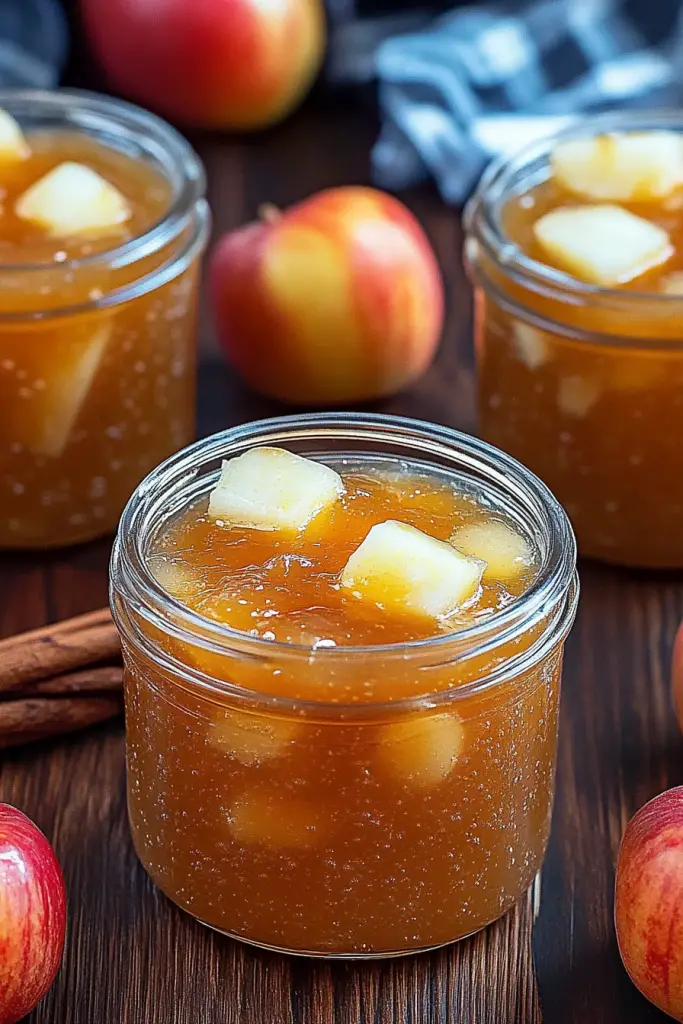
So, what exactly *is* apple pie jam? Think of it as your favorite apple pie, but condensed and transformed into a luscious, spreadable jam. It captures all those comforting, nostalgic flavors – the sweet, slightly tart apples, the warm embrace of cinnamon, nutmeg, and a hint of cloves – all swirled together into a vibrant, ruby-red jewel. It’s not quite a jelly, and it’s definitely not a chunky preserve, though it has delightful little apple bits in there. It’s got a smooth, rich texture that’s absolutely divine. The name itself just sounds delightful, doesn’t it? It evokes images of cozy kitchens, crackling fires, and happy gatherings. It’s essentially a deconstructed apple pie, simplified into the most user-friendly form imaginable. It’s the flavor profile we all adore, made accessible for any time, any place, and any craving.
How do I make Apple Pie Jam?
Quick Overview
This apple pie Jam Recipe is all about capturing that beloved pie flavor in a super easy-to-make spread. You’ll simply cook down chopped apples with sugar, spices, and a touch of lemon juice until they’re tender and the mixture thickens into a jammy consistency. It’s wonderfully forgiving, and the vibrant aroma that fills your kitchen as it cooks is just pure magic. You’ll end up with a jar of deliciousness that’s far superior to anything store-bought.
Ingredients
For the Main Jam: What are the rules?
• 3 lbs (about 6-7 medium) crisp, tart apples (like Honeycrisp, Fuji, or a mix of Gala and Granny Smith) – this is important for flavor and texture!
• 1 ½ cups granulated sugar (you can adjust this slightly based on apple sweetness and your preference)
• ¼ cup fresh lemon juice (this brightens the flavor and helps with pectin setting)
• 2 teaspoons ground cinnamon (don’t be shy here!)
• ½ teaspoon ground nutmeg
• ¼ teaspoon ground cloves (just a pinch, to add that authentic pie warmth)
• ½ cup water (or Apple Cider for extra flavor!)
• 1 tablespoon apple cider vinegar (for a little tang that balances the sweetness)
For the Optional Swirl (makes it extra special!):
• 1 tablespoon softened unsalted butter
• 1 tablespoon brown sugar
• ¼ teaspoon cinnamon
Step-by-Step Instructions
Step 1: Preheat & Prep Pan
You don’t need to preheat an oven for this, but you do need to get your jam pot ready. Grab a large, heavy-bottomed pot or Dutch oven. A heavy bottom is key to prevent scorching, especially as the jam thickens. Make sure it’s clean and dry.
Step 2: Mix Dry Ingredients
In a small bowl, whisk together the granulated sugar, cinnamon, nutmeg, and cloves. This ensures the spices are evenly distributed and you don’t get little clumps of spice in your jam. Set this aside for now.
Step 3: Mix Wet Ingredients
Peel, core, and chop your apples into small, roughly ½-inch cubes. You don’t need them to be perfectly uniform, as they’ll break down quite a bit during cooking. Place the chopped apples in your large pot. Add the lemon juice and water (or apple cider) and the apple cider vinegar. Give it a good stir.
Step 4: Combine
Pour the sugar and spice mixture over the apples in the pot. Stir everything together really well, making sure all the apple pieces are coated in the sugar and spice blend. This initial mix helps draw out moisture from the apples, which is the start of the jam-making process.
Step 5: Prepare Filling
Now, let’s get cooking! Place the pot over medium heat. Bring the mixture to a gentle simmer, stirring frequently. You want to cook the apples until they are tender and begin to break down. This usually takes about 20-30 minutes. As they cook, you can use your spoon or a potato masher to gently mash some of the apples, creating a smoother jam base while leaving some small apple pieces for texture. Continue to cook, stirring more often as it thickens, for another 20-30 minutes, or until the jam reaches your desired consistency. It should be thick enough to coat the back of a spoon and hold its shape for a few seconds when you drag your finger through it. It will thicken more as it cools.
Step 6: Layer & Swirl
While the jam is still hot and spreadable (but not bubbling furiously), if you’re adding the optional swirl, this is the time! In a small bowl, combine the softened butter, brown sugar, and ¼ teaspoon cinnamon. Stir until it forms a paste. Dollop small spoonfuls of this mixture over the surface of the jam in the pot. Then, using a knife or a skewer, gently swirl the butter-sugar mixture into the jam. Don’t over-mix; you want streaks of it to remain for visual appeal and pockets of extra flavor.
Step 7: Bake
This jam doesn’t get baked in the oven. The “baking” is all done on the stovetop! The goal is to cook the jam down until it reaches that perfect, spreadable consistency.
Step 8: Cool & Glaze
Once the jam has reached your desired thickness, remove the pot from the heat. Let it cool in the pot for about 10-15 minutes. This allows it to thicken up a bit more. If you didn’t do the swirl, you can add a touch more cinnamon or a tiny splash of Vanilla Extract now and stir it in. Spoon the jam into clean, sterilized jars. The heat from the jam will help seal the jars if you plan to store them for longer periods. The “glaze” in this recipe is really the jam itself, and the optional swirl adds a beautiful dimension to its appearance and flavor.
Step 9: Slice & Serve
This apple pie jam is best served slightly warm or at room temperature. It’s perfect for spreading on toast, biscuits, or even as a topping for Ice Cream. Allow it to cool completely before sealing jars for storage. If you’re serving it immediately, let it cool for at least an hour to thicken properly.
What to Serve It With
Oh, the ways you can enjoy this glorious apple pie jam! It’s truly a chameleon in the kitchen. For **breakfast**, it’s heavenly spread on warm, buttered toast, English muffins, or even a toasted bagel. It’s also a fantastic dollop on top of plain Greek yogurt or cottage cheese for a bit of sweetness and spice. Imagine it on top of buttermilk pancakes or fluffy waffles – pure breakfast bliss! Moving onto **brunch**, it elevates simple scones to something truly special. Serve it alongside a cheese board featuring a sharp cheddar or a mild goat cheese for a delightful sweet-and-savory contrast. It’s also absolutely divine with some crusty bread and a cup of coffee. As a **dessert**, it’s a revelation! Try it as a filling for shortbread cookies, spread on a slice of pound cake, or served warm over vanilla ice cream. It adds an instant homemade touch that guests will adore. And for those **cozy snacks**, let’s be real, sometimes you just need a little comfort. A spoonful of this jam straight from the jar is always an option (I won’t judge!), but it’s also wonderful on a simple cracker with a sliver of cheese. My kids absolutely love it on their peanut butter and jelly sandwiches – it’s a fun twist on a classic!
Top Tips for Perfecting Your Apple Pie Jam
I’ve tinkered with this apple pie jam recipe more times than I can count, and through those trials and triumphs, I’ve picked up a few tricks that I think will help you make it perfectly every time. First, **apple selection is crucial**. While you can use a mix, I highly recommend using apples that hold their shape well and have a good balance of sweetness and tartness. Granny Smith is great for tartness, while Honeycrisp or Fuji offer sweetness and a pleasant texture. Avoid apples that turn mushy too quickly. When you’re **chopping the apples**, don’t stress about perfection. Small, uneven cubes are fine because they’ll break down during cooking. However, ensure they’re not too large, or you’ll end up with chunks rather than jam. For **mixing the dry ingredients** before adding them to the pot, really take the time to whisk them together thoroughly. This prevents pockets of pure cinnamon or sugar and ensures even flavor distribution throughout the jam. It’s a small step but makes a big difference. Now, about **overmixing**: While you need to stir frequently, especially as it thickens, avoid aggressive stirring that breaks down the apples *too* much if you like a bit of texture. Gently mash some of the apples with the back of your spoon towards the end if you want a smoother consistency. For **swirl customization**, remember that the goal is visual appeal and added flavor, not to completely incorporate the mixture. Dollop small amounts and use a toothpick or a thin knife to create gentle swirls, leaving plenty of the apple jam visible. You can play with the ratio of the swirl ingredients to suit your taste. When it comes to **baking tips** (or rather, stovetop cooking!), patience is key. The jam needs time to thicken. Don’t rush the process by cranking up the heat too high, as this can lead to scorching. Stirring frequently, especially as it gets thicker, is your best friend. You’ll know it’s ready when it coats the back of a spoon and holds its shape for a few seconds. If you’re unsure, you can always chill a small spoonful on a plate for a minute or two to see how it sets. Finally, for **glaze variations**, while the optional brown sugar swirl is fantastic, you could also consider adding a teaspoon of vanilla extract towards the end of cooking for a different flavor dimension, or even a tiny pinch of cardamom for a more complex spice profile. The “glaze” in this context is really about enhancing the jam’s appearance and flavor before it sets.
Storing and Reheating Tips
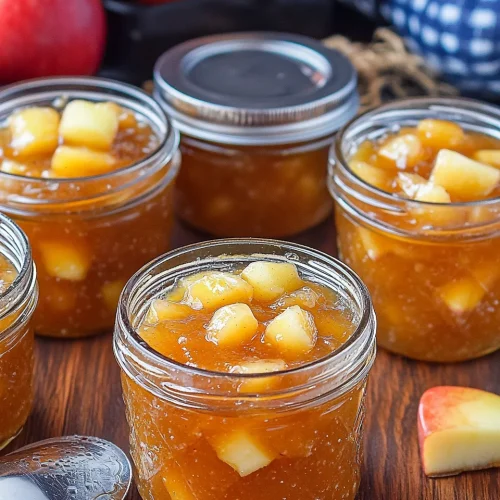
Proper storage is key to enjoying your delicious apple pie jam for as long as possible. For **room temperature storage**, ensure your jars are sterilized and the jam has cooled completely before sealing. Properly sealed jars can be stored in a cool, dark pantry for up to 2-3 weeks. Once opened, however, it’s best to refrigerate. For **refrigerator storage**, keep your jam in clean, airtight containers or use the jars you canned them in. It will stay wonderfully fresh in the fridge for about 3-4 weeks. The texture might firm up a bit when chilled, but it will soften nicely at room temperature. If you find it’s too firm, just let it sit out for about 15-20 minutes before serving. For **freezer instructions**, this jam freezes beautifully, making it perfect for preserving the flavors of the apple season. Spoon the cooled jam into freezer-safe containers or heavy-duty freezer bags, leaving about ½ inch of headspace as liquids expand when frozen. It can be stored in the freezer for up to 6 months. To thaw, transfer the jam to the refrigerator overnight. **Glaze timing advice** is important here; if you’re freezing, make sure the jam is fully cooled and settled before freezing. If you’ve made the swirl version, the swirls will still be visible and delicious after thawing. The jam itself acts as its own beautiful glaze, so no extra glazing is needed after storage!
Frequently Asked Questions
Final Thoughts
I really hope you give this apple pie jam a try! It’s more than just a recipe; it’s a little jar of happiness that I think you’ll absolutely adore. It’s the perfect way to capture those comforting apple pie flavors without turning on the oven. The aroma while it’s cooking is truly something special, filling your home with the scent of autumn and cozy kitchens. It’s so incredibly versatile, from jazzing up your morning toast to being the star of a fancy cheese board. If you loved this apple pie jam, you might also enjoy my Spiced Pear Butter recipe or my Easy Berry Jam. They share that same homemade charm and incredible flavor. I can’t wait to hear how your apple pie jam turns out! Please leave a comment below and share your experience, or even your favorite way to enjoy it. Happy cooking, and happy spreading!
Apple Pie Jam
Ingredients
Main Ingredients
- 6 pounds apples a mix of tart and sweet, like Granny Smith and Honeycrisp, peeled, cored, and chopped
- 3 cups granulated sugar
- 0.5 cup lemon juice freshly squeezed
- 2 teaspoons ground cinnamon
- 0.25 teaspoons ground nutmeg
- 0.125 teaspoons ground cloves
Instructions
Preparation Steps
- Combine chopped apples, sugar, lemon juice, cinnamon, nutmeg, and cloves in a large, heavy-bottomed pot.
- Let the mixture sit for about 15 minutes to allow the sugar to draw out some juice from the apples.
- Cook over medium-high heat, stirring frequently, until the mixture comes to a boil.
- Reduce heat to medium-low and simmer, uncovered, stirring often, for about 30-45 minutes, or until the jam has thickened.
- Test for set: Place a small amount of jam on a chilled plate. If it wrinkles when you push it with your finger, it's ready. Otherwise, continue simmering.
- Once thickened, remove from heat. Ladle hot jam into sterilized jars, leaving 0.25-inch headspace.
- Wipe rims clean, apply lids and rings, and process in a boiling water bath for 10 minutes (adjusting for altitude if necessary).
- Let jars cool completely on a rack. Check seals after 12-24 hours.
Notes
Featured Comments
“This recipe is everything—so cozy and nostalgic. I’ve made it twice now and my whole kitchen smells like fall.”
“Impressed! Clear steps and creamy results. Perfect for busy nights.”
“New favorite here — perfect for busy nights. crowd-pleaser was spot on.”
“Super easy and turned out amazing! My family asked for seconds. Saving this one.”
“This sweet treat was absolutely loved — the rich really stands out. Thanks!”
“Made it tonight and wow — super easy! Will definitely make Apple Pie Jam again.”


This recipe is everything—so cozy and nostalgic. I’ve made it twice now and my whole kitchen smells like fall.