

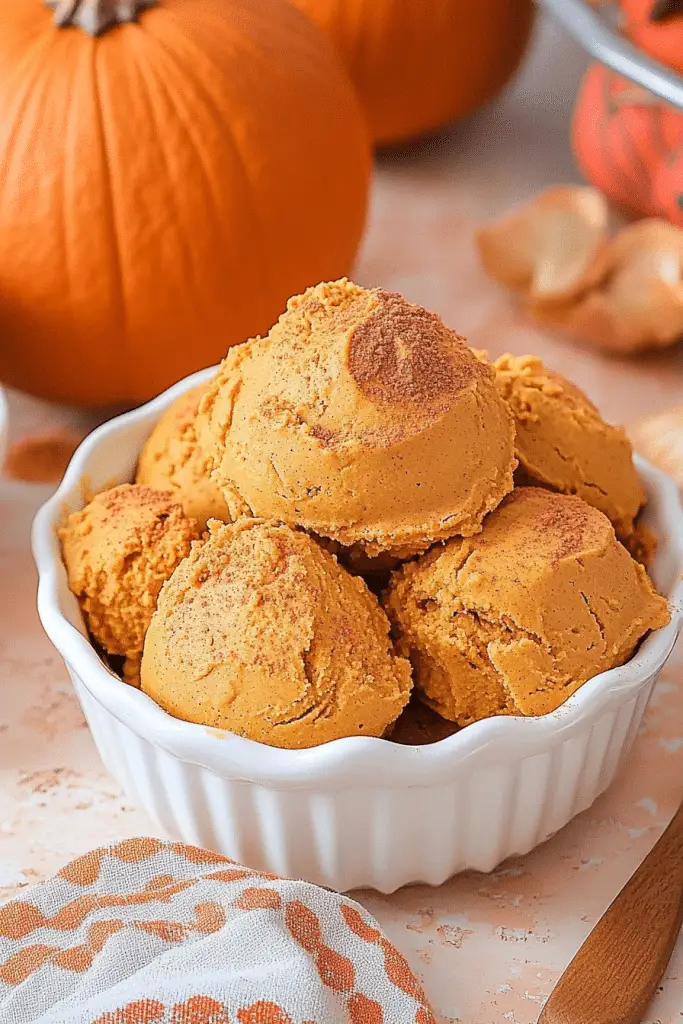
There’s something about pumpkin pie that always takes me back — to cozy autumn afternoons, the smell of spices lingering in the air, and my grandma’s warm smile when she pulls a freshly baked pie out of the oven. I remember the first time I tried making it myself; I was nervous about getting it just right, but honestly, it’s one of those recipes that feels so comforting and magically forgiving. This pumpkin pie isn’t fancy or complicated — it’s the kind that’s made with love, simple ingredients, and a little bit of patience. And trust me, once you slice into that tender, spiced filling, the rich aroma alone will have everyone rushing to the table. It’s perfect when you want something sweet and homey, without fuss. Whether you’re a seasoned baker or just winging it for the first time, I’ll walk you through every step so you can enjoy making this classic treat as much as my family does on holidays or quiet weekends. Get ready for a slice of childhood and a whole lot of flavor — I promise, you’ll want to make this over and over again!
What is pumpkin pie?
Think of pumpkin pie as the cozy cousin of all desserts — it’s essentially a creamy, spiced custard nestled in a flaky pie crust, capturing the essence of fall in every bite. Originating from early North American settlers who used pumpkin and squash in their baking, it’s become a staple for holidays like Thanksgiving and Halloween. The name itself is pretty straightforward, but what makes it special is the warm blend of cinnamon, ginger, nutmeg, and cloves that transform simple pumpkin puree into something downright addictive. It’s kind of like a hug in food form, with that smooth, velvety texture and a hint of spice that makes everyone reach for seconds. And the best part? It’s super approachable — no fancy techniques needed, just good ingredients and a little love. Think of it as a dessert that bridges family traditions and modern comfort, perfect for sharing with loved ones or enjoying all by yourself with a cup of coffee.
How do I make homemade pumpkin pie?
Quick Overview
This pumpkin pie comes together with surprisingly little fuss. Basically, you prepare your pie crust, mix up a smooth, spiced pumpkin filling, pour it into the crust, and bake until just set. The best part? You can get it baking while you relax a bit, and the smell that fills your kitchen is worth every minute of waiting. I love to make the filling first, which is just a matter of blending pumpkin with eggs, sugar, and spices — it’s super simple. The tricky part is avoiding overbaking (trust me, underbake slightly if you want that perfect custardy texture). The whole process takes maybe an hour from start to finish, give or take, and the result? A dessert everyone ohs and ahs over. I tested this with different oven settings and it’s flexible; just keep an eye on it towards the end. Truly, once you taste that first slice, you’ll see why I keep coming back to this recipe.
Ingredients
For the Main Batter:
– 1 ¾ cups pumpkin puree (canned or homemade, I like Libby’s best)
– 3 large eggs
– ¾ cup granulated sugar (or coconut sugar for a warm touch)
– 1 tsp ground cinnamon
– ½ tsp ground ginger
– ¼ tsp ground nutmeg
– ¼ tsp ground cloves
– ½ tsp salt
– 1 ½ cups heavy cream (or whole milk for a lighter version)
For the Pie Crust:
– 1 pre-made pie crust (store-bought saves time, but homemade is fantastic too)
– Or make your own with flour, butter, cold water, and a pinch of salt — super satisfying!
For the Glaze (optional but pretty):
– 2 tbsp apricot jam or honey (melted briefly for a glossy finish)
– A sprinkle of cinnamon or sugar for decoration
Step-by-Step Instructions
Step 1: Preheat & Prep Pan
Set your oven to 350°F (175°C). Take out your pie dish and put it somewhere safe. If you’re using a homemade crust, I always give it a quick chill in the fridge for about 15 minutes before blind baking a bit — just line it with parchment and weight it down. For store-bought, you can just unroll and press it into the dish, then carefully prick the bottom with a fork to prevent bubbles. It’s a simple start, but it makes a big difference in the crust’s texture once baked.
Step 2: Mix Dry Ingredients
In a small bowl, whisk together your spices, salt, and sugar. This step helps distribute the flavors evenly throughout your filling, so every slice is perfectly seasoned. I do this even before blending the pumpkin — it just makes the final flavor pop!
Step 3: Mix Wet Ingredients
In a large mixing bowl, combine the pumpkin puree, eggs, and heavy cream. Whisk until smooth and creamy — I like to use a wire whisk for this because it helps incorporate everything without overdoing it. The mixture should look velvety and vibrant orange, with no streaks of egg.
Step 4: Combine
Gradually add the dry spice mixture into the pumpkin mixture, stirring gently until everything is just combined. Don’t overmix — overworking the batter can lead to a less tender texture. Trust me, a light hand keeps it silky and perfect.
Step 5: Prepare Filling
Pour the filling into your prepared pie crust. If you want a little extra flair, sprinkle a dash of cinnamon on top before baking. For that marbled look, I like to add a few dollops of extra pumpkin or cream on top and swirl it with a toothpick or skewer. This creates pretty patterns and hints of extra flavor in each bite.
Step 6: Layer & Swirl
If you’re feeling creative, you can layer different fillings — like a swirl of caramel or a sprinkle of crushed cookies. Just add the extras on top before baking and swirl gently to integrate. For a classic look, keep it simple and let the spices and pumpkin shine through.
Step 7: Bake
Pop it into the oven and bake for about 50-60 minutes. Check around the 50-minute mark — the edges should be set but the center will still jiggle slightly. That’s perfect; it will firm up as it cools. If the crust browns too quickly, tent with foil. Sometimes every oven is a bit different, so keep an eye on it and do the toothpick test — insert in the center, and if it comes out just slightly moist, it’s done.
Step 8: Cool & Glaze
Allow the pie to cool on a rack for at least 2 hours. This helps the filling set. If you want that beautiful glossy finish, brush the top with melted apricot jam or honey once cooled slightly. It adds a stunning shine and a tiny hint of sweetness. I love to sprinkle a little extra cinnamon or powdered sugar on top for presentation.
Step 9: Slice & Serve
Use a sharp knife dipped in hot water for clean slices. Serve it warm with whipped cream, or chilled — either way, it’s divine. My kids ask for this all the time, and I swear there’s no better fall dessert to share with family or friends.
What to Serve It With
This pumpkin pie is versatile enough for all kinds of occasions. For a cozy breakfast, serve a warm slice with coffee and a drizzle of melted butter — the sweetness is tame enough to kickstart your day. At brunch, it pairs beautifully with a dollop of Greek yogurt or vanilla whipped cream and a sprinkle of toasted pecans or walnuts for crunch. As a proper dessert, consider serving it with caramel sauce or cinnamon-spiced ice cream, which melts over the hot filling in the best way.
And honestly, for a casual snack, I love slicing off a piece and eating it on the porch with a cup of cider — it’s like autumn in every bite. My family loves to keep slices in the fridge and reheat just a bit, so it’s ready whenever cravings hit. It’s become a little tradition that no holiday goes by without this pie making an appearance — a simple, comforting, classic that never fails to bring smiles and warm hearts.
Top Tips for Perfecting Your Pumpkin Pie
Over the years, I’ve picked up a few tricks that make this pie turn out just right every time. First, always peel and drain your pumpkin well if using fresh puree — extra moisture can make the filling too runny. I learned this the hard way after a soggy bottom! When mixing the batter, do it gently; I used to whip it vigorously, but now I fold the ingredients with care, keeping it light and silky. For the swirl patterns or decorating, use a toothpick or skewer to create beautiful designs without disturbing the filling too much. If you want a richer flavor, try adding a splash of bourbon or vanilla extract — it’s subtle but adds a lovely depth. Also, don’t forget to keep an eye on the oven; every oven bakes a little differently, so start checking around 45 minutes to avoid overbaking and a dry texture. As for the glaze, I’ve experimented with honey, maple syrup, and even coconut oil — the apricot jam is my favorite because it’s neutral and makes the top shine without overpowering the spices. Trust me on this: patience, gentle mixing, and a careful eye are your best friends here. And once it’s cooled, the set-up and flavor are just perfect — a true labor of love that always impresses.
Storing and Reheating Tips
Leftovers? Absolutely! This pumpkin pie keeps well for a couple of days, which is great because honestly, it probably won’t last that long. After it cools, cover it tightly with plastic wrap or store it in an airtight container in the fridge. It’s good for up to 3 days, but I like to reheat slices gently in the microwave for about 20 seconds — just enough to warm the filling without making it rubbery. If you prefer it chilled, it’s just as delicious cold, with the flavors melding beautifully overnight. Want to freeze it? Wrap the entire pie tightly in plastic and foil, and it’ll hold up for up to 2 months. Just thaw it in the fridge overnight before serving. If you’ve added a glaze, wait to do that until right before serving, so it stays glossy and fresh. Either way, a quick reheat or fresh slice keeps that comforting taste alive. Just remember, the longer it sits, the more the filling firm up — which I actually like, because a firmer slice is easier to serve! If you’re making this ahead, just take out what you need, and you’re good to go.
Frequently Asked Questions
Final Thoughts
Homemade pumpkin pie holds a special place in my heart — it’s the kind of dessert that brings people together, fills the house with warmth, and tastes like an old family hug. Every time I make it, I’m reminded of those special moments, of sharing something simple but delicious with loved ones. The best part? It’s straightforward enough that even a novice baker can master it with a bit of patience. Once you taste that first spoonful — smooth, spiced, and velvety — I bet you’ll find yourself craving it again and again. Whether it’s for holiday gatherings, a cozy weekend treat, or just because you deserve something sweet, this pumpkin pie is a keeper. So go ahead, gather your ingredients, put on some good music, and give this a try. I’d love to hear how yours turns out — don’t forget to leave a comment or snap a photo for me! Happy baking!
pumpkin pie
Ingredients
Main Ingredients
- 1 cup pumpkin puree
- 3 eggs large eggs
- 1 cup evaporated milk
- 1 cup granulated sugar
- 1 teaspoon ground cinnamon
- 0.5 teaspoon ground ginger
- 0.5 teaspoon ground nutmeg
- 0.25 teaspoon cloves
- 1 pinch salt
- 1 pie crust unbaked pie crust
Instructions
Preparation Steps
- Preheat oven to 350°F (175°C). Place the unbaked pie crust in a pie dish.
- In a mixing bowl, combine pumpkin puree, eggs, sugar, cinnamon, ginger, nutmeg, cloves, and salt. Mix until smooth.
- Gradually add evaporated milk to the mixture, stirring continuously until well incorporated.
- Pour the filling into the prepared pie crust.
- Bake in the preheated oven for 60 minutes or until the filling is set and a knife inserted in the center comes out clean.
- Remove from oven and let cool before serving.
Notes
Featured Comments
“Impressed! Clear steps and absolutely loved results. Perfect for busy nights.”
“New favorite here — creamy. crowd-pleaser was spot on.”
“Super easy and turned out amazing! My family asked for seconds. Saving this one.”
“This sweet treat was absolutely loved — the silky really stands out. Thanks!”
“Made it tonight and wow — perfect for busy nights! Will definitely make Autumn Spice Ice Cream How to Make It again.”
“Packed with flavor and so simple. Exactly what I wanted from Autumn Spice Ice Cream How to Make It.”


