

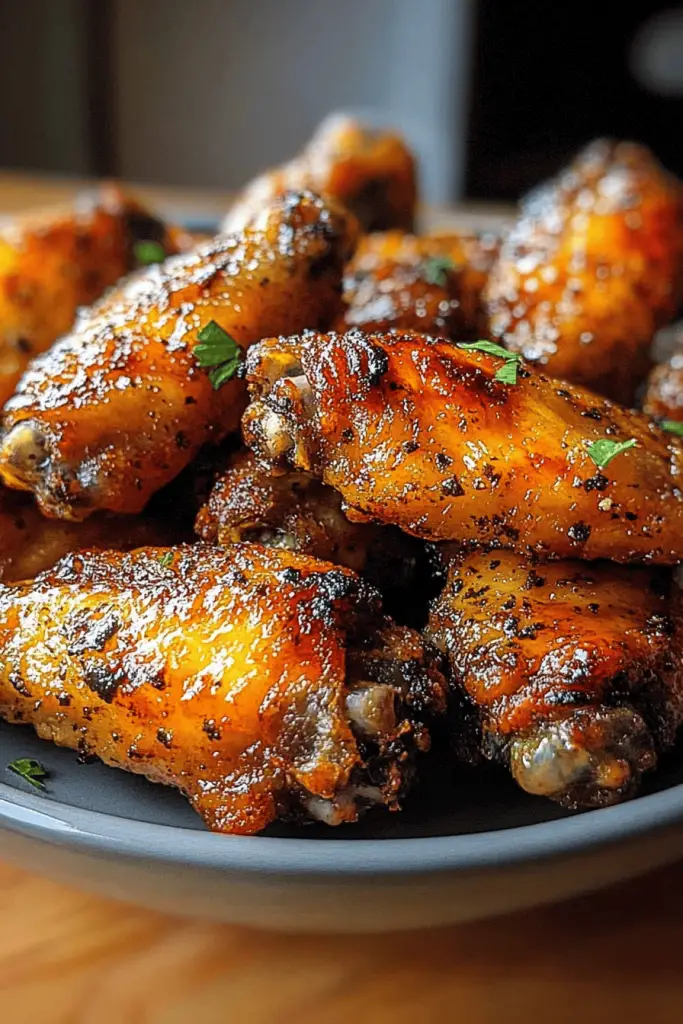
Oh, chicken wings! They’re just one of those things, aren’t they? The kind of food that instantly brings a smile to your face, sparks conversation, and makes any gathering feel a little more festive. For the longest time, I was stuck in the cycle of greasy, fried wings that left my kitchen smelling like a fast-food joint for days. Then, a few years ago, I stumbled upon a method for Baked Chicken wings that completely changed the game. Seriously, these baked chicken wings are so ridiculously crispy and flavorful, you’d swear they came straight from a fryer. They’re my secret weapon for weeknight dinners when everyone’s hungry, game days, or when I just need a little something special without all the fuss. If you thought baked wings couldn’t compete, trust me, you are in for a delightful surprise. This recipe is less about complicated techniques and more about understanding a few simple tricks to unlock ultimate crispiness. It’s the kind of recipe you’ll find yourself coming back to again and again, just like I do!
What Are These Crispy Baked Chicken Wings?
So, what exactly makes these baked chicken wings so special? Think of them as your new best friend in the kitchen when it comes to satisfying that chicken wing craving. They’re not deep-fried, which is a huge win for cleanup and for my waistline (shhh, don’t tell anyone!). Instead, we’re using a clever combination of high heat and a little kitchen magic to achieve that signature crunch you usually only get from frying. The name itself, “Crispy Baked Chicken Wings,” really says it all. It’s straightforward, it’s honest, and it promises exactly what you’re going to get: incredibly crispy, juicy, and Flavorful Chicken wings, all made in the oven. We’re talking tender meat that falls right off the bone, coated in a perfectly crisp skin that has just the right amount of chew. It’s the kind of dish that’s universally loved, from picky eaters to gourmet foodies. It’s essentially the best of both worlds – all the deliciousness of fried wings without any of the mess or guilt.
How to Make Crispy Baked Chicken Wings
Quick Overview
Making these crispy baked chicken wings is honestly a breeze, and the results are always spectacular. We start by prepping the wings to ensure maximum crispiness, then give them a simple but flavorful seasoning. The key is baking them at a higher temperature, allowing the skin to render its fat and get wonderfully crunchy without drying out the meat. It’s a straightforward process that delivers restaurant-quality results right in your own oven. You’ll be amazed at how simple it is to achieve that perfect crunch!
Ingredients
For the Main Batter:
This is where we set the stage for ultimate crispiness! It’s not really a ‘batter’ in the traditional sense, but more of a coating that helps achieve that wonderful texture.
- 3 pounds chicken wings, flats and drumettes separated
- 1 tablespoon baking powder (NOT baking soda – this is crucial for crispiness!)
- 1 teaspoon kosher salt
- 1/2 teaspoon Black Pepper
- 1/2 teaspoon garlic powder
- 1/2 teaspoon onion powder
The baking powder might sound odd, but it works by raising the pH of the chicken skin, helping it to brown and crisp up much faster. Make sure it’s aluminum-free if you can find it, though any kind will do the trick. For the salt and pepper, I like to use kosher salt because it has a nice texture, but table salt works too. Just use a little less if you do! The garlic and onion powders are for a subtle flavor base that’s delicious even before any sauce goes on.
For the Optional Glaze (Choose Your Favorite!):
This is totally optional, as the wings are amazing on their own, but a good glaze takes them to the next level. Here are a couple of my favorites:
- For Buffalo Style: 1/2 cup Frank’s RedHot sauce + 1/4 cup unsalted butter, melted
- For Honey Garlic: 1/4 cup honey + 2 tablespoons soy sauce + 1 clove garlic, minced + 1 teaspoon grated ginger
- For BBQ: 1/2 cup your favorite BBQ sauce + 1 tablespoon brown sugar
You can mix and match these, or come up with your own! The key is to have enough to coat the wings once they’re cooked. I usually make my glaze while the wings are baking so it’s ready to go.
Step-by-Step Instructions
Step 1: Preheat & Prep Pan
First things first, let’s get that oven hot! Preheat it to a sizzling 400°F (200°C). While the oven is heating up, grab a large baking sheet. The trick to getting the bottoms crispy too is to line it with parchment paper (this is a lifesaver for cleanup!) and then place a wire rack on top of the parchment paper. This allows the air to circulate all around the wings, ensuring maximum crispiness on all sides. If you don’t have a wire rack, you can still make them directly on the parchment paper, but you’ll want to flip them halfway through baking.
Step 2: Mix Dry Ingredients
In a large bowl, this is where we create our magic coating. Add the separated chicken wings. Now, sprinkle in the baking powder (remember, NOT baking soda!), kosher salt, black pepper, garlic powder, and onion powder. Toss everything together really well with your hands. You want to make sure every single wing is evenly coated. It might look a little dusty, and that’s exactly what we want! This dry coating is the secret to that incredible crispiness.
Step 3: Mix Wet Ingredients (for Glaze, if using)
If you’re planning on glazing your wings, now’s a good time to get that ready. In a small saucepan over medium-low heat, combine your chosen glaze ingredients. For example, for the buffalo glaze, melt the butter and whisk in the hot sauce. For honey garlic, combine honey, soy sauce, minced garlic, and ginger. For BBQ, just warm up your favorite sauce with a little brown sugar. Let it simmer gently for a few minutes, stirring occasionally, until everything is well combined and slightly thickened. Turn off the heat and set aside.
Step 4: Arrange Wings on Rack
Now, carefully arrange the seasoned chicken wings in a single layer on the prepared wire rack on the baking sheet. Make sure they aren’t overlapping too much; giving them a little breathing room is key for crisping. If they are too crowded, you might need to use two baking sheets. We’re aiming for that perfect, crispy skin, and overcrowding will just steam them instead of crisping them.
Step 5: Bake the Wings
Pop the baking sheet into your preheated oven. Now, here’s where the magic happens. Bake for about 40-50 minutes, flipping the wings halfway through the cooking time (around the 20-25 minute mark). You’ll know they’re done when they’re deeply golden brown and wonderfully crispy. The internal temperature should reach at least 165°F (74°C), but for extra crispiness, you can even push it a little higher.
Step 6: Toss with Glaze (Optional)
Once the wings are perfectly baked and crispy, remove them from the oven. If you’re using a glaze, carefully transfer the hot wings to a clean large bowl. Pour your prepared glaze over the top and toss gently until each wing is beautifully coated. Work quickly so the wings stay nice and hot!
Step 7: Serve Immediately
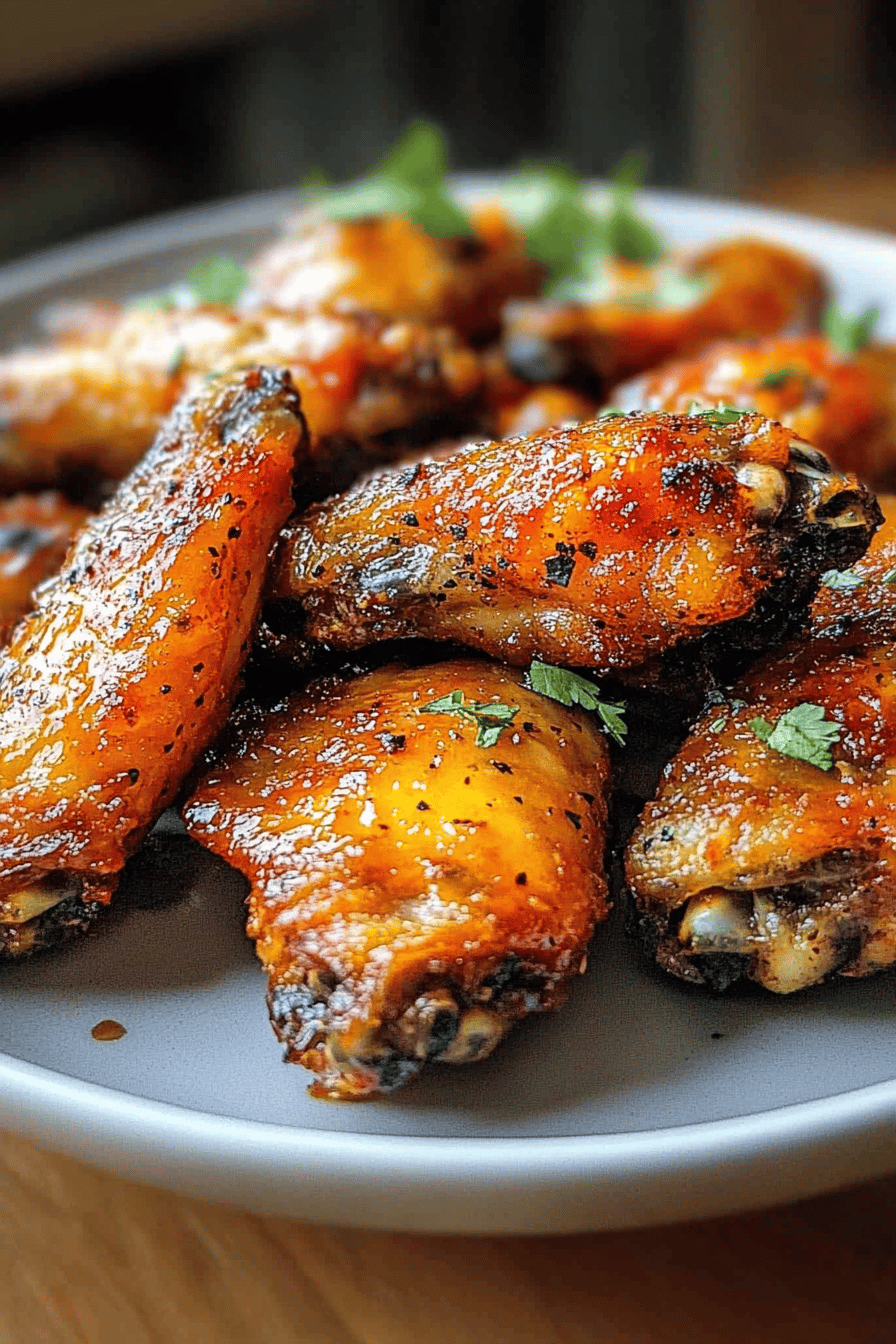
These crispy baked chicken wings are best served hot, right off the rack or tossed in their glaze. They’re so incredibly addictive. You can serve them as is, or with your favorite dipping sauces like ranch or blue cheese. Enjoy the crunch!
What to Serve It With
These baked chicken wings are so versatile, they really fit into almost any meal! For a casual weeknight dinner, I love serving them alongside a big, fresh salad – something like my crunchy coleslaw recipe or a simple mixed greens salad with a vinaigrette. It’s a perfect balance of rich and fresh. If we’re having a game day spread or a more substantial meal, they’re fantastic alongside some homemade potato wedges or sweet potato fries. My kids also adore them with some mac and cheese; it’s a classic comfort food combo that never fails. For a potluck or party, these wings are always a huge hit. You can even serve them with some mini corn on the cob or a refreshing cucumber salad to round out the flavors. Honestly, they’re so good, you can just serve them as is with a side of celery sticks and a good ranch dressing, and everyone will be perfectly happy!
Top Tips for Perfecting Your Crispy Baked Chicken Wings
I’ve made these baked chicken wings more times than I can count, and over the years, I’ve picked up a few tricks that really elevate them. The most crucial step, in my opinion, is using baking powder, NOT baking soda. I learned this the hard way after one batch where I grabbed the wrong one, and let me tell you, the texture was totally off! Baking powder helps draw moisture out of the skin, which is exactly what we want for that ultimate crisp. Another tip for maximum crispiness is ensuring your wings are completely dry before seasoning. Pat them thoroughly with paper towels after you’ve separated them; any excess moisture will prevent that beautiful browning. When it comes to the baking process, don’t overcrowd the pan. Air circulation is your best friend here. If your wings are piled on top of each other, they’ll steam instead of crisp. I always use a wire rack set over a baking sheet for this reason; it allows air to circulate from all sides. If you don’t have a rack, make sure to flip them halfway through baking for even cooking. For the glaze, I always make sure it’s warm when I toss the wings in it. This helps it coat more evenly and prevents the wings from cooling down too much. Don’t leave them sitting in the glaze for too long though, or they can get a bit soggy. A quick toss and serve is best! Finally, don’t be afraid of the temperature. That 400°F (200°C) might seem high, but it’s necessary for getting that lovely crisp. Just keep an eye on them towards the end to prevent burning. If your oven runs hot, you might need to adjust the time slightly. I’ve found that different ovens really do bake differently, so trusting your eyes and the texture is key!
Storing and Reheating Tips
One of the great things about these baked chicken wings is that they’re still pretty delicious even if you have leftovers. If you find yourself with more wings than you can possibly eat (which is rare at my house!), here’s how to store them properly. For refrigerator storage, let the wings cool completely before transferring them to an airtight container. You can put a piece of paper towel in the bottom of the container to absorb any excess moisture, which helps maintain some of that crispiness. They should stay good in the fridge for about 3-4 days. When it comes to reheating, the microwave is usually not your friend if you want crispy wings. It tends to make them a bit rubbery. Instead, I highly recommend reheating them in the oven or an air fryer. Spread them on a baking sheet in a single layer and bake at around 350°F (175°C) for about 10-15 minutes, or until heated through and slightly re-crisped. An air fryer works wonders too, just a few minutes at 375°F (190°C) should do the trick. If you’ve tossed them in a glaze, they might not regain all their original crispiness, but they’ll still be wonderfully flavorful. I haven’t personally tested freezing these, as they’re usually devoured too quickly, but if you wanted to freeze them, I’d suggest doing so before glazing. Make sure they’re completely cooled, wrap them tightly in plastic wrap and then in foil, and they should be good in the freezer for about 2-3 months. Thaw them in the refrigerator overnight before reheating using the oven or air fryer method.
Frequently Asked Questions
So there you have it – my absolute favorite way to make baked chicken wings that are incredibly crispy and bursting with flavor! I really hope you give this recipe a try. It’s become a staple in my kitchen because it’s just so reliable and delicious. It proves that you don’t need to deep-fry to achieve that perfect crunch that makes wings so irresistible. Whether you serve them plain, with your favorite sauce, or as part of a larger meal, they’re always a crowd-pleaser. If you love this recipe, you might also enjoy my crispy baked chicken tenders or my juicy baked chicken thighs – they use similar principles for getting that wonderful golden-brown crispiness! Don’t forget to leave a comment below and let me know how your baked chicken wings turned out, or if you tried any fun glaze variations. I love hearing from you all, and seeing your culinary creations! Happy baking!
Baked chicken wings
Ingredients
Main Ingredients
- 2 pounds chicken wings cut into drumettes and flats
- 2 tablespoons olive oil
- 1 teaspoon paprika
- 0.5 teaspoon garlic powder
- 0.5 teaspoon onion powder
- 0.25 teaspoon cayenne pepper optional, for heat
- 1 teaspoon salt
- 0.5 teaspoon black pepper
Instructions
Preparation Steps
- Preheat your oven to 400°F (200°C). Line a baking sheet with parchment paper or aluminum foil for easy cleanup.
- Pat the chicken wings thoroughly dry with paper towels. This is crucial for achieving crispy skin.
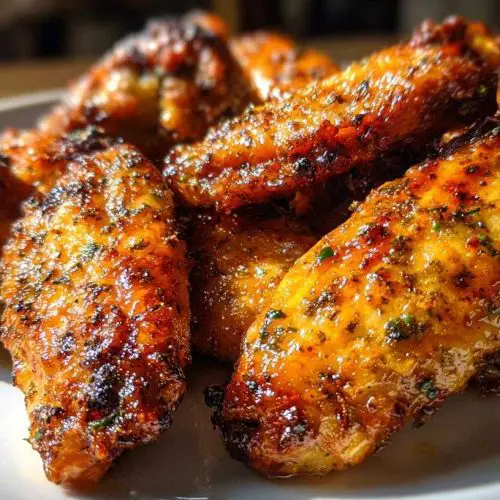
- In a large bowl, toss the chicken wings with olive oil, paprika, garlic powder, onion powder, cayenne pepper (if using), salt, and black pepper until evenly coated.
- Arrange the seasoned chicken wings in a single layer on the prepared baking sheet, ensuring they are not overcrowding the pan.
- Bake for 45 minutes, flipping the wings halfway through, until they are golden brown and crispy. The internal temperature should reach 165°F (74°C).
- Remove from the oven and let rest for a few minutes before serving. Serve hot with your favorite dipping sauces.
Notes
Featured Comments
“Impressed! Clear steps and turned out amazing results. Perfect for busy nights.”
“New favorite here — crowd-pleaser. crowd-pleaser was spot on.”
“Super easy and turned out amazing! My family asked for seconds. Saving this one.”
“This sweet treat was absolutely loved — the buttery really stands out. Thanks!”
“Made it tonight and wow — comforting! Will definitely make Baked chicken wings again.”
“Packed with flavor and so simple. Exactly what I wanted from Baked chicken wings.”


