

The Ultimate Chewy Smores Cookies (No Campfire Required!)
Have you ever craved that gooey, toasted marshmallow and melted chocolate combo, but absolutely dreaded the idea of smelling like a campfire for three days straight? Trust me, I completely get it. Summer nights around a fire pit are magical, but sometimes you just want that classic flavor while wearing your favorite sweatpants on the couch. That is exactly how my obsession with these chewy smores cookies began.
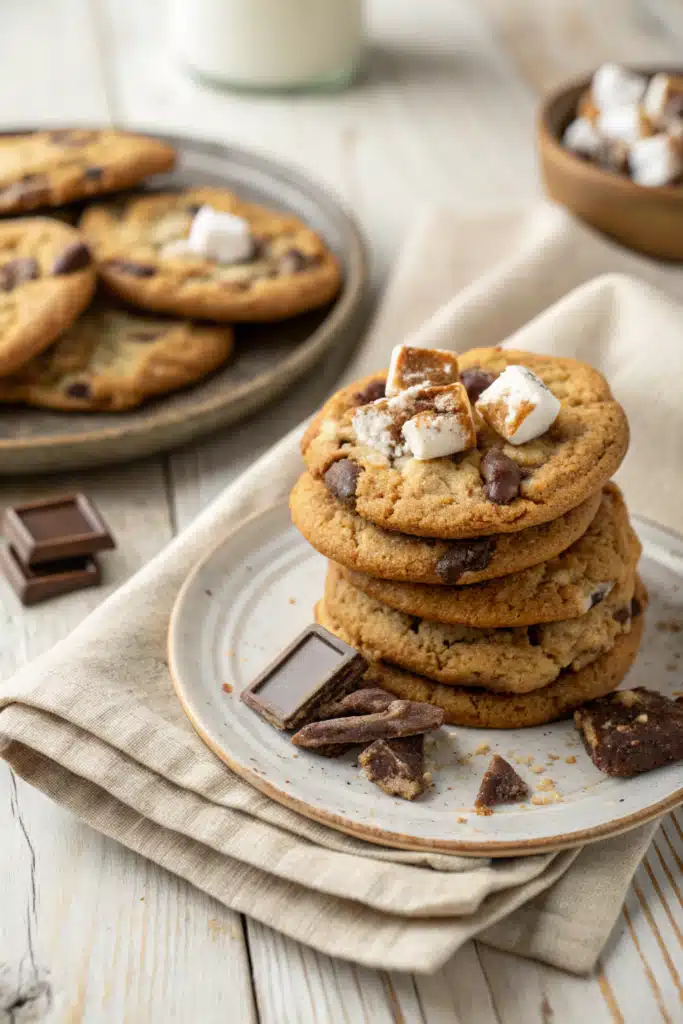
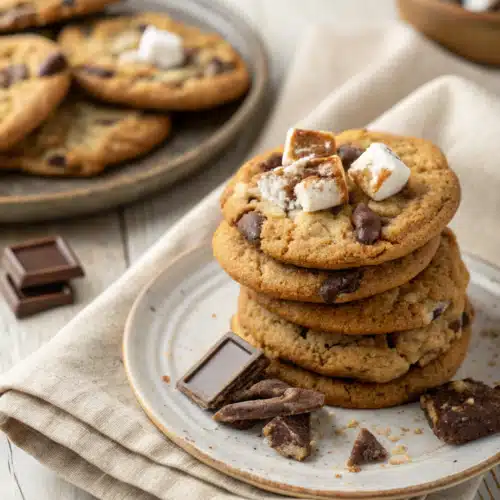
I spent weeks tweaking my go-to chocolate chip cookie base, trying to figure out how to cram as much graham cracker flavor and marshmallow goodness into a single bite without the whole thing turning into a flat, sticky mess on the baking sheet. And let me tell you, the result is nothing short of a miracle. These chewy smores cookies are thick, soft, and bursting with pools of melty chocolate and those irresistible, stretchy marshmallow pockets. You don’t need a roasting stick, you don’t need bug spray, and you definitely don’t need to wait for summer. Grab your mixing bowls, because we are about to bring the best part of camping straight into your kitchen.
What Are Chewy Smores Cookies?
If you are wondering what makes these stand out from your average cookie, let me break it down for you. At their core, chewy smores cookies are a brilliant mashup between a classic, buttery chocolate chip cookie and a traditional campfire s’more. Instead of just tossing some marshmallows and chocolate into regular cookie dough, we are actually altering the DNA of the dough itself.
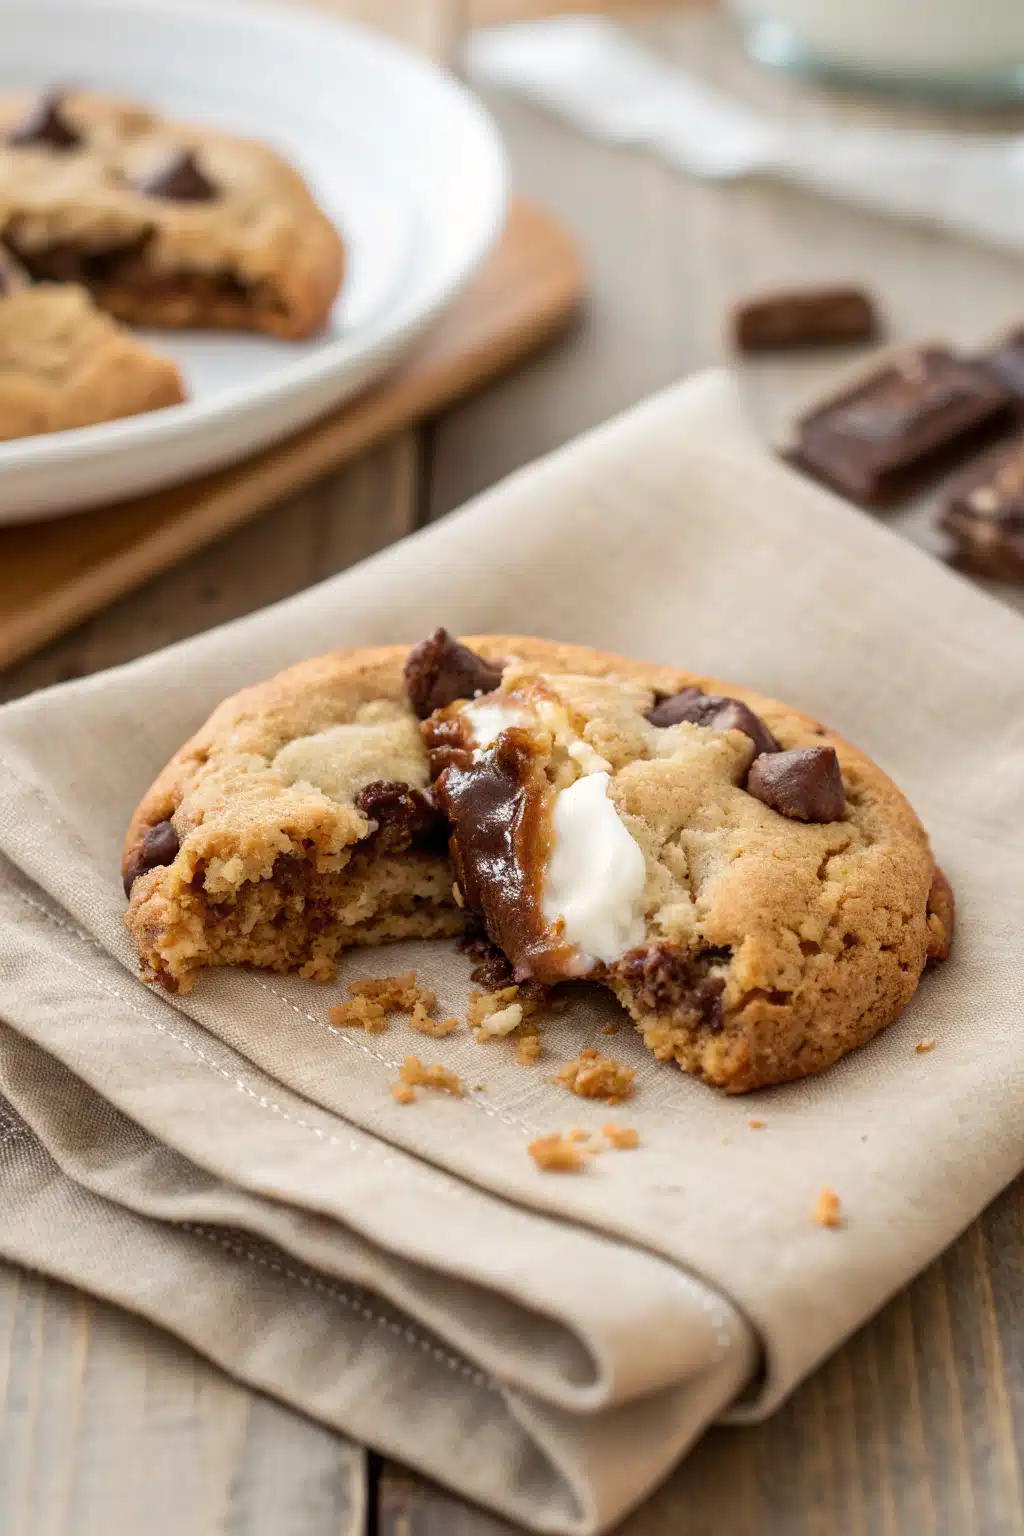
How do we do that? By blending crushed graham crackers right into the dry ingredients. This gives the entire cookie a slightly nutty, honey-kissed flavor that mimics the graham cracker crunch perfectly. Then, we fold in generous handfuls of semi-sweet chocolate chunks and sticky mini marshmallows. As the cookies bake, the marshmallows expand, caramelize slightly on the edges, and create these gorgeous, chewy pockets of sweetness throughout the dough. The chocolate melts into little puddles of joy, while the brown sugar in the dough keeps the center incredibly soft and chewy. It is essentially a handheld, mess-free version of your favorite childhood summer treat. No sticky fingers, no ash in your food—just pure, unadulterated dessert bliss in cookie form.
How to Make Chewy Smores Cookies
Quick Overview
Don’t let the bakery-style look of these cookies intimidate you; making chewy smores cookies is surprisingly straightforward! The process takes about 15 minutes of active prep time, followed by a quick chill in the fridge, and then a short trip to the oven. We start by creaming together softened butter and a mix of brown and white sugars to build a chewy, flavorful base. Next, we mix in our wet ingredients before gently folding in the dry ingredients—including our secret weapon, crushed graham crackers. Finally, we fold in the chocolate and marshmallows, chill the dough to prevent spreading, and bake until golden brown. You are less than an hour away from cookie perfection!
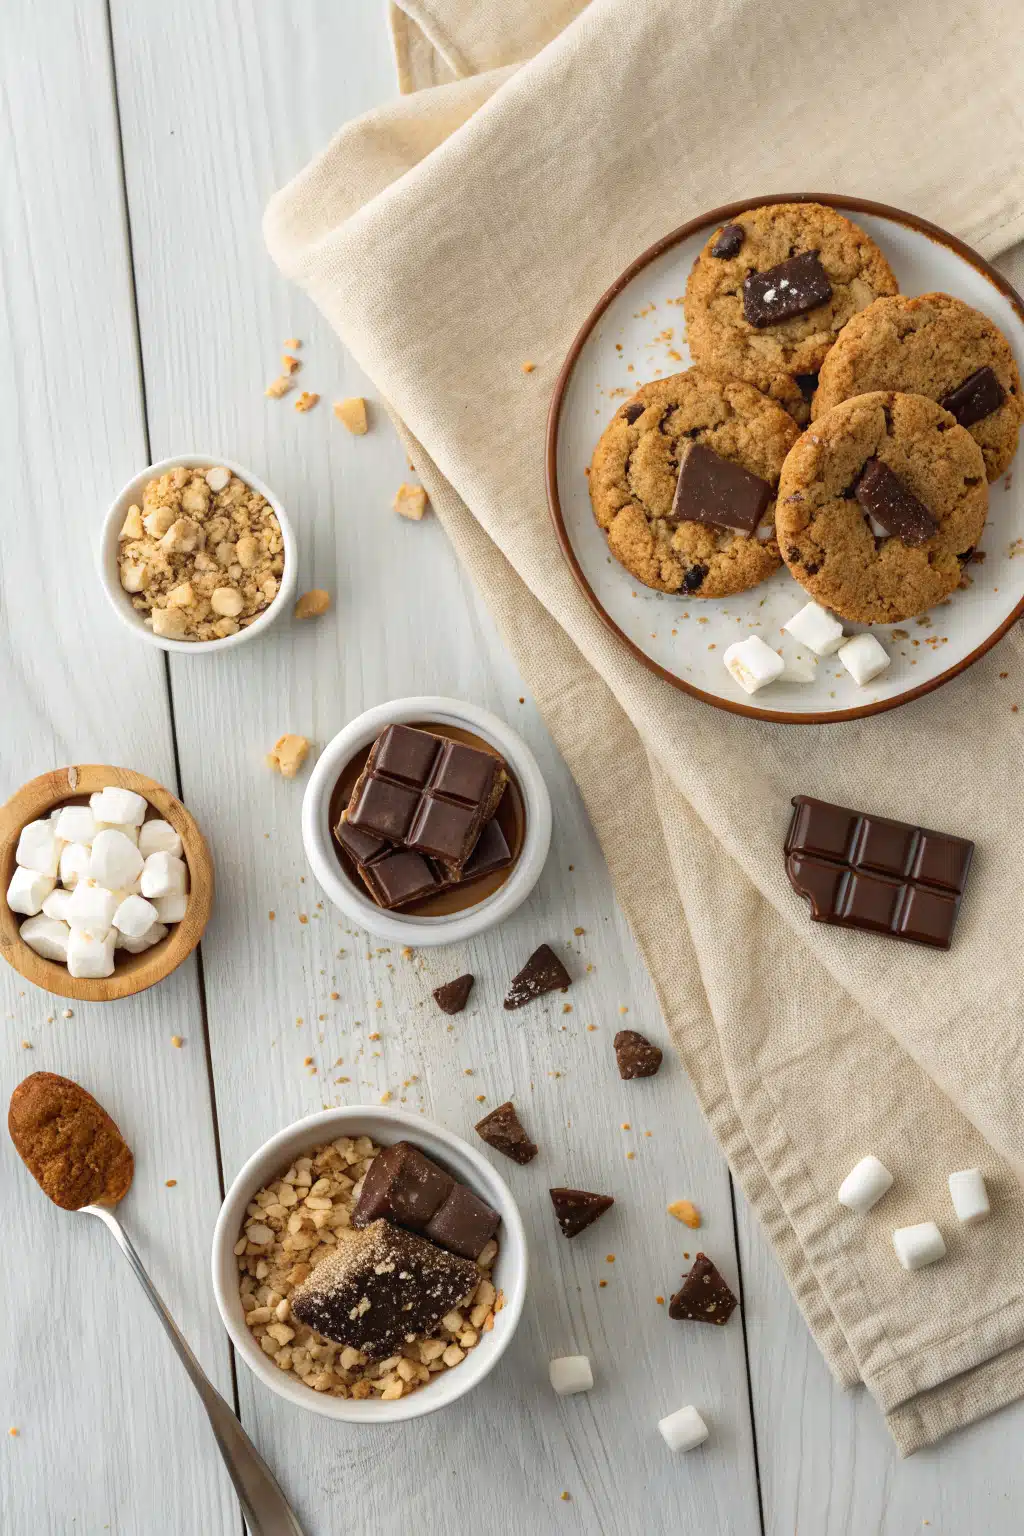
Ingredients
- Unsalted Butter: 1/2 cup (1 stick), softened to room temperature.
- Brown Sugar: 1/2 cup, packed. This is the secret to that ultimate chewy texture.
- Granulated Sugar: 1/4 cup, for perfectly crispy edges.
- Egg: 1 large egg, room temperature.
- Vanilla Extract: 1 teaspoon of pure vanilla extract.
- All-Purpose Flour: 1 and 1/4 cups, spooned and leveled.
- Graham Cracker Crumbs: 1/2 cup (about 4-5 full sheets finely crushed).
- Baking Soda: 1/2 teaspoon to give the cookies a nice lift.
- Salt: 1/2 teaspoon to balance the sweetness.
- Chocolate Chunks: 1 cup of semi-sweet chocolate chunks or chips.
- Mini Marshmallows: 3/4 cup, plus a few extra for pressing on top.
Step-by-Step Instructions
Step 1: Preheat & Prep Pan
First things first, let’s get that oven preheating to 350 degrees Fahrenheit (175 degrees Celsius). While it is warming up, go ahead and line two large baking sheets with parchment paper. This is super important because melted marshmallows can be incredibly sticky, and parchment paper will save you from a dishwashing nightmare later.
Step 2: Whisk the Dry Ingredients
In a medium-sized mixing bowl, whisk together your all-purpose flour, graham cracker crumbs, baking soda, and salt. Make sure the graham crackers are crushed pretty finely so they blend seamlessly into the dough. Set this bowl aside for a moment.
Step 3: Cream Butter and Sugars
In a large bowl, use a hand mixer or a stand mixer to beat the softened butter, brown sugar, and granulated sugar together. You want to beat this on medium speed for about two minutes until the mixture is light, fluffy, and pale in color. Scrape down the sides of the bowl with a rubber spatula.
Step 4: Add Wet Ingredients
Add the room temperature egg and the vanilla extract into your butter and sugar mixture. Beat on low speed just until they are fully combined. Try not to overmix here!
Step 5: Combine Wet and Dry
Gradually pour your dry ingredient mixture into the wet ingredients. Mix on low speed until just a few flour streaks remain. Then, turn off your mixer and grab your spatula. Gently fold in the chocolate chunks and mini marshmallows by hand. Doing this by hand ensures you don’t crush the marshmallows.
Step 6: Chill the Dough
Cover your bowl with plastic wrap and pop it into the fridge for at least 30 minutes. I know waiting is the hardest part, but chilling the dough stops the cookies from spreading too thin and keeps the marshmallows from completely melting away in the oven.
Step 7: Scoop and Bake
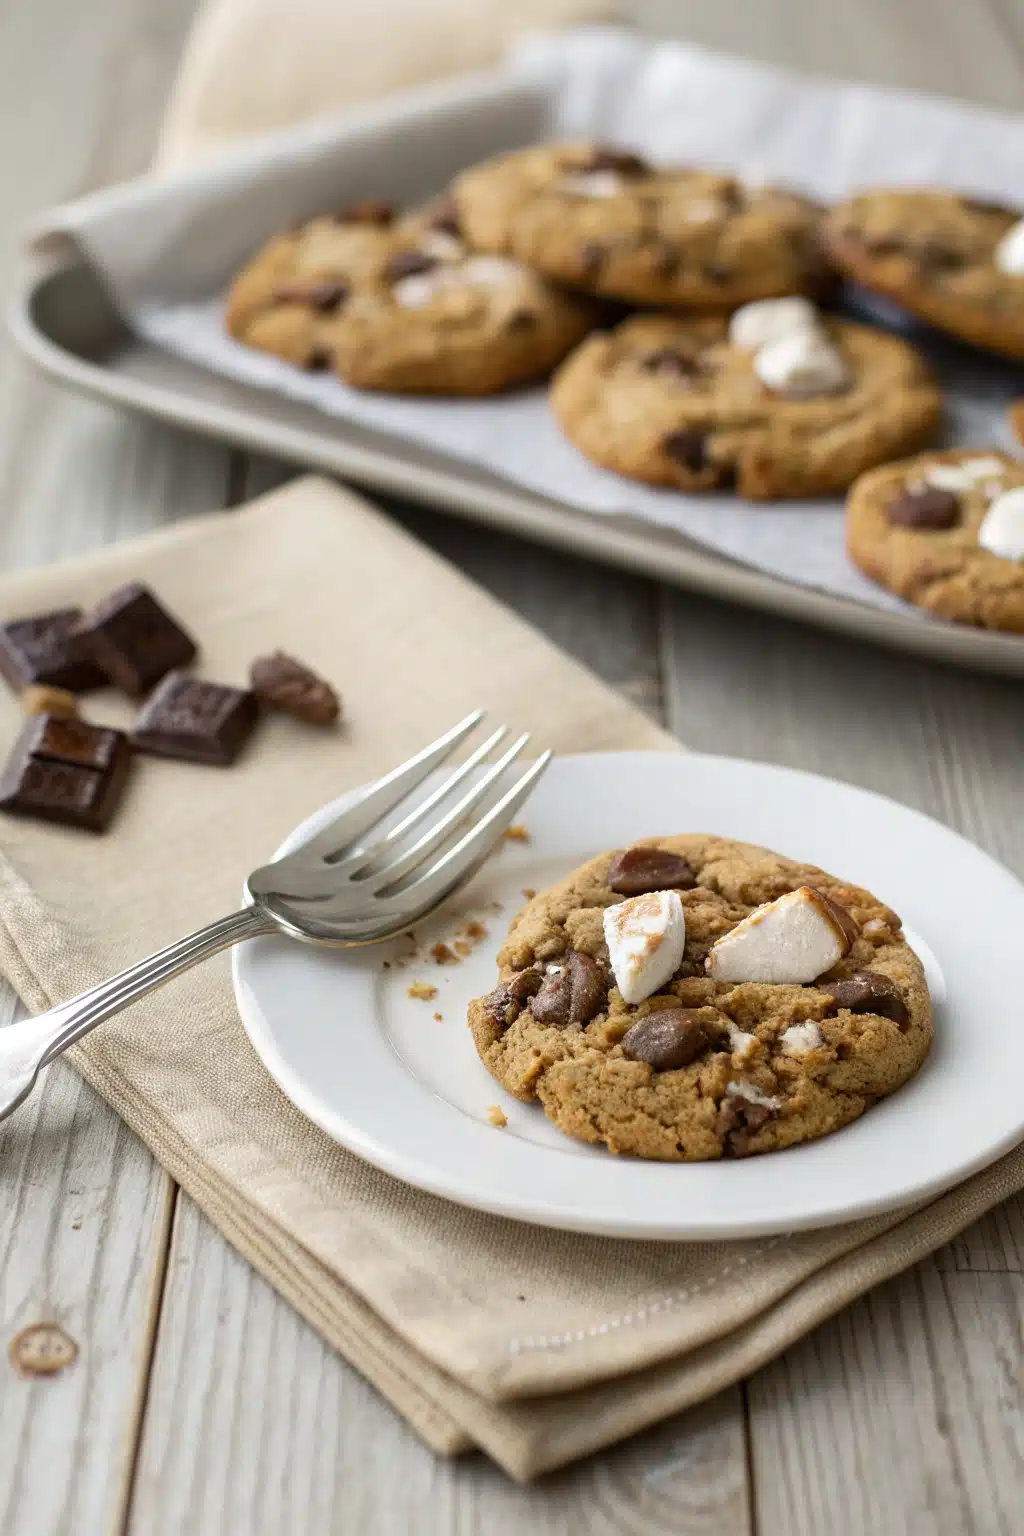
Scoop the chilled dough into 2-tablespoon-sized balls and place them on your prepared baking sheets, leaving about two inches of space between each one. Bake for 10 to 12 minutes. The edges should look golden and set, but the centers might still look a little underdone—that is exactly what you want! Let them cool on the baking sheet for 10 minutes before moving them to a wire rack.
What to Serve It With
Honestly, these chewy smores cookies are a masterpiece all on their own, but if you want to elevate your dessert experience, I highly recommend serving them warm alongside a tall, ice-cold glass of whole milk. The contrast between the warm, gooey cookie and the cold milk is pure comfort food magic.
If you are feeling a little extra indulgent, try making a s’mores ice cream sandwich! Take two completely cooled cookies and sandwich a generous scoop of vanilla bean or chocolate fudge ice cream right in the middle. Gently press them together and roll the edges in extra mini chocolate chips. It is a show-stopping dessert that is perfect for summer barbecues or birthday parties. A hot cup of dark roast coffee or a rich hot chocolate also pairs beautifully with the sweet, honey-graham notes in the cookie.
Top Tips for Perfecting Your Chewy Smores Cookies
After making dozens of batches of these beauties, I have learned a few tricks to ensure they come out perfectly every single time. First, never skip the chilling step. Room temperature marshmallows melt incredibly fast in a hot oven and can turn into hard, caramelized puddles on your baking sheet. Chilling the dough gives the cookie structure time to set before the marshmallow completely melts.
My second tip is the “cookie scoot.” If your cookies come out of the oven looking a little misshapen or spread out, grab a large round biscuit cutter or a mug that is slightly larger than the cookie. Place it over the hot cookie right out of the oven and gently swirl it around in a circular motion. This tucks the edges back in and creates a perfectly round, thick cookie.
Lastly, for that ultimate bakery-style presentation, reserve a few chocolate chunks and mini marshmallows. As soon as you pull the baking sheet out of the oven, gently press those extra toppings right onto the top of the soft cookies. It makes them look incredibly appetizing and gives you that perfect gooey top!
Storing and Reheating Tips
If you somehow end up with leftovers (which is a rare occurrence in my house!), you will want to store these chewy smores cookies in an airtight container at room temperature. They will stay soft and fresh for up to 4 days. I recommend placing a piece of parchment paper between the layers so the marshmallows don’t stick the cookies together.
When you are ready to eat a leftover cookie, do yourself a favor and pop it in the microwave for about 8 to 10 seconds. This quick burst of heat softens the chocolate right back up and makes the marshmallow pull apart just like it did when it was fresh out of the oven. You can also freeze the baked cookies for up to 3 months. Just thaw them at room temperature for an hour before doing the microwave trick!
Frequently Asked Questions
Final Thoughts
There you have it, friends! The absolute best chewy smores cookies you will ever make. I really hope this recipe brings a little bit of that cozy, nostalgic campfire magic right into your kitchen, without any of the smoky clothes or bug bites. Baking should be fun, and sharing these gooey, chocolatey treats with the people you love is what it is all about.
If you decide to whip up a batch this weekend, please let me know how they turn out! I always love hearing about your baking adventures. Don’t forget to save that extra piece of chocolate for the top, and pour yourself a giant glass of cold milk. Happy baking, and enjoy every single chewy bite!
Chewy Smores Cookies
Ingredients
Main Ingredients
- 1 cup unsalted butter melted and slightly cooled
- 0.75 cup light brown sugar packed
- 0.5 cup granulated sugar
- 2 large eggs room temperature
- 2 tsp pure vanilla extract
- 2.5 cups all-purpose flour
- 1 tsp baking soda
- 0.5 tsp salt
- 1.5 cups mini marshmallows
- 1 cup graham cracker pieces
- 0.5 cup semi-sweet chocolate chips
- 1 cup chopped Hershey's milk chocolate bars
Instructions
Preparation Steps
- Preheat the oven to 375°F (190°C) and line two baking sheets with parchment paper.
- In a large bowl, whisk together the melted butter, brown sugar, and granulated sugar until smooth.
- Add the eggs one at a time, mixing well after each addition, then stir in the vanilla extract.
- In a separate bowl, whisk together the flour, baking soda, and salt. Gradually fold the dry ingredients into the wet mixture until just combined.
- Gently fold in the mini marshmallows, graham cracker pieces, chocolate chips, and chopped chocolate bars.
- Scoop the dough into 2-tablespoon sized balls and place them on the prepared baking sheets, spacing them about 2 inches apart.
- Bake for 8 to 10 minutes until the edges are lightly golden but the centers are still soft and slightly underbaked.
- Allow the cookies to cool on the baking sheet for 10 minutes before transferring them to a wire rack to cool completely.
Notes
Featured Comments
“This sounds so good—marshmallowy, gooey perfection! Can’t wait to try these.”
“Impressed! Clear steps and restaurant-level results. Perfect for busy nights.”
“New favorite here — spot on. crowd-pleaser was spot on.”
“Super easy and turned out amazing! My family asked for seconds. Saving this one.”
“This sweet treat was absolutely loved — the fresh really stands out. Thanks!”
“Made it tonight and wow — crowd-pleaser! Will definitely make Best 7 Secrets to Chewy S’mores Cookies That Yum! again.”


This sounds so good—marshmallowy, gooey perfection! Can’t wait to try these.