

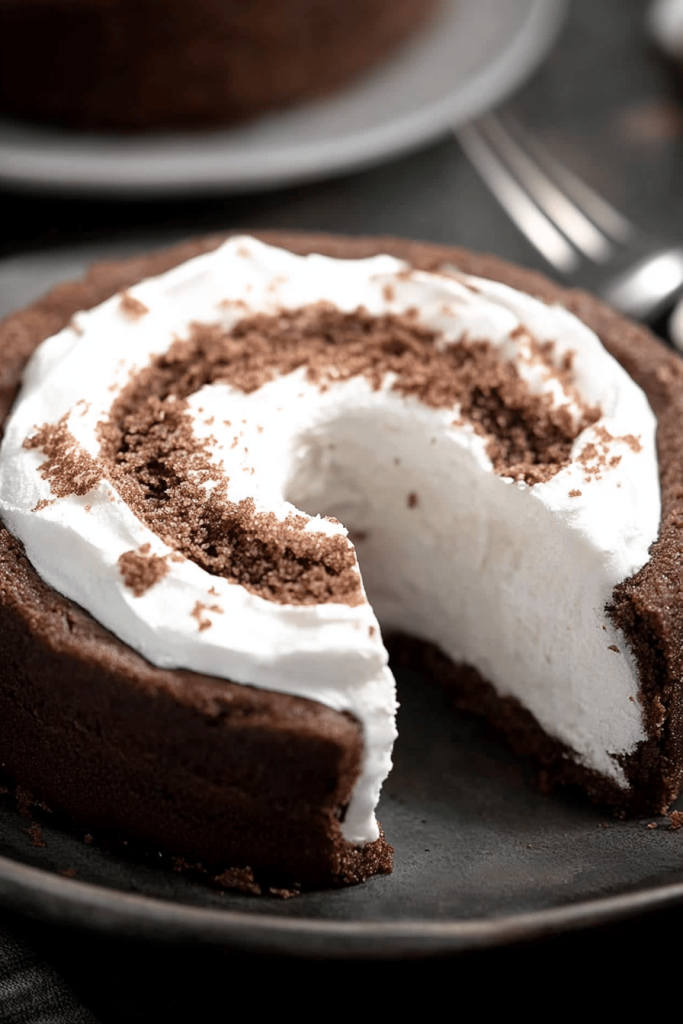
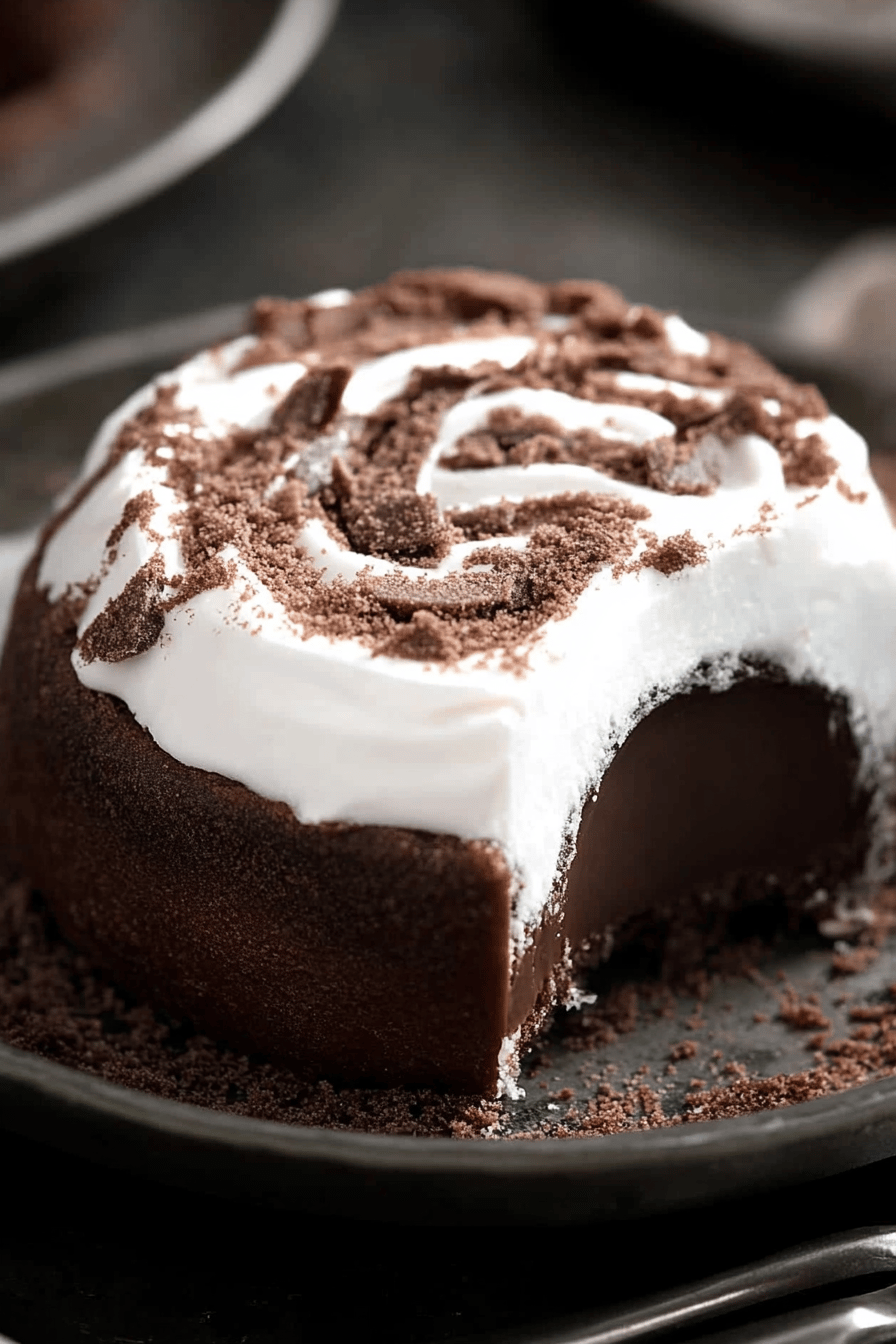
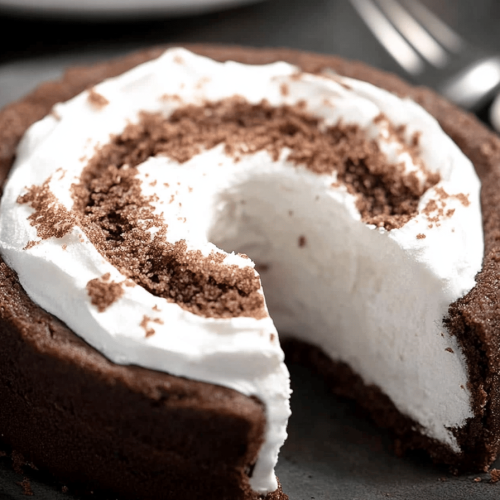
What do you remember about those little chocolatey, cream-filled snack cakes you loved as a kid? What were the ones that came individually wrapped and were devoured in about three bites? If you’re like me and have had to ditch gluten, you have probably mourned the loss of Ho Hos. I’ve cracked the code to making delicious, incredibly satisfying food.Gluten-free Ho Hos.What makes a chocolate cake that melts in your mouth? What are some of the best chocolate glazes? What are some of the Best Gluten-Free recipes? If you love a good chocolate swiss roll, this is the perfect gluten-free substitute for you!
What is Gluten Free Ho Ho?
What are some of the things that are.?Gluten-free Ho Hos.Think of them as mini, rolled chocolate cakes filled with a fluffy, sweet cream. What is a gluten-free version of the classic snack cake we all grew up with? The cake is thin and delicate, rolled around a luscious filling, then glazed in an elegant, shiny glaze. What is the perfect balance of textures and flavors? What are some of the What is a great treat for parties, lunchboxes, or when you’re looking for comfort? What is a homemade
How do I make gluten-free Ho Hos?
Quick Overview
How do you make a chocolate cake? Cake around the filling, chill it all to firm it up, and then dip it in a luscious chocolate glaze. The key is patience and a gentle hand – the cake can be incredibly delicate, but trust me, the end result will be perfect. Is it worth it? What are some good recipes that will have you asking for more? Will it take you long?
Ingredients
What is gluten free cake?
- Is there a gluten-free all-purpose flour?
- 1/2 cup unsweetened cocoa powder (Dutch-processed is my fave for a richer flavor)
- 1 teaspoon baking powder. 1 tablespoon baking soda.
- 1/2 teaspoon baking soda. 1 tablespoon baking powder. 1/4
- 1/4 teaspoon salt. 1 teaspoon pepper.
- 3/4 cup granulated sugar. 1/4 cup.
- 1/2 cup milk (dairy or non-daire both work great; I’ve even used almond milk with fantastic results!
- 1/4 cup vegetable oil. 1 teaspoon salt.
- What is vanilla extract? 1 teaspoon.
- 1 large egg
- 1/2 cup boiling water. 1 cup ice cold water
For the cream filling: For Cream Filling,
- 1 cup heavy cream (or full-fat coconut cream for a dairy-free option)
- 1/2 cup powdered sugar. 1/4 cup water.
- What is vanilla extract? 1 teaspoon.
What is the Chocolate Glaze?
- One cup semi-sweet chocolate chips. 1 cup Semi-Swe
- 2 tablespoons butter (or coconut oil) per person.

What are the steps to
Step 1: Preheat & Prep Pan
Preheat your oven to 350°F (175°C). Grease and line a 10×15 inch jelly roll pan with parchment paper, leaving an overhang on the sides. How do you remove a cake? I’ve forgotten this step before, and it’s a real pain to get the cake out!
Step 2: Mix Dry Ingredients
In a large bowl, whisk together the Gluten-Free Flour, cocoa powder, baking soda, and salt. Set aside. I always sift the cocoa powder to get rid of any lumps.
Step 3: Mix Wet Ingredients
In a separate bowl, whisk together the sugar, milk, oil, Vanilla Extract, and egg until well combined. Set aside. What is the best way to Make a smooth, smooth mixture? If your egg is cold, let it sit in warm water for a couple of minutes before using, to help it harden. What are the best ways
Step 4: Combine
Gradually add the wet ingredients to the dry ingredients, mixing on low speed until just combined. How do you avoid overmixing a cake? Slowly pour in the boiling water and mix until smooth and thin. It will be a bit runny, and that’s totally normal!
Step 5: Bake
How do I spread the batter in a pan? Bake for 12-15 minutes, or until toothpick inserted into the center comes out clean. The cake should spring back slightly when touched.
Step 6: Prepare Filling
While the cake is baking, prepare the cream filling. In a large bowl, whip the heavy cream (or coconut cream) with an electric mixer until soft peaks form. Gradually add the powdered sugar and Vanilla Extract, and continue whipping until stiff peaks form. Be careful not to overwhip, or you’ll end up with butter!
Step 7: Assemble & Chill
Once the cake is cooled slightly (but still warm), carefully invert it onto a clean kitchen towel dusted with powdered sugar. Gently peel off the parchment paper. Spread the cream filling evenly over the cake. Starting from one of the short ends, roll the cake up tightly, using the towel to help you. Wrap the rolled cake in plastic wrap and refrigerate for at least 1 hour to allow the filling to set.
Step 8: Glaze
While the cake is chilling, prepare the chocolate glaze. In a microwave-safe bowl, combine the chocolate chips and butter (or coconut oil). Microwave in 30-second intervals, stirring in between, until melted and smooth. Let the glaze cool slightly.
Step 9: Slice & Serve
Remove the chilled cake roll from the refrigerator. Trim the ends of the roll to create clean edges. Slice the roll into 1-inch thick slices. Dip each slice into the chocolate glaze, coating completely. Place the glazed Ho Hos on a parchment-lined baking sheet and refrigerate for a few minutes to allow the glaze to set. Enjoy!
What to Serve It With
These gluten-free Ho Hos are perfect on their own, but here are some fun ideas to elevate your snacking experience:
For Breakfast: Pair them with a strong cup of coffee or a latte. The chocolate and coffee flavors complement each other beautifully. Arrange them on a pretty plate with some fresh berries for a more elegant presentation.
For Brunch: Serve them alongside other brunch favorites like Fruit Salad, yogurt parfaits, and mini quiches. A mimosa or a sparkling cider would be the perfect beverage pairing.
As Dessert: These are fantastic after dinner with a scoop of vanilla Ice Cream or a dollop of whipped cream. A glass of dessert wine or a cup of herbal tea would be a lovely accompaniment.
For Cozy Snacks: Enjoy them with a warm glass of milk (dairy or non-dairy) or a mug of hot chocolate. Perfect for a cozy night in!
My family loves these with a scoop of Mint Chocolate Chip Ice cream – the coolness of the ice cream and the chocolatey goodness of the Ho Hos are a match made in heaven!
Top Tips for Perfecting Your Gluten-Free Ho Hos
Want to make sure your gluten-free Ho Hos are absolutely perfect? Here are some of my tried-and-true tips:
Gluten-Free Flour: Not all gluten-free flour blends are created equal! I highly recommend using a blend that contains xanthan gum, as it helps to bind the ingredients together and provides structure to the cake. If your blend doesn’t contain xanthan gum, you may want to add 1/2 teaspoon to the dry ingredients.
Mixing Advice: Be careful not to overmix the cake batter! Overmixing can develop the gluten (even in gluten-free flour), resulting in a tough cake. Mix until just combined, and then gently fold in the boiling water.
Baking Tips: Keep a close eye on the cake while it’s baking. Gluten-free cakes can sometimes dry out quickly, so you want to make sure it’s still moist and tender. A toothpick inserted into the center should come out clean, but with a few moist crumbs attached.
Filling Customization: Feel free to experiment with different flavors in the cream filling! A few drops of peppermint extract, a tablespoon of coffee liqueur, or a pinch of cinnamon can add a delicious twist.
Glaze Consistency: The consistency of the glaze is important. If it’s too thick, it will be difficult to dip the Ho Hos evenly. If it’s too thin, it won’t adhere properly. If needed, add a teaspoon of milk (or non-dairy milk) to thin it out, or a tablespoon of melted chocolate to thicken it up.
Rolling Technique: When rolling the cake, be gentle but firm. Use the kitchen towel to help you roll it up tightly. This will help to prevent the cake from cracking.
I’ve learned that letting the cake cool slightly before rolling helps to prevent it from tearing. But don’t let it cool completely, or it will become too stiff to roll.
Storing and Reheating Tips
Want to make these gluten-free Ho Hos ahead of time? Here’s How to store them properly:
Room Temperature: These are best stored in the refrigerator. If you do store them at room temperature, they should be kept in an airtight container for up to 2 days. However, the cream filling may soften, so refrigerating is preferred.
Refrigerator Storage: Store the Ho Hos in an airtight container in the refrigerator for up to 5 days. This will help to keep the cake moist and the cream filling firm.
Freezer Instructions: For longer storage, you can freeze the Ho Hos. Wrap them individually in plastic wrap, then place them in a freezer-safe container. They can be frozen for up to 2 months. Thaw them in the refrigerator overnight before serving.
Glaze Timing Advice: I recommend glazing the Ho Hos just before serving, as the glaze can sometimes become sticky or dull during storage. However, if you’re making them ahead of time, you can glaze them and then store them in the refrigerator.
Frequently Asked Questions
Final Thoughts
These gluten-free Ho Hos are more than just a recipe – they’re a little piece of childhood nostalgia, reimagined for a gluten-free lifestyle. They’re fun to make, delicious to eat, and guaranteed to bring a smile to your face. If you’re looking for a truly satisfying gluten-free treat, this is it!
If you enjoyed this recipe, be sure to check out my other gluten-free dessert recipes, like my Gluten-Free Chocolate Chip Cookies or my gluten-free brownies. And don’t forget to leave a comment below and let me know how your Ho Hos turned out! I can’t wait to hear from you. Happy baking!
gluten-free Ho Hos
Ingredients
Cake
- 1 cup Gluten-Free Flour Blend All-purpose blend
- 0.5 cup Cocoa Powder Unsweetened
- 1 tsp Baking Soda
- 0.5 tsp Salt
- 1 cup Granulated Sugar
- 0.5 cup Vegetable Oil
- 1 tsp Vanilla Extract
- 1 cup Buttermilk
- 1 Large Egg
Filling
- 8 oz Cream Cheese Softened
- 4 cups Powdered Sugar
- 1 tsp Vanilla Extract
Chocolate Coating
- 12 oz Semi-Sweet Chocolate Chips
- 2 tbsp Vegetable Shortening
Instructions
Cake Preparation
- Preheat oven to 350°F (175°C). Grease and flour a 9x13 inch baking pan.
- In a large bowl, whisk together the gluten-free flour, cocoa powder, baking soda, and salt.
- In a separate bowl, combine the sugar, oil, vanilla extract, buttermilk, and egg. Beat well.
- Gradually add the wet ingredients to the dry ingredients, mixing until just combined. Do not overmix.
- Pour the batter into the prepared pan and bake for 25-30 minutes, or until a toothpick inserted into the center comes out clean.
- Let the cake cool completely in the pan before frosting.
Filling Preparation
- In a large bowl, beat the softened cream cheese until smooth.
- Gradually add the powdered sugar, beating until smooth and creamy.
- Stir in the vanilla extract.
Assembly
- Using a round cookie cutter (about 3 inches in diameter), cut out circles from the cooled cake.
- Spread a generous amount of filling on the flat side of half of the cake circles. Top with the remaining cake circles to create a sandwich.
- Place the sandwiches in the freezer for about 30 minutes to firm up.
Chocolate Coating
- In a microwave-safe bowl, melt the chocolate chips and shortening together in 30-second intervals, stirring in between, until smooth.
- Dip each frozen cake sandwich into the melted chocolate, coating completely. Place on a parchment-lined baking sheet to set.
- Refrigerate for at least 15 minutes to allow the chocolate to set completely.
Notes
Featured Comments
“Impressed! Clear steps and quick weeknight win results. Perfect for busy nights.”
“New favorite here — comforting. crowd-pleaser was spot on.”
“Super easy and turned out amazing! My family asked for seconds. Saving this one.”
“This sweet treat was absolutely loved — the zingy really stands out. Thanks!”
“Made it tonight and wow — restaurant-level! Will definitely make Best 7 Tips for Making Gluten-Free Ho Hos that Rival the Original! again.”
“Packed with flavor and so simple. Exactly what I wanted from Best 7 Tips for Making Gluten-Free Ho Hos that Rival the Original!.”


