

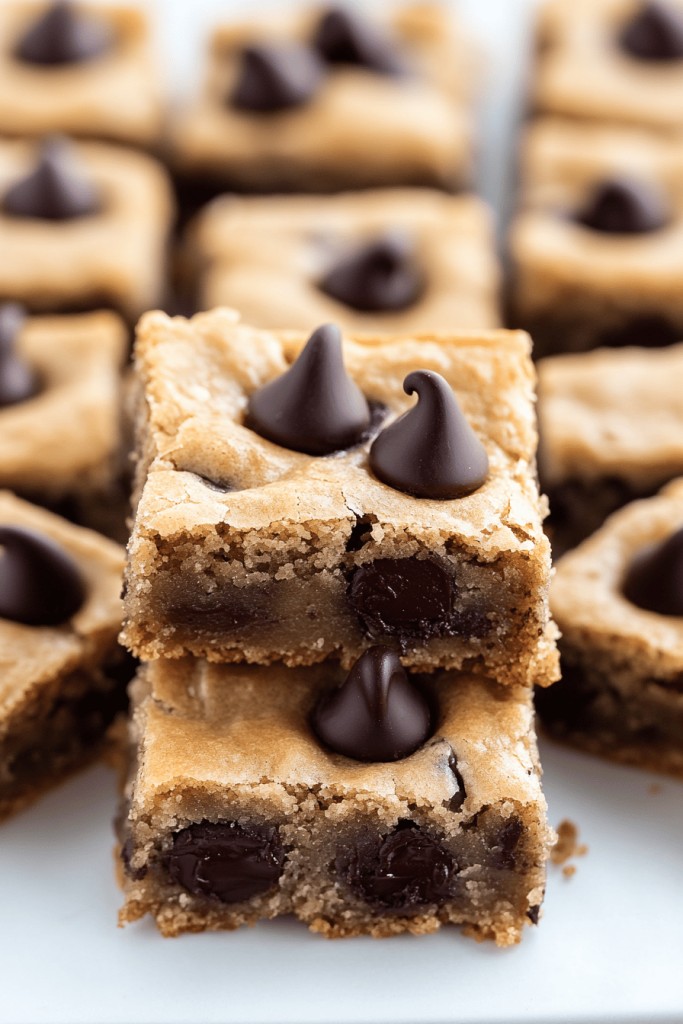
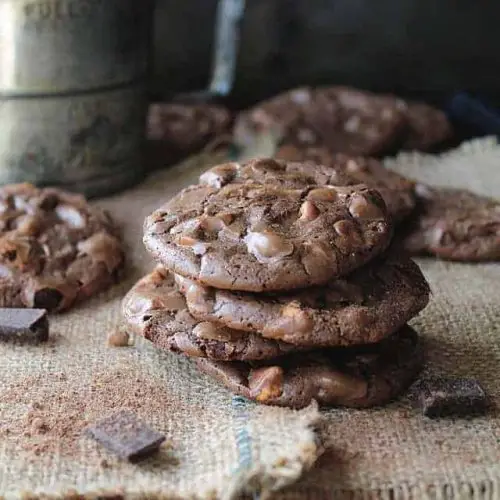
There are some recipes that just feel like home, aren’t there? For me, that’s a steaming mug of tea on a rainy afternoon, a worn-out blanket, and a plate piled high with something warm and comforting. And when it comes to comforting, my chocolate butterscotch cookies hit every single mark. These aren’t your average, run-of-the-mill cookies. Oh no. These are a symphony of rich, dark chocolate mingling with that unmistakable sweet, buttery goodness of butterscotch. They’re a little bit chewy, a little bit fudgy, and when they first come out of the oven, the aroma alone is enough to make everyone in the house magically appear in the kitchen. I’ve tried so many variations over the years, but this chocolate butterscotch cookie recipe is the one that my family requests constantly. It’s that perfect balance of flavors that just sings. If you’re a fan of a good Chocolate Chip Cookie but crave something with a bit more depth and caramel-y magic, then you’re in for a real treat.
What is chocolate butterscotch cookies?
So, what exactly are these magical little delights we’re talking about? Think of them as the ultimate hybrid. You’ve got the beloved, familiar base of a classic Chocolate Chip Cookie, but then we swirl in that glorious butterscotch flavor. It’s not just about tossing in butterscotch chips, although that’s part of it! We’re talking about creating a dough that’s kissed with caramel notes and then studded with both chunks of dark chocolate and those sweet little butterscotch discs. The result is a cookie that’s more complex than a simple chocolate chip, with layers of flavor that unfold with every bite. It’s like a warm hug in cookie form, perfect for dunking, sharing, or just devouring in secret when no one’s looking. It’s that satisfying chewiness you love in a good cookie, combined with a melt-in-your-mouth texture that’s just *chef’s kiss*.
How do I make chocolate butterscotch cookies?
Quick Overview
This recipe is all about building layers of flavor and achieving that perfect chewy-crisp texture. We start by creaming butter and sugars for a tender base, then incorporate our dry ingredients, followed by plenty of chocolate and butterscotch goodness. The key is not to overmix, ensuring a chewy, not tough, cookie. They bake up golden brown with slightly gooey centers, making them irresistible straight from the oven. It’s straightforward, rewarding, and the results are always spectacular. Trust me, you’ll be amazed at how easy it is to create such a decadent treat.
Ingredients
For the Main Batter:
Let’s talk ingredients! For the base of these beauties, you’ll need unsalted butter, softened. I always recommend good quality butter; it really makes a difference in the flavor. You’ll also need granulated sugar and packed light brown sugar. The brown sugar is crucial for that lovely chewiness and caramel undertone. Then, we have eggs – large ones, at room temperature is best as they incorporate more smoothly. A touch of Vanilla Extract is non-negotiable for that classic cookie aroma and flavor boost. And of course, all-purpose flour. Make sure to spoon and level your flour, don’t scoop directly from the bag, or you’ll end up with too much flour and dry cookies!
For the Mix-ins:
This is where the magic happens! We’re going to use both semi-sweet chocolate chips or chunks, and butterscotch chips. I like using a mix of both for varied texture and flavor. Some people prefer all dark chocolate, and that’s great too! For the butterscotch, good quality chips are essential. If you can find them, Ghirardelli or even the store brand usually works wonders. The ratio of chocolate to butterscotch is really up to your personal preference, but I find a roughly equal mix to be divine.
For the Finishing Touches (Optional but Recommended!):
A little sprinkle of flaky sea salt on top of the cookies just before baking takes them to a whole new level. It balances the sweetness beautifully and makes the flavors pop. You won’t regret this step, trust me!
Step-by-Step Instructions
Step 1: Preheat & Prep Pan
First things first, let’s get your oven ready. Preheat it to 375 degrees Fahrenheit (190 degrees Celsius). This temperature is key for getting that perfect balance of set edges and soft centers. While the oven is heating, line a couple of baking sheets with parchment paper. This is my number one tip for easy cleanup and ensuring your cookies don’t stick. Parchment paper is a lifesaver! If you don’t have any, you can lightly grease your baking sheets, but parchment paper is truly the way to go.
Step 2: Mix Dry Ingredients
In a medium bowl, whisk together your all-purpose flour, baking soda, and salt. Baking soda is what gives the cookies their lift and chewiness, and the salt helps to balance the sweetness and enhance the other flavors. Whisking them together ensures they’re evenly distributed throughout the flour, which means no surprises with pockets of salt or baking soda in your cookies. Give it a good whisk for about 30 seconds until everything looks uniformly combined.
Step 3: Mix Wet Ingredients
In a large bowl, cream together your softened unsalted butter with the granulated sugar and packed light brown sugar. Use an electric mixer (handheld or stand mixer) for this step. You want to beat them together until the mixture is light and fluffy. This process incorporates air into the dough, which helps with the texture of the final cookie. It usually takes about 2-3 minutes. Once creamy, beat in the eggs, one at a time, making sure each one is fully incorporated before adding the next. Then, stir in the vanilla extract. The mixture should be smooth and fragrant.
Step 4: Combine
Now it’s time to bring the wet and dry ingredients together. Gradually add the flour mixture to the wet ingredients, mixing on low speed until just combined. Be careful not to overmix! Overmixing develops the gluten in the flour, which can lead to tough cookies. Stop mixing as soon as you no longer see streaks of dry flour. It’s better to have a few small lumps than to overwork the dough. The dough will be thick and luscious.
Step 5: Prepare Filling
This step is incredibly simple because we’re using chips! Have your semi-sweet chocolate chips (or chunks) and butterscotch chips ready to go. If you’re using chocolate chunks, you might want to roughly chop them up so you get nice little pockets of melty chocolate throughout the cookie. For the butterscotch, just open the bag! Their sweetness and unique flavor are exactly what we’re after here.
Step 6: Layer & Swirl
Gently fold in the chocolate chips and butterscotch chips into the Cookie Dough. Use a spatula or wooden spoon and stir just until they are evenly distributed. Again, avoid overmixing. You want to see distinct chips, not a uniform brown mass. I like to reserve a few chocolate and butterscotch chips to press onto the tops of the dough balls before baking, just for that extra visual appeal and a little surprise burst of flavor. This little step really makes them look bakery-worthy!
Step 7: Bake
Drop rounded tablespoons of dough onto your prepared baking sheets, leaving about 2 inches between each cookie because they will spread. If you’re using the flaky sea salt, sprinkle a pinch or two over the top of each cookie dough ball now. Bake for 9-12 minutes, or until the edges are lightly golden brown and the centers still look a little soft. They’ll continue to set up as they cool on the baking sheet. Don’t overbake them! The slightly underbaked center is what gives them that delightful chewiness.
Step 8: Cool & Glaze
Once they’re out of the oven, let the cookies cool on the baking sheets for about 5-10 minutes. This allows them to firm up enough to be moved without falling apart. Then, carefully transfer them to a wire rack to cool completely. If you’re adding a glaze (which I highly recommend, though it’s optional!), prepare it while the cookies are cooling. For a simple drizzle, whisk together powdered sugar with a tiny bit of milk or melted butter until you get a thick but pourable consistency. You can also add a drop of vanilla or even a tiny splash of butterscotch extract for an extra punch. Drizzle it over the cooled cookies.
Step 9: Slice & Serve
Once the glaze has set (if you used one), your chocolate butterscotch cookies are ready to be enjoyed! The best way to serve them is usually at room temperature, where all the flavors have melded together. If you want to get fancy, you can serve them with a scoop of vanilla bean ice cream or a glass of cold milk. For a truly decadent experience, try dipping them into your morning coffee – it’s a game-changer! Store any leftovers in an airtight container at room temperature. They’re usually best eaten within 3-4 days.
What to Serve It With
These chocolate butterscotch cookies are so versatile, they fit into almost any occasion! For a cozy breakfast, imagine them alongside a perfectly brewed cup of coffee or a glass of cold milk. They add a touch of sweetness to start your day without being overwhelmingly rich. If you’re hosting a weekend brunch, these cookies are a must-have on your dessert table. Their beautiful appearance and delightful flavors make them feel extra special. I love arranging them on a tiered stand with some fresh berries. As a dessert, they are simply divine. Serve them warm with a dollop of whipped cream or a scoop of vanilla or salted caramel ice cream. They’re the perfect ending to any meal. And for those moments when you just need a little pick-me-up, a cozy snack moment with these cookies is unparalleled. Pair them with your favorite tea or hot chocolate for ultimate comfort. My kids especially love them after school with a glass of chocolate milk – it’s their favorite “after school treat” and frankly, one of mine too!
Top Tips for Perfecting Your Chocolate Butterscotch Cookies
Over the years, I’ve picked up a few tricks that really help make these chocolate butterscotch cookies sing. When it comes to the butter, make sure it’s truly softened but not melted. If it’s too cold, it won’t cream properly with the sugar, and if it’s melted, your cookies will spread too much and be greasy. I learned this the hard way many times! For the flour, I can’t stress enough the importance of measuring it correctly. Spooning it into your measuring cup and leveling it off with a straight edge is crucial. Too much flour equals dry, crumbly cookies, and nobody wants that. When you’re mixing the wet and dry ingredients, be gentle. Seriously, stop mixing as soon as you don’t see any dry streaks. A little bit of imperfection in the dough is actually good; it means you haven’t overdeveloped the gluten, leading to that coveted chewy texture. I’ve also found that using a mix of chocolate chips and chunks can really elevate the cookie. The chunks create more gooey pockets of chocolate, while the chips provide a more consistent distribution. For butterscotch, I find that slightly crumbling some of the chips before adding them can help spread that flavor more evenly. If your dough seems a little too soft to handle, don’t be afraid to pop it in the fridge for about 15-20 minutes. This makes it much easier to scoop and handle, and it also helps control spread during baking. And for that extra sparkle and flavor enhancement, the flaky sea salt on top is a non-negotiable for me. It cuts through the sweetness and really makes the chocolate and butterscotch flavors pop. It sounds minor, but it’s a game-changer!
Storing and Reheating Tips
Let’s talk about keeping these delicious chocolate butterscotch cookies fresh! Once they’ve cooled completely, store them in an airtight container at room temperature. They’ll stay wonderfully soft and chewy for about 3 to 4 days. If you’re planning to keep them longer, you can refrigerate them, but they might become a bit firmer. To reheat refrigerated cookies, pop them in a 300°F (150°C) oven for about 3-5 minutes. This will warm them up and bring back that fresh-baked softness. For longer-term storage, these cookies freeze beautifully! You can freeze them either baked and cooled, or as dough balls. If freezing baked cookies, wrap them individually in plastic wrap, then place them in a freezer-safe bag or container. They’ll keep for up to 2-3 months. Thaw them at room temperature. If you’re freezing the dough, scoop them into balls, place them on a baking sheet lined with parchment paper, freeze until firm, then transfer to a freezer bag. You can bake them directly from frozen, just add a couple of extra minutes to the baking time. If you’ve drizzled them with glaze, I’d recommend waiting to glaze them until *after* they’ve been thawed and reheated, or glaze them just before serving if you’re serving them at room temperature. This prevents the glaze from getting sticky or cracking during storage. Honestly, though, they rarely last long enough in my house to need freezing!
Frequently Asked Questions
Final Thoughts
So there you have it – my absolute favorite chocolate butterscotch cookies! I truly believe this recipe captures the perfect balance of rich chocolate and sweet, comforting butterscotch, all wrapped up in a wonderfully chewy package. It’s the kind of cookie that brings smiles to faces, whether it’s for a special occasion or just a regular Tuesday afternoon. I hope you give them a try and that they become a beloved recipe in your kitchen, just as they have in mine. If you love these, you might also enjoy my recipe for classic chewy chocolate chip cookies or my decadent peanut butter swirl brownies. They share that same spirit of comforting, homemade goodness. I can’t wait to hear how your chocolate butterscotch cookies turn out! Please leave a comment below and share your thoughts, or even your own little twists on the recipe. Happy baking, everyone!
Chocolate Butterscotch Cookies
Ingredients
Dry Ingredients
- 0.25 cup all-purpose flour
- 0.25 teaspoon baking powder
Wet Ingredients
- 3 tablespoons butter
- 2 eggs
- 0.5 cup sugar
- 2 teaspoons vanilla extract
Chips
- 1 cup semi-sweet chocolate chips
- 1 cup butterscotch chips
Instructions
Preparation Steps
- Preheat oven to 350°F (175°C).
- In a medium-sized bowl, sift together the flour and baking powder; set aside.
- Place the butter and the semi-sweet chocolate chips in a small saucepan and heat over medium heat until melted and smooth. Set aside.
- Crack the eggs in a large mixing bowl, add in the sugar and vanilla.
- With an electric mixer on medium speed, beat the mixture for 10 minutes, or until pale and creamy.
- Stir the flour mixture into the egg mixture.
- Fold in the melted chocolate followed by the butterscotch chips. Let stand for 10 minutes.
- Line two baking sheets with parchment paper.
- Drop dough by rounded tablespoonfuls, about 2 inches apart.
- Bake for 9 to 11 minutes, or until dry and cracked.
- Cool on trays.
Notes
Featured Comments
“Impressed! Clear steps and so flavorful results. Perfect for busy nights.”
“New favorite here — so flavorful. crowd-pleaser was spot on.”
“Super easy and turned out amazing! My family asked for seconds. Saving this one.”
“This sweet treat was absolutely loved — the fresh really stands out. Thanks!”
“Made it tonight and wow — crowd-pleaser! Will definitely make Best Chocolate Butterscotch Cookie Recipe again.”
“Packed with flavor and so simple. Exactly what I wanted from Best Chocolate Butterscotch Cookie Recipe.”


