

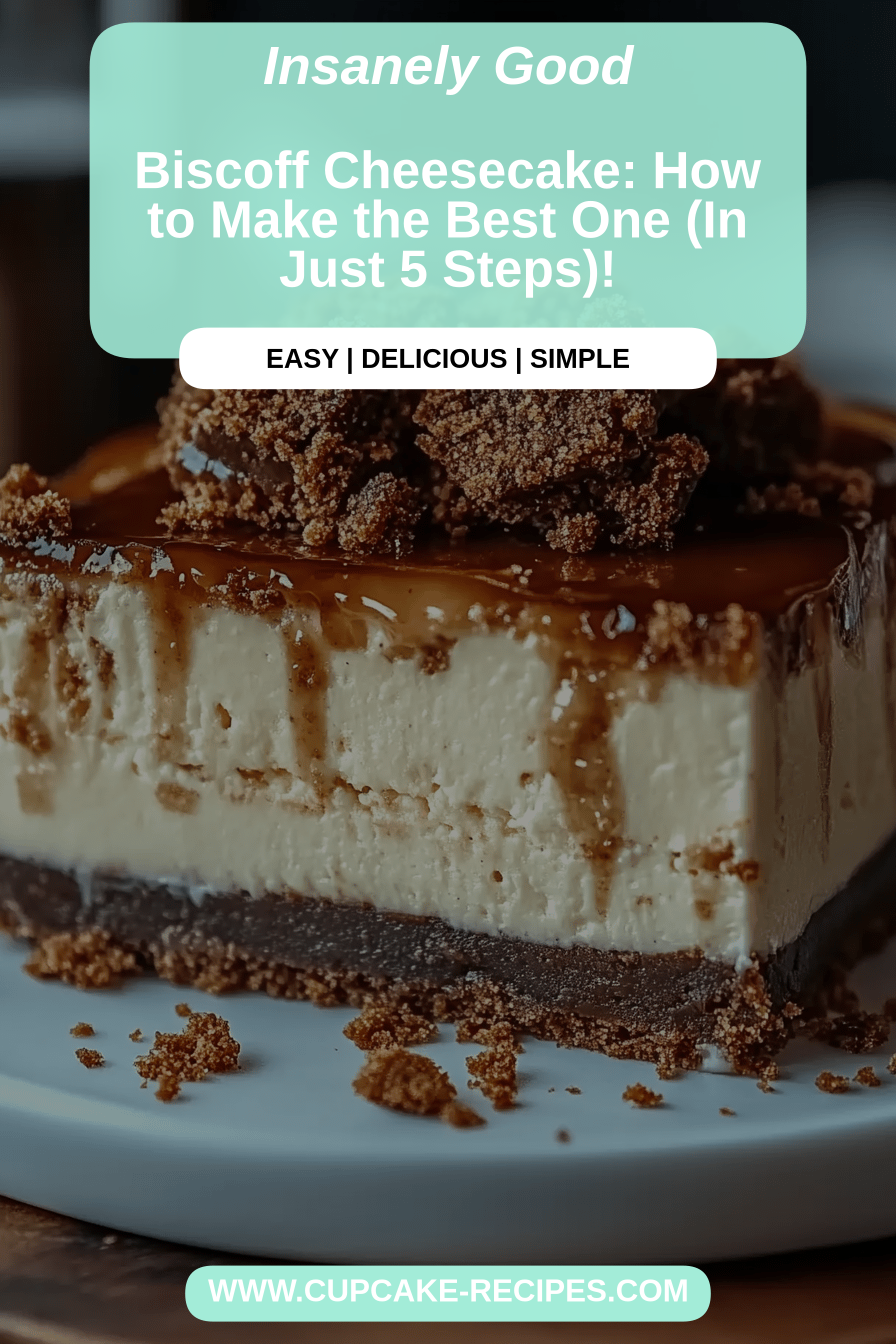
You know those recipes that just *feel* like a warm hug? The ones that instantly transport you back to a happy memory, or just make an ordinary Tuesday feel a little bit special? Well, this Biscoff cheesecake is exactly that for me. It’s the dessert I pull out when I need to impress, when I want to celebrate, or honestly, when I just have a serious craving for something utterly delicious and comforting. It’s like a fancier, more exciting version of a classic cheesecake, but don’t let that scare you – it’s surprisingly simple to make. If you’ve ever fallen head-over-heels for those spiced, caramel-y Biscoff cookies, then get ready, because this Biscoff cheesecake takes that magic and turns it into pure dessert bliss. Forget complicated techniques; this is the kind of cheesecake that says, “I can do this!” and delivers spectacularly.
What is Biscoff cheesecake?
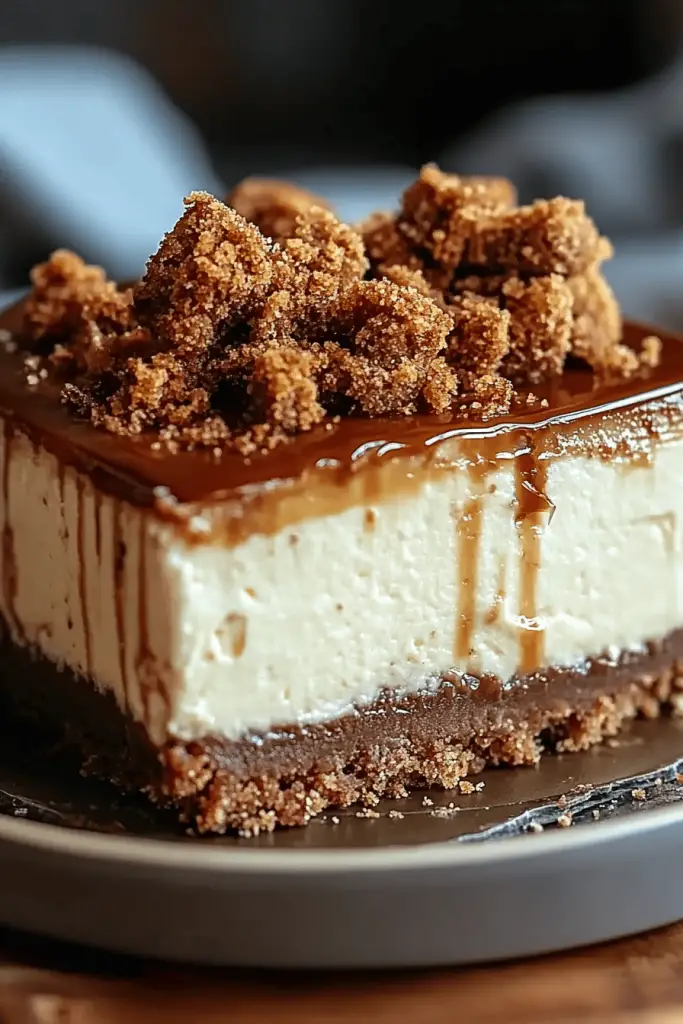
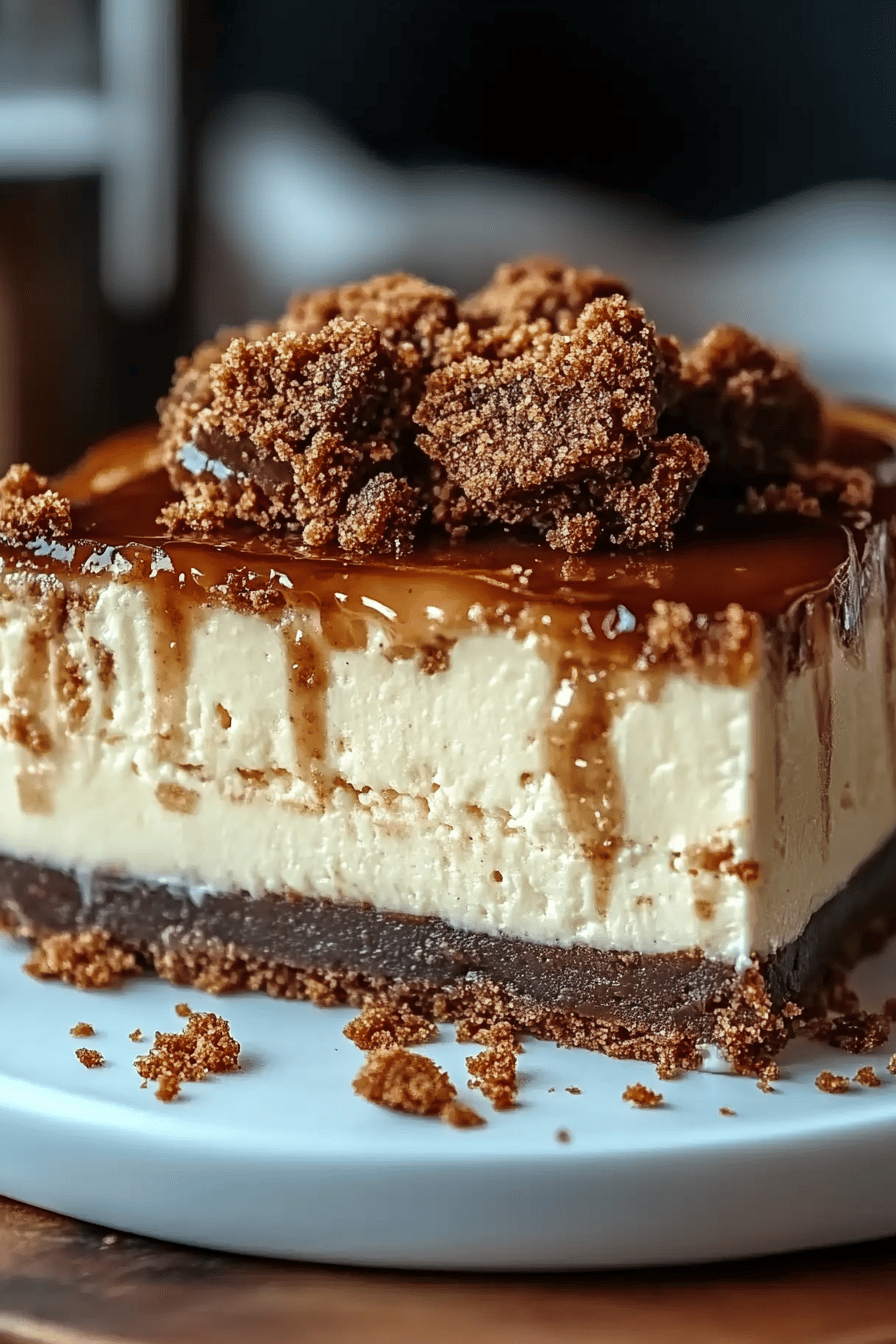
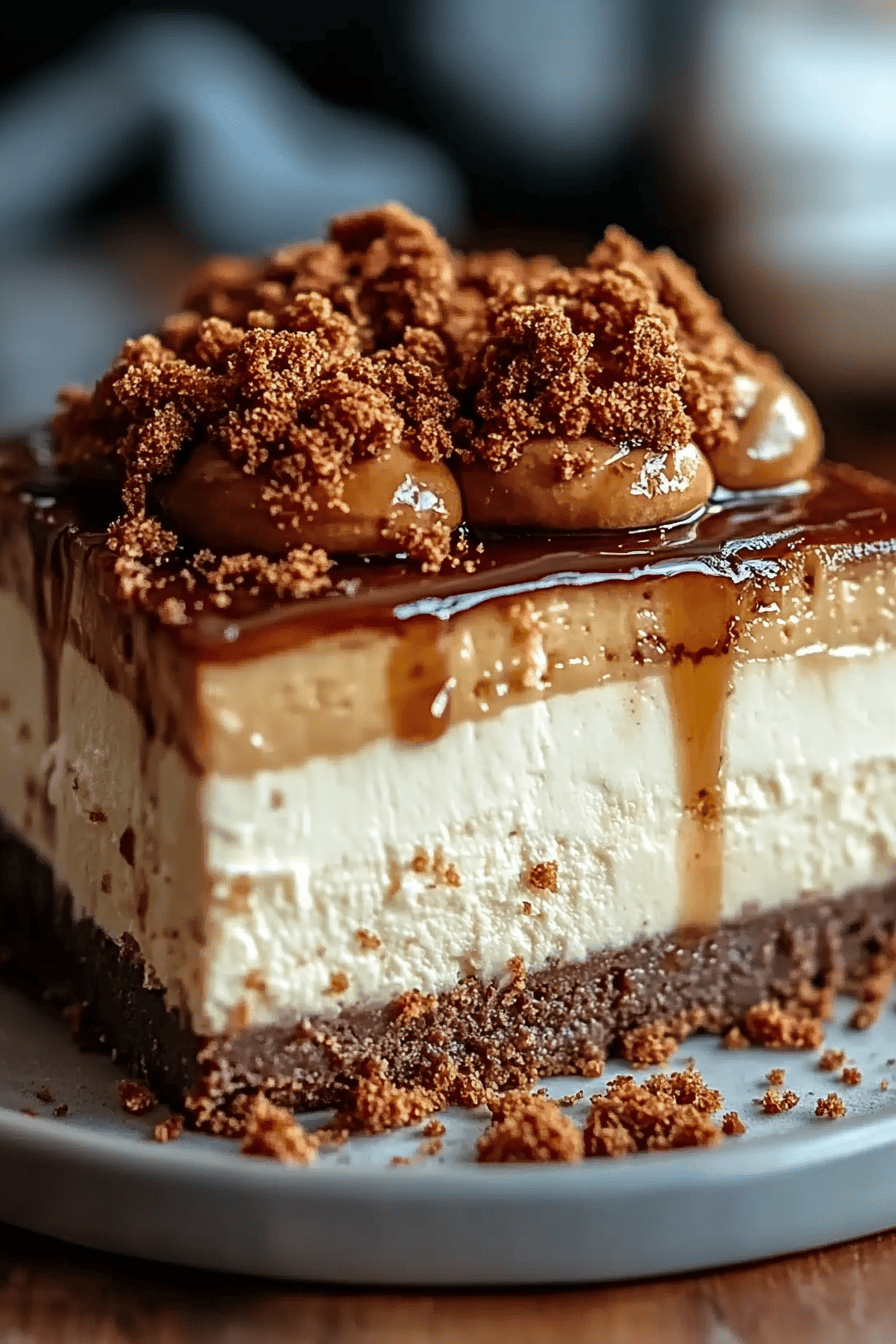
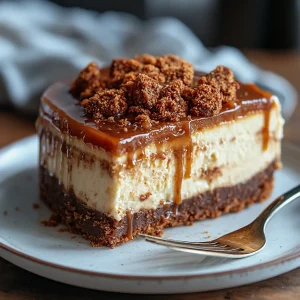
So, what exactly *is* this Biscoff cheesecake I’m always raving about? Think of it as a classic, creamy, dreamy baked cheesecake with a serious flavor upgrade. Instead of just a plain graham cracker crust, we’re talking about a glorious, buttery base made from crushed Biscoff cookies – those delightful little spiced cookies that taste like caramel, cinnamon, and pure happiness all rolled into one. And it doesn’t stop there! We’re swirling Biscoff spread right into the cheesecake batter itself, infusing every single bite with that irresistible spiced cookie flavor. It’s essentially taking everything you love about a rich, decadent cheesecake and giving it a warm, cozy, and incredibly addictive Biscoff twist. It’s sophisticated enough for a dinner party, but comforting enough for a quiet night in.
How do you make Biscoff cheesecake?
Quick Overview
Making this Biscoff cheesecake is a straightforward process that yields incredibly impressive results. We start by creating a buttery, cookie-crumb crust that’s packed with Biscoff flavor. Then, we whip up a smooth, creamy cheesecake filling, generously swirling in that irresistible Biscoff spread for maximum impact. After baking to golden perfection and chilling it thoroughly (patience is key here!), we finish it with a luscious Biscoff drizzle. It’s a journey of Simple Steps that build upon each other to create something truly spectacular. You’ll be amazed at how achievable this decadent dessert really is!
Ingredients
For the Crust:
2 cups finely crushed Biscoff cookies (about 25-30 cookies)
1/4 cup granulated sugar (optional, if you like a slightly sweeter crust)
1/2 cup (1 stick) unsalted butter, melted
For the Filling:
3 (8-ounce) packages cream cheese, softened to room temperature
1 1/4 cups granulated sugar
1/4 cup all-purpose flour
1 teaspoon Vanilla Extract
1/2 teaspoon lemon zest (optional, but it adds a lovely brightness!)
3 large eggs, at room temperature
1/2 cup Biscoff spread (creamy or crunchy, your preference!), warmed slightly to make it easier to swirl
For the Biscoff Drizzle/Glaze:
1/2 cup Biscoff spread
2-3 tablespoons milk or heavy cream (start with 2 and add more if needed)
Step-by-Step Instructions
Step 1: Preheat & Prep Pan
First things first, let’s get our oven fired up to 325°F (160°C). This lower temperature is key to a beautifully baked cheesecake that doesn’t crack. Now, grab a 9-inch springform pan. It’s the best pan for cheesecake because it makes removing it so easy. I like to lightly grease the sides of the pan with butter or cooking spray. Some people like to wrap the outside of the springform pan tightly with a couple of layers of heavy-duty aluminum foil. This is especially helpful if you plan to use a water bath (which I highly recommend for the silkiest texture, though it’s not strictly mandatory for this recipe). Trust me, a little extra prep work here goes a long way in preventing leaks and ensuring even cooking.
Step 2: Mix Dry Ingredients
In a medium bowl, combine your finely crushed Biscoff cookies. You can do this in a food processor for a super fine crumb, or just pop them in a zip-top bag and bash them with a rolling pin – it’s quite therapeutic! If you’re using the optional sugar, whisk it in now. This step is simple but important for creating that cohesive, delicious crust.
Step 3: Mix Wet Ingredients
In a large mixing bowl, add the softened Cream Cheese. Make sure it’s truly softened, or you’ll end up with lumps, and nobody wants that in their cheesecake. Beat it with an electric mixer (a stand mixer with the paddle attachment is my go-to) on medium speed until it’s completely smooth and creamy. Scrape down the sides and bottom of the bowl often. Then, gradually beat in the granulated sugar and the flour until just combined and smooth. Stir in the vanilla extract and the optional lemon zest. This combination of ingredients forms the foundation of our luscious filling.
Step 4: Combine
Now, it’s time to add the eggs, one at a time, beating on low speed after each addition until *just* incorporated. Overmixing the eggs can introduce too much air, which can lead to cracking. So, gentle is the name of the game here! Scrape down the bowl again to make sure everything is fully blended, but resist the urge to beat it vigorously. The batter should be thick and smooth.
Step 5: Prepare Filling
Take your slightly warmed Biscoff spread (just a few seconds in the microwave or sitting it in a bowl of warm water works wonders) and gently dollop about half of it over the cheesecake batter. Using a knife or a skewer, swirl the Biscoff into the batter. Don’t over-swirl; you want distinct ribbons of Biscoff, not a uniform brown color. Then, repeat with the remaining Biscoff spread. You can even add a few extra dollops on top for decoration after pouring the batter into the pan. This step is where the magic really happens visually!
Step 6: Layer & Swirl
Pour the cheesecake batter into your prepared springform pan. If you’re using a water bath, carefully place the foil-wrapped pan into a larger roasting pan. Pour enough hot water into the roasting pan to come about halfway up the sides of the springform pan. This gentle, moist heat helps the cheesecake bake evenly and prevents cracks. Carefully transfer the roasting pan to the preheated oven.
Step 7: Bake
Bake for about 50-70 minutes. The baking time can vary depending on your oven. You’re looking for the edges of the cheesecake to be set and slightly puffed, but the center should still have a slight jiggle when you gently nudge the pan. It shouldn’t look liquidy, but more like firm Jell-O. If you’re not using a water bath, keep an eye on it, as it might bake a little faster and could be more prone to cracking. Remember, it will continue to set as it cools.
Step 8: Cool & Glaze
This is perhaps the MOST important step for a perfect cheesecake. Once baked, turn off the oven, but leave the cheesecake inside with the oven door cracked open slightly for about an hour. This gradual cooling helps prevent dramatic temperature changes that can cause cracks. After that hour, carefully remove the cheesecake from the oven (and from the water bath, if used) and let it cool completely on a wire rack. Once it’s at room temperature, cover it loosely with plastic wrap and refrigerate for at least 6 hours, or preferably overnight. For the glaze, whisk together the 1/2 cup Biscoff spread with 2 tablespoons of milk or cream until smooth and pourable. If it’s too thick, add another tablespoon of liquid. Once the cheesecake is fully chilled and firm, drizzle the glaze over the top. It’s so tempting to dig in immediately, but this chilling time is crucial for the texture and flavor to fully develop!
Step 9: Slice & Serve
Once the glaze has set slightly, it’s time to reveal your masterpiece! Carefully run a thin knife around the edge of the springform pan before releasing the sides. For the cleanest slices, use a sharp knife dipped in hot water and wiped dry between each cut. Serve chilled, and watch it disappear! The smooth, creamy texture, the rich Biscoff flavor, and the slightly crisp cookie crust make every bite an absolute delight.
What to Serve It With
This Biscoff cheesecake is pretty spectacular on its own, but if you’re looking to build a whole experience around it, I’ve got some ideas! For BREAKFAST, though I know it sounds decadent, a small sliver with a strong cup of coffee is surprisingly divine. It’s like a sweet treat to start your day off right. For BRUNCH, I love to serve it with some fresh berries – raspberries or strawberries add a lovely tartness that cuts through the richness. A little whipped cream on the side never hurts, of course. As a proper DESSERT, it’s pure perfection. I sometimes like to add a sprinkle of crushed Biscoff cookies on top of the glaze for extra texture, or a tiny scoop of vanilla bean Ice Cream if I’m feeling extra fancy. And for COZY SNACKS? This is the ultimate comfort food. It’s perfect with a hot cup of tea or a glass of milk on a rainy afternoon. My family tradition is to have it for our “special occasion” dessert, and it always feels like a celebration, no matter what we’re celebrating!
Top Tips for Perfecting Your Biscoff Cheesecake
I’ve learned a few things over the years of making cheesecakes, and I’m happy to share them so you can have the best possible Biscoff cheesecake experience. First, on the ZUCCHINI PREP – wait, what? Oh, sorry, I’m thinking of my zucchini bread recipe! For this cheesecake, the key is SOFTENED CREAM CHEESE. I can’t stress this enough. Let it sit on the counter for at least an hour, or gently warm it in the microwave in short bursts. Lumps are the enemy of smooth cheesecake. When it comes to MIXING ADVICE, remember that less is more once you add the eggs. You want to incorporate them, not whip them into a frenzy. Overmixing eggs incorporates air, which can cause cracks as the cake bakes and cools unevenly. Gentle mixing is your friend. For SWIRL CUSTOMIZATION, don’t go crazy trying to make perfect patterns. A few random dollops and gentle swirls with a knife create a beautiful, rustic look that’s totally unique to your cheesecake. It’s more art than science! In terms of INGREDIENT SWAPS, I haven’t experimented too much with the Biscoff part because, well, it’s Biscoff! But if you can’t find Biscoff cookies, a gingersnap or speculoos cookie would be the closest alternative for the crust. And for the spread, other cookie butters might work, but Biscoff is truly special. For BAKING TIPS, the water bath is a game-changer for even cooking and a super creamy texture. If you don’t want to use one, just be extra vigilant about not overbaking. Your oven might run hotter or cooler, so getting to know it is helpful. Use the visual cues of set edges and a slightly jiggly center. And for the GLAZE VARIATIONS, if you find the Biscoff spread too thick to drizzle, simply warm it gently with a bit of milk or cream. If you want it thicker, just use less liquid. You can also add a tiny pinch of salt to the glaze to enhance the flavors.
Storing and Reheating Tips
This Biscoff cheesecake is best enjoyed chilled, and thankfully, it stores beautifully! At ROOM TEMPERATURE, it’s best not to leave it out for more than a couple of hours, especially if it’s warm in your kitchen. For refrigerator storage, once it’s fully chilled, wrap the cheesecake tightly with plastic wrap or place it in an airtight container. It should stay wonderfully fresh and delicious for up to 4-5 days. I often find it tastes even better on the second day! If you need to FREEZER INSTRUCTIONS, wrap the chilled cheesecake very well in a couple of layers of plastic wrap, then a layer of aluminum foil. It can be frozen for up to 1-2 months. To thaw, remove it from the freezer and let it defrost overnight in the refrigerator. For the glaze timing advice, I always recommend glazing the cheesecake just before serving if it’s been refrigerated, or once it’s completely cooled if serving immediately after chilling. If you freeze it, you can add the glaze after it’s thawed and chilled in the fridge.
Frequently Asked Questions
Final Thoughts
So there you have it – my absolute favorite Biscoff cheesecake recipe! It’s a dessert that always brings a smile to my face and is a guaranteed hit with everyone who tries it. The way the creamy cheesecake blends with those warm, spiced Biscoff flavors is just pure magic. It’s proof that you don’t need to be a pastry chef to create something truly spectacular in your own kitchen. If you love this recipe, you might also enjoy my classic New York cheesecake for a timeless treat, or perhaps my spiced apple crumble for another cozy, comforting dessert. I really hope you give this Biscoff cheesecake a try. It’s more than just a dessert; it’s an experience. I can’t wait to hear how yours turns out and what you think of it! Happy baking!
Biscoff Cheesecake
Ingredients
Crust
- 200 grams Biscoff cookies crushed
- 50 grams butter melted
Cheesecake Filling
- 700 grams cream cheese softened
- 150 grams granulated sugar
- 2 large eggs
- 120 ml heavy cream
- 1 teaspoon vanilla extract
- 150 grams Biscoff spread melted
Topping
- 100 grams Biscoff cookies crumbled
- 50 ml Biscoff spread warmed slightly
Instructions
Preparation Steps
- Preheat oven to 160°C (325°F). Grease and line a 23cm (9-inch) springform pan.
- For the crust, combine crushed Biscoff cookies and melted butter. Press firmly into the bottom of the prepared pan.200 grams Biscoff cookies
- Bake the crust for 10 minutes. Let cool while preparing the filling.
- In a large bowl, beat the softened cream cheese until smooth. Gradually beat in the sugar until well combined.200 grams Biscoff cookies
- Beat in the eggs one at a time, mixing well after each addition. Stir in the heavy cream and vanilla extract.200 grams Biscoff cookies
- Gently fold in the melted Biscoff spread until just combined. Do not overmix.200 grams Biscoff cookies
- Pour the filling over the cooled crust.
- Bake for 50-60 minutes, or until the edges are set and the center is slightly jiggly.
- Turn off the oven and let the cheesecake cool in the oven with the door slightly ajar for 1 hour. This helps prevent cracking.
- Remove from the oven and let cool completely on a wire rack. Then, refrigerate for at least 4 hours, or preferably overnight.
- Before serving, drizzle with warmed Biscoff spread and sprinkle with crumbled Biscoff cookies.200 grams Biscoff cookies
Notes
Featured Comments
“Impressed! Clear steps and creamy results. Perfect for busy nights.”
“New favorite here — perfect for busy nights. crowd-pleaser was spot on.”
“Super easy and turned out amazing! My family asked for seconds. Saving this one.”
“This sweet treat was absolutely loved — the cozy really stands out. Thanks!”
“Made it tonight and wow — super easy! Will definitely make Biscoff cheesecake again.”
“Packed with flavor and so simple. Exactly what I wanted from Biscoff cheesecake.”


