

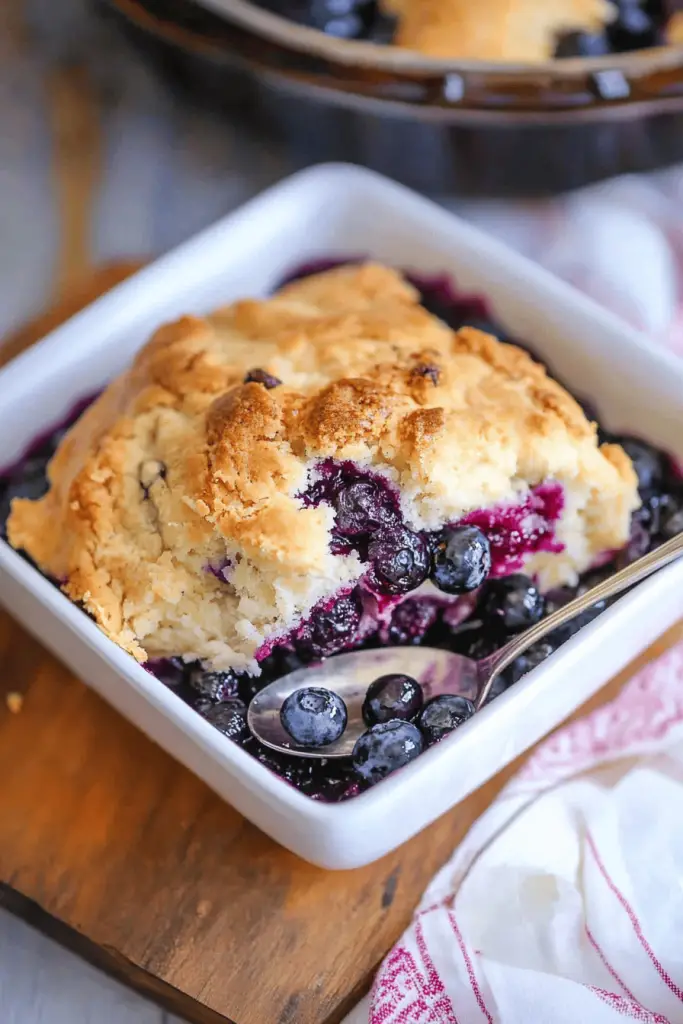
Oh, this blueberry cobbler! It’s the recipe that whispers “summer” to me, even when there’s a chill in the air. I remember the first time I made it, trying to impress some friends, and honestly, I was a nervous wreck. But then, the aroma started wafting from the oven, that sweet, slightly tart scent of baked blueberries mingling with warm spices, and I just knew it was going to be special. It’s not as fussy as a pie, and way more comforting than a simple crumble. This blueberry cobbler is that perfect balance – rustic, forgiving, and always, always delicious. It’s like a warm hug in dessert form, and it’s the one I pull out when I need a guaranteed win. Honestly, compared to some of the more elaborate desserts out there, this one is a total lifesaver and always gets rave reviews.
What is blueberry Cobbler?
So, what exactly *is* blueberry cobbler? At its heart, it’s a baked fruit dessert, usually featuring berries, topped with a biscuit-like or cake-like batter. The name “cobbler” supposedly comes from the way the topping looks, like a cobblestone path after it’s baked – all bumpy and irregular. Think of it as a slightly more rustic, less structured cousin to a pie. Instead of a neat pastry crust all around, you get this lovely, fluffy topping that bakes right into the juicy fruit. It’s essentially a celebration of ripe fruit, enveloped in a comforting, sweet batter. It’s the kind of dessert that feels homemade, even if you’re a total beginner in the kitchen. It’s just pure, unadulterated goodness.
How do I make blueberry Cobbler?
Quick Overview
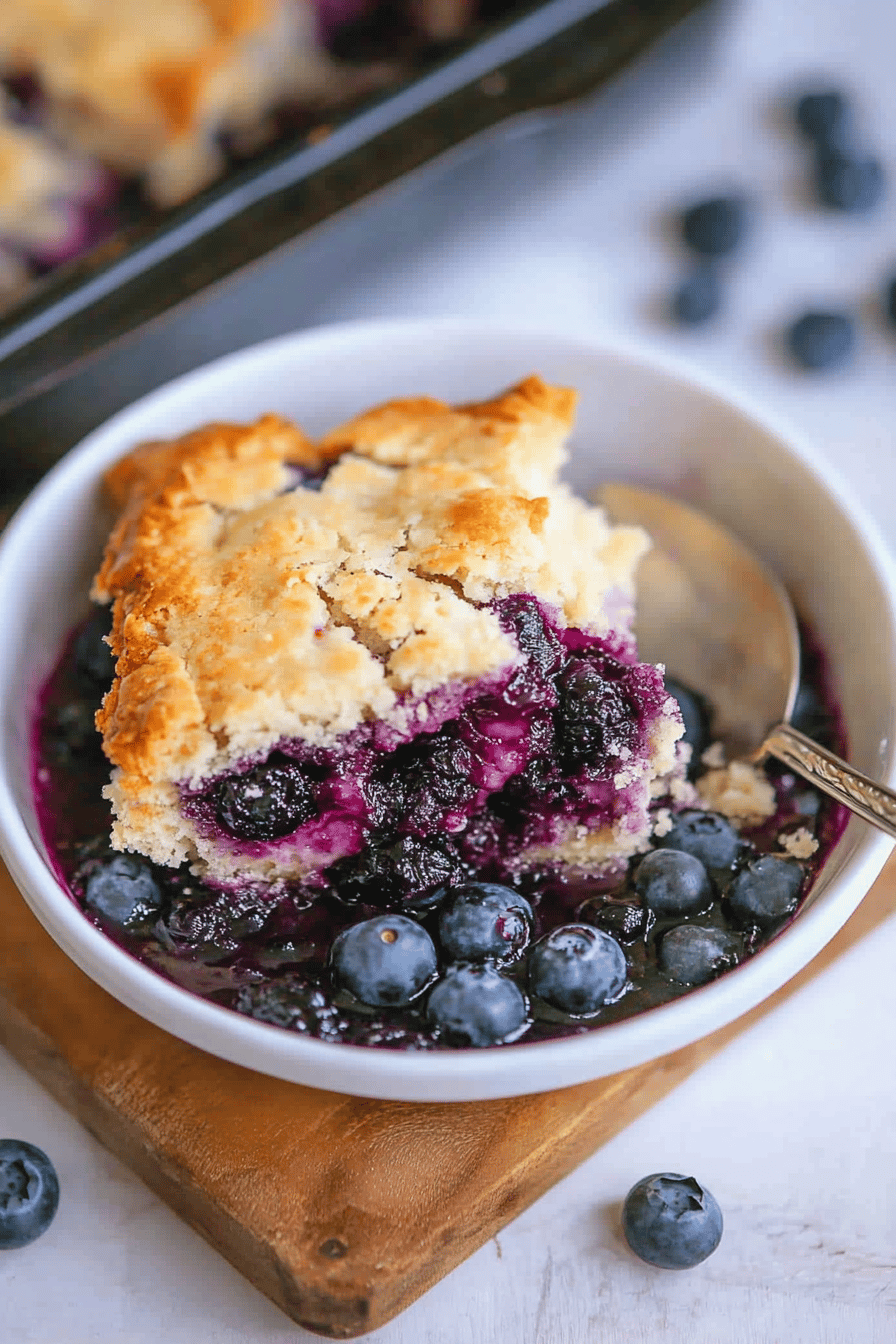
This recipe is surprisingly straightforward. We’ll start by getting our oven nice and hot, then mix up a simple batter right in the pan. While that’s chilling, we’ll toss our blueberries with a touch of magic – sugar, a little thickener, and some zingy lemon. Then, we’ll pour that beautiful fruit mixture over the batter and let the oven do the rest. The topping will puff up and turn golden, creating this incredible contrast with the soft, jammy blueberries underneath. It’s a process that smells heavenly as it bakes and tastes even better when it’s warm from the oven. You’ll be amazed at how quickly this comes together for such a show-stopping dessert.
Ingredients
For the Main Batter:
This is the foundation of our cobbler, creating that wonderfully tender cake-like layer. I always use all-purpose flour for this, but if you want to try a gluten-free version, I’ve had success with a good 1:1 gluten-free blend (more on that in the FAQ!). Make sure your baking powder is fresh; it’s what gives the topping its lift. A pinch of salt balances the sweetness, and granulated sugar provides that lovely sweetness. For the fat, unsalted butter is my go-to, melted until it’s just golden. And don’t skip the Vanilla Extract; it adds a beautiful depth of flavor. For liquid, I typically use whole milk, but I’ve tested this with almond milk and it actually made it even creamier! If you don’t have milk, you can even use water in a pinch, though it won’t be quite as rich.
For the Filling:
Fresh or frozen blueberries are key here. If you’re using frozen, don’t thaw them completely; just a quick rinse is usually enough. Too much sugar can make the filling too syrupy, so we’re using just enough granulated sugar to enhance the berries’ natural sweetness. Cornstarch is our secret weapon for thickening the juices so you don’t end up with a watery cobbler. A little bit of lemon zest and lemon juice brightens everything up and cuts through the sweetness beautifully. It’s amazing how much flavor a tiny bit of citrus adds! And a whisper of cinnamon can really elevate the berry flavor without overpowering it, though you can leave it out if you prefer pure blueberry.
For the Glaze:
This is optional but highly recommended for that extra touch of elegance and sweetness. It’s just powdered sugar whisked with a little milk or lemon juice until it’s the perfect drizzle-able consistency. You can play with the flavor here; a splash of lemon juice makes it extra bright, while a tiny bit of vanilla adds classic sweetness. You want it thick enough to coat the back of a spoon but thin enough to drizzle easily.
Step-by-Step Instructions
Step 1: Preheat & Prep Pan
First things first, get your oven preheating to 375 degrees Fahrenheit (190 degrees Celsius). This is a crucial step because we want that oven nice and hot when the cobbler goes in. While the oven is heating, take an 8×8 inch baking dish (or a similar-sized cast iron skillet) and melt your butter directly in it. Just pop it in the preheating oven for a few minutes until the butter is completely melted and maybe even a little golden. This not only saves you an extra bowl but also coats the bottom of your pan beautifully, giving the cobbler a wonderful buttery crust. Once the butter is melted, carefully swirl it around to coat the entire bottom of the dish. Be cautious, as the dish and butter will be hot!
Step 2: Mix Dry Ingredients
In a medium bowl, whisk together your all-purpose flour, granulated sugar, baking powder, and salt. A whisk is best here because it aerates the flour and ensures everything is evenly distributed. You don’t want pockets of baking powder or clumps of sugar in your finished topping! Give it a good whisk for about 30 seconds until it all looks uniform. This step is simple, but it really does make a difference in the texture of the cobbler topping.
Step 3: Mix Wet Ingredients
In a separate, smaller bowl, whisk together your milk (or milk alternative) and your vanilla extract. If you’re adding an egg for a richer topping (which I sometimes do when I have one handy!), whisk it in here too. Just a quick whisk until everything is combined is all you need. The goal here is just to get the wet ingredients ready to be incorporated into the dry.
Step 4: Combine
Now, pour the wet ingredients into the bowl with the dry ingredients. Using a spatula or a wooden spoon, gently mix just until everything is *barely* combined. Seriously, do NOT overmix! You should still see a few streaks of flour. Overmixing develops the gluten in the flour, which can lead to a tough, rubbery topping, and that’s the last thing we want in our delicious blueberry cobbler. The batter should be thick and a little lumpy, and that’s perfectly okay. It’s actually what we’re aiming for.
Step 5: Prepare Filling
In another medium bowl (don’t worry about washing the bowls from the batter, a little leftover batter residue is fine!), gently toss your blueberries with the granulated sugar, cornstarch, lemon zest, lemon juice, and cinnamon (if using). If you’re using frozen blueberries, you might find you need to add a minute or two to the baking time, as they release more moisture. When you’re tossing, be gentle so you don’t crush the berries too much. You want to see them coated evenly. This mixture should look glossy and fragrant.
Step 6: Layer & Swirl
Carefully pour the blueberry filling mixture evenly over the melted butter in your prepared baking dish. Don’t stir it into the butter; just let it sit on top. Now, dollop spoonfuls of the cobbler batter over the blueberry filling. You don’t need to spread it perfectly; leave some gaps. The batter will spread and puff up as it bakes, creating that lovely rustic, cobbler look. If you want a bit of a marbled effect, you can gently swirl a knife or skewer through the batter and filling a couple of times, but don’t overdo it. Just a few gentle swirls are perfect. The key is to get a good amount of topping covering most of the fruit.
Step 7: Bake
Pop the dish into your preheated oven. Bake for about 35-45 minutes, or until the topping is golden brown and puffed up, and the blueberry filling is bubbling around the edges. You should be able to see the juices thickening. If the topping starts to get too dark before the filling is bubbling, you can loosely tent the dish with aluminum foil for the last 10-15 minutes of baking. A toothpick inserted into the center of the cobbler topping should come out clean, indicating the cakey part is fully cooked.
Step 8: Cool & Glaze
Once it’s out of the oven, let the blueberry cobbler cool for at least 15-20 minutes before serving. This is tough, I know, but it allows the filling to set up a bit and prevents you from burning your tongue on molten fruit. While it’s cooling, if you’re using the glaze, whisk together the powdered sugar with a tablespoon or two of milk or lemon juice until you reach a smooth, drizzly consistency. Add more liquid a teaspoon at a time if it’s too thick, or more powdered sugar if it’s too thin. Drizzle this glaze over the warm cobbler just before serving. It adds a lovely sweet finish.
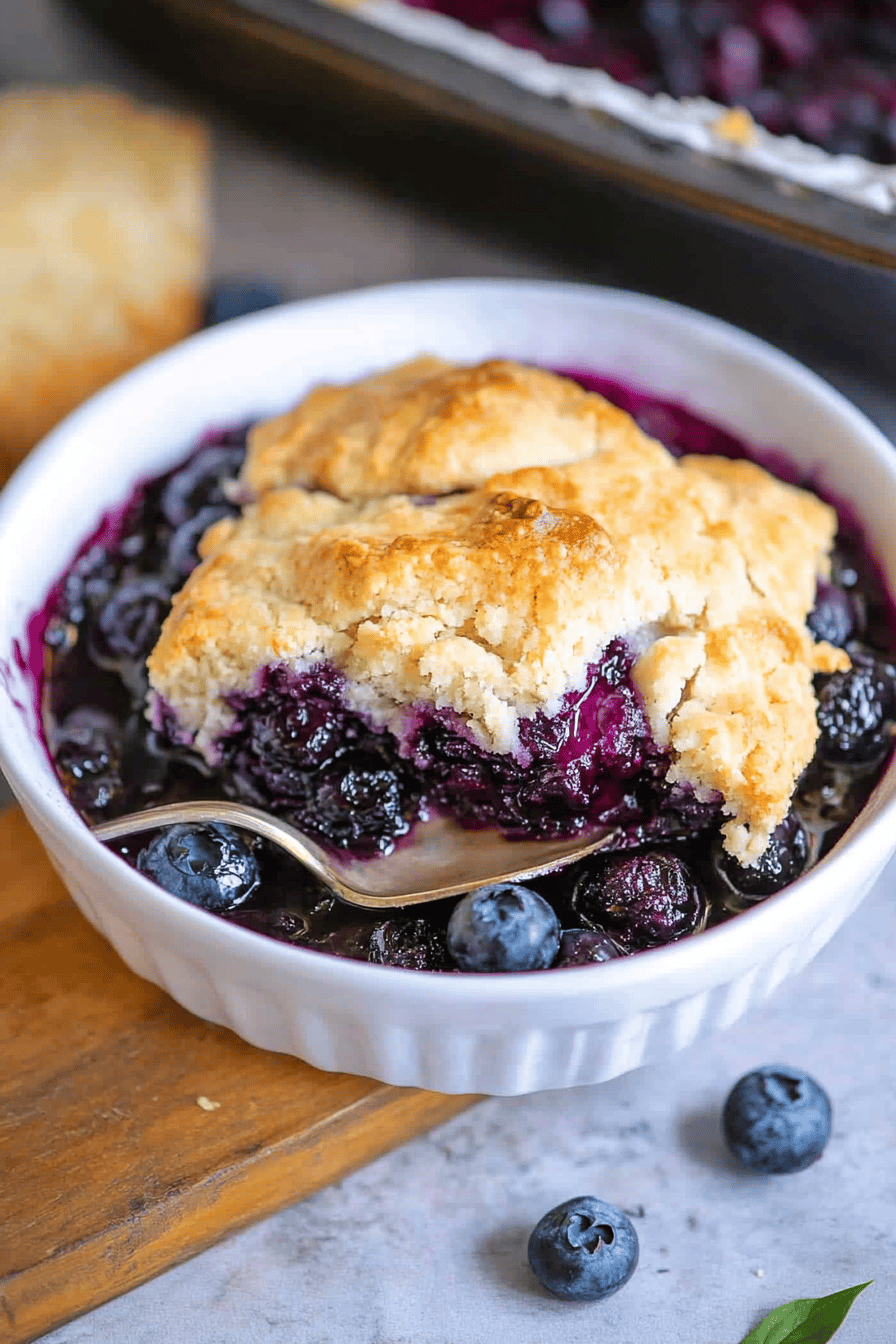
Step 9: Slice & Serve
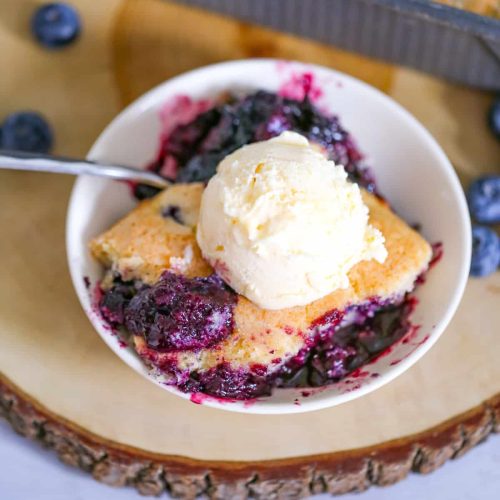
Serve your glorious blueberry cobbler warm, directly from the dish. A good sturdy spoon or spatula is perfect for scooping out generous portions. It’s absolutely divine on its own, but I highly recommend serving it with a scoop of vanilla bean Ice Cream or a dollop of freshly whipped cream. The contrast of the warm, gooey cobbler with the cold, creamy topping is pure bliss. You can also serve it with a drizzle of heavy cream for a simpler, yet equally delicious, finish. Enjoy every single spoonful!
What to Serve It With
This blueberry cobbler is so versatile, you can genuinely enjoy it at any time of day or for any occasion. For breakfast, it’s a delightful treat. Imagine a slice topped with a dollop of Greek yogurt and a sprinkle of granola – it’s a fancy way to start your day. Coffee is the perfect beverage pairing here, a rich dark roast to balance the sweetness. For brunch, it steps up its game. Serve it in individual ramekins for a more elegant presentation, alongside mimosas or a nice cup of tea. The bright berry flavor and comforting topping make it a hit for any gathering. As a dessert, it’s a classic for a reason. After dinner, serve it warm with a scoop of high-quality vanilla Ice Cream or a drizzle of crème anglaise. The contrast of warm fruit and cold cream is just divine. And for those cozy, late-night cravings when you need something sweet but don’t want to bake a whole cake? This is your answer. Serve a small portion with a glass of milk or a mug of hot chocolate. My family also loves it warmed up with a spoonful of mascarpone cheese – it’s a little decadent and oh-so-good. I’ve even seen it served with a drizzle of honey or a sprinkle of toasted almonds for added texture.
Top Tips for Perfecting Your Blueberry Cobbler
I’ve made this blueberry cobbler more times than I can count, and along the way, I’ve picked up a few tricks that I think you’ll find super helpful. When it comes to the blueberries, whether you’re using fresh or frozen, make sure you don’t overwork them when mixing with the sugar and cornstarch. Gentle is key! If using frozen, you might notice a bit more liquid released, so just let the filling sit for an extra minute or two while you mix the batter to let the cornstarch start its magic. For mixing the batter, my biggest piece of advice is: do NOT overmix. Seriously, I can’t stress this enough. You want just enough mixing to bring the ingredients together. A few streaks of flour are perfectly fine, and actually desirable! Overmixing is the number one culprit for a tough, dense topping, and we want light and tender. If you’re feeling adventurous with the swirls, a clean knife or skewer is your best friend. Just a couple of gentle passes through the batter and fruit creates a beautiful marbled effect without disturbing the structure too much. For ingredient swaps, I’ve found that if you don’t have cornstarch, you can use an equal amount of all-purpose flour or tapioca starch for thickening, though cornstarch gives the best, clearest result. If you’re out of milk, don’t fret! You can substitute it with buttermilk for a tangier topping, or even heavy cream diluted with a little water for extra richness. For baking, trust your oven but also trust your senses. Keep an eye on it after about 30 minutes. If the top is browning beautifully but the center isn’t quite set, a loose tent of foil is your secret weapon to prevent burning while the inside finishes cooking. As for glaze variations, I sometimes add a tiny pinch of ground ginger to the powdered sugar for a little warmth, or even some finely grated orange zest for a citrusy twist. It’s amazing how much you can customize this simple recipe!
Storing and Reheating Tips
One of the best things about this blueberry cobbler is how well it keeps, making it perfect for leftovers (if you even have any!). If you’ve got some delicious cobbler remaining, you can leave it at room temperature for up to two hours. After that, it’s best to cover it tightly with plastic wrap or transfer it to an airtight container and store it in the refrigerator. In the fridge, it should stay good for about 3 to 4 days. When you’re ready to reheat, a quick zap in the microwave will warm it up, but for the best texture, I prefer to reheat it in a low oven (around 300°F or 150°C) for about 10-15 minutes, or until warmed through. This helps to revive that lovely crispness of the topping. If you’re freezing it, it’s best to do so *before* you add the glaze. Let the cobbler cool completely, then wrap it tightly in a couple of layers of plastic wrap followed by a layer of aluminum foil. It can be frozen for up to 2-3 months. To thaw, simply transfer it to the refrigerator overnight, then reheat as usual. For the glaze, it’s always best to add it just before serving, whether it’s fresh or reheated. If you’ve frozen the cobbler, you can make a fresh batch of glaze once it’s thawed and reheated. It’s worth the extra step for that beautiful finish!
Frequently Asked Questions
Final Thoughts
So there you have it – my absolute favorite blueberry Cobbler Recipe! It’s a dessert that brings out pure joy every single time I make it. It’s simple enough for a weeknight treat but special enough for company. The way the sweet, juicy blueberries mingle with that tender, golden topping is just pure magic. If you love this recipe, I think you’ll also really enjoy my classic apple crisp or my peach cobbler for more fruit-filled delights. They share that same comforting, homemade vibe that just makes you feel good. Give this blueberry cobbler a try, and I promise, it’ll become a staple in your recipe collection too. I can’t wait to hear how yours turns out and what variations you might try! Please leave a comment below with your thoughts or share your own tips and tricks – I love hearing from you all. Happy baking!
Blueberry Cobbler
Ingredients
Blueberry Filling
- 6 cups fresh blueberries
- 0.5 cup granulated sugar
- 0.25 cup all-purpose flour
- 1 tablespoon lemon juice
- 0.5 teaspoon cinnamon
Cobbler Topping
- 1.5 cups all-purpose flour
- 0.75 cup granulated sugar
- 2 teaspoons baking powder
- 0.5 teaspoon salt
- 0.5 cup cold unsalted butter, cut into cubes
- 0.5 cup milk
Instructions
Preparation Steps
- Preheat oven to 375°F (190°C).
- In a large bowl, combine blueberries, 0.5 cup sugar, 0.25 cup flour, lemon juice, and cinnamon. Toss gently to coat. Pour the blueberry mixture into a 9x13 inch baking dish.
- In a separate medium bowl, whisk together 1.5 cups flour, 0.75 cup sugar, baking powder, and salt.
- Cut in the cold butter using a pastry blender or your fingertips until the mixture resembles coarse crumbs.
- Pour in the milk and stir until just combined. Do not overmix.
- Drop spoonfuls of the topping mixture over the blueberries, covering most of the surface.
- Bake for 35-40 minutes, or until the topping is golden brown and the blueberry filling is bubbly.
- Let cool for at least 15 minutes before serving. Serve warm, with ice cream or whipped cream if desired.
Notes
Featured Comments
“Impressed! Clear steps and family favorite results. Perfect for busy nights.”
“New favorite here — crowd-pleaser. crowd-pleaser was spot on.”
“Super easy and turned out amazing! My family asked for seconds. Saving this one.”
“This sweet treat was absolutely loved — the light really stands out. Thanks!”
“Made it tonight and wow — spot on! Will definitely make blueberry cobbler again.”
“Packed with flavor and so simple. Exactly what I wanted from blueberry cobbler.”


