

The kitchen smells like weekend mornings and a little bit of sugar magic, doesn’t it? I still remember the first time I bit into a warm buttermilk scone after sleepily dragging myself to grandma’s kitchen. The oven hummed, butter danced on my tongue, and the day suddenly felt possible. These Buttermilk Scones are the easier cousin to a biscuit and the fancier sister to a muffin—crisp edges, pillowy centers, and a whisper of tang that keeps you reaching for one more. I love how forgiving they are, how they bake up golden in no time, and how they pair with coffee or tea like they were meant to be there from the start. My kids actually ask for seconds, and frankly, I’m not surprised—the scent alone makes the whole house feel cozier. This batch might look simple, but trust me, the first bite says it all: a tender crumb, bright vanilla, and a little glaze that makes them feel like a special treat without any fuss. If you’ve got buttermilk in the fridge, you’re halfway to a dozen smiles.
What is buttermilk scones?
Buttermilk scones are essentially a super tender pastry that relies on cold butter, a splash of tang from buttermilk, and a quick mix to keep the crumb light. Think of them as a European-style Coffee Cake with the rustic charm of a bakery biscuit. The name hints at the culture—those little jars of cultured liquid that bring brightness to the dough and keep it moist as it bakes. It’s essentially a shortcut to that flaky, tender texture you crave, without turning the kitchen into a science project. Think of them as the ideal canvas: you can keep them plain for a dunkable staple or swirl in a filling to suit your mood. I’ve learned to treat them like a whisper: handle the dough just enough to come together, then let the rest happen naturally in the oven. A good scone, in my book, should be elegantly simple and deeply comforting at the same time.
How to Make Buttermilk Scones
Quick Overview
In a nutshell, you whisk dry ingredients, cut in cold butter until the mixture looks like chunky gravel, then drizzle in cold buttermilk (plus a touch of vanilla) until it just comes together. You’ll pat and fold to create those signature layers, swirl in your filling if you’re feeling fancy, shape into rounds, and bake until the tops are a rich amber. The result is a batch of soft, flaky, tea-time-worthy scones that disappear fast around here. The trick is to handle the dough lightly and keep everything cold—that’s how you lock in the tenderness without turning the dough into a dense brick.
Ingredients
For the Main Batter:
- 2 cups all-purpose flour (plus a tablespoon extra for dusting) — I like to use a light blend of all-purpose with a touch of whole wheat for flavor, but straight all-purpose works beautifully too.
- 1/4 cup granulated sugar — not too sweet, just a gentle counterpoint to the tang.
- 1 tablespoon baking powder
- 1/2 teaspoon baking soda
- 1/2 teaspoon fine salt
- 6 tablespoons cold unsalted butter, cut into small cubes
- 1 cup cold buttermilk
- 1 teaspoon vanilla extract
For the Filling:
- For a Cream Cheese Swirl: 4 ounces cream cheese, softened, 2 tablespoons sugar, 1 teaspoon lemon zest
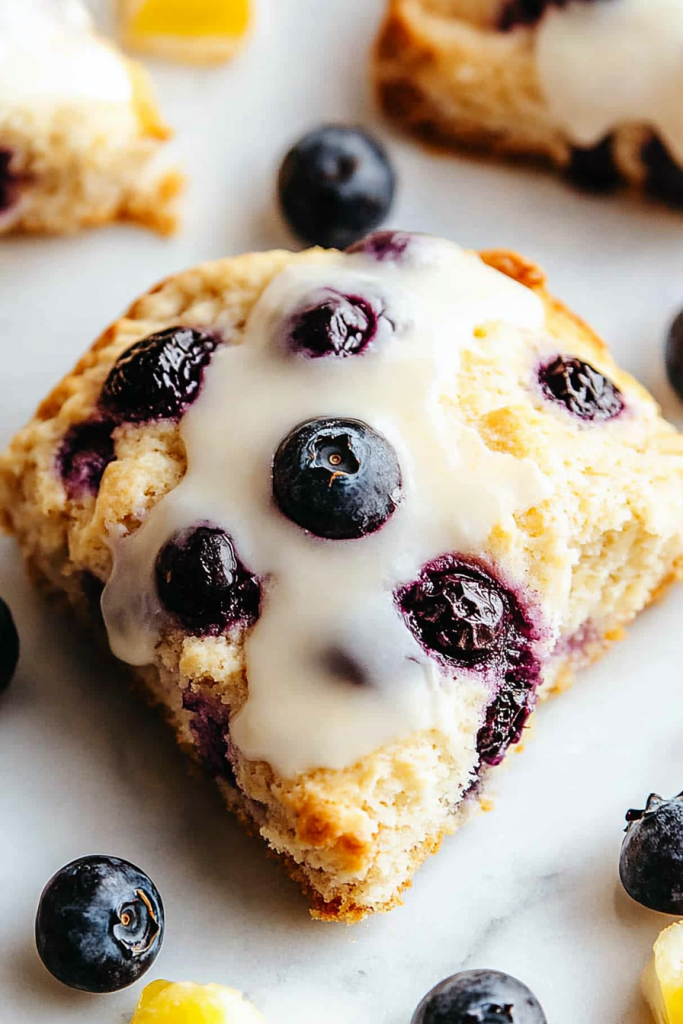
- For a Fruit Hints: 1/3 cup blueberry jam or lemon-curd, optional
For the Glaze:
- 1/2 cup powdered sugar
- 1–2 tablespoons milk or cream
- 1 teaspoon vanilla extract or lemon juice
- Optional: extra zest or a pinch of lemon sugar for sparkle
Step-by-Step Instructions
Step 1: Preheat & Prep Pan
Heat your oven to 425°F (220°C). Line a baking sheet with parchment or a silicone mat. A hot pan is your best friend here because it helps the edges crisp beautifully. I always give the sheet a light spritz of cooking spray and a quick dusting of flour to prevent sticking. If you’ve got a nonstick sheet, you’re good to go, but either way, keep things tidy and ready so you don’t rush once the dough comes together.
Step 2: Mix Dry Ingredients
Whisk flour, sugar, baking powder, baking soda, and salt together in a large bowl. The key is to distribute the leaveners evenly so every bite lifts a little. I like to sift the dry ingredients once if I’m feeling particular, but a good whisk does the job just fine. The aroma here—vanilla sweetness with a hint of baking powder—is half the battle won.
Step 3: Mix Wet Ingredients
In a separate bowl, whisk the cold buttermilk and vanilla together. It’s crucial that the buttermilk is cold; it helps wake up the butter-coated flour and gives you that flaky texture. If you’re using a dairy alternative, I’ve found that a splash of plain yogurt can mimic the tang, but keep the total liquid close to 1 cup for proper hydration. Pour the wet into the dry and stir just until you see a shaggy dough starting to form—it’s okay if there are still lumps. Overworking now will make the scones tougher.
Step 4: Combine
Gently fold the dough a few times until it just holds together. You’re aiming for a loose, slightly crumbly mass with some visible butter bits—these pockets are where the tenderness hides. If you need a touch more moisture, add a tablespoon or two of buttermilk, but do it sparingly. This is where patience pays off: you want clumps rather than a smooth, cohesive ball.
Step 5: Prepare Filling
For the Cream Cheese swirl, mix the softened cream cheese, sugar, and lemon zest until smooth. If you’re not into filling, skip this step and keep the dough plain. The swirl is a kitchen whisper of indulgence, but it’s not required for success. For a fruity kick, dab some blueberry jam in the center of a few dough portions before shaping into rounds.
Step 6: Layer & Swirl
Turn the shaggy dough onto a lightly floured surface. Gather it into a rough disk, then pat it into a circle about 1 inch thick. If you’re going for a swirl, spread the Cream Cheese mixture in a thin line across the center and fold the sides over to seal, then pat again into a disk. For a simpler approach, cut the disk into triangles and place them on the baking sheet, leaving space to grow. The goal is even, tender layers with a delicate, flaky edge.
Step 7: Bake
Bake for 12–14 minutes, or until the scones are golden brown at the edges and a toothpick inserted into the center comes out clean or with a few crumb bits. If you’re baking on convection, start checking at 10 minutes to avoid over-browning. The tops should spring back lightly when pressed; when in doubt, trust the color and the scent—that warm, toasty aroma is your signal that they’re done.
Step 8: Cool & Glaze
Let the scones rest on the pan for about 5 minutes, then transfer to a rack to cool completely or just a bit for that soft interior. If you’re glazing, whisk the powdered sugar with milk and vanilla until smooth. dribble or drizzle lightly across the tops while they’re still just warm—the glaze sets so prettily as the scones finish cooling. If you want a citrus lift, a touch of lemon juice in the glaze adds brightness without sweetness overload.
Step 9: Slice & Serve
These buttermilk scones slice easily when they’re warm but fully cooled is ideal for stacking on a plate. I like to cut mine into rough wedges rather than perfectly even triangles; it makes the whole setup feel a little rustic and comforting. Serve with more jam, a dab of clotted cream if you’ve got it, or simply a hot cup of coffee. They’re wonderful at room temperature too, which is perfect for a casual weekend brunch. If you’re entertaining, place a small bowl of lemon curd at the center and watch everyone dive in.
What to Serve It With
These buttermilk scones are a flexible sidekick for every moment of the day. Here are a few ways I love to pair them:
For Breakfast: A strong mug of coffee, a small pat of butter, and a little fruit preserve. I sometimes set a few scones out with sliced strawberries or raspberries for color and a pop of tart sweetness. The house smells like a bakery, and the kids wander in, eyes half closed but noses wide awake.
For Brunch: Do a light plate with lemon yogurt and a few dollops of jam, plus an orange-carrot juice or a sparkling agua fresca. Plating matters here—fanned slices on a wooden board, a dusting of powdered sugar, and a sprig of mint makes it feel festive without extra effort.
As Dessert: They’re surprisingly capable of behaving like a pastry—warm with a dollop of whipped cream or a spoonful of lemon curd. If you want a dessert vibe, drizzle with a vanilla glaze and a few fresh berries for color and tang.
For Cozy Snacks: Break them apart for a quick tea-time nibble, or toast lightly with a smear of butter for a late-night treat. This batch disappears in minutes at my house, and I love that it’s not overly sweet, so it feels like a proper snack rather than a guilty indulgence.
Top Tips for Perfecting Your Buttermilk Scones
Butter Handling: Keep the butter cold and cut into small cubes. When it hits the dry mix, you want the pieces to stay firm so they can create those buttery, flaky layers as they melt in the heat. Work quickly and avoid overworking the dough.
Mixing Advice: The moment the dough comes together, stop. A few little lumps are fine. Overworking will make the crumb gummy instead of light and delicate. It’s okay if you see streaks of flour—that’s your texture goal.
Swirl Customization: If you’re adding a swirl, spread the filling gently and avoid overloading. A thin, even layer yields a prettier spiral and keeps the center from collapsing. You can also swirl in a touch of zest (lemon or orange) into the cream cheese for extra brightness.
Ingredient Swaps: Whole-wheat flour in small amounts adds depth, but keep a higher ratio of all-purpose to prevent toughness. I’ve swapped half the buttermilk for plain yogurt in a pinch and the result stays tender—just watch the moisture. For dairy-free, a thick coconut yogurt can work, but you may need a touch more flour.
Baking Tips: Oven position matters—middle rack is ideal for even heat. If your oven tends to run hot, lower the temperature 15°F and extend the bake time by a few minutes. You’re aiming for a deep amber edge, not burnt tops. Use a light touch when testing for doneness, and rely on color and aroma as much as the toothpick test.
Glaze Variations: If you prefer a shiny, sweeter finish, add a touch more sugar to the glaze or switch to a honey-lemon glaze for complexity. For a dairy-free glaze, use oatly or almond milk and a splash of vanilla. If you love a subtle crunch, finish with a tiny pinch of sanding sugar before the glaze sets.
Lessons learned: I once overmixed, and the crumb turned dense and a little dry. I also learned to chill the dough slightly longer on crowded evenings; that extra 10 minutes in the fridge makes a world of difference in shaping and final texture. The best batches come when I’m patient about folding and keeping things cold. Trust the process, and you’ll have a bakery-worthy bite that still feels like home.
Storing and Reheating Tips
Storage is where the real test happens—these scones keep well, but there are a few tricks to preserve that tender crumb.
Room Temperature: Fresh for up to 2 days in an airtight container or wrapped in a clean kitchen towel. If you’re serving them the same day, cover with a towel to keep the tops from drying out.
Refrigerator Storage: 3–4 days in an airtight container. Rewarm gently in a 300°F oven for about 8–10 minutes or a quick 15–20 seconds in the microwave if you’re in a rush, then glaze immediately for that fresh look.
Freezer Instructions: Freeze baked scones individually wrapped for up to 2–3 months. Thaw at room temperature and rewarm in a 350°F oven for 8–10 minutes. Glaze after heating for that just-made glow.
Glaze Timing Advice: If you’re freezing, skip the glaze on first bake and add it after reheating. If you’re storing unfrosted, glaze just before serving to ensure that glossy finish and bright sweetness remain intact.
These little tips save you from soggy bottoms and dryness, turning leftovers into a quick, cozy snack rather than a near-forgotten crumb tray. I’ve definitely learned to plan ahead—a quick bake the night before a gathering means you wake up to the best kind of problem: empty plates and happy guests.
Frequently Asked Questions
Final Thoughts
If you’re craving something that feels like a warm hug from a friend, these buttermilk scones are it. They’re forgiving, cozy, and always a hit, whether you serve them with coffee after a long day or cut them into little rounds for a celebratory brunch. The crumb stays tender, the edges stay crisp, and the scent lingers long after the plate is empty. I’m continuously surprised by how such a simple dough can feel like a small ceremony—every bake is a quiet moment of comfort and a gentle nudge to slow down and savor the little things. If you try this, come back and tell me what filling you love most or which glaze makes your kitchen sing. Happy baking, friend, and may your mornings be as warm as these scones. Can’t wait to hear how yours turns out!

buttermilk scones
Ingredients
Main Ingredients
- 2.5 cups all-purpose flour
- 0.33 cup granulated sugar
- 1 tablespoon baking powder
- 0.5 teaspoon salt
- 0.5 cup cold unsalted butter cut into cubes
- 1 cup cold buttermilk
- 1 large egg beaten, for egg wash
Instructions
Preparation Steps
- Preheat your oven to 425°F (220°C) and line a baking sheet with parchment paper.
- In a large bowl, whisk together the flour, sugar, baking powder, and salt.
- Cut in the cold butter using a pastry blender or your fingertips until the mixture resembles coarse crumbs.
- Pour in the cold buttermilk and mix until just combined. Do not overmix.
- Turn the dough out onto a lightly floured surface and gently pat it into a 0.75-inch thick disc.
- Cut the disc into 8 wedges using a sharp knife or pizza cutter.
- Place the scones on the prepared baking sheet and brush the tops with the beaten egg.
- Bake for 15-18 minutes, or until golden brown and cooked through.
- Let cool slightly on the baking sheet before transferring to a wire rack.
Notes
Featured Comments
“Impressed! Clear steps and so flavorful results. Perfect for busy nights.”
“New favorite here — super easy. crowd-pleaser was spot on.”
“Super easy and turned out amazing! My family asked for seconds. Saving this one.”
“This sweet treat was absolutely loved — the bright really stands out. Thanks!”
“Made it tonight and wow — turned out amazing! Will definitely make buttermilk scones again.”
“Packed with flavor and so simple. Exactly what I wanted from buttermilk scones.”


