

I’ll never forget the first time I swapped a big, deep-fried cannoli shell for something you can whip up in under an hour. It happened on a chaotic weeknight when the kitchen smelled like a bakery and I needed a hug in dessert form. I pulled out a stack of wonton wrappers, my grandma’s ricotta tucked in the fridge, and somehow turned a classic Italian favorite into something that felt just as indulgent but a whole lot quicker. These Cannoli Cups are the kind of recipe that disappears in minutes at my house—and I suspect they’ll vanish at yours, too. Think of them as the grown-up, make-ahead cousin of the traditional cannoli, with crisp shells that bake up beautifully in a muffin tin and a filling that’s dreamy, silky, and not overly sweet. This version is a little playful, a little nostalgic, and a lot of fun to assemble with friends or kids helping with the “filling party.” I’ve made these countless times and they never fail to bring a smile to the table. And yes, the smell alone brings everyone to the kitchen. Welcome to my favorite, no-fuss cannoli cups recipe.

What is cannoli cup?
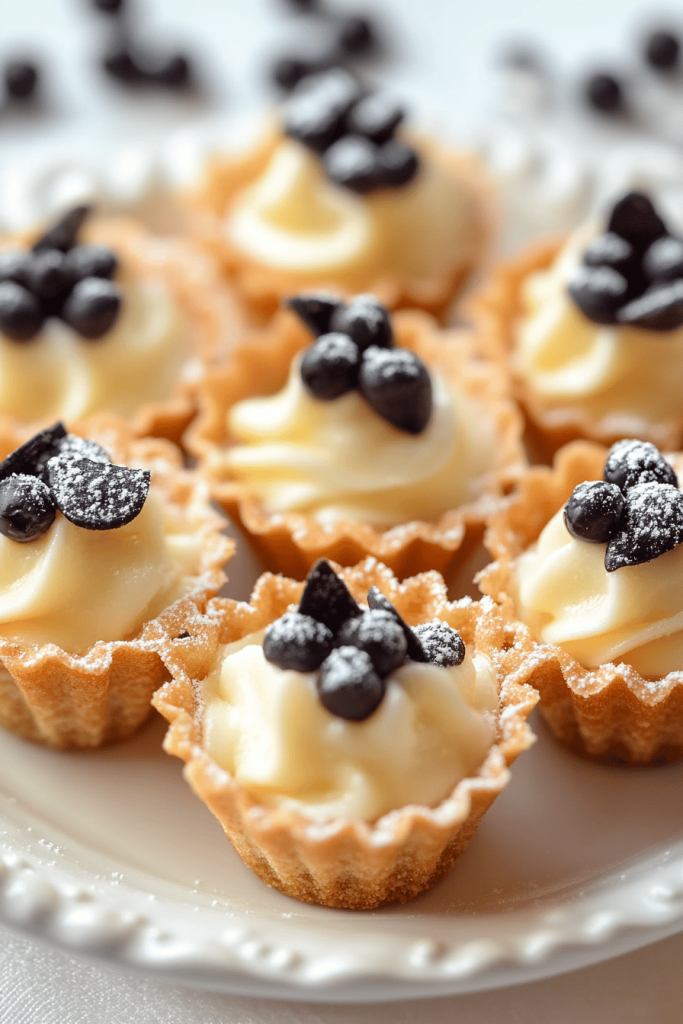
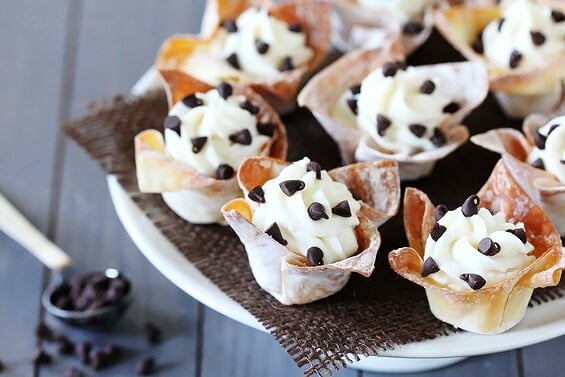
Cannoli cups are essentially mini cannoli shells formed in a muffin tin, then filled with a luscious ricotta-cream filling and finished with a glaze or chocolate drizzle. Think of it as a clever, bake-and-fill adaptation of the classic: no deep-frying, no hard-to-handle long tubes, just crisp, curling little cups that hold a cloudlike filling. The name comes from the way the shells resemble tiny cups—perfect for cradling a generous spoonful of filling. It’s essentially a creative shortcut that keeps all the flavors you love—vanilla, citrus, chocolate, and ricotta—while dialing down the mess and time. I love how flexible they are: you can swap citrus zest for a touch of almond, fold in mini chocolate chips, or dust with cinnamon sugar for a warmer finish. This is one of those recipes that feels like a cheat in the best possible way—delicious, impressive, and totally doable on a weeknight.
How do I make cannoli cups?
Quick Overview
Here’s the quick version: line a mini muffin tin with wonton wrappers, brush with a little butter and cinnamon sugar, and bake until the edges crisp and brown. Meanwhile, whisk together ricotta, powdered sugar, vanilla, and a splash of citrus zest. Once the shells are cooled, spoon or pipe the filling into each cup, then drizzle with melted chocolate or a citrus glaze. The result is a hold-in-your-hand dessert that looks fancy but comes together in about an hour, with much of that time focused on crisping the shells. Trust me on this one—these cannoli cups deliver that classic cannoli flavor in a more approachable, less fussy format.
Ingredients
For the Main Batter:
- 36 wonton wrappers (round or square, store-brand is fine) – they’re sturdy enough to hold the filling but delicate enough to crisp beautifully. If you can, pick the thin variety so they’re extra crisp.
- 4 tablespoons unsalted butter, melted – for brushing on shells so they brown without drying out.
- 1 teaspoon cinnamon sugar (mix 1 teaspoon sugar with ¼ teaspoon ground cinnamon) – this adds a subtle warmth that echoes the classic cannoli flavor.
- Optional pinch of flaky salt – just a whisper to balance the sweetness.
For the Filling:
- 1 ½ cups whole-milk ricotta (drained well, or use part-skim if you prefer a lighter texture)
- ¾ cup powdered sugar, sifted (adjust to taste if you like it sweeter)
- 1 teaspoon pure Vanilla Extract
- Zest of 1 small orange or lemon (optional but magical for brightness)
- ½ cup mini chocolate chips or finely chopped dark chocolate
- ¼ cup heavy cream or to taste (optional, for extra silkiness)
For the Glaze:
- ½ cup confectioners’ sugar
- 2–3 teaspoons milk or lemon juice (adjust for your desired glaze consistency)
- 1–2 teaspoons melted dark chocolate for a chocolate drizzle (optional)
Step-by-Step Instructions
Step 1: Preheat & Prep Pan
Preheat your oven to 350°F (175°C). Lightly grease a mini muffin tin or line with nonstick parchment cups. I like to brush each cup with a tiny bit of melted butter so the shells release cleanly. If you’re worried about sticking, give the cups a quick spray with cooking spray after greasing; it’s a tiny step, but it saves you from frustrating shell breakage later.
Step 2: Mix Dry Ingredients
In a small bowl, whisk together the cinnamon sugar and a pinch of salt. This is your flavor inside the shells, so don’t skip it. It should be just enough to lightly perfume the air as the shells bake and to offer a little bite when you bite into them.
Step 3: Mix Wet Ingredients
In a separate small bowl, melt the butter and let it cool just a touch. You’ll brush this onto the wonton wrappers to help them crisp and brown. If you like a glossier finish, you can add a tiny splash of water to the butter to loosen it a bit, but I usually keep it simple with just melted butter.
Step 4: Combine
Gently brush each wonton wrapper with a thin layer of the melted butter, then sprinkle a touch of the cinnamon sugar on top. Twist the wrappers into a small cup shape and tuck them into the muffin tin cups. If you have any wrappers that overlap or don’t want to stand up, a tiny dab of butter on the edges acts like glue, helping them keep their form while they bake.
Step 5: Prepare Filling
In a medium bowl, mix the ricotta, powdered sugar, vanilla, and citrus zest until silky and homogeneous. Fold in the mini chocolate chips. If you’re after extra silkiness, whisk in the heavy cream a little at a time until you reach a soft, pipeable texture. Taste and adjust the sweetness if needed. My trick is to chill the filling for 15 minutes before filling the cups—it makes it easier to handle and keeps the filling from oozing out as you pipe.
Step 6: Layer & Swirl
Once the shells are baked and cooled, spoon or pipe a generous amount of filling into each cup. If you’re feeling fancy, do a quick swirl with the back of a spoon to create a little ridge for the glaze. A decorative swirl not only looks pretty but helps keep the filling neatly contained inside each cup.
Step 7: Bake
There’s no more baking for the filling—only the shells. Bake the shells for about 8–10 minutes, or until they are deeply golden and crisp. If your wrappers puff up too much, you can press them down gently with a paring knife while they’re hot to maintain a neat cup shape. Remove from the oven and let them cool completely on a rack before filling.
Step 8: Cool & Glaze
Cool the filled cups for at least 15 minutes. For the glaze, whisk together the confectioners’ sugar with enough milk or lemon juice to reach a drizzle-able consistency. Drizzle lightly over each cannoli cup, or skip the glaze and dust with a tiny bit of cocoa or extra zest for color and aroma. If you prefer a chocolate finish, melt a little dark chocolate and pipe a thin line across the top of each cup for a chic tuxedo look.
Step 9: Slice & Serve
These cannoli cups are best served the day they’re filled for the sharpest shell crispness. If you need to hold them for a short while, store the cooled shells in an airtight container and fill just before serving to preserve that incredible contrast between the crisp shell and the creamy filling. When you set them on the plate, a little citrus zest confetti or a few extra chocolate chips scattered on top make them look instantly tempting. My family swears these taste even better once the flavors have had a few minutes to mingle, so don’t rush the filling process—let the filling rest while the shells cool completely for a moment, then you’re in for a guaranteed wow.
What to Serve It With
These cannoli cups are adorable on their own, but they shine when paired with a few complementary treats. Here are ideas organized by occasion:
For Breakfast: A light espresso or a creamy macchiato, plus a small bowl of fresh berries to balance the sweetness. The bright citrus notes in the filling pair surprisingly well with a respectfully strong coffee aroma, making this a gentle, indulgent morning treat.
For Brunch: Serve alongside a ricotta-almond crostata or a light chocolate-covered biscotti. A sparkling lemon water or a berry spritzer keeps things lively and refreshing between bites.
As Dessert: Pair with a glass of prosecco or a rich Italian dessert wine. The filling’s vanilla and citrus highlights echo the wine’s fruitiness, while the crisp shells provide the texture contrast your fork will thank you for.
For Cozy Snacks: Plate them with a mug of warm cinnamon tea or a hot chocolate with a pinch of orange zest. They’re a little fancy, but they fit perfectly into a casual evening in, especially when you’re watching a movie and want something a bit special without much fuss.
Top Tips for Perfecting Your Cannoli Cups
Here are a few tried-and-true strategies that keep these cups reliable and delicious every time.
Shell Prep: Use thin wonton wrappers and brush lightly with butter. If you like extra crunch, bake a minute or two longer, but watch closely—they can go from golden to burnt fast. If you’re dragging your feet on shaping, place the shells in the muffin cups with a tiny pinch of butter to help them hold their form as they bake.
Filling Consistency: Drain ricotta well and press between paper towels to remove excess moisture. A drier filling holds up better in the cups and avoids a soggy shell. If you want it extra creamy, add a splash of heavy cream or a teaspoon of mascarpone for richness without heaviness.
Texture Balance: For a little extra texture, fold in finely chopped pistachios or candied orange peel. It adds a nice pop of color and a welcome crunch that contrasts with the cream.
Swirl & Pattern: If you’re piping, try a simple two-color swirl: fill half the cups with the standard ricotta and dust the top with cocoa powder. Then pipe a thin line of the remaining filling on top in a spiral pattern for a visual “cannoli” look without extra effort.
Ingredient Swaps: Swap orange zest for lemon, or add a teaspoon of espresso powder to the filling for a tiramisu-inspired bite. You can also use a whipped ricotta mixture (ricotta folded with a bit of Whipped Cream) for an even lighter texture, but keep the sugar balanced so it doesn’t taste flat.
Baking Tips: If your oven runs hot, test one shell first. You don’t want the shells to brown too quickly or the centers to stay soft. Position the rack in the middle to ensure even browning. If you’re making these for a party, bake shells ahead and refrigerate them unfilled; fill just before serving to preserve maximum crispness.
Glaze Variations: A glaze adds shine and sweetness. To keep things light, mix confectioners’ sugar with lemon juice and a touch of vanilla. For a bolder finish, melt a little dark chocolate and drizzle it across the tops. A light dusting of citrus zest over the glaze feels festive and fragrant.
Lessons I’ve learned: the best cannoli cups come from patience with the shells and a filling that stands up to the moment you bite into them. Don’t rush the cooling, don’t skimp on the vanilla, and don’t be afraid to tweak the citrus to match your palate. This is one of those recipes where your home kitchen becomes a little pastry shop, and you’re the star baker behind the counter asking for opinions from the people you love.
Storing and Reheating Tips
Carnival-worthy desserts don’t have to be finished in the moment. Here’s how I keep these cannoli cups fresh and delicious.
Room Temperature: Shells, when stored in an airtight container, stay crisp for about 1–2 days. Fill a little closer to serving time to preserve that contrast between shell and filling.
Refrigerator Storage: If you’ve prepared the shells ahead, store them in a dry container at room temperature. The filling can be kept in the fridge for up to 2 days; bring it to a light chill and re-whip briefly before filling to restore its texture.
Freezer Instructions: Shells freeze well when kept in a sealed container in a single layer to prevent sticking. Fillings don’t freeze as well—textures can become grainy—so I recommend freezing the shells only and assembling fresh fillings when you’re ready to serve.
Glaze Timing Advice: If you plan to glaze, drizzle just before serving to keep the glaze glossy and not sticky. If you’re freezing shells, skip the glaze and add it after thawing and filling.
In my kitchen, these hold up beautifully for a small party or a weekend breakfast tray, but for absolute peak texture, I recommend making the shells a day ahead and storing them in a cool, dry place until you’re ready to fill and serve.
Frequently Asked Questions
Final Thoughts
If you’ve ever wanted something that feels special but is truly doable on a weeknight, these cannoli cups are your answer. They capture all the comforting flavors of a classic cannoli—the creamy filling, the citrus brightness, the hint of vanilla—without the time sink of rolling shells and frying. I’ve served them as a finale to a pasta night, tucked them into a brunch buffet, and even surprised guests with a mini-dessert bar at a party. The shells stay crisp, the filling stays fluffy, and the glaze adds just the right amount of shine. My family loves how the little cups look on a plate, how they crackle when you bite through, and how forgiving they are if you’re a little heavy-handed with the chocolate chips. I hope you’ll try them, tweak them to your taste, and find your own little rituals around this recipe. Happy baking, friends—and can’t wait to hear how yours turn out!
Cannoli Cups
Ingredients
For the Cups
- 1 package wonton wrappers
- 0.5 cup melted butter
For the Filling
- 15 ounces ricotta cheese whole milk, drained
- 0.5 cup powdered sugar
- 1 teaspoon vanilla extract
- 0.25 cup mini chocolate chips
Optional Toppings
- candied orange peel chopped
- chopped pistachios
Instructions
Preparation Steps
- Preheat oven to 375°F (190°C). Lightly grease a standard 12-cup muffin tin.
- Cut each wonton wrapper into quarters. Brush both sides of each wonton piece with melted butter. Press 2-3 buttered wonton pieces into each muffin cup, overlapping slightly to form a cup shape.
- Bake for 8-10 minutes, or until golden brown and crispy. Let cool in the muffin tin for a few minutes before carefully removing them to a wire rack to cool completely.
- In a medium bowl, combine the drained ricotta cheese, powdered sugar, and vanilla extract. Mix until smooth and well combined.
- Gently fold in the mini chocolate chips.
- Spoon or pipe the ricotta filling into the cooled cannoli cups. Garnish with chopped candied orange peel or pistachios, if desired.
- Chill for at least 30 minutes before serving to allow the filling to set.
Notes
Featured Comments
“I love how this simplifies a classic dessert—perfect for busy nights! Do the cups hold up well when made ahead?”
“That’s such a game-changer—so much easier than the deep-fried version and just as delicious!”
“Impressed! Clear steps and turned out amazing results. Perfect for busy nights.”
“New favorite here — creamy. crowd-pleaser was spot on.”
“Super easy and turned out amazing! My family asked for seconds. Saving this one.”
“This sweet treat was absolutely loved — the rich really stands out. Thanks!”


That’s such a game-changer—so much easier than the deep-fried version and just as delicious!
I love how this simplifies a classic dessert—perfect for busy nights! Do the cups hold up well when made ahead?