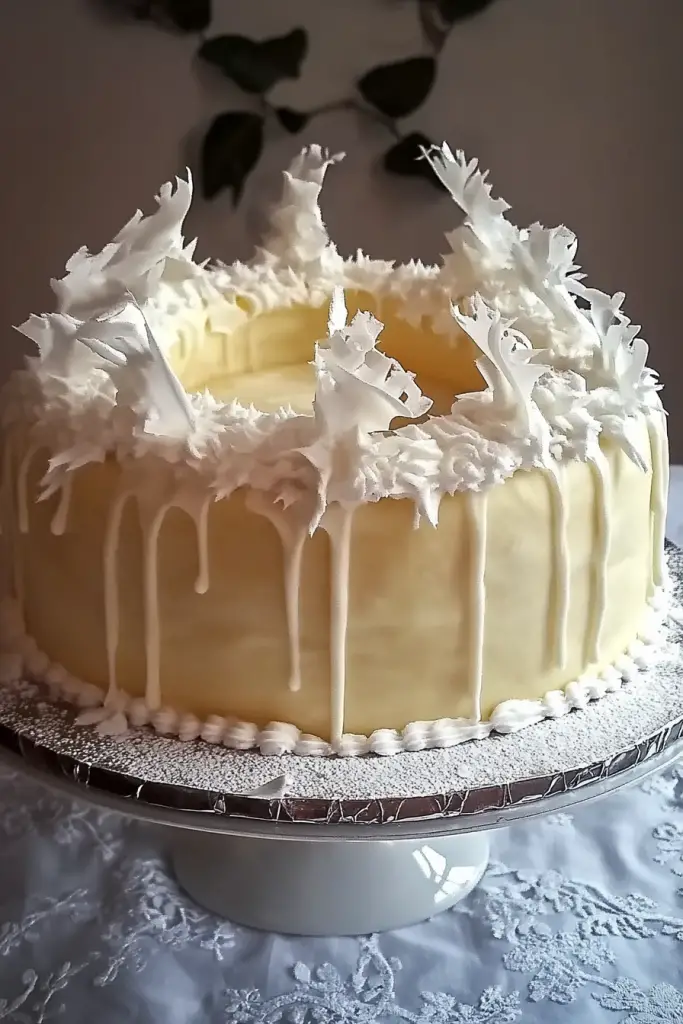
Oh, where do I even begin with this cake? It’s called the “Catch a Husband” cake in my family, and while that might sound a little old-fashioned or even a tad cheeky, there’s a whole lot of truth packed into that name. It’s not just about snagging a partner, mind you. It’s about that moment when you pull this beauty out of the oven, and the aroma just fills your entire home – warm, sweet, and utterly comforting. I remember the first time I made it. I was a nervous young thing, trying to impress my now-husband’s mother, and let me tell you, this cake was my saving grace. It’s a bit like a really, really good Zucchini Bread, but elevated. Think of it as the sophisticated cousin of your everyday quick bread, with a swirl of something magical and a glaze that just seals the deal. It’s the kind of dessert that makes people stop, take a deep breath, and just sigh with happiness. It’s surprisingly simple to whip up, too, which is always a huge win in my book, especially when life gets a bit hectic. Honestly, it’s a recipe that has earned its permanent spot on my baking rotation, and I’m so excited to finally share it with you. If you’ve ever tried a really moist, flavorful, not-too-sweet chocolate cake, this is in that ballpark, but with a secret ingredient that takes it to a whole new level.
What is catch a husband cake?
So, what exactly *is* this “Catch a Husband” cake? Well, at its heart, it’s a wonderfully moist, tender cake with a rich, slightly spiced, and beautifully swirled filling. The name, as I mentioned, is more about the effect it has on people – it’s so delightful, so comforting, that it’s almost guaranteed to win hearts. It’s not overly fussy, which is part of its charm. It relies on humble ingredients, but when you put them together, something truly special happens. Imagine a cake that’s moist from the inside out, with pockets of sweet, slightly tangy goodness swirled throughout. It’s not a dense cake, nor is it super airy. It’s somewhere perfectly in between, giving you that satisfying bite without being heavy. It’s the kind of dessert you can serve at a fancy gathering or just enjoy with a cup of tea on a rainy afternoon. It’s essentially a hug in cake form, and who wouldn’t want to catch a piece of that?
How do I make a “Catch a Husband” cake?
Quick Overview
This cake comes together like a dream. You’ll start by creaming butter and sugar until it’s light and fluffy, then add your wet ingredients. Separately, you’ll whisk together the dry ingredients, and then gently combine them with the wet. While that’s happening, you’ll whip up a quick, flavorful filling. The magic happens when you layer the batter and filling into your prepared pan, swirl it all together for that beautiful marbled effect, and bake it until golden and fragrant. A simple glaze drizzled over the top is the final flourish. It’s honestly one of the most straightforward cakes you’ll ever bake, and the results are consistently stunning.
Ingredients
For the Main Batter:
You’ll need 1 cup (2 sticks) unsalted butter, softened to room temperature. Make sure it’s truly soft, not melted, for the best texture. And don’t skimp on the quality here; good butter makes a difference! Then, 2 cups granulated sugar. I find this amount gives a lovely sweetness without being overwhelming. You’ll also need 4 large eggs, at room temperature. Room temperature eggs emulsify better, leading to a smoother batter. And for that incredible moisture, you’ll need 1 cup buttermilk. If you don’t have buttermilk, you can make your own by adding 1 tablespoon of lemon juice or white vinegar to 1 cup of milk and letting it sit for 5-10 minutes. Finally, 2 teaspoons pure Vanilla Extract for that classic warm flavor.
For the Dry Ingredients:
This is where a lot of the cake’s structure comes from. You’ll want 3 cups all-purpose flour, spooned and leveled. I always say to spoon it into the cup and then level it off with a straight edge – don’t scoop directly from the bag, as it can pack too much flour. Then, 1 teaspoon baking soda and 1/2 teaspoon baking powder. These leavening agents work together to give the cake its lift. And a pinch of salt, about 1/2 teaspoon, to balance out the sweetness and enhance the flavors.
For the Filling:
This is the star of the show! You’ll need 1 cup packed light brown sugar. The brown sugar adds a lovely caramel note. Then, 2 tablespoons all-purpose flour, which helps thicken the filling. 1 teaspoon ground cinnamon for warmth and spice. And 1/2 cup (1 stick) unsalted butter, melted. This creates a rich, gooey swirl that’s just divine.
For the Glaze:
To finish it all off, you’ll need 1 cup powdered sugar, sifted to avoid lumps. And 2-3 tablespoons milk (or buttermilk for extra tang), added gradually until you reach your desired drizzling consistency. A splash of vanilla extract (1/2 teaspoon) is also nice here, though optional.
Step-by-Step Instructions
Step 1: Preheat & Prep Pan
First things first, get your oven preheating to 350°F (175°C). This ensures it’s at the perfect temperature when your batter is ready. Next, grab a 9×13 inch baking pan. I always like to grease it thoroughly with butter or baking spray, and then lightly flour it. This prevents any sticking and makes getting the cake out a breeze. Run your hands around the edges of the pan after flouring to make sure any excess is removed – you don’t want white flour marks on your beautiful cake.
Step 2: Mix Dry Ingredients
In a medium bowl, whisk together your 3 cups of all-purpose flour, 1 teaspoon baking soda, 1/2 teaspoon baking powder, and 1/2 teaspoon salt. Whisking them together ensures that the leavening agents are evenly distributed throughout the flour, which is crucial for an even rise. You want everything to be well combined and look uniformly blended. This step is simple but mighty important!
Step 3: Mix Wet Ingredients
Now, in a large mixing bowl, cream together the 1 cup of softened butter and 2 cups of granulated sugar. Beat this with an electric mixer (a stand mixer or hand mixer works perfectly) on medium-high speed until it’s pale and fluffy. This usually takes about 3-5 minutes. This creaming process incorporates air into the batter, which contributes to the cake’s tender texture. Then, beat in the 4 large eggs, one at a time, making sure each egg is fully incorporated before adding the next. Scrape down the sides of the bowl as needed. Finally, stir in the 1 cup of buttermilk and 2 teaspoons of vanilla extract until just combined. Don’t overmix here.
Step 4: Combine
Gradually add the dry ingredients to the wet ingredients, mixing on low speed until just combined. It’s super important not to overmix the batter once the flour is added. Overmixing can develop the gluten too much, resulting in a tough cake. You want to mix just until you no longer see streaks of dry flour. A few small lumps are perfectly fine. Your batter should be thick but pourable.
Step 5: Prepare Filling
While the batter is resting for a moment, let’s get that dreamy filling ready. In a separate small bowl, combine the 1 cup packed light brown sugar, 2 tablespoons all-purpose flour, and 1 teaspoon ground cinnamon. Whisk these dry ingredients together until they’re well combined. Then, pour in the 1/2 cup of melted butter and stir until you have a thick, paste-like consistency. It might seem a little dry at first, but keep stirring, and it’ll come together. This filling is what gives the cake its signature swirl and incredible flavor!
Step 6: Layer & Swirl
Now for the fun part! Pour about half of the cake batter into your prepared 9×13 inch pan, spreading it evenly. Spoon dollops of the filling mixture evenly over the batter. Don’t worry about being precise; just distribute it. Then, pour the remaining cake batter over the top of the filling. Now, grab a butter knife or a skewer and gently swirl the filling into the batter. You want to create beautiful marbled patterns without over-mixing and blending everything into one color. Just a few gentle swirls will do the trick! Aim for zig-zag motions or figure-eights.
Step 7: Bake
Pop that pan into your preheated oven. Bake for 35-45 minutes, or until a wooden skewer or toothpick inserted into the center of the cake comes out clean. Baking times can vary depending on your oven, so start checking around the 35-minute mark. The cake should be golden brown around the edges and slightly puffed in the center. If the top starts browning too quickly, you can loosely tent it with aluminum foil.
Step 8: Cool & Glaze
Once it’s out of the oven, let the cake cool in the pan on a wire rack for about 15-20 minutes. This allows it to set up properly. While it’s cooling, prepare the glaze. In a small bowl, whisk together the 1 cup sifted powdered sugar and 2-3 tablespoons of milk (or buttermilk) until smooth and pourable. You want it thin enough to drizzle easily but thick enough to coat. Once the cake has cooled for a bit, drizzle the glaze all over the top. I love seeing it drip down the sides! Let the glaze set for another 10-15 minutes before slicing.
Step 9: Slice & Serve
And there you have it – your stunning “Catch a Husband” cake! Once the glaze has set, you can slice it into squares or rectangles. I find that a sharp knife makes for clean cuts. Serve it warm or at room temperature. It’s truly delicious either way!
What to Serve It With
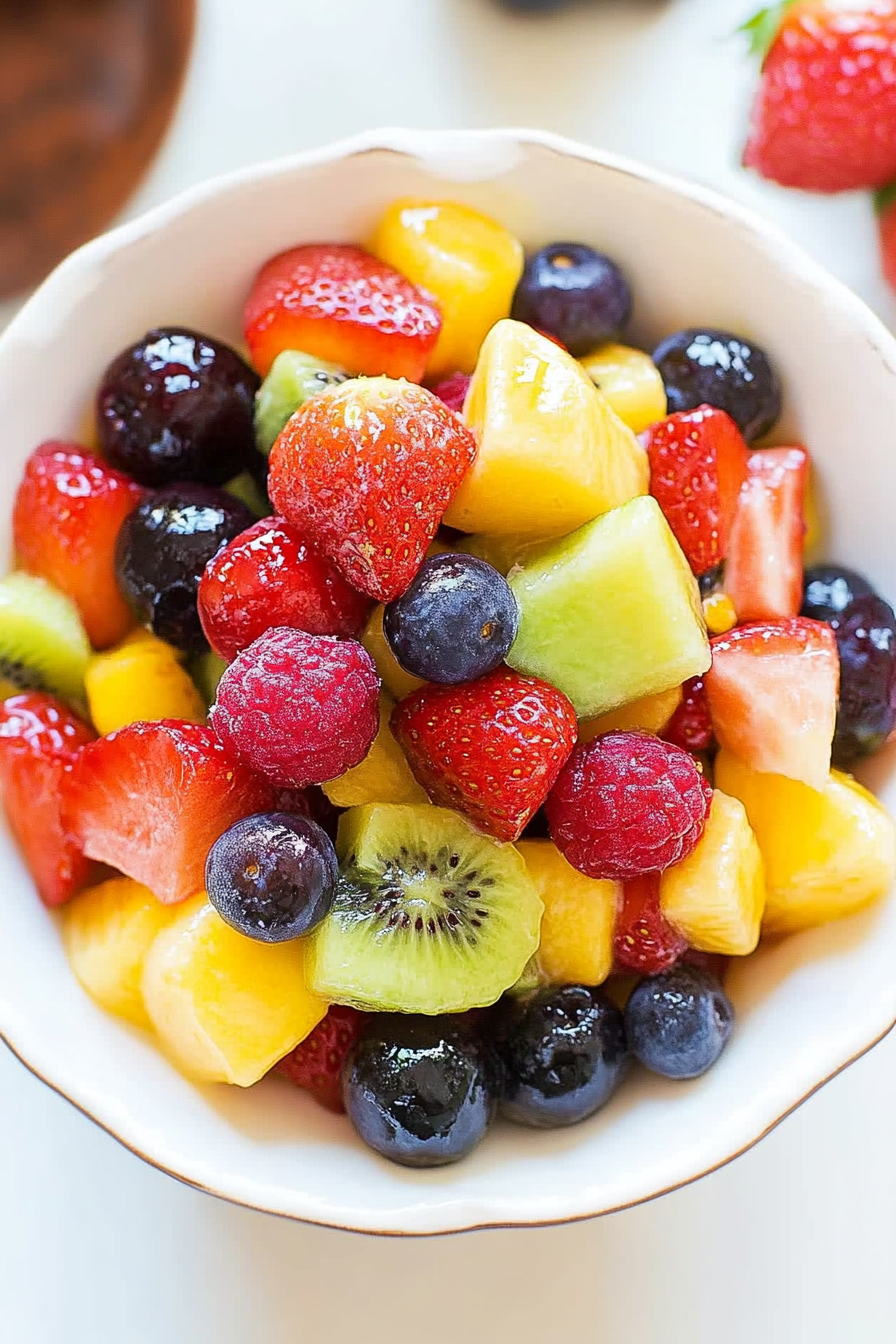
This “Catch a Husband” cake is so versatile, it fits into just about any meal or occasion. For a delightful Breakfast, I love slicing it thick and serving it warm with a steaming mug of strong black coffee or a creamy latte. It’s the perfect sweet start to the day, especially on a weekend. For Brunch, it really shines. I often serve it as part of a larger spread with fresh fruit salad, maybe some scrambled eggs or quiche, and a mimosa or fresh orange juice. It adds that touch of elegance and sweetness that everyone enjoys. As a Dessert, it’s a winner! A scoop of good quality vanilla bean Ice Cream or a dollop of freshly whipped cream takes it to the next level. A drizzle of chocolate sauce wouldn’t hurt either! And for those Cozy Snacks, it’s perfect on its own, perhaps with a glass of milk or a comforting cup of herbal tea. My family has a tradition of having this cake on movie nights, cut into smaller squares, of course!
Top Tips for Perfecting Your “Catch a Husband” Cake
Over the years, I’ve learned a few tricks that make this cake absolutely perfect every single time. For the Zucchini Prep, if you decide to add a cup of grated zucchini (yes, you can totally add it for extra moisture!), make sure you squeeze out as much liquid as possible. Grate it finely and then wrap it in a clean kitchen towel or cheesecloth and wring it out vigorously. This prevents a soggy cake. For Mixing Advice, I can’t stress enough the importance of not overmixing once the flour is added. Mix just until the flour disappears. You should aim for a batter that’s thick but still pourable. If it seems too stiff, a tiny splash more buttermilk can help, but be cautious. When it comes to Swirl Customization, don’t be afraid to experiment! You can add a few drops of food coloring to your filling for a fun pop of color, or even a tablespoon of cocoa powder for a chocolate swirl within the filling itself. For Ingredient Swaps, if you’re out of buttermilk, that homemade version I mentioned earlier works perfectly. I’ve also experimented with using half Whole Wheat flour and half all-purpose flour for a slightly nuttier flavor, but the texture might change slightly. For Baking Tips, always know your oven. If you find your oven runs hot, you might need to reduce the temperature slightly or shorten the baking time. Testing for doneness with a skewer is your best bet. For Glaze Variations, if you prefer a less sweet glaze, use more milk and less powdered sugar. You can also add a little lemon zest or orange zest to the glaze for a citrusy kick. And for a richer glaze, a tablespoon of melted butter can be stirred in.
Storing and Reheating Tips
This “Catch a Husband” cake is wonderfully forgiving when it comes to storage. At Room Temperature, it will stay fresh and delicious for about 2-3 days if stored in an airtight container. I usually just cover the pan tightly with plastic wrap or transfer it to a cake keeper. The moisture from the cake and filling helps keep it from drying out. For Refrigerator Storage, if you want it to last a bit longer, up to a week, keep it in an airtight container in the fridge. It will be a little firmer when cold, but still perfectly edible. Just let it sit at room temperature for about 20-30 minutes before serving to bring it back to its best texture. Freezer Instructions are also a lifesaver! You can freeze the unfrosted cake for up to 3 months. Wrap it tightly in a couple of layers of plastic wrap, then a layer of aluminum foil. To thaw, remove the foil and let it thaw in the refrigerator overnight. You can also thaw it at room temperature, but be mindful of condensation. For Glaze Timing Advice, I always recommend applying the glaze *after* the cake has cooled completely, especially if you plan to store it at room temperature or in the fridge. If you’re freezing, it’s best to glaze the cake *after* it has thawed. This ensures the glaze stays nice and pristine.
Frequently Asked Questions
Final Thoughts
So there you have it – my beloved “Catch a Husband” cake! I truly hope you give this recipe a try. It’s more than just a cake; it’s a little piece of comfort, a guarantee of deliciousness, and honestly, a recipe that just makes people happy. It’s the perfect example of how simple ingredients and a little bit of love can create something truly spectacular. It’s the kind of dessert that brings people together, sparks conversations, and leaves a lasting impression. If you’re looking for a go-to recipe that’s consistently amazing, relatively easy, and always a hit, this is it. And if you end up sharing it, well, I can’t promise anything, but the name does have a certain… charm, doesn’t it? I’d absolutely love to hear how yours turns out, so please leave a comment below and let me know your thoughts! Feel free to share any variations you try too – I’m always eager to learn new ways to enjoy this wonderful cake. Happy baking!

Catch a Husband Cake
Ingredients
Cake Layers
- 2.5 cups all-purpose flour
- 1.5 cups granulated sugar
- 0.75 cups unsweetened cocoa powder
- 1.5 teaspoons baking soda
- 0.75 teaspoons baking powder
- 0.75 teaspoons salt
- 2 large eggs room temperature
- 1 cup buttermilk room temperature
- 0.5 cup vegetable oil
- 2 teaspoons vanilla extract
- 1 cup hot water
Cream Cheese Frosting
- 1 cup unsalted butter softened
- 8 ounces cream cheese softened
- 4 cups powdered sugar
- 2 teaspoons vanilla extract
- 0.25 cup milk or heavy cream, as needed for consistency
Instructions
Prepare the Cake
- Preheat oven to 350°F (175°C). Grease and flour two 9-inch round cake pans.
- In a large bowl, whisk together flour, sugar, cocoa powder, baking soda, baking powder, and salt.2.5 cups all-purpose flour
- In a separate medium bowl, whisk together eggs, buttermilk, oil, and vanilla extract.2.5 cups all-purpose flour
- Add the wet ingredients to the dry ingredients and mix until just combined. Gradually add the hot water and mix until the batter is smooth and thin.2.5 cups all-purpose flour
- Pour the batter evenly into the prepared cake pans.
- Bake for 30-35 minutes, or until a wooden skewer inserted into the center comes out clean.
- Let the cakes cool in the pans for 10 minutes before inverting them onto a wire rack to cool completely.
Make the Frosting
- In a large bowl, beat the softened butter and cream cheese together until smooth and creamy.2.5 cups all-purpose flour
- Gradually add the powdered sugar, alternating with the milk, and beat until the frosting is light and fluffy. Stir in the vanilla extract.2.5 cups all-purpose flour
Assemble the Cake
- Once the cake layers are completely cool, place one layer on a serving plate. Spread a generous amount of frosting over the top.2.5 cups all-purpose flour
- Place the second cake layer on top and frost the entire cake, including the sides.2.5 cups all-purpose flour
- Decorate as desired. Chill for at least 30 minutes before slicing and serving.
Notes
Featured Comments
“Impressed! Clear steps and absolutely loved results. Perfect for busy nights.”
“New favorite here — turned out amazing. crowd-pleaser was spot on.”
“Super easy and turned out amazing! My family asked for seconds. Saving this one.”
“This sweet treat was absolutely loved — the balanced really stands out. Thanks!”
“Made it tonight and wow — so flavorful! Will definitely make Catch a Husband Cake again.”
“Packed with flavor and so simple. Exactly what I wanted from Catch a Husband Cake.”