

Oh, hello there! Come on in, make yourself comfortable. I’ve got a pot of coffee brewing and something truly special I’ve been dying to share with you. You know how sometimes you just crave something that’s a little bit sweet, a little bit decadent, but surprisingly easy to whip up? Well, I’ve found the answer, and it’s this amazing Cherry Bomb recipe. Honestly, it’s become my go-to for everything from a quick weekend treat to a surprise dessert when friends pop over. I remember the first time I made this; I was a bit nervous because I’d heard the name and thought it sounded intimidating, but it turned out to be so wonderfully simple. It’s like a delightful explosion of cherry goodness that just melts in your mouth. If you’ve ever had those incredibly moist, flavorful coffee cakes or bundt cakes, this has that same comforting vibe, but with a unique, vibrant twist that makes it totally unforgettable. It’s truly one of those recipes that feels like a secret weapon in my baking arsenal.
What is the recipe for the Cherry Bomb?
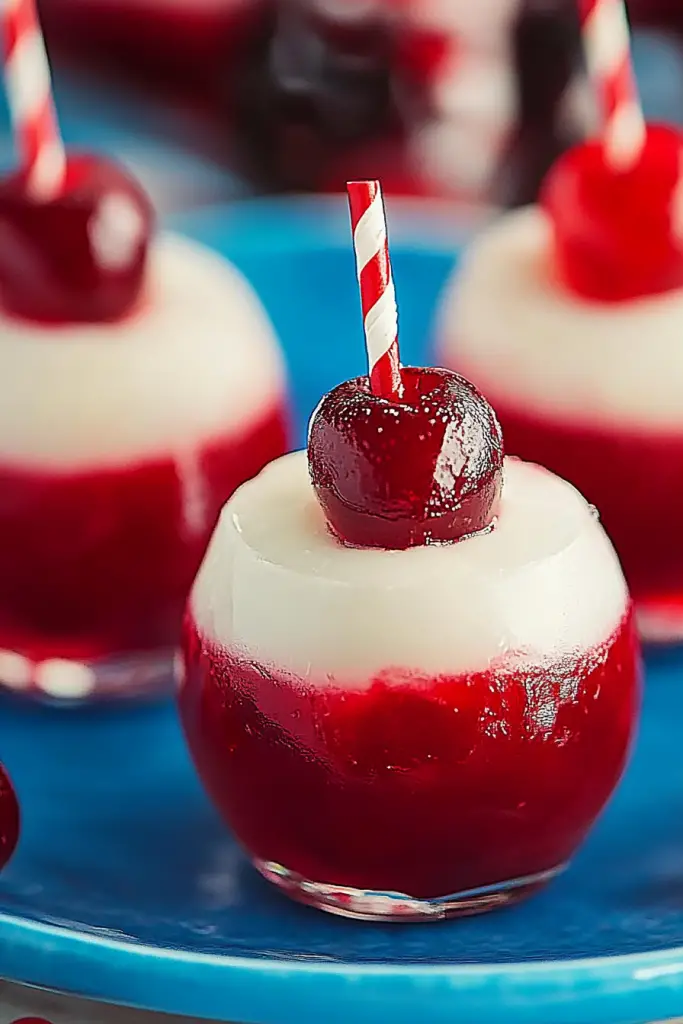
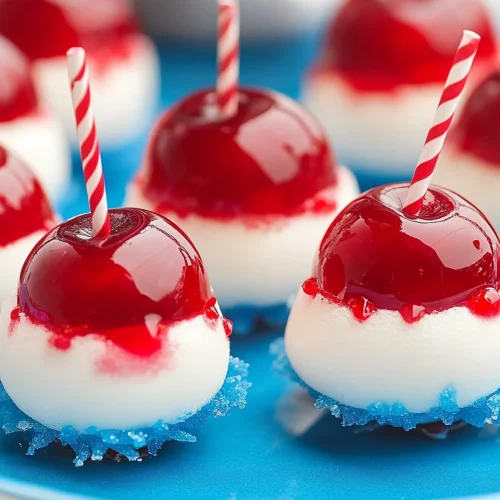
So, what exactly *is* this “Cherry Bomb recipe” that’s got me so excited? Think of it as a super moist, tender cake or quick bread, usually baked in a loaf or bundt pan, that’s absolutely studded with bright, slightly tart cherries. The “bomb” part comes from the sheer impact of flavor and texture – it’s not shy! It’s got a beautiful, almost blush-pink hue from the cherries and a rich, buttery crumb that’s just pure comfort. The name might sound a bit dramatic, but it perfectly captures that moment when you take a bite and get a burst of cherry deliciousness. It’s essentially a love letter to cherries, elevated with simple ingredients and a whole lot of love. It’s not overly complicated, which is a huge win in my book. It’s more akin to a wonderfully forgiving quick bread or a rustic cake that doesn’t demand fussy decorating.
How to Make The Cherry Bomb Recipe
Quick Overview
Making this Cherry Bomb recipe is wonderfully straightforward. You’ll basically whisk together your dry ingredients, mix your wet ingredients, combine them gently, fold in the cherries, and bake until golden and a tester comes out clean. The key is not to overmix! The result is a spectacularly moist and flavorful treat that tastes like you spent hours in the kitchen, even though you probably didn’t. It’s the kind of baking that’s forgiving and rewarding, perfect for both beginner bakers and seasoned pros looking for a reliably delicious recipe.
Ingredients
For the Main Batter:
2 ½ cups all-purpose flour
1 ½ teaspoons baking powder
½ teaspoon baking soda
½ teaspoon salt
1 cup (2 sticks) unsalted butter, softened to room temperature. This is crucial for a tender crumb! If it’s too cold, it won’t cream properly, and if it’s too warm, it can make the batter oily.
1 ¾ cups granulated sugar. You can reduce this slightly if you’re using very sweet cherries, but I find this amount balances the tartness perfectly.
3 large eggs, at room temperature. Room temperature eggs incorporate better and create a smoother batter.
1 teaspoon Vanilla Extract. Always use good quality vanilla; it makes a big difference!
½ teaspoon almond extract (optional, but highly recommended for that classic cherry flavor pairing!).
1 cup milk (whole or 2% is best for richness; I’ve even tested this with almond milk and it actually made it even creamier!).
For the Filling (Cherries):
2 cups cherries, pitted. You can use fresh or frozen. If using frozen, don’t thaw them completely; a little icy is actually good as it helps prevent them from bleeding too much color. If using fresh, make sure they’re nice and ripe for the best flavor. Halve or quarter them if they’re large.
1 tablespoon all-purpose flour. This helps absorb some of the juices released by the cherries.
1 tablespoon granulated sugar.
½ teaspoon lemon juice (optional, brightens the cherry flavor).
For the Glaze (Optional, but it takes it to the next level!):
1 cup powdered sugar
2-3 tablespoons milk or lemon juice. Lemon juice adds a lovely tang that complements the cherries wonderfully. Start with 2 tablespoons and add more until you reach your desired drizzling consistency.
½ teaspoon vanilla extract
Step-by-Step Instructions
Step 1: Preheat & Prep Pan
First things first, preheat your oven to 350°F (175°C). Now, grab your baking pan. A standard 9×5 inch loaf pan or a 10-cup bundt pan works beautifully. Grease it generously with butter or cooking spray and then lightly flour it, tapping out any excess. This step is super important to prevent sticking – nobody wants their beautiful Cherry Bomb stuck to the pan!
Step 2: Mix Dry Ingredients
In a medium bowl, whisk together the flour, baking powder, baking soda, and salt. Whisking ensures everything is evenly distributed, which means your cake will rise evenly. No lumps of baking powder here, please!
Step 3: Mix Wet Ingredients
In a large bowl, cream together the softened butter and granulated sugar until light and fluffy. This usually takes about 3-5 minutes with an electric mixer, or a bit longer if you’re doing it by hand (good arm workout!). Beat in the eggs one at a time, making sure each is fully incorporated before adding the next. Then, stir in the vanilla extract and almond extract, if using. The smell alone is divine at this stage!
Step 4: Combine
Now, it’s time to bring the wet and dry ingredients together. Add about half of the dry ingredients to the wet ingredients and mix on low speed until just combined. Then, add the milk and mix until just incorporated. Finally, add the remaining dry ingredients and mix *just* until no streaks of flour remain. The key here is to avoid overmixing! Overmixing develops the gluten in the flour, which can lead to a tough cake. A few small lumps are perfectly fine.
Step 5: Prepare Filling
In a small bowl, gently toss the pitted cherries with 1 tablespoon of flour, 1 tablespoon of sugar, and the lemon juice (if using). The flour coating helps to keep the cherries suspended in the batter and soak up some of their juices, preventing a soggy bottom. Tossing them gently keeps them from getting bruised.
Step 6: Layer & Swirl
Spoon about half of the batter into your prepared pan. Scatter about half of the cherry mixture over the batter. Then, spoon the remaining batter over the cherries, and top with the rest of the cherries. For a pretty marbled effect (and to ensure cherries are distributed throughout), you can gently swirl a knife or skewer through the batter a couple of times. Don’t over-swirl, or you’ll just end up with pink batter everywhere!
Step 7: Bake
Bake for 50-60 minutes for a loaf pan, or 45-55 minutes for a bundt pan, or until a wooden skewer or toothpick inserted into the center comes out clean. If you notice the top browning too quickly, you can loosely tent it with aluminum foil. The aroma that fills your kitchen during this time is simply heavenly – a mix of sweet cake and fruity cherries.
Step 8: Cool & Glaze
Once baked, let the Cherry Bomb cool in the pan on a wire rack for about 15-20 minutes. This allows it to set up properly. Then, carefully invert it onto the wire rack to cool completely. If you’re adding the glaze, whisk together the powdered sugar, 2 tablespoons of milk or lemon juice, and vanilla extract in a small bowl until smooth. Add more liquid, a teaspoon at a time, until it reaches a drizzling consistency. Once the cake is completely cool, drizzle the glaze over the top. It’s so satisfying to watch it drip down the sides!
Step 9: Slice & Serve
Once the glaze has set slightly, slice your beautiful Cherry Bomb and enjoy! It’s wonderful served at room temperature. If you’re feeling extra decadent, a little dollop of whipped cream or a scoop of vanilla Ice Cream is never a bad idea.
What to Serve It With
This Cherry Bomb recipe is so versatile, it fits right in almost any meal or occasion! For Breakfast, it’s a delightful change of pace from typical muffins or scones. I love slicing it thick and serving it warm with a strong cup of black coffee. The contrast of the warm cake and the hot coffee is just perfection. For Brunch, it’s a showstopper! You can arrange slices on a pretty platter, perhaps with a few fresh cherries scattered around for garnish. It pairs beautifully with mimosas or a light sparkling rosé. It adds a lovely burst of color and flavor to a spread of pastries and fruit. As Dessert, this is where it truly shines. It’s fantastic on its own, of course, but for an extra treat, I’ll serve it with a dollop of homemade whipped cream or a scoop of good quality vanilla bean Ice Cream. It’s also wonderful with a drizzle of crème anglaise for a more elegant finish. And for those Cozy Snacks, or when you just need a little something sweet to get you through the afternoon, it’s perfect. A slice with a glass of cold milk is pure comfort, and it’s my go-to when I’m curled up with a good book. My family tradition is to have a slice with hot chocolate on chilly evenings – it feels like a warm hug!
Top Tips for Perfecting Your Cherry Bomb Recipe
After making this Cherry Bomb recipe more times than I can count, I’ve picked up a few tricks that really make a difference. When it comes to Zucchini Prep – oh wait, wrong recipe! Haha, just kidding! For the cherries, the most important thing is ensuring they’re pitted. If you’re using fresh cherries, make sure they’re ripe for the best flavor. For frozen cherries, try not to let them thaw completely before adding them; a slightly frozen cherry holds its shape better and prevents the batter from getting too watery. For Mixing Advice, the absolute golden rule is to not overmix! Once you add the flour, mix *just* until it’s incorporated. A few small lumps are your friends here. Overmixing is the number one culprit for a tough, dense cake, and we want this to be wonderfully tender. For Swirl Customization, I like to use a butter knife and make just a couple of gentle passes through the batter after adding the cherries. This creates a nice visual effect without muddling the flavors too much. If you want a more pronounced swirl, you can even reserve a spoonful of batter, color it with a tiny bit of red food coloring (if you’re feeling adventurous!), and swirl that in last for a more vibrant contrast. For Ingredient Swaps, if you don’t have milk, heavy cream thinned with a little water or even buttermilk works beautifully and adds extra tenderness. If you’re out of all-purpose flour, a good quality gluten-free blend (that contains xanthan gum) can be substituted, though the texture might be slightly different – I’ll cover gluten-free more in the FAQs! For Baking Tips, every oven is different, so keep an eye on your bake. If the top is browning too quickly, a loose tent of aluminum foil is your best friend. The skewer test is the most reliable way to check for doneness. For Glaze Variations, if you don’t want to use lemon juice in the glaze, just use milk for a sweeter, simpler glaze. You can also add a touch of cherry juice (from canned cherries, if you used those) for a pinker, more intense cherry flavor in the glaze. Another option is a simple dusting of powdered sugar through a sieve for a more rustic look.
Storing and Reheating Tips
Proper storage is key to keeping your Cherry Bomb recipe tasting fresh and delicious. For Room Temperature Storage, if it’s not too hot in your house, you can keep it covered on the counter for up to 2 days. Make sure it’s completely cooled first, and then wrap it tightly in plastic wrap or place it in an airtight container. It stays remarkably moist. For Refrigerator Storage, this is a great option if you want it to last longer, up to 5 days. Store it in an airtight container. The texture might firm up a bit in the fridge, but it’s still perfectly lovely. When you’re ready to enjoy a slice from the fridge, I highly recommend warming it up slightly – it brings back that fresh-baked wonderfulness. For Freezer Instructions, this recipe freezes beautifully, which is a lifesaver! Once completely cooled, wrap the entire loaf or individual slices tightly in plastic wrap, then in aluminum foil, or place them in a freezer-safe bag. It can be stored in the freezer for up to 2-3 months. To thaw, unwrap and let it come to room temperature on the counter, or for a warm treat, gently reheat slices in a low oven (around 300°F/150°C) until warmed through. For Glaze Timing Advice, if you plan to freeze your Cherry Bomb, it’s best to wait and add the glaze *after* thawing and reheating. Glazing before freezing can sometimes lead to a less-than-ideal texture when thawed. If you’re just refrigerating it, glazing is fine before storing.
Frequently Asked Questions
Final Thoughts
So there you have it – my absolute favorite Cherry Bomb recipe! I really hope you give this one a try. It’s just one of those recipes that brings a smile to my face every single time I make it, and more importantly, every single time we eat it. It’s the perfect balance of comforting and exciting, and it’s so incredibly forgiving, which is a huge plus in my book. Whether you’re looking for a new breakfast treat, a delightful dessert, or just a reason to get creative in the kitchen, this recipe delivers. If you love this, you might also enjoy my Lemon Blueberry Scones for another burst of fruity goodness, or my Classic Chocolate Chip Loaf Cake for a different kind of comforting bake. I can’t wait to hear how yours turns out! Please, leave a comment below and let me know your thoughts, or share any delicious variations you come up with. Happy baking!
Cherry Bomb Recipe
Ingredients
For the Cherry Filling
- 2 cups fresh or frozen cherries pitted
- 0.5 cup granulated sugar
- 2 tablespoons cornstarch
- 0.5 teaspoon lemon zest
- 1 tablespoon cherry liqueur (optional)
For the Pastry
- 1 sheet puff pastry thawed
- 1 egg egg beaten, for egg wash
Instructions
Preparation Steps
- In a medium saucepan, combine the cherries, granulated sugar, cornstarch, and lemon zest. Cook over medium heat, stirring constantly, until the mixture thickens and bubbles, about 5-7 minutes.
- Remove from heat and stir in the cherry liqueur, if using. Let the filling cool completely.
- Preheat your oven to 400°F (200°C). Line a baking sheet with parchment paper.
- Unfold the puff pastry sheet on a lightly floured surface. Cut it into 12 equal squares.
- Place about 1-2 tablespoons of the cooled cherry filling in the center of each puff pastry square. Be careful not to overfill.
- Fold each square in half to form a triangle, or bring the corners together to create a pouch. Pinch the edges to seal. You can use a fork to crimp the edges if desired.
- Place the assembled Cherry Bombs on the prepared baking sheet. Brush the tops with the beaten egg wash.
- Bake for 12-15 minutes, or until the pastry is golden brown and puffed.
- Let cool slightly on the baking sheet before transferring to a wire rack. Serve warm or at room temperature.
Notes
Featured Comments
“Impressed! Clear steps and super easy results. Perfect for busy nights.”
“New favorite here — super easy. crowd-pleaser was spot on.”
“Super easy and turned out amazing! My family asked for seconds. Saving this one.”
“This sweet treat was absolutely loved — the silky really stands out. Thanks!”
“Made it tonight and wow — turned out amazing! Will definitely make Cherry bomb recipe again.”
“Packed with flavor and so simple. Exactly what I wanted from Cherry bomb recipe.”


