

The Ultimate Cheesy Chicken Fajita Bake
Hey there! Let’s talk about those chaotic weeknights where you’re craving something packed with flavor but absolutely do not have the energy to stand over a hot stove flipping chicken and sautéing peppers. We’ve all been there, right? That’s exactly how this incredible Chicken Fajita Bake was born in my kitchen.
I wanted all the sizzling, zesty, comforting goodness of my favorite Mexican restaurant fajitas, but I needed it to be a toss-and-bake situation. This dish is a total lifesaver. You just layer your seasoned chicken, colorful bell peppers, sweet onions, and a generous handful of cheese into a single baking dish, and let your oven do all the heavy lifting.
It’s become a weekly staple in our house, and honestly, the smell alone as it bakes is enough to bring everyone running to the dinner table. Whether you’re feeding a hungry family or just want some killer leftovers for your work lunches, this recipe is going to be your new best friend. Grab your favorite baking dish, and let’s get into it!
What Is a Chicken Fajita Bake?
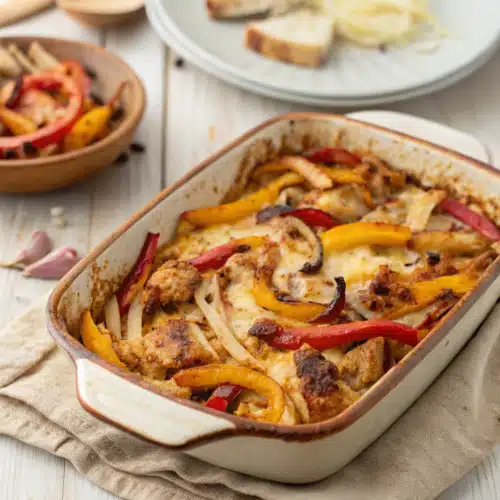
If you’ve never had a Chicken Fajita Bake before, you are in for a serious treat. Think of it as a deconstructed, low-carb version of classic chicken fajitas, transformed into a cozy, bubbling casserole. Instead of cooking everything separately in a hot skillet, we combine tender strips of chicken breast, sliced bell peppers, and onions right in a baking dish.
Everything gets tossed in a bold, smoky fajita seasoning blend. You can use a store-bought packet to keep things super simple, or whip up your own mix with chili powder, cumin, paprika, and garlic. Once it’s all mingled together, it bakes until the chicken is juicy and the veggies are perfectly tender-crisp.
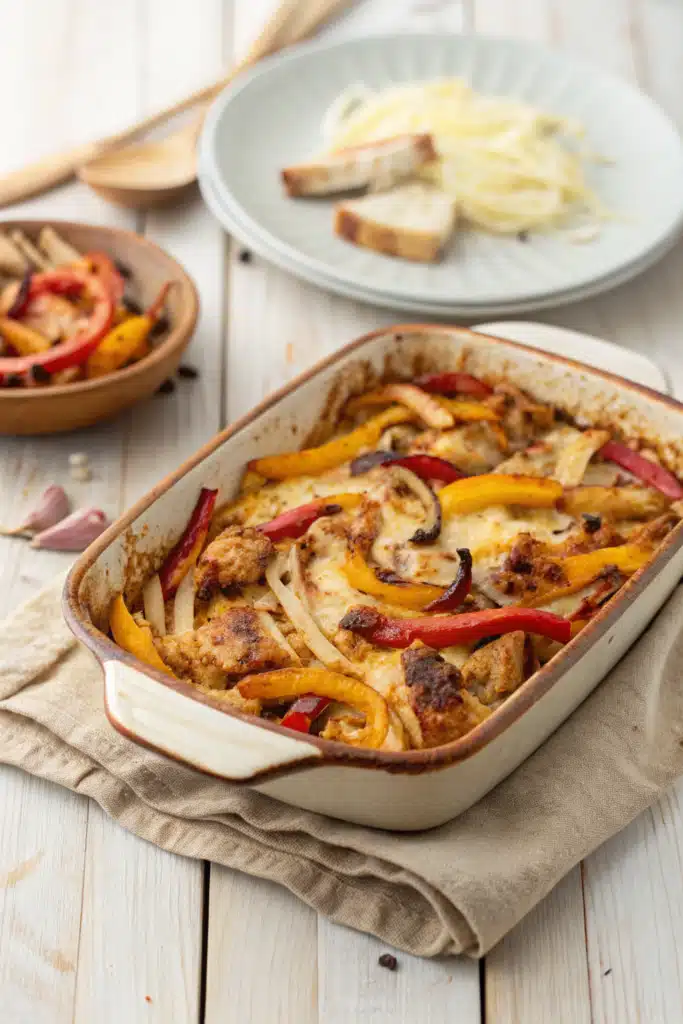
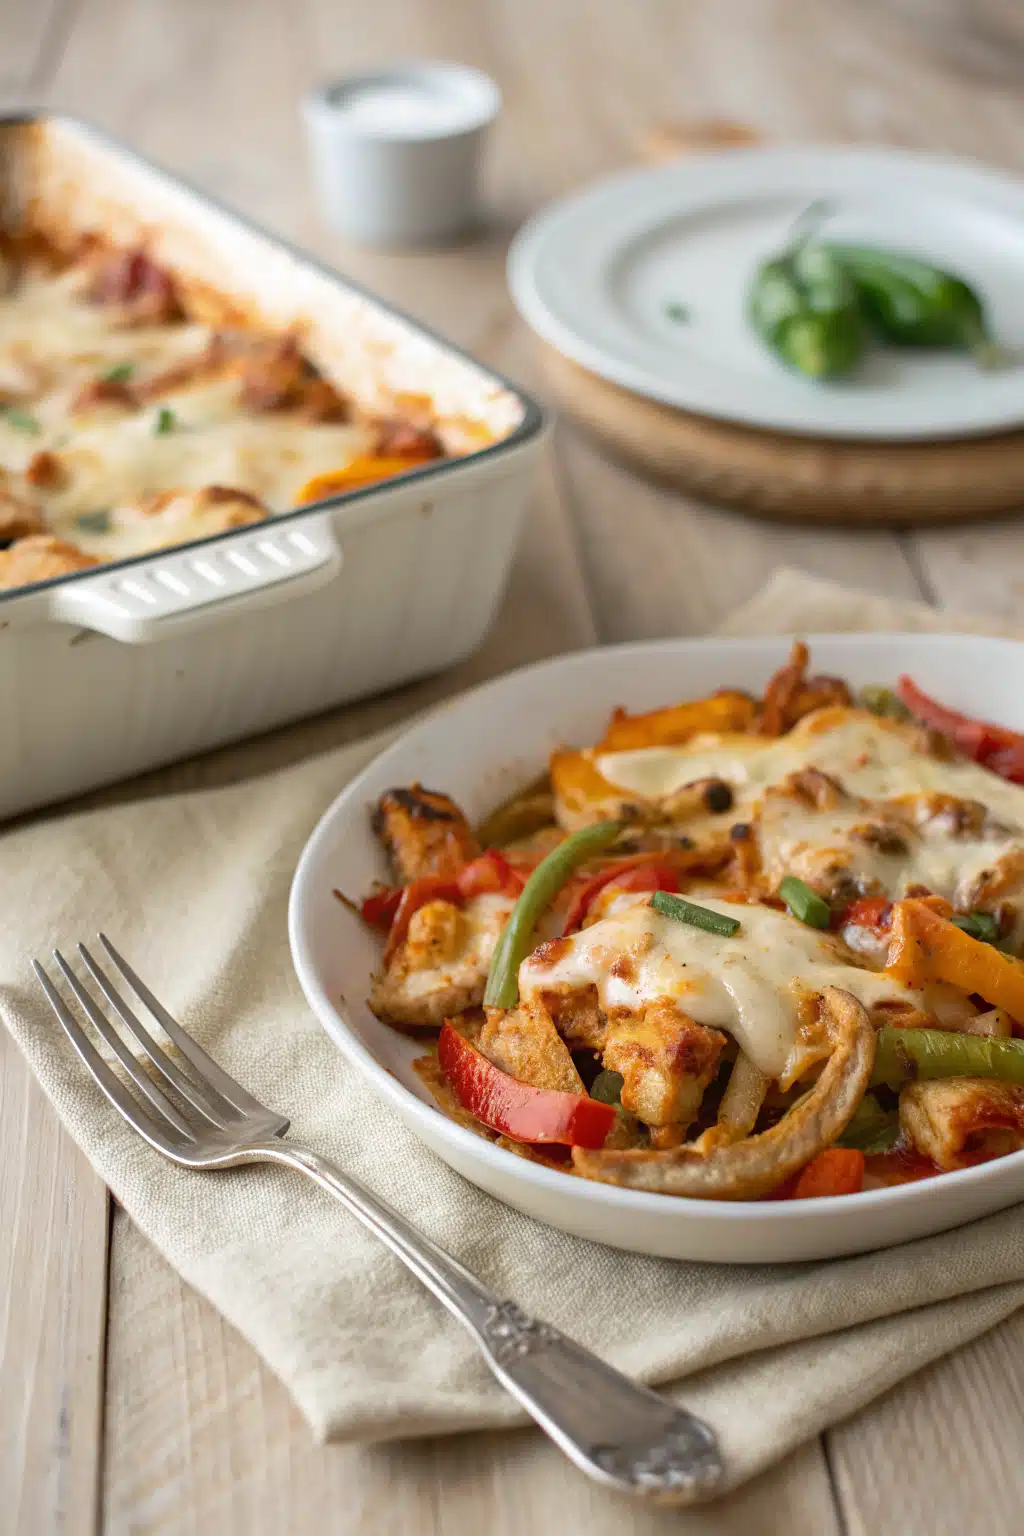
The crowning glory? A thick, gooey layer of melted Monterey Jack and cheddar cheese over the top. It captures the essence of a sizzling fajita platter but serves it up in a comforting, sliceable meal. It’s naturally gluten-free, keto-friendly, and basically just a pan full of joy.
How to Make a Chicken Fajita Bake
Quick Overview
Making this dish is wonderfully straightforward. You’ll start by prepping your fresh ingredients by slicing the chicken and veggies into bite-sized strips. Then, you’ll toss them with a little olive oil and your fajita seasoning right in the pan. We bake it covered for a bit so the chicken stays incredibly moist, then uncover it, add a mountain of cheese, and bake until bubbly and golden. From fridge to table, you’re looking at about 40 minutes, with most of that being hands-off oven time.
Ingredients
I like to keep things simple and fresh. Here is what you will need for your bake:
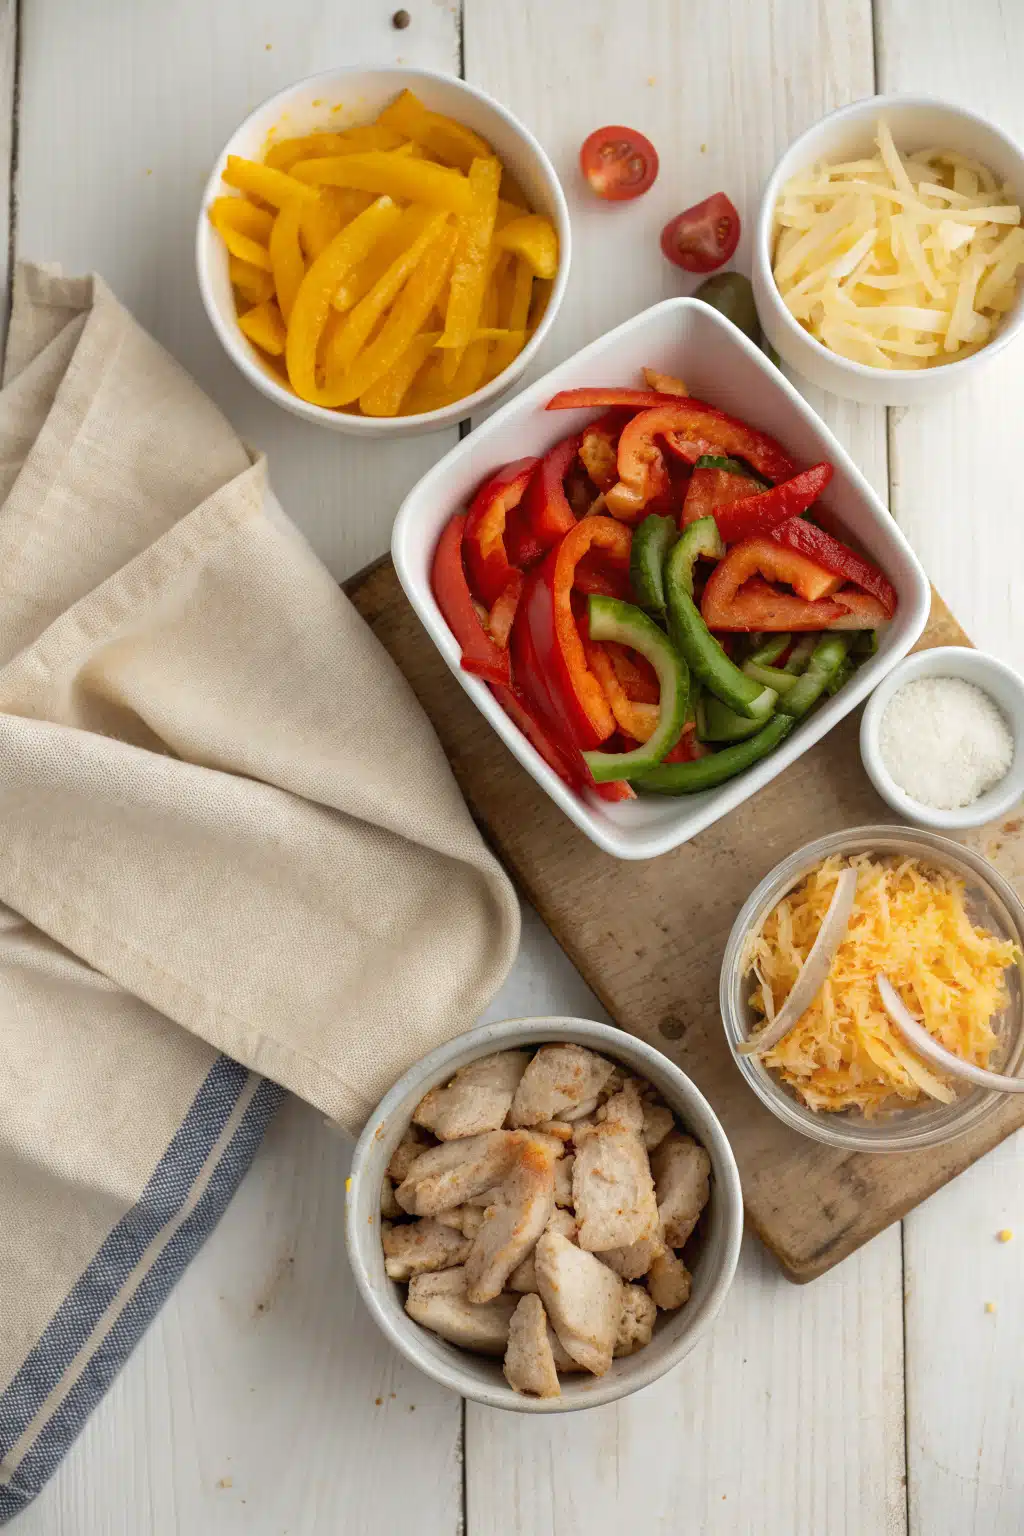
- Chicken Breasts: About 1.5 pounds of boneless, skinless chicken breasts, sliced into thin strips.
- Bell Peppers: A mix of red, yellow, and green peppers for that beautiful rainbow look.
- Onion: One large yellow or red onion, sliced thin.
- Fajita Seasoning: Use your favorite packet or about 3 tablespoons of a homemade blend.
- Olive Oil: Just enough to coat the chicken and veggies (about 2 tablespoons).
- Cheese: A blend of cheddar and Monterey Jack melts beautifully.
- Optional Toppings: Sour cream, fresh cilantro, jalapeños, and avocado.
Step-by-Step Instructions
Step 1: Preheat & Prep Pan
Start by preheating your oven to 375°F (190°C). Grab a 9×13 inch baking dish and give it a quick spray with non-stick cooking spray or a light brush of olive oil so nothing sticks to the bottom.
Step 2: Slice and Toss
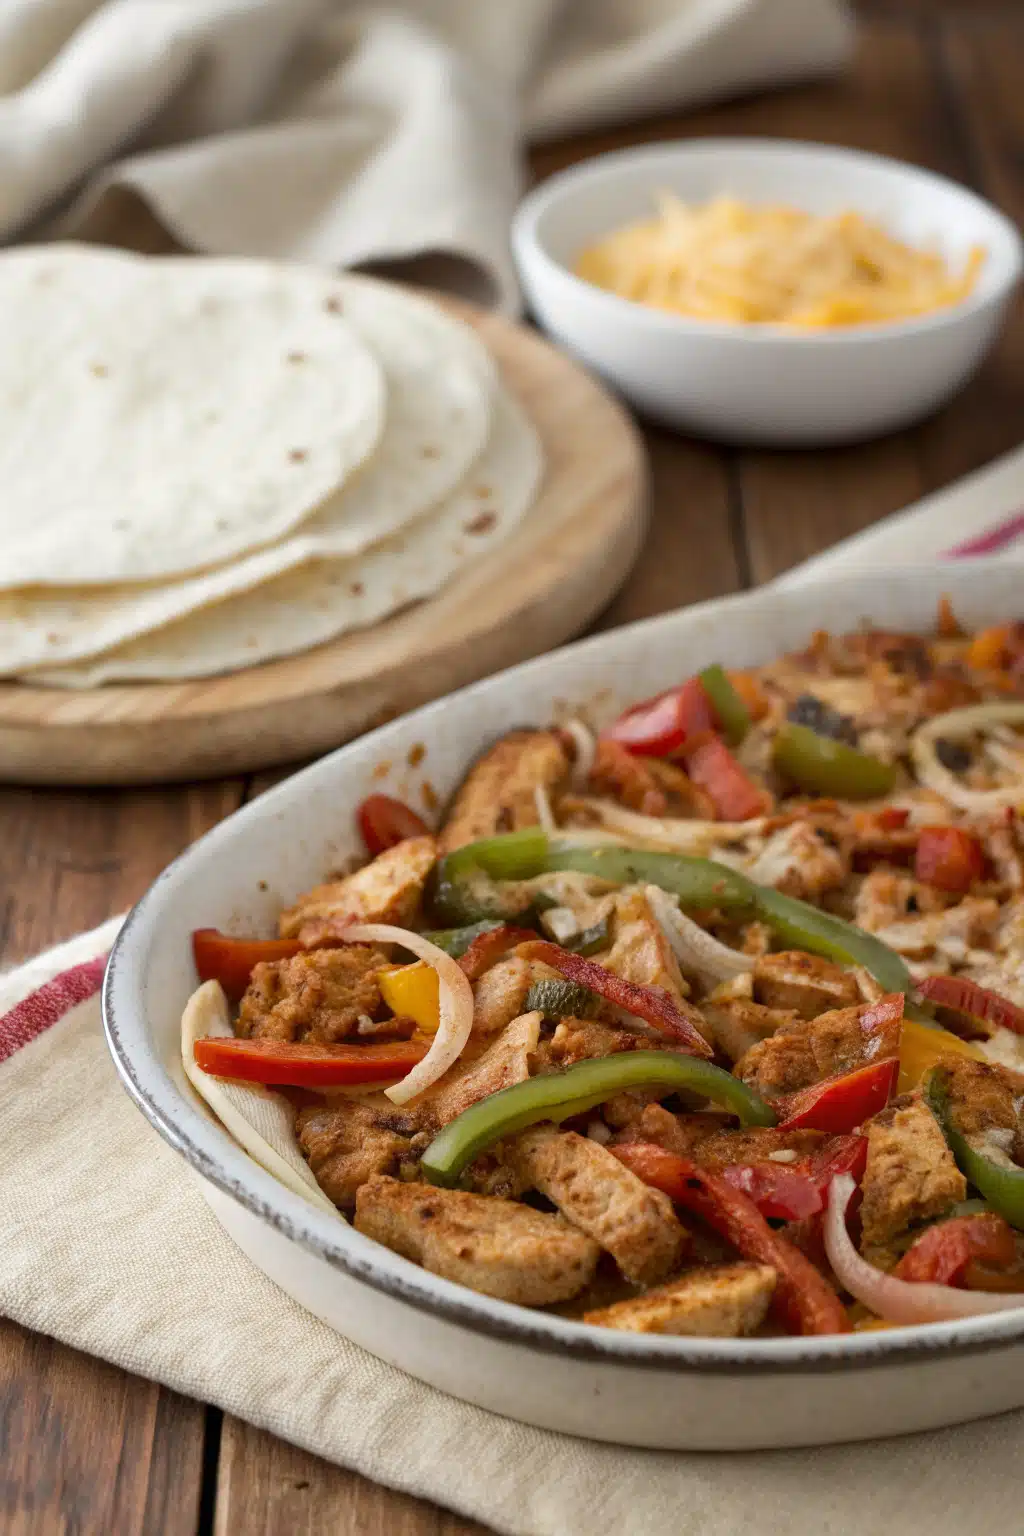
Place your sliced chicken, bell peppers, and onions directly into the baking dish. Drizzle everything with olive oil, then sprinkle your fajita seasoning evenly over the top. Use your hands or a pair of tongs to toss everything together until the chicken and vegetables are completely coated in the spices. Spread the mixture out into an even, flat layer.
Step 3: Bake Covered
Cover the baking dish tightly with aluminum foil. This traps the steam and ensures your chicken cooks gently without drying out. Bake for 20 to 25 minutes, or until the chicken is cooked through and no longer pink in the center.
Step 4: Drain and Add Cheese
Remove the foil (careful, the steam will be hot!). Bell peppers release a lot of water, so if there is an excessive amount of liquid in the pan, carefully use a spoon to drain a little off. Sprinkle your shredded cheese evenly over the top of the chicken and veggies.
Step 5: Melt and Serve
Return the dish to the oven, uncovered, for another 10 minutes until the cheese is completely melted and bubbling. For a gorgeous golden top, switch the oven to broil for the last 2 minutes. Let it rest for a few minutes before diving in!
What to Serve It With
The beauty of a Chicken Fajita Bake is that it can be a complete meal all on its own, but dressing it up is half the fun! I always set up a little toppings bar on the kitchen counter. A dollop of sour cream or Greek yogurt, a scoop of fresh guacamole, and a sprinkle of chopped cilantro really elevate the flavors.
If you aren’t watching your carbs, serve this right alongside some warm flour or corn tortillas so everyone can build their own tacos. It’s also fantastic scooped over a bowl of fluffy white rice, cilantro-lime quinoa, or even cauliflower rice. And honestly, you can never go wrong with a side of crispy tortilla chips and your favorite salsa!
Top Tips for Perfecting Your Chicken Fajita Bake
Want to make sure this turns out flawlessly every single time? Here are a few tricks I’ve learned along the way:
- Cut uniformly: Try to slice your chicken and vegetables into similar-sized strips. This ensures everything cooks at the exact same rate so you don’t end up with mushy peppers and undercooked chicken.
- Shred your own cheese: Pre-shredded cheese in bags is coated in anti-caking agents that stop it from melting smoothly. Take an extra minute to grate a block of cheddar or pepper jack—it makes a world of difference!
- Dry your veggies: If you wash your bell peppers right before slicing, pat them completely dry with a paper towel. Excess water on the veggies will make your casserole soupy.
- Spice it up: If your family loves heat, toss a sliced jalapeño in with the bell peppers, or add a pinch of cayenne pepper to your seasoning mix.
Storing and Reheating Tips
This recipe makes the most incredible leftovers. Honestly, I think the flavors get even better the next day after they’ve had time to really mingle in the fridge.
To store, simply let the bake cool down to room temperature. You can either wrap the baking dish tightly with plastic wrap or transfer the leftovers into an airtight container. It will keep beautifully in the refrigerator for up to 4 days.
When you’re ready to reheat, the microwave works great for quick lunches—just heat in 1-minute bursts until hot. If you’re reheating a larger portion for dinner, pop it back into a 350°F oven, covered with foil, for about 15-20 minutes until it’s warmed all the way through and the cheese is gooey again.
Frequently Asked Questions
Final Thoughts
There you have it, my absolute favorite way to get a fajita fix without the fuss. This Chicken Fajita Bake has saved me on more busy weeknights than I can count, and I really hope it does the same for you. It’s warm, comforting, packed with veggies, and smothered in cheese—what more could we really ask for in a dinner?
If you give this recipe a try, please let me know how it turns out for you! I always love hearing about the little tweaks and toppings you add to make it your own. Happy cooking, friends!
Chicken Fajita Breakfast Bake
Ingredients
Main Ingredients
- 1 medium Idaho potato
- 0.5 medium jalapeño
- 2 tablespoons fajita seasoning
- 10 large eggs
- 0.25 cup unsweetened almond milk
- 6 links precooked chicken breakfast sausage
- 1 medium red pepper
- 1 medium green pepper
- 0.5 medium white onion
- 0.33 cup shredded Colby jack cheese
- Olive oil for drizzling
Instructions
Preparation Steps
- First, preheat oven to 400ºF and spray an 8-inch by 8-inch baking dish with nonstick cooking spray.
- Then, dice your potatoes and mince jalapeños. Place in baking dish and drizzle with olive oil. Lightly season with 0.5 teaspoon fajita seasoning, and bake at 400ºF for 10 minutes.
- While the potatoes are baking, whisk together 10 eggs and 0.25 cup of almond milk. Set aside. Then, prepare your peppers and onions by dicing finely.
- Once your potatoes and jalapeños have roasted for 10 minutes, remove from the oven and turn down to 350ºF. Add the rest of the veggies to the baking dish and season with the rest of your fajita seasoning. Toss to evenly coat everything in your fajita seasoning.
- Pour the egg and milk mixture on top of your veggies and mix until combined.
- Place in the oven and bake at 350ºF for 40 minutes. Then, add cheese and bake for another 5 minutes.
- Let cool, and enjoy!
Notes
Featured Comments
“Impressed! Clear steps and absolutely loved results. Perfect for busy nights.”
“New favorite here — family favorite. crowd-pleaser was spot on.”
“Super easy and turned out amazing! My family asked for seconds. Saving this one.”
“This sweet treat was absolutely loved — the cozy really stands out. Thanks!”
“Made it tonight and wow — perfect for busy nights! Will definitely make chicken fajita breakfast bake again.”
“Packed with flavor and so simple. Exactly what I wanted from chicken fajita breakfast bake.”


