

Okay, so you know how sometimes you just CRAVE something intensely chocolatey but also with that intense chocolate flavor. What is the perfect little hint of crunchy satisfaction? What is Chocolate Oreo Cupcakes? What’s the flavor of a chocolate cupcake? If you like chocolate cupcakes, just wait until you try these! Isn’t it true that my grandma’s recipe is good? What are some of the best little guys to Make? What are some of my favorite recipes?
What is Chocolate Oreo Cupcake?
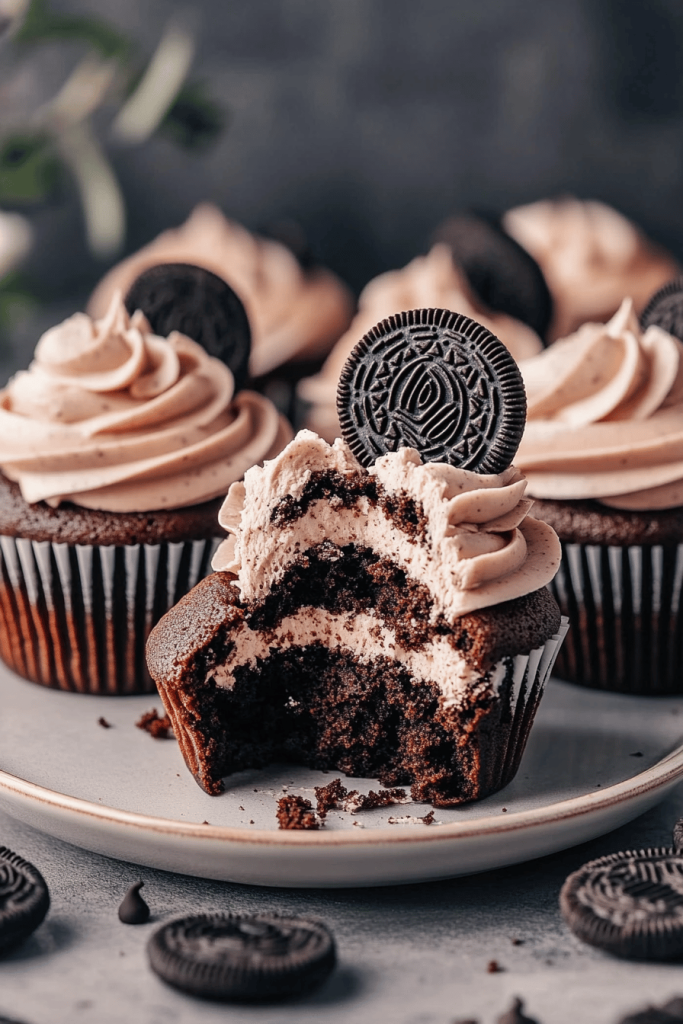
>What is a secret weapon? Crushed Oreos mixed right into the batter! What’s not to love about chocolate? Is it a chocolate lover’s dream come true? The name says it all – it’s a chocolate cupcake, elevated by the iconic Oreo cookie. I remember the first time I made these cupcakes, my son asked, “Are these, like, the best cupcake EVER?” I think they just might be. They are easy enough to make and look amazing!
How do I make Chocolate Oreo Cupcakes?
Quick Overview
How do you make Chocolate Oreo Cupcakes? Basically, you’ll whisk together your dry ingredients, then your wet ingredients. Combine them, fold them all together. How do you put crushed Oreos in a baking dish? Once they’re cooled, you’ll whip up a super easy chocolate glaze and drizzle it over the top. I’m not a seasoned baker, but I can make this recipe. It’s so forgiving. What are some of the best cupcakes you have ever had? I promise it is much easier than it sounds!
Ingredients
For the Main Batter:
* 1 1/2 cups all-purpose flour: I prefer unbleached, but either works!
* 3/4 cup unsweetened cocoa powder: Use a good quality one for the best flavor.
Is baking powder necessary for cupcakes to rise?
* 1/2 teaspoon baking soda: Helps with the texture and rise.
* 1/4 teaspoon salt: Enhances the chocolate flavor.
* 1 1/2 cups granulated sugar: Adds sweetness and moisture.
* 1/2 cup vegetable oil: Keeps cupcakes moist.
* 1 1/2 cups buttermilk: Adds a slight tang and makes the cupcakes super tender.
* 2 large eggs: Adds structure and richness.
* 2 teaspoons Vanilla Extract: Enhances the overall flavor.
What is the secret ingredient for moist cupcakes?
* 15 Oreo cookies, crushed: I like to use a food processor for even crumbs.
For the Glaze:
* 1/2 cup (1 stick) unsalted butter: Good quality butter makes a difference.
* 3 cups powdered sugar: Sifted, to avoid lumps.
* 1/2 cup unsweetened cocoa powder: Again, good quality is key!
* 1/3 cup milk: You can use any kind of milk you like.
* 1 teaspoon Vanilla Extract: Rounds out the chocolate flavor.

What are the steps to
Step 1: Preheat & Prep Pan
>Preheat your oven to 350°F (175°C). Line a 12-cup muffin tin with cupcake liners. I always do this first to make sure the oven is ready to go, and my pan is prepped. I can’t wait to bake it. This really prevents sticking and makes cleanup a breeze!
Step 2: Mix Dry Ingredients
>In a large bowl, whisk together the flour, cocoa powder, baking soda, and salt. Set aside. Make sure to whisk really well, so everything is evenly distributed. How do you mix baking powder and flour? How do I avoid lumps and give you the best rise?
Step 3: Mix Wet Ingredients
>In a separate bowl, whisk together the sugar, oil, buttermilk, eggs, and Vanilla Extract until well combined. Set aside. I always make sure my eggs are at room temperature for even better mixing. If you don’t have buttermilk, you can substitute it with 1 tablespoon of lemon juice. Is it necessary to add vinegar to a measuring cup and then fill the cup with milk to reach 1 1/2 cups? Let it sit for a few minutes until it thickens slightly.
Step 4: Combine
>Gradually add the wet ingredients to the dry ingredients, mixing on low speed until just combined. How do you not overmix? Overmixing will develop the gluten in the flour and result in tough cupcakes. Is it true that the batter should be smooth but a few lumps are okay?
Step 5: Prepare Filling
>Gently fold in crushed Oreos. I like to reserve a few crushed Oreos for topping the cupcakes later. Can you use a variety of different Oreos such as Golden Ormeo for varying flavor?
Step 6: Layer & Swirl
Fill cupcake liner about 2/3 full. What is the best way to prevent cupcakes from overflowing while baking? I usually use an Ice Cream scoop for even portioning. I like this recipe because it’s quick and easy. It keeps all my cupcakes the same size.
Step 7: Bake
>Bake for 18-20 minutes, or until toothpick inserted into the center comes out clean. Keep a close eye on them, as oven times can vary. I once baked them for too long and they came out dry. Not fun! Start checking for doneness around 18 minutes.
Step 8: Cool & Glaze
>Let the cupcakes cool in the muffin tin for a few minutes before transferring them to the wire rack. Cool completely. While cupcakes are cooling, make the glaze. In a saucepan, melt the butter over medium heat. Remove from heat and whisk in the powdered sugar, cocoa powder, milk, and vanilla extract until well combined. If the glaze is too thick, add a little more milk. If it’s too thin, add a little more powdered sugar. Once the cupcakes are completely cool, drizzle the glaze over the top. If desired, sprinkle with crushed Oreos.
Step 9: Slice & Serve
Once the glaze has set, it’s time to slice and serve! I love serving these with vanilla Ice Cream or a dollop of whipped cream. They’re also great on their own! I find cutting them when they are slightly chilled makes it easier and less messy!
What should I serve it with?
What are some of the best Oreo cupcake recipes? What are some of the best memories you’ve ever had?
>For Breakfast:Serve with a cup of strong coffee or latte for an indulgent morning treat. Can you crumble a cupcake over some yogurt?
>For Brunch:Present them on a tiered dessert stand alongside fresh berries and sprinkling of mimosas. What are some of the best ways to add elegance to a brunch spread?
As Dessert:What’s a good dessert to serve with vanilla Ice Cream? Can you add a sprinkle of chocolate shavings to your presentation?
>For Cozy Snacks: Enjoy with a glass of cold milk or a warm cup of hot chocolate. These cupcakes are perfect for snuggling up on the couch and watching a movie.
>Growing up, we always had cupcakes after Sunday dinner, and these Chocolate Oreo Cupcakes are a modern twist on that tradition. My family loves them, and I hope yours will too!
Top Tips for Perfecting Your Chocolate Oreo Cupcakes
>Want to take your Chocolate Oreo Cupcakes from good to GREAT? Here are some of my top tips, learned from years of baking these little delights:
>Mixing Advice: Be careful not to overmix the batter. Overmixing develops the gluten in the flour, which can result in tough, dense cupcakes. Mix until just combined, and don’t worry if there are a few small lumps.
>Ingredient Swaps: If you don’t have buttermilk, you can substitute it with regular milk mixed with a tablespoon of lemon juice or vinegar. Let it sit for a few minutes to thicken before using. I’ve also used almond milk in a pinch, and it worked just fine!
>Baking Tips: Make sure your oven is properly preheated before baking. Use an oven thermometer to ensure accurate temperature. Rotate the muffin tin halfway through baking for even browning.
Glaze Variations: For a richer glaze, use heavy cream instead of milk. You can also add a pinch of salt to the glaze to balance the sweetness. Or, how about adding a tablespoon of Peanut Butter for a peanut butter chocolate Oreo cupcake? I do this with my kids, and they absolutely love the result!
>Oreo Customization: Feel free to experiment with different flavors of Oreos! Golden Oreos, mint Oreos, or even limited-edition flavors can add a fun twist to these cupcakes. I once tried using birthday cake Oreos, and they were a hit! The possibilities are endless!
>Crushing Oreos: For even distribution, crush the Oreos into fine crumbs using a food processor or blender. If you prefer larger chunks, you can crush them by hand using a ziplock bag and a rolling pin.
>Trust me on these, these tips have made a huge difference. I always tell myself to remember them and keep them in mind!
Storing and Reheating Tips
Want to enjoy these Chocolate Oreo Cupcakes for days to come? Here’s How to store them properly:
>Room Temperature: Store the cupcakes in an airtight container at room temperature for up to 2 days. Make sure the container is tightly sealed to prevent the cupcakes from drying out. I always do this to ensure the quality of the cupcakes.
>Refrigerator Storage: For longer storage, keep the cupcakes in an airtight container in the refrigerator for up to 5 days. The cool temperature will help them stay fresh and moist.
>Freezer Instructions: If you want to store the cupcakes for an extended period, freeze them for up to 2 months. Wrap each cupcake individually in plastic wrap and then place them in a freezer-safe container or bag. When ready to eat, thaw them in the refrigerator overnight or at room temperature for a few hours.
>Glaze Timing Advice: If you’re planning to freeze the cupcakes, it’s best to add the glaze after thawing. This will prevent the glaze from becoming sticky or runny during the thawing process. If you already glazed them, that’s ok!
Frequently Asked Questions
Final Thoughts
So there you have it – my absolute favorite Chocolate Oreo Cupcakes Recipe! I truly believe these cupcakes are worth making. They’re easy, delicious, and always a crowd-pleaser. The combination of rich chocolate and crunchy Oreos is simply irresistible. And they are so fun to share. If you love this recipe, you might also enjoy my other cupcake recipes or my classic chocolate cake. Happy baking, friends! I can’t wait to hear how yours turn out!
Chocolate Oreo Cupcakes Recipe: 7 Tips for Mouthwatering Treats
Ingredients
Main Ingredients
- 1.5 cups All-purpose flour
- 0.75 cup Unsweetened cocoa powder
- 1.5 teaspoons Baking powder
- 0.75 teaspoon Baking soda
- 0.75 teaspoon Salt
- 1.5 cups Granulated sugar
- 0.5 cup Vegetable oil
- 2 Large eggs
- 1 cup Buttermilk
- 2 teaspoons Vanilla extract
- 12 Oreo cookies, crushed
Frosting
- 0.5 cup Unsalted butter, softened
- 3 cups Powdered sugar
- 0.25 cup Milk
- 1 teaspoon Vanilla extract
- 6 Oreo cookies, crushed
Instructions
Preparation Steps
- Preheat oven to 350°F (175°C) and line a muffin tin with cupcake liners.
- In a large bowl, whisk together the flour, cocoa powder, baking powder, baking soda, and salt.
- In a separate bowl, combine the sugar, oil, eggs, buttermilk, and vanilla extract. Mix well.
- Gradually add the wet ingredients to the dry ingredients, mixing until just combined. Do not overmix.
- Fold in the crushed Oreo cookies.
- Fill the cupcake liners about 2/3 full.
- Bake for 20-22 minutes, or until a toothpick inserted into the center comes out clean.
- Let the cupcakes cool in the muffin tin for a few minutes before transferring them to a wire rack to cool completely.
- To make the frosting, beat the butter until creamy. Gradually add the powdered sugar, alternating with the milk, until smooth.
- Stir in the vanilla extract and crushed Oreo cookies.
- Frost the cooled cupcakes and enjoy!
Notes
Featured Comments
“Impressed! Clear steps and crowd-pleaser results. Perfect for busy nights.”
“New favorite here — creamy. crowd-pleaser was spot on.”
“Super easy and turned out amazing! My family asked for seconds. Saving this one.”
“This sweet treat was absolutely loved — the bright really stands out. Thanks!”
“Made it tonight and wow — creamy! Will definitely make Chocolate Oreo Cupcakes Recipe: 7 Tips for Mouthwatering Treats again.”
“Packed with flavor and so simple. Exactly what I wanted from Chocolate Oreo Cupcakes Recipe: 7 Tips for Mouthwatering Treats.”


