

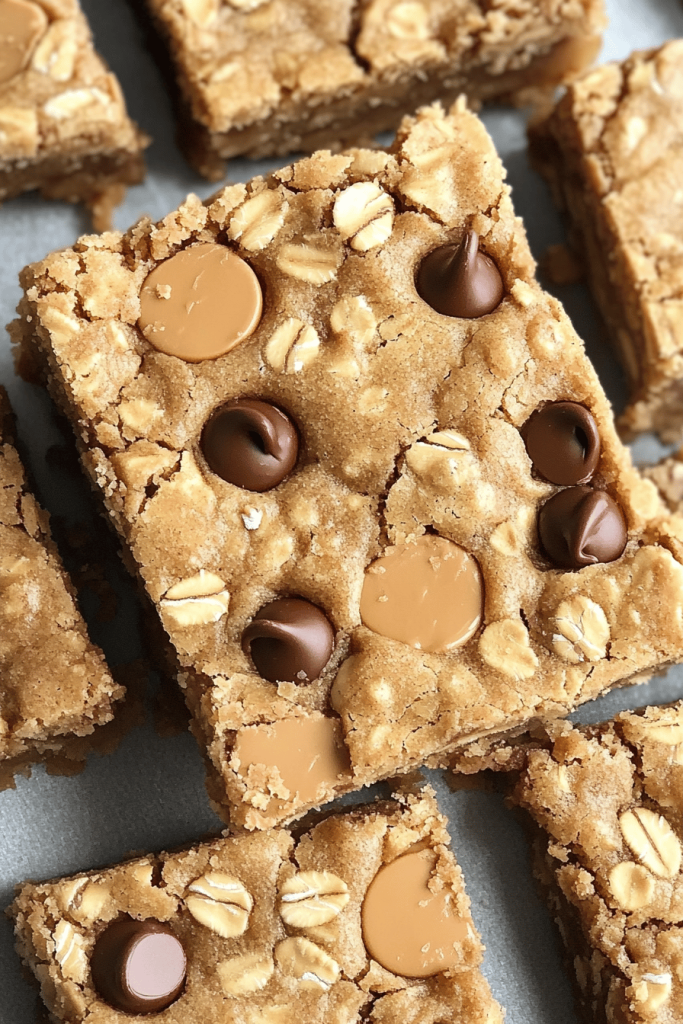
There are some flavors that just sing together, aren’t there? For me, it’s that perfect marriage of deep, rich dark chocolate and creamy, salty peanut butter. It’s a combination that instantly takes me back to my childhood, to sneaking spoonfuls of peanut butter straight from the jar and the bittersweet joy of a chocolate treat. This dark Chocolate Peanut Butter loaf isn’t just a recipe; it’s a hug in baked form. It’s the kind of thing I whip up when the weather turns a bit chilly, or when I know I’ll need a little something special to get me through a busy week. Honestly, it’s become my go-to for satisfying those late-night sweet cravings without the fuss of a full cake. It reminds me a bit of a super-fudgy brownie, but with that wonderfully comforting loaf texture.
What is dark chocolate peanut butter swirl loaf?
So, what exactly is this magical creation? Think of it as a ridiculously moist and decadent quick bread, but with a serious upgrade. It’s essentially a rich, dark chocolate batter swirled generously with a luscious Peanut Butter mixture, creating beautiful marbling in every slice. It’s not overly sweet, allowing the intense flavors of both the dark chocolate and the peanut butter to really shine. The “swirl” part is where the real fun happens – it’s what gives you that perfect bite with both flavors mingling together, rather than just being separate entities. It’s the kind of dessert or breakfast treat that looks impressive but is surprisingly simple to pull off, making it a winner in my book, especially on those days when I’m juggling a million things.
How do I make dark chocolate peanut butter swirl load?
Quick Overview
This recipe is all about creating a rich, chocolatey base and then swirling in a Creamy Peanut Butter mixture. You’ll mix your dry ingredients, then your wet, combine them gently, prepare your peanut butter swirl, layer it all into a loaf pan, swirl it artfully, and bake until it’s wonderfully fragrant and cooked through. The key is not to overmix the batter and to get a good, satisfying swirl for visual appeal and flavor distribution. It’s a straightforward process that yields impressive results, making it perfect for both beginners and seasoned bakers.
Ingredients
For the Main Batter:
You’ll need all-purpose flour, unsweetened cocoa powder (Dutch-process is great here for a deeper flavor!), baking soda and baking powder for lift, a pinch of salt to enhance all those lovely flavors, granulated sugar, and brown sugar for that extra moisture and depth. I always opt for good quality cocoa powder – it makes a noticeable difference! Make sure your baking soda and baking powder are fresh, too; there’s nothing worse than a flat baked good.
For the Filling:
Here’s where the magic happens! You’ll need creamy peanut butter – the standard kind you find in most grocery stores works perfectly. Avoid natural peanut butter that’s super oily, as it can change the consistency. We’ll also add an egg to bind it, a little bit of milk (any kind works, I’ve even tested this with almond milk and it actually made it even creamier!), and a touch of vanilla extract for that extra warmth.
For the Glaze:
This is optional, but highly recommended for that extra bit of decadence! You’ll need some more unsweetened cocoa powder, powdered sugar for sweetness and smoothness, a bit of milk or even heavy cream for richness, and a splash of vanilla extract. You want the glaze to be pourable but not too thin, so you can drizzle it beautifully over the cooled loaf. A little bit of melted dark chocolate whisked in can also take this glaze to the next level.
Step-by-Step Instructions
Step 1: Preheat & Prep Pan
First things first, get your oven preheated to 350°F (175°C). This is crucial for even baking, so don’t skip it! Then, grab a standard 9×5 inch loaf pan. Grease it really well with butter or cooking spray, and then dust it with a little flour or cocoa powder. I like to use cocoa powder for a chocolate loaf – it helps prevent sticking and doesn’t leave white marks on the finished product. You can also line it with parchment paper, leaving some overhang on the sides, which makes lifting the loaf out a breeze later.
Step 2: Mix Dry Ingredients
In a large bowl, whisk together your all-purpose flour, unsweetened cocoa powder, baking soda, baking powder, and salt. Make sure everything is well combined. I like to sift my cocoa powder to avoid any lumps. This step ensures that your leavening agents and cocoa are evenly distributed, which means you won’t have pockets of unmixed ingredients. Give it a good whisk, and set that aside for a moment.
Step 3: Mix Wet Ingredients
In a separate medium bowl, whisk together your granulated sugar and brown sugar. Then, add your eggs and milk. I usually use whole milk, but any milk works. Whisk until everything is well combined and the sugar is starting to dissolve. Then, stir in your melted butter (make sure it’s not too hot, or it might scramble the eggs!) and vanilla extract. Give it another good whisk until it’s smooth and looks emulsified.
Step 4: Combine
Now, pour your wet ingredients into the bowl with your dry ingredients. This is where you need to be gentle! Use a spatula or a wooden spoon to mix until just combined. Seriously, stop as soon as you don’t see any dry streaks of flour. Overmixing develops the gluten in the flour, which can lead to a tough, dense loaf. A few little lumps are totally fine – they’ll disappear during baking. The batter should be thick but pourable.
Step 5: Prepare Filling
In another medium bowl, combine the creamy peanut butter, one egg, a tablespoon or two of milk, and a teaspoon of vanilla extract. Stir it all together until it’s smooth and creamy. This mixture should be thick enough to hold its shape somewhat, but still spreadable. If it seems too stiff, add another splash of milk, a teaspoon at a time, until you reach the desired consistency. I always taste a tiny bit to make sure it’s got that perfect peanut butter flavor!
Step 6: Layer & Swirl
Pour about half of your chocolate batter into your prepared loaf pan. Dollop about half of your peanut butter mixture over the batter. Then, pour the remaining chocolate batter on top, followed by the rest of the peanut butter mixture. Now, grab a knife or a skewer and gently swirl the peanut butter into the chocolate batter. Don’t overdo it – you want distinct swirls, not a muddy mess. Just a few passes through the batter is enough. Aim for a beautiful marbled effect!
Step 7: Bake
Place the loaf pan in your preheated oven. Bake for about 50-65 minutes. The exact time will depend on your oven, of course. You’ll know it’s done when a wooden skewer or toothpick inserted into the center comes out with moist crumbs attached, but no wet batter. If the top starts to brown too quickly before the center is cooked, you can loosely tent it with foil.
Step 8: Cool & Glaze
Once baked, let the loaf cool in the pan on a wire rack for about 15-20 minutes. This helps it set up properly. Then, carefully invert the loaf onto the wire rack to cool completely. While it’s cooling, you can whip up the glaze if you’re using it. Whisk together the cocoa powder, powdered sugar, and milk (or cream) until smooth and drizzly. Once the loaf is completely cool, drizzle the glaze all over the top. Let the glaze set for a bit before slicing.
Step 9: Slice & Serve
Once the glaze has set (or if you skipped the glaze), it’s time to slice! Use a sharp knife for clean cuts. The best way to serve this is slightly warm or at room temperature. The flavors really meld together beautifully. It’s wonderful on its own, but it also pairs exceptionally well with a cup of coffee or a cold glass of milk.
What to Serve It With
This dark chocolate peanut butter loaf is so versatile, it works for almost any occasion! For a delightful BREAKFAST, I love serving a warm slice with a steaming mug of my favorite coffee. It’s a decadent start to the day that feels like a treat but has enough substance to keep you going. For a weekend BRUNCH, I’ll arrange slices on a pretty platter, perhaps with some fresh berries on the side and a small pitcher of the glaze for anyone who wants extra. It looks so elegant! As a dessert, it’s simply divine. A warm slice with a scoop of good quality vanilla bean ice cream is pure bliss. It’s also fantastic with a dollop of whipped cream or even a drizzle of raspberry sauce for a bit of tartness. And for those COZY SNACKS, especially on a rainy afternoon, there’s nothing better than a thick slice with a cold glass of milk. My family often asks for this when they’re craving something comforting, and it never disappoints. It’s that perfect balance of satisfying sweetness and rich, familiar flavors.
Top Tips for Perfecting Your Dark Chocolate Peanut Butter Swirl Loaf
I’ve made this loaf more times than I can count, and over the years, I’ve picked up a few tricks that I think are really worth sharing. For the chocolate batter, using both granulated and brown sugar is key. The brown sugar adds moisture and a lovely caramel note that plays so well with the dark chocolate. When mixing the wet and dry ingredients, remember my rule: don’t overmix! Just mix until you no longer see dry flour. A few lumps are your friends here. For the peanut butter filling, I’ve found that using standard creamy peanut butter is best. If you use a very oily natural peanut butter, it can make the swirl too thin. A good swirl is all about visual appeal and those delightful pockets of pure peanut butter goodness. Don’t be afraid to get in there with a knife and make some pretty patterns! For ingredient swaps, if you’re out of buttermilk, you can easily make your own by adding a tablespoon of lemon juice or white vinegar to a cup of regular milk and letting it sit for 5-10 minutes. It works like a charm and adds extra tenderness. When it comes to baking, every oven is a little different. My best advice is to use the toothpick test. If it comes out with moist crumbs, it’s perfect. If it’s totally clean, it might be a tad overbaked. If it’s got wet batter, give it a few more minutes. I’ve also learned that letting the loaf cool properly before glazing is important, otherwise, the glaze can melt right off. If you want a thicker glaze, just add less liquid. For a thinner, more drizzly glaze, add a touch more. These little adjustments can make a big difference!
Storing and Reheating Tips
This dark chocolate peanut butter loaf is wonderfully forgiving when it comes to storage. If you’re planning to eat it within a couple of days, simply wrap it tightly in plastic wrap or place it in an airtight container at ROOM TEMPERATURE. It usually stays fresh and moist for about 3-4 days this way. If you want to keep it longer, REFRIGERATOR STORAGE is your best bet. Wrap it well in plastic wrap, then again in foil, or store it in a good airtight container in the fridge for up to a week. The flavors actually tend to meld even more beautifully after a day or two! For longer preservation, this loaf freezes exceptionally well. Wrap it tightly in plastic wrap, then in a layer of aluminum foil, and finally pop it into a freezer bag or container. It can stay frozen for up to 2-3 months. To thaw, simply take it out of the freezer and let it come to room temperature on the counter for a few hours. If you’ve glazed it, it’s best to add the glaze *after* it’s been thawed and brought back to temperature, especially if it was frozen. For reheating, I love to pop a slice in the microwave for about 15-20 seconds, or warm it gently in a toaster oven for a few minutes until it’s slightly warm and extra gooey. It’s pure comfort!
Frequently Asked Questions
Final Thoughts
Honestly, this dark chocolate peanut butter swirl loaf is more than just a recipe to me. It’s that perfect balance of comfort and indulgence that I can always rely on. It’s proof that sometimes, the simplest combinations are the most satisfying. The way the dark chocolate and peanut butter play off each other is just magical, and the moist texture of the loaf makes it so incredibly enjoyable. It’s a real crowd-pleaser, whether you’re serving it for breakfast, dessert, or just a special snack. If you love the classic pairing of dark chocolate and peanut butter, you are going to adore this. It’s simple enough for a weeknight but special enough for guests. Give it a try – I truly think you’ll fall in love with it, just like my family and I have. I can’t wait to hear what you think!
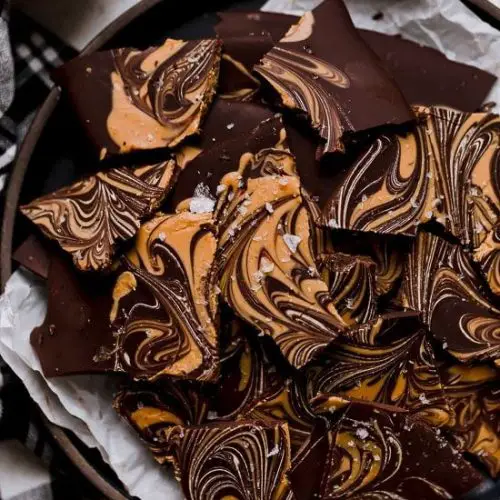
Dark Chocolate Peanut Butter Bark
Ingredients
Main Ingredients
- 226.8 ounces Lily's sugar free dark chocolate baking bar
- 2 tablespoons creamy peanut butter Skippy recommended
- 0.5 teaspoons coarse sea salt such as Maldon
Instructions
Preparation Steps
- Line a small 9 x 13-inch sheet pan with parchment paper. Set aside.
- Chop the chocolate with a knife. Melt the chocolate in the microwave, stirring every 30 seconds to avoid seizing. Once melted and smooth, set aside.
- Melt the peanut butter in the microwave in 20-second increments, stirring after each increment, until completely smooth.
- Pour chocolate onto the prepared baking sheet, spreading with a rubber spatula into a smooth layer.
- Drizzle melted peanut butter mixture in parallel lines on top of chocolate. Run a toothpick or knife through to form swirls.
- Top with coarse sea salt.
- Allow the bark to set completely in the refrigerator, about 30 minutes.
- Once hardened, break into pieces as large or as small as you want.
- Keep bark stored in an airtight container refrigerated or in a cool, dry place for up to 1 week.
Notes
Featured Comments
“I love this combo! It's like dessert heaven in every bite—rich chocolate and peanut butter just never disappoint.”
“Impressed! Clear steps and turned out amazing results. Perfect for busy nights.”
“New favorite here — so flavorful. crowd-pleaser was spot on.”
“Super easy and turned out amazing! My family asked for seconds. Saving this one.”
“This sweet treat was absolutely loved — the buttery really stands out. Thanks!”
“Made it tonight and wow — crowd-pleaser! Will definitely make Decadent Dark Chocolate Peanut Butter Treat again.”


I love this combo! It’s like dessert heaven in every bite—rich chocolate and peanut butter just never disappoint.