

You know those nights, right? The ones where you’re staring into the fridge, feeling that familiar pang of hunger, and you just want something utterly satisfying, something that feels like a treat but doesn’t require a whole production? Yeah, me too. And for me, on those nights, nothing hits the spot quite like a batch of perfectly crispy, deeply flavorful dry rub chicken wings. Forget soggy, bland wings that leave you feeling a bit meh. This recipe, my friends, is the real deal. It’s the one I’ve tweaked and perfected over years, the one that my family devours without a second thought, and honestly, it’s so ridiculously easy, it almost feels like cheating. If you’ve ever been intimidated by making wings at home, or if you’ve had less-than-stellar results in the past, this is the recipe that will change your mind. It’s my go-to, my secret weapon, my absolute favorite way to whip up some Dry rub chicken wings.What are some of the best sports bars in the world?
What is dry rub chicken wings?
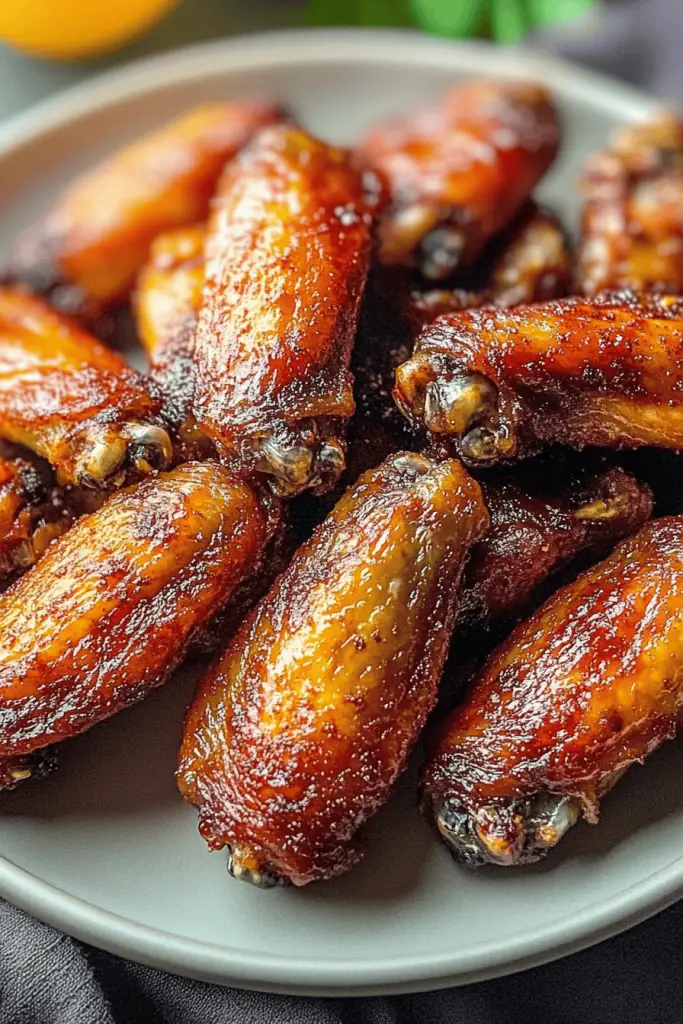
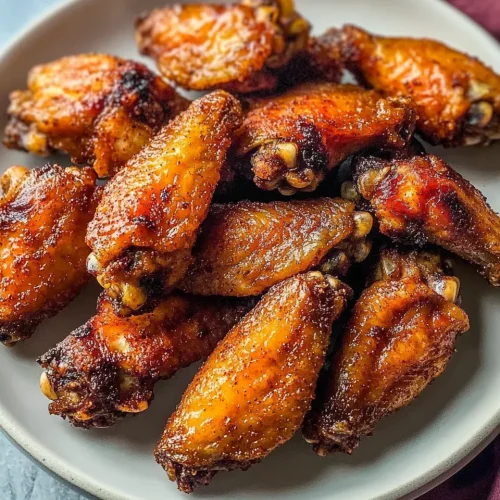
So, what exactly are we talking about when we say “dry rub chicken wings”? Think of it as the superhero of wing preparation. Instead of drowning our wings in a liquid marinade or a heavy sauce *before* cooking (which can sometimes lead to steaming and a less-than-crispy skin), we’re going to create this magical blend of spices – the dry rub – that clings to the chicken. This rub is packed with all sorts of savory, smoky, and sometimes a little spicy goodness. When it hits the hot oven, those spices toast and caramelize directly onto the skin, creating this incredible, almost crackly crust that is just out-of-this-world. It’s a totally different ballgame than your typical wet-marinated wings. It’s about building flavor from the outside in, letting the chicken’s natural deliciousness shine, amplified by a symphony of perfectly balanced seasonings. It’s simple, it’s effective, and it results in some seriously addictive chicken wings.
How to Make Dry Rub Chicken Wings
Quick Overview
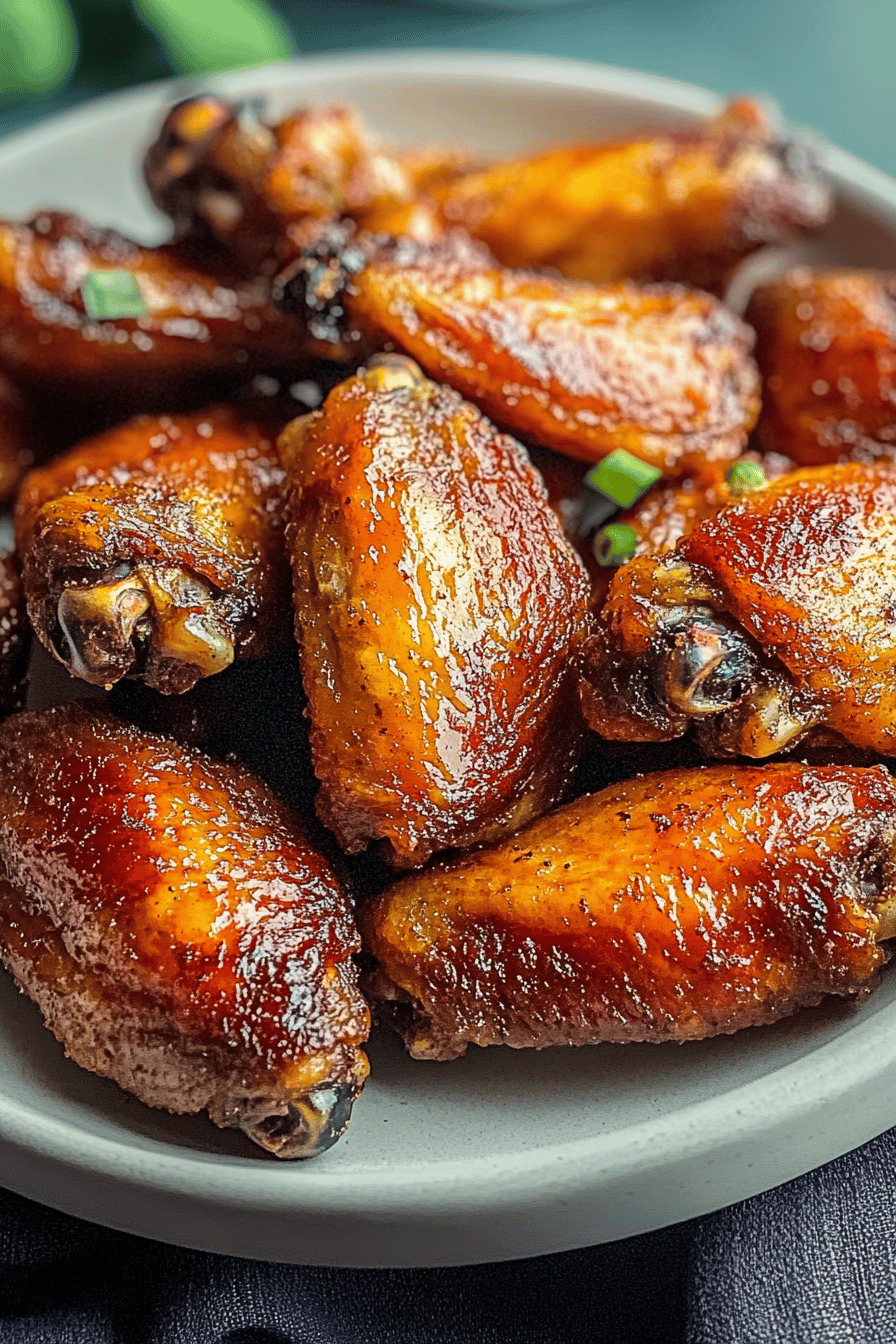
The process for these amazing dry rub chicken wings is refreshingly straightforward. We’ll start by getting our chicken wings prepped and then toss them in a killer homemade spice blend. The key is letting that dry rub really adhere to the wings. Then, we bake them at a higher temperature to ensure maximum crispiness. It’s a three-step wonder: prep, season, and bake. The beauty of this method is that it lets the natural flavors of the chicken and the spices shine, creating a texture that’s impossibly crisp. Trust me, you’ll be amazed at how easy it is to achieve such incredible results.
Ingredients
For the Chicken Wings:
3 pounds chicken wing flats and drumettes (about 2.5-3 lbs total) – I always go for a mix of flats and drumettes, as they cook a little differently and give everyone their favorite piece! Make sure they are patted completely dry. This is CRUCIAL for crispiness. I usually lay them out on paper towels for at least 15 minutes.
For the Amazing Dry Rub:
* 3 tablespoons smoked paprika – This is non-negotiable for that gorgeous color and smoky depth!
* 2 tablespoons brown sugar – Just a touch to help with caramelization and a hint of sweetness.
* 1 tablespoon garlic powder – Never skimp on garlic powder.
* 1 tablespoon onion powder – For that savory foundation.
* 2 teaspoons kosher salt – I prefer kosher salt for its texture and ability to dissolve nicely.
* 1 teaspoon Black Pepper – Freshly ground is always best if you have it.
* 1 teaspoon cayenne pepper (or more, to taste!) – This is where you can control the heat. I usually do 1 teaspoon, and my family is happy. If you like it spicier, add a bit more!
* ½ teaspoon dried thyme – A subtle herbal note that really rounds out the flavors.
* ½ teaspoon dried oregano – Another classic herb that pairs beautifully with chicken.
For Serving (Optional but Recommended!):
Your favorite hot sauce, ranch dressing, or blue cheese dip.
Step-by-Step Instructions
Step 1: Preheat & Prep Pan
First things first, let’s get your oven fired up and your baking sheet ready. Preheat your oven to 400°F (200°C). Now, line a large baking sheet with parchment paper. This is a lifesaver for cleanup, trust me! Some people use a wire rack on top of the baking sheet, and that’s a great option too if you have one, as it allows air to circulate around the wings for even crispier skin. But parchment paper alone works beautifully.
Step 2: Mix Dry Ingredients
Grab a medium-sized bowl and dump in all your dry rub ingredients: the smoked paprika, brown sugar, garlic powder, onion powder, kosher salt, black pepper, cayenne pepper, thyme, and oregano. Give it a good whisk with a fork or a small whisk until everything is thoroughly combined. You want to make sure there are no clumps and that all the spices are evenly distributed. This ensures every single wing gets a uniform coating of deliciousness.
Step 3: Mix Wet Ingredients
This step is more about preparing the wings themselves! Make absolutely sure your chicken wings are patted bone-dry with paper towels. Seriously, I can’t stress this enough. Any moisture on the skin will steam the wings instead of crisping them up. Lay them out on paper towels, flip them over, and dab them dry. The drier they are, the crispier they’ll get. It’s that simple!
Step 4: Combine
Now for the fun part! Place your thoroughly dried chicken wings into a large bowl. Sprinkle about half of your prepared dry rub mixture over the wings. Using your hands (this is the best way!), toss the wings to coat them evenly. Don’t be shy! You want every nook and cranny to be coated. If it seems like they need more, add the rest of the rub, a little at a time, tossing as you go. The goal is a nice, even coating of the spice mixture.
Step 5: Prepare Filling
This step isn’t applicable for this specific recipe as it’s for dry rub chicken wings. The “filling” is already inside the chicken!
Step 6: Layer & Swirl
Arrange the seasoned chicken wings in a single layer on your prepared baking sheet. Make sure they’re not overcrowding the pan; give them a little breathing room so they can crisp up properly. If they’re too close together, they’ll steam instead of roast. You might need to use two baking sheets if you’re making a big batch.
Step 7: Bake
Pop that baking sheet into your preheated oven. Bake for 20 minutes. Then, carefully flip each wing over. Continue baking for another 20-25 minutes, or until the wings are golden brown, crispy, and cooked through. The internal temperature should reach 165°F (74°C). Keep an eye on them, as oven temperatures can vary. If you want them extra crispy, you can turn on the broiler for the last 1-2 minutes, watching them very closely to prevent burning!
Step 8: Cool & Glaze
Once they’re perfectly cooked and crispy, remove the wings from the oven. Let them rest for just a few minutes on the baking sheet. If you’re planning to add a sauce, this is the time! Toss them gently in your favorite hot sauce or BBQ Sauce right in the bowl you used for seasoning, or pour the sauce over them on the baking sheet. I often skip the sauce entirely because this dry rub is so good on its own, but it’s totally up to you!
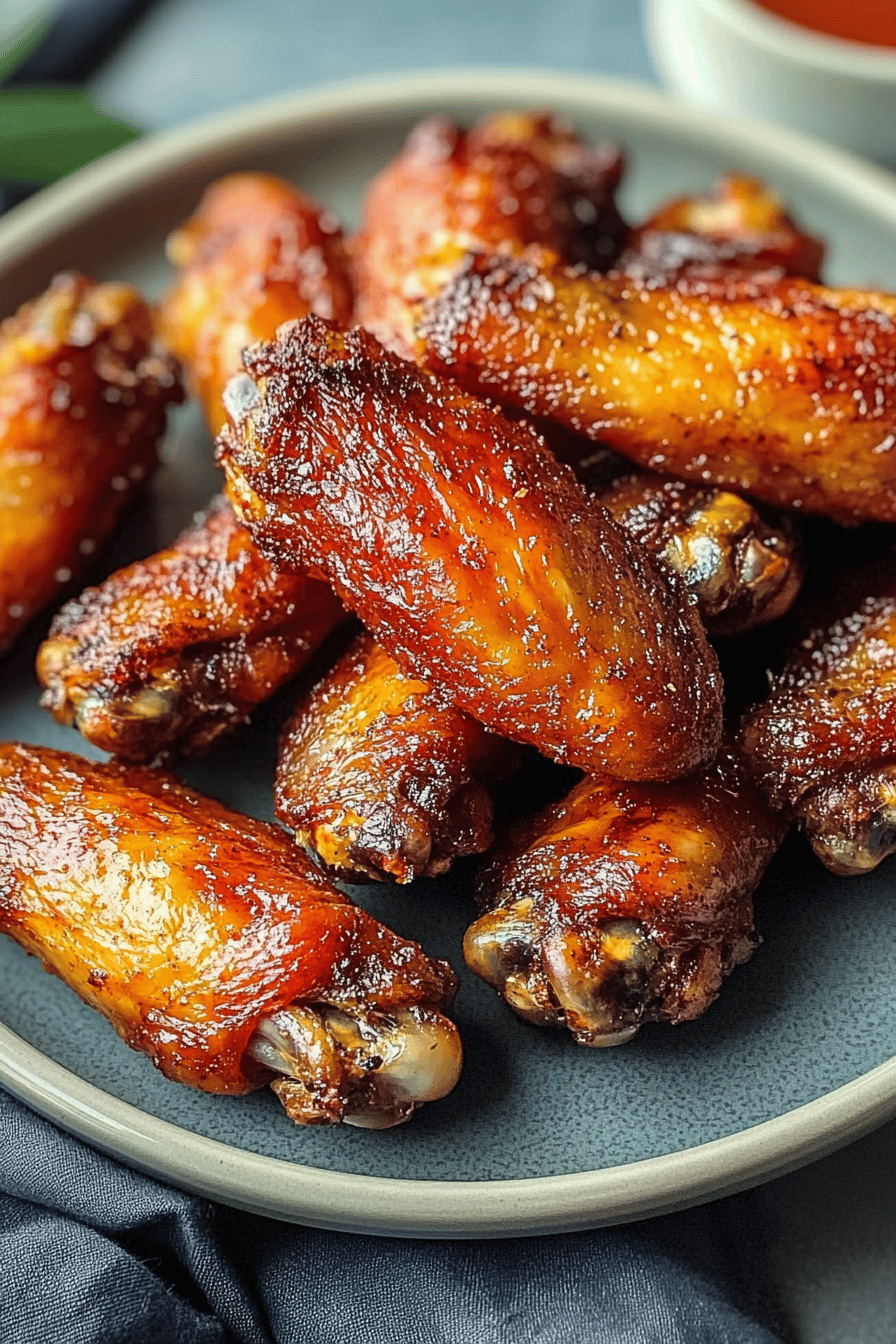
Step 9: Slice & Serve
Serve your glorious dry rub chicken wings immediately while they’re hot and crispy. They’re perfect on their own, but I love serving them with a side of cool, creamy ranch dressing or a tangy blue cheese dip for some contrast. A little celery and carrot on the side never hurts either!
What to Serve It With
These dry rub chicken wings are so incredibly versatile, they can honestly be the star of any meal or occasion. For those casual weeknight dinners when you want something satisfying but easy, I love serving them alongside a big, fresh green salad. The crispness of the salad really complements the richness of the wings. If we’re talking game day or a party, these are a no-brainer! They disappear faster than you can say “touchdown!” I usually put out a few bowls of different dips – classic ranch, a spicy Sriracha mayo, and of course, some good old blue cheese dressing.
For a more substantial meal, especially if you’re trying to round out a meal, I’ll pair them with some classic comfort sides. Think creamy mashed potatoes, crispy baked potato wedges, or even some Sweet Potato fries. They also make a fantastic appetizer when you’re having friends over for a more formal-ish get-together. Imagine a platter of these beauties alongside some mini quiches or a cheese board – it’s the perfect balance of casual and a little bit fancy. My kids, bless their hearts, are happy with just the wings and maybe some ketchup, but I often sneak in some roasted broccoli or green beans on their plates too. They’re just one of those foods that makes everyone happy, no matter how you serve them!
Top Tips for Perfecting Your Dry Rub Chicken Wings
After making these dry rub chicken wings more times than I can count, I’ve definitely picked up a few tricks that elevate them from good to absolutely spectacular. Let’s dive into some of my favorite tips and lessons learned:
Chicken Wing Prep is Key: I cannot stress this enough: pat those wings DRY. Seriously, get them as dry as possible with paper towels. I often lay them out on a rack set over a baking sheet for at least 15-20 minutes before I even think about seasoning them. The less moisture, the crispier your wings will be. It’s the single most important step to avoid soggy wings!
Don’t Be Shy with the Rub: When you’re tossing the wings with the dry rub, make sure you’re getting a really good, even coating. Use your hands for this! It helps you really work the spices into all the nooks and crannies. A light sprinkle won’t do. You want that beautiful, deep color and robust flavor all over.
Single Layer is Non-Negotiable: When you place the wings on the baking sheet, make sure they are in a single layer and not touching each other. Overcrowding the pan is a recipe for steamed wings, not crispy ones. If you have to use two baking sheets, do it! It’s worth the extra dish to wash for perfectly crisp results.
The Right Oven Temp: Baking them at a moderately high temperature, like 400°F (200°C), is crucial for crisping. If your oven runs cool or hot, use an oven thermometer to get it just right. It makes a world of difference.
Flip with Confidence: Flipping the wings halfway through the baking time ensures they crisp up evenly on all sides. Don’t be afraid to get in there and give them a good flip. Some people even like to use tongs to carefully lift and place them back down. Just make sure every surface gets exposed to the heat!
Broiler for Extra Crisp: If you are a true crisp-lover (like me!), after they’ve baked and been flipped, you can switch your oven to the broiler for the last 1-2 minutes. Keep a very close eye on them though, as they can go from perfectly crispy to burnt in seconds! This step is for the brave and the texture-obsessed.
Ingredient Quality Matters: While this is a simple recipe, using good quality spices can really make them sing. Fresh spices have more flavor. If your spices have been sitting in the back of your cupboard for years, they might be worth refreshing for this recipe!
Dry Rub vs. Sauce: Honestly, I often serve these wings without any added sauce. The dry rub itself is so incredibly flavorful and the texture is perfect. But if you love a saucy wing, a light toss in your favorite hot sauce or BBQ sauce right after they come out of the oven is divine. Don’t drown them, though; just a gentle coating.
Storing and Reheating Tips
The reality of having delicious dry rub chicken wings is that sometimes, you might have leftovers! And that’s a good thing, because they’re still pretty darn tasty when reheated. However, the key to enjoying them later is proper storage and reheating.
Room Temperature: If you’re planning to serve them as part of a larger spread and they won’t be sitting out too long, they’re usually okay at room temperature for about two hours. Beyond that, it’s best to get them refrigerated to maintain food safety.
Refrigerator Storage: Once they’ve cooled down a bit, transfer your leftover wings to an airtight container or a resealable plastic bag. They’ll stay good in the fridge for about 3-4 days. I’ve found that they hold their texture better if they aren’t completely sealed in a super airtight container right away – letting some air circulate can prevent them from getting too soggy, but for food safety, airtight is generally best.
Freezer Instructions: If you want to make a big batch and freeze some for later, that’s totally doable! Let the wings cool completely. Then, wrap them tightly in plastic wrap, followed by a layer of aluminum foil or place them in a heavy-duty freezer bag. This helps prevent freezer burn. They should last in the freezer for about 2-3 months. When you’re ready to use them, thaw them overnight in the refrigerator.
Reheating for Maximum Crispiness: This is where the magic happens. Microwaving is generally the enemy of crispy wings, so I strongly advise against it if you can help it. The best way to reheat these dry rub chicken wings is in the oven or an Air Fryer. Preheat your oven to around 375°F (190°C) and spread the wings in a single layer on a baking sheet. Reheat for about 10-15 minutes, or until they’re heated through and have regained some of their crispiness. An air fryer is even faster, usually taking just 5-8 minutes at around 375°F (190°C). They might not be *quite* as crispy as when they’re fresh, but they’ll be a million times better than microwaved ones!
Glaze Timing Advice: If you added a sauce after baking the first time, they might be a little softer upon reheating. If you prefer saucy wings and plan to reheat, I often recommend tossing them in sauce *after* reheating. This way, you reheat the crispy wings first, and then add the sauce just before serving.
Frequently Asked Questions
Final Thoughts
There you have it, my friends! A recipe for dry rub chicken wings that is truly a game-changer. I’ve shared this with so many people over the years, and the reactions are always the same: pure delight and a request for the recipe. It’s proof that you don’t need fancy techniques or a long list of obscure ingredients to create something incredibly delicious and satisfying. These wings are proof that simplicity can often lead to the most rewarding culinary experiences.
What I love most about this recipe is that it brings people together. Whether it’s for a cozy family dinner, a lively game day, or just a casual get-together with friends, these wings are always a hit. They’re the kind of food that sparks conversation and creates happy memories. I really hope you give this recipe a try. I’m confident it will become a go-to in your kitchen too. Don’t be afraid to experiment with the spice blend – make it your own! Maybe add a pinch of smoked paprika, or a different herb. The possibilities are endless.
I can’t wait to hear what you think! If you make these, please leave a comment below and let me know how they turned out. Did your family love them? Did you try any fun variations? Your feedback means the world to me, and I love seeing your culinary adventures. Happy cooking!
dry rub chicken wings
Ingredients
Main Ingredients
- 2 pounds chicken wings cut into drumettes and flats, tips removed
- 2 tablespoons paprika
- 1 tablespoon garlic powder
- 1 tablespoon onion powder
- 0.5 tablespoon black pepper
- 0.5 tablespoon salt
- 0.25 tablespoon cayenne pepper optional, for heat
Instructions
Preparation Steps
- Preheat your oven to 400°F (200°C). Line a baking sheet with parchment paper or a wire rack set over a baking sheet.
- In a large bowl, combine the paprika, garlic powder, onion powder, black pepper, salt, and cayenne pepper (if using). Stir well to create the dry rub.
- Add the chicken wings to the bowl with the dry rub. Toss until the wings are evenly coated.
- Arrange the coated chicken wings in a single layer on the prepared baking sheet or wire rack. Ensure they are not overlapping for maximum crispiness.
- Bake for 25 minutes, then flip the wings and bake for another 20-25 minutes, or until the wings are golden brown and cooked through. For extra crispy wings, you can broil them for the last 2-3 minutes, watching them closely to prevent burning.
- Remove from oven and let rest for a few minutes before serving. Serve hot with your favorite dipping sauces.
Notes
Featured Comments
“Impressed! Clear steps and spot on results. Perfect for busy nights.”
“New favorite here — comforting. crowd-pleaser was spot on.”
“Super easy and turned out amazing! My family asked for seconds. Saving this one.”
“This sweet treat was absolutely loved — the balanced really stands out. Thanks!”
“Made it tonight and wow — absolutely loved! Will definitely make dry rub chicken wings again.”
“Packed with flavor and so simple. Exactly what I wanted from dry rub chicken wings.”


