

The Ultimate Easy Dutch Baby (A Foolproof Weekend Breakfast)
Let’s talk about lazy weekend mornings. You know the ones. You’re still in your pajamas, coffee in hand, and you want a breakfast that feels incredibly special but requires almost zero brainpower. Enter my absolute favorite morning lifesaver: the easy Dutch baby. I’ll never forget the first time I watched one of these magical pancakes puff up in the oven. I was hovering by the oven door like a little kid watching a magic trick. It felt so fancy, yet the batter took me exactly three minutes to blend together.
If you’ve never made one before, you are in for a serious treat. It’s basically a giant, pillowy, custard-like pancake with crispy, buttery edges that climbs up the sides of your skillet. The best part? There is absolutely no standing over a hot stove flipping individual pancakes while the rest of your family eats without you. We’re tossing everything into a blender, pouring it into a hot pan, and letting the oven do all the heavy lifting.
What Is an Easy Dutch Baby?
Sometimes called a German pancake, a Bismarck, or a Dutch puff, an easy Dutch baby is essentially a large, baked pancake. But don’t let the word “pancake” fool you into thinking it’s heavy or dense. It actually has a lot more in common with a Yorkshire pudding or a popover. The batter is super thin and relies heavily on eggs rather than baking powder to get its lift.
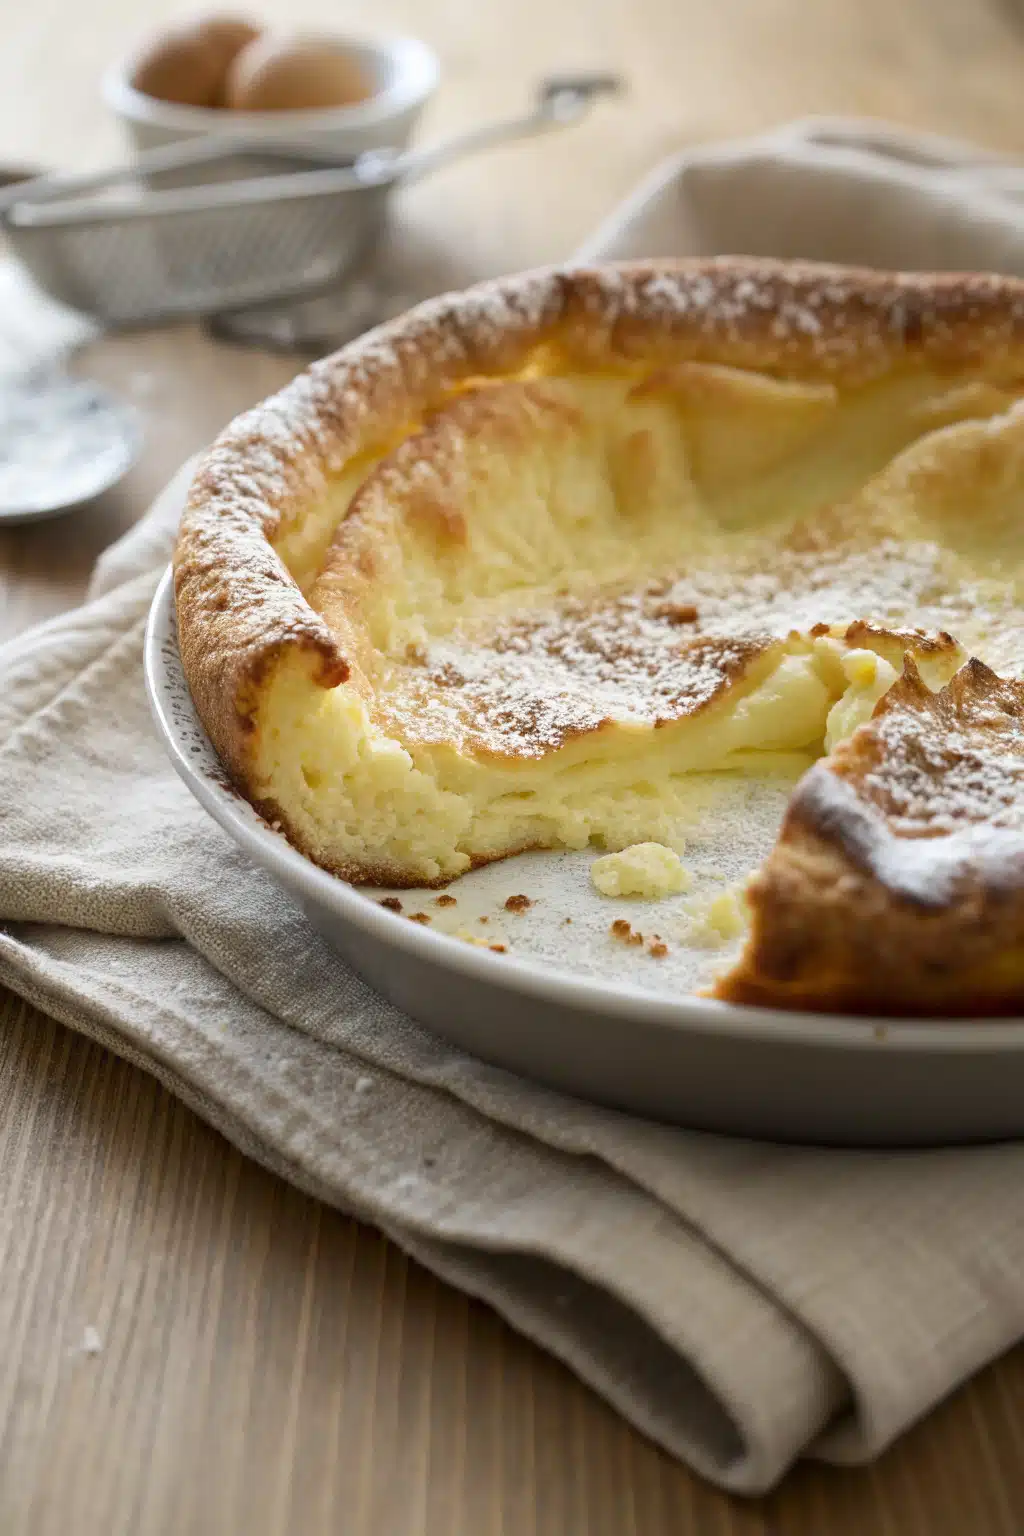
When that cool, liquid batter hits a screaming-hot cast-iron skillet slicked with melted butter, something wonderful happens. The steam forces the edges to rapidly climb up the sides of the pan, creating a spectacular, craggy, golden-brown bowl of pastry. The center stays slightly custardy and rich, while the edges get delightfully crisp and airy. And despite the name “Dutch,” they actually originated right here in the US—specifically in Seattle in the early 1900s—derived from traditional German pfannkuchen. Whatever you want to call it, I just call it delicious.
How to Make an Easy Dutch Baby
Quick Overview
Making this easy Dutch baby comes down to three incredibly simple phases. First, you’ll heat up your skillet in a hot oven so it’s ready to create that signature dramatic puff. Next, you’ll blitz your room-temperature ingredients in a blender until they are perfectly smooth and frothy. Finally, you’ll melt a generous knob of butter in your hot pan, pour in the batter, and let it bake until golden brown. The whole active prep takes less than five minutes of your time.
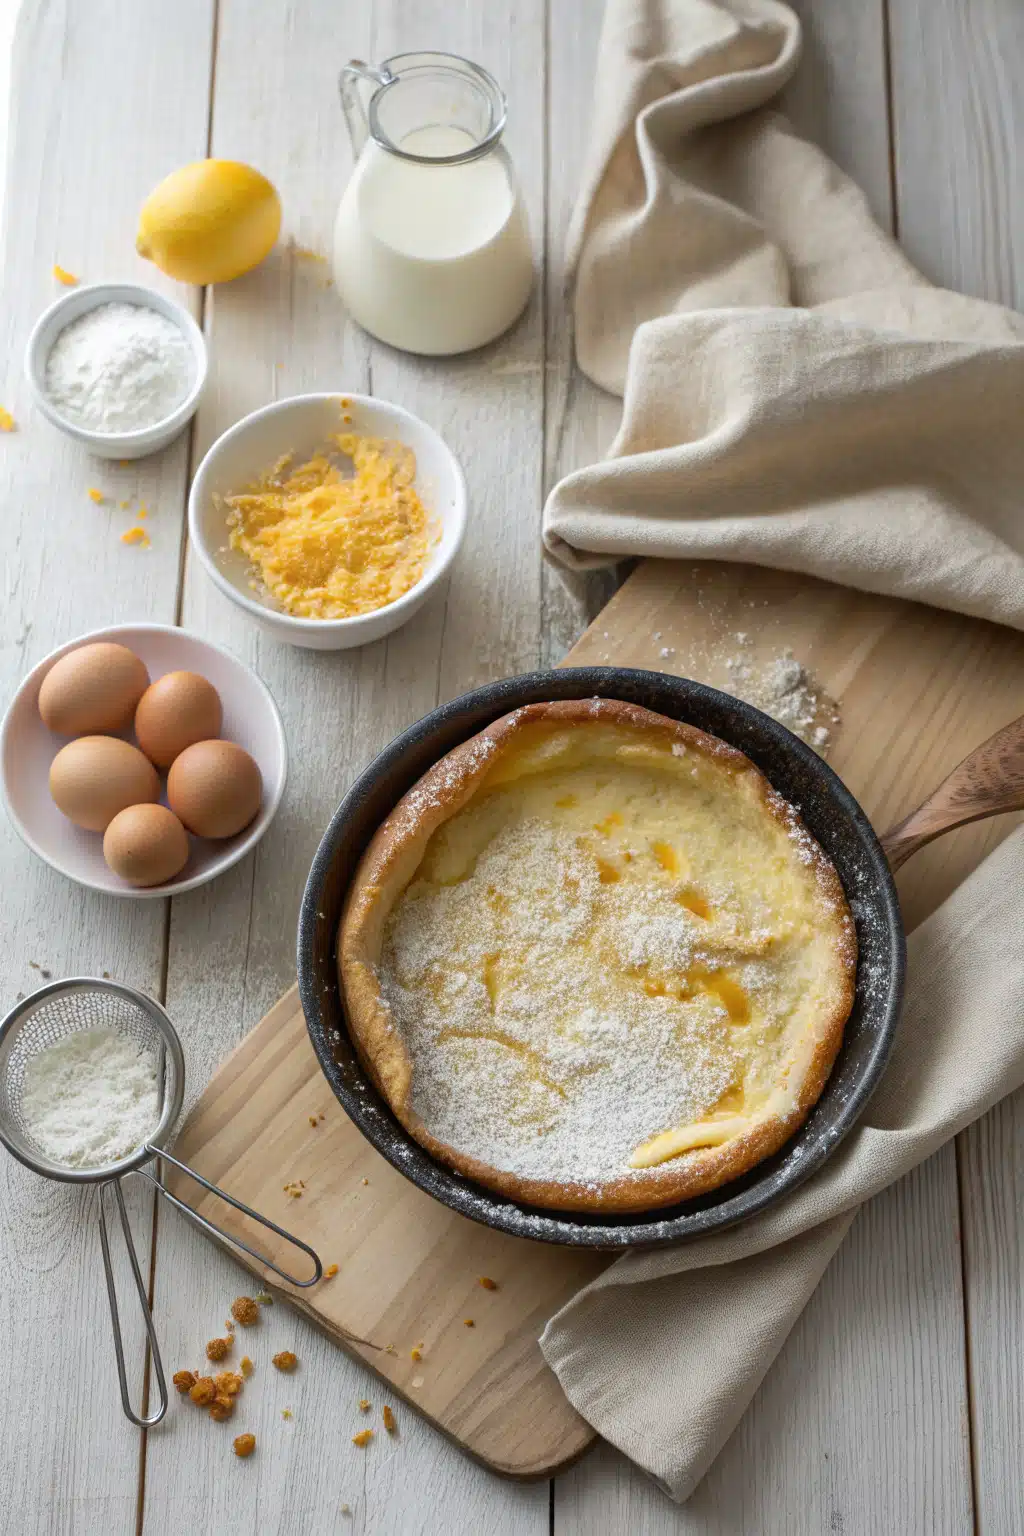
Ingredients
- Eggs: Three large eggs. They absolutely must be at room temperature for the best rise!
- Milk: Half a cup. Whole milk works best for a rich flavor, but 2% is totally fine. Again, make sure it’s room temperature.
- Flour: Half a cup of standard all-purpose flour.
- Sugar & Salt: Just one tablespoon of granulated sugar and a pinch of salt to balance the flavors.
- Vanilla Extract: A splash of real vanilla extract makes the whole house smell amazing.
- Butter: Three tablespoons of unsalted butter to coat the pan and give the edges that glorious crispiness.
Step-by-Step Instructions
Step 1: Preheat & Prep Pan
Place a 10-inch cast-iron skillet (or any heavy oven-safe baking dish) into your cold oven. Turn the heat to 425°F. Letting the pan heat up right alongside the oven is the ultimate secret to getting those sky-high, puffy edges. Give it about 15 to 20 minutes to get screaming hot.
Step 2: Blend the Batter
While the oven is preheating, crack your room-temperature eggs into a blender. Add the milk, flour, sugar, vanilla, and salt. Blend it on high for about 30 seconds until it’s completely smooth and frothy. Scrape down the sides with a spatula if you need to. Let the batter rest in the blender while the oven finishes heating. This resting time lets the flour hydrate, which gives you a much fluffier pancake.
Step 3: Melt the Butter
Once the oven is fully preheated, carefully remove the hot skillet using heavy-duty oven mitts. Drop your butter right into the center of the pan. Swirl it around as it melts quickly and starts to bubble. Make sure the butter coats the bottom and slightly up the sides of the skillet.
Step 4: Pour and Bake
Immediately pour your rested batter directly into the center of the buttered skillet. Don’t stir it! Just pop the skillet straight back into the oven. Bake for 15 to 20 minutes. Keep an eye on it through the oven window, but whatever you do, do not open the oven door! Once it’s puffed and deeply golden brown, take it out and serve immediately.
What to Serve It With
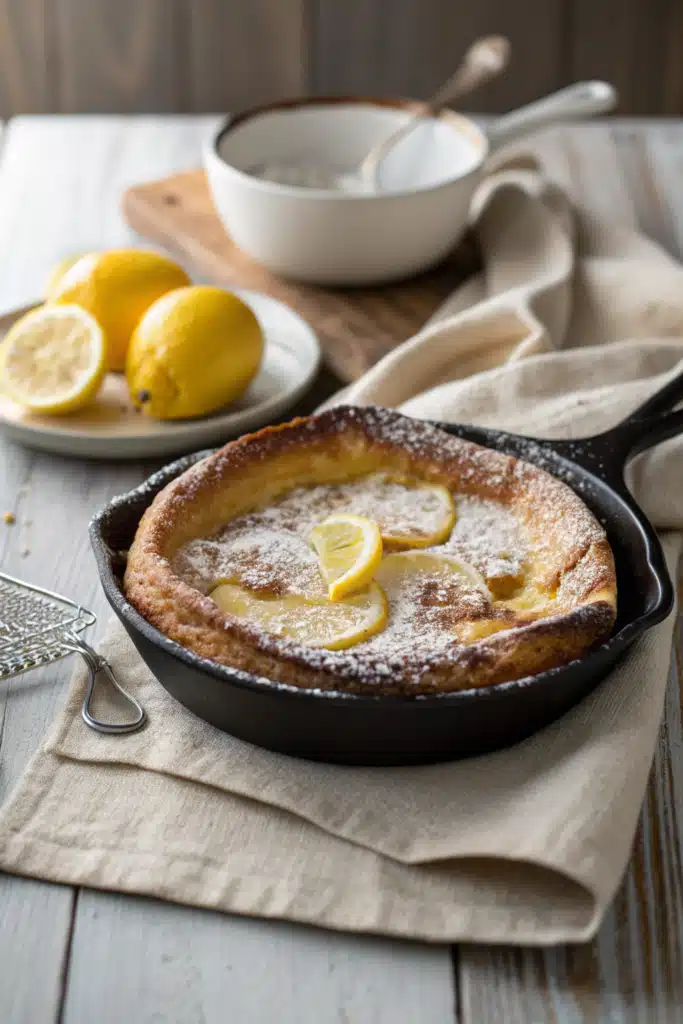
The fun really begins once your easy Dutch baby comes out of the oven. Because it deflates fairly quickly, you’ll want to have your toppings ready to go. My absolute favorite, traditional way to serve this is with a generous squeeze of fresh lemon juice and a heavy dusting of powdered sugar. The tartness of the lemon cuts through the rich, buttery pastry perfectly.
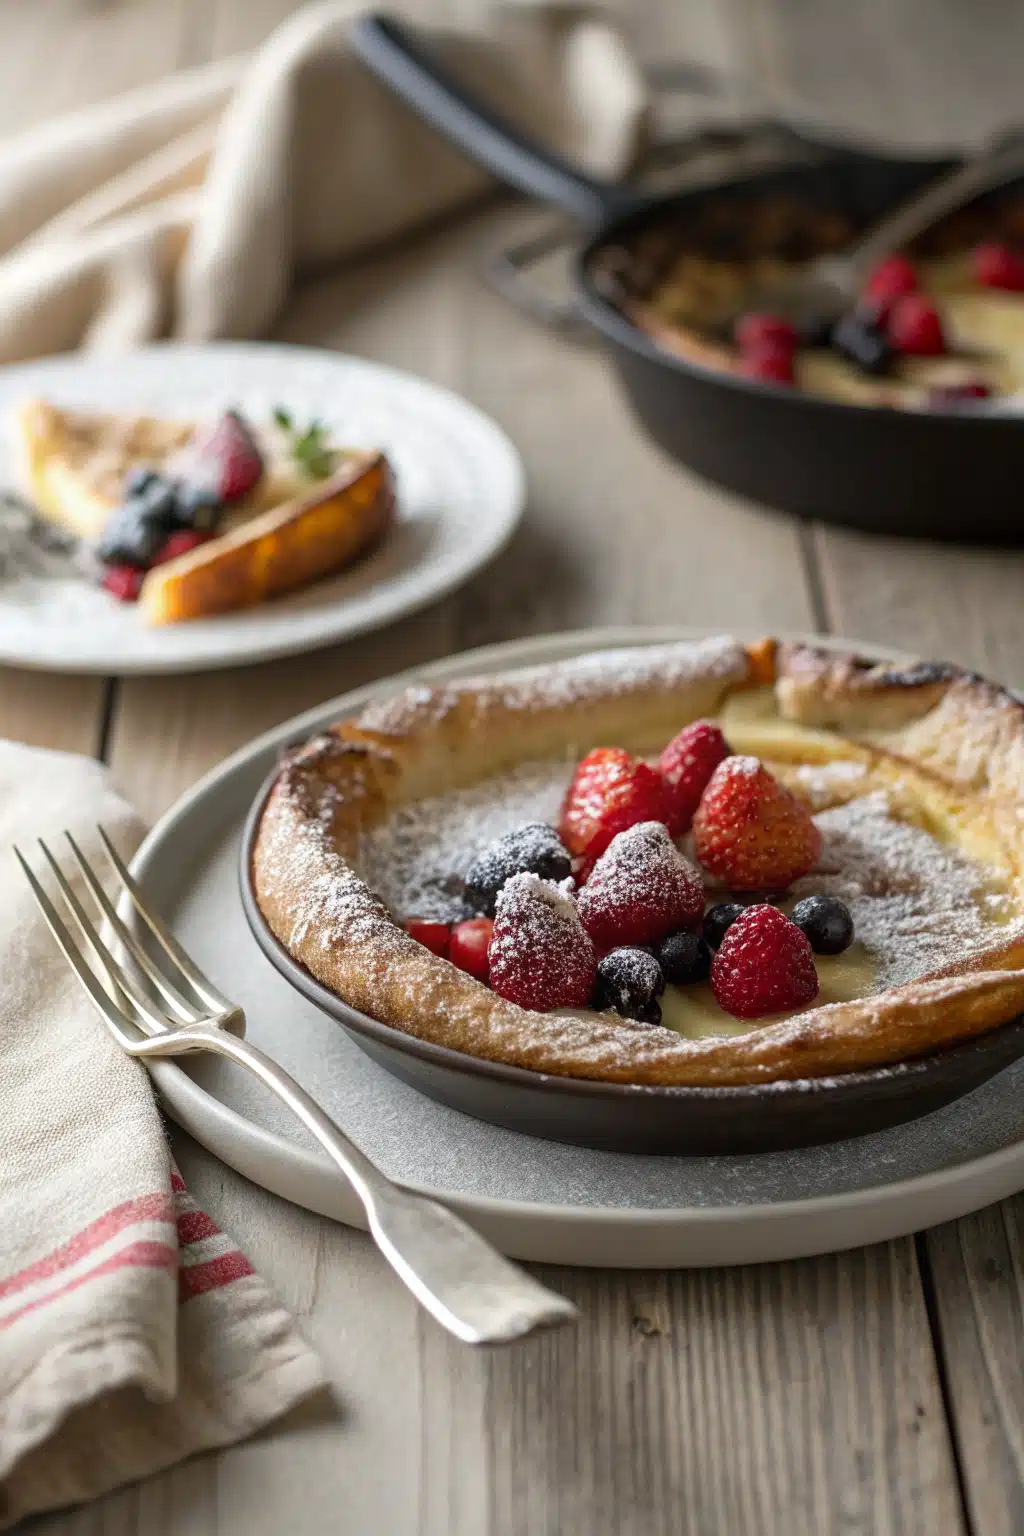
If you have a sweet tooth, try loading the center with fresh berries. Strawberries, blueberries, and raspberries look stunning against the golden crust. You can also drizzle it with warm maple syrup, add a dollop of freshly whipped cream, or even spoon on some lemon curd. For a cozy fall vibe, sauté some sliced apples in cinnamon and brown sugar while the pancake bakes, and spoon them right into the center before serving.
Top Tips for Perfecting Your Easy Dutch Baby
While this recipe is incredibly forgiving, there are a few golden rules I always follow to make sure I get that dramatic, show-stopping puff every single time.
- Room temperature ingredients are non-negotiable: Cold eggs and milk will cool down your hot pan and stop the steam from forming quickly. Take your eggs and milk out of the fridge at least 30 minutes before you plan to bake.
- Get that pan screaming hot: The thermal shock of the room-temperature batter hitting a blazing hot, buttered skillet is exactly what causes the edges to climb. Don’t skip preheating the pan!
- Keep the oven door shut: I know it’s so tempting to peek, but opening the oven lets out the precious steam and heat that your pancake needs to rise. Turn on the oven light and watch through the glass instead.
- Serve it immediately: Dutch babies are meant to be eaten right away. They will naturally deflate within a minute or two of coming out of the oven, so have your plates and toppings ready on the counter!
Storing and Reheating Tips
Listen, an easy Dutch baby is definitely best enjoyed fresh right out of the oven. But if you happen to have leftovers (which rarely happens in my house, to be honest), don’t throw them away!
You can store leftover slices in an airtight container in the refrigerator for up to three days. To reheat, I highly recommend using a toaster oven or your regular oven at 300°F for a few minutes until it’s warmed through and the edges crisp up again. You can use the microwave if you’re in a rush, but be warned: it will make the pancake a bit soft and rubbery instead of crisp.
Frequently Asked Questions
Final Thoughts
There you have it—my absolute favorite weekend breakfast hack. This easy Dutch baby looks like it belongs in a fancy brunch restaurant, but it’s secretly the most laid-back recipe in my morning rotation. It’s crispy, buttery, slightly sweet, and endlessly customizable.
I really hope you give this a try the next time you’re craving something special but don’t want to spend your morning hunched over a hot stove flipping flapjacks. Pour yourself a hot cup of coffee, watch the magic happen through the oven window, and enjoy a beautiful breakfast with the people you love. Let me know how yours turned out and what delicious toppings you decided to use!

Easy Dutch Baby
Ingredients
Main Ingredients
- 0.75 cup whole milk
- 4 large eggs
- 2 tablespoons unsalted butter melted
- 0.67 cup all-purpose flour
- 0.5 teaspoon sea salt
- 1.5 teaspoons vanilla extract
- 2 tablespoons unsalted butter
- Whipped cream for garnish
- Fresh berries for garnish
- Powdered sugar for garnish
Instructions
Preparation Steps
- Add a 10-inch cast iron skillet to an oven and preheat to 400°F.
- In the meantime, add the milk, eggs, melted butter, flour, salt, and vanilla to a blender and blend on high for 20 to 30 seconds or until very smooth. Set it aside.
- Remove the skillet once it has been preheated and add in the 2 tablespoons of butter and heat until it is melted.
- Immediately pour in the batter from the blender and bake at 400°F for 20 minutes or until browned, firm, and the batter has crawled up the sides of the pan.
- Remove the Dutch baby from the oven and garnish with fresh berries, whipped cream, and powdered sugar.
Notes
Featured Comments
“Love this recipe! The crispy edges and fluffy center are absolutely perfect. Can't wait to try it with fresh berries.”
“Impressed! Clear steps and perfect for busy nights results. Perfect for busy nights.”
“New favorite here — turned out amazing. crowd-pleaser was spot on.”
“Super easy and turned out amazing! My family asked for seconds. Saving this one.”
“This sweet treat was absolutely loved — the bright really stands out. Thanks!”
“Made it tonight and wow — crowd-pleaser! Will definitely make Dutch Baby Pancake again.”


Love this recipe! The crispy edges and fluffy center are absolutely perfect. Can’t wait to try it with fresh berries.