

You know those days? The ones where life feels like a whirlwind, and you just need a little bit of comfort, a moment of pure, unadulterated deliciousness? That’s when I reach for this Banana Bread. It’s more than just a recipe; it’s a memory maker, a crowd-pleaser, and honestly, my secret weapon for turning a chaotic afternoon into a cozy haven. I’ve tried countless variations, but this one, my friends, is the one I come back to again and again. It’s ridiculously easy, uses up those overripe bananas you’ve been meaning to deal with, and the aroma that fills the house while it bakes? Absolutely magical. If you’ve ever felt intimidated by baking, this is your starting point. It’s like the kinder, gentler cousin to a complex cake, but with all the cozy charm. Seriously, if you’re looking for genuinely easy bread recipes that deliver big on flavor without a fuss, you’ve found your winner.
What is your favorite easy banana bread recipe?
So, what exactly *is* this glorious loaf? Think of it as your ultimate comfort food in baked form. It’s essentially a moist, tender quick bread, meaning it doesn’t require any yeast or lengthy rising times. The star of the show, of course, is the banana. The riper, the better! Those brown, spotty bananas you might usually toss? They’re gold for banana bread. They break down beautifully, infusing the entire loaf with their natural sweetness and a wonderfully distinct flavor. This recipe is designed to be straightforward – no fancy techniques, just simple mixing and baking. It’s the kind of recipe you can whip up on a Sunday morning with sleepy kids underfoot, or even on a weeknight when a sweet craving strikes. It’s unfussy, forgiving, and always turns out just right. It’s the definition of an easy Bread Recipe that feels like a treat.
How do I make my go-to easy banana bread?
Quick Overview
The beauty of this banana bread lies in its straightforward approach. You’ll mash your ripe bananas, whisk them with wet ingredients, then gently combine them with the dry ingredients. A quick swirl of any optional add-ins, into the oven it goes, and soon you’ll be rewarded with a golden-brown, incredibly fragrant loaf. It’s designed to be forgiving, ensuring even beginners can achieve fantastic results. No complicated steps, just pure baking joy.
Ingredients
For the Main Batter:
You’ll need about 3-4 very ripe bananas. The spottier, the better – they’ll give you the most flavor and sweetness. Make sure they’re mashable! I always use unsalted butter, softened, because it gives you more control over the salt content. For the sugar, I usually go with a mix of granulated and brown sugar; the brown sugar adds a lovely moisture and caramel note. For the flour, all-purpose is perfectly fine, but if you happen to have cake flour on hand, using it can make the bread even more tender, though it’s not essential. A teaspoon of baking soda is key for leavening, and a pinch of salt just balances all the sweetness. And don’t skip the Vanilla Extract; it really enhances all the flavors.
For Optional Mix-Ins (My Favorites!):
This is where you can have some fun! My personal go-to is about a cup of chocolate chips – semi-sweet are divine. Walnuts or pecans are also fantastic; they add a lovely crunch. I’ve even thrown in a handful of dried cranberries for a little tartness. If you’re feeling adventurous, a pinch of cinnamon or nutmeg in the batter itself is wonderful. Just make sure whatever you choose is roughly chopped if it’s large, so it distributes evenly.
For the Simple Glaze (Optional, but oh-so-good!):
This is so simple it barely counts as a recipe step! It’s just powdered sugar mixed with a little bit of milk or water until you get a drizzly consistency. You can play with the liquid amount to get it just right. A tiny splash of vanilla extract in the glaze is also a nice touch, or even a little lemon zest for brightness. It’s not essential, but it really elevates the final loaf.
Step-by-Step Instructions
Step 1: Preheat & Prep Pan
First things first, let’s get that oven preheated to 350 degrees Fahrenheit (175 degrees Celsius). While the oven is warming up, grab a standard 9×5 inch loaf pan. I like to grease it really well with butter or cooking spray, and then dust it with a little bit of flour. You can also line it with parchment paper, leaving some overhang on the sides – this makes lifting the finished loaf out a breeze. Having this ready to go means your batter won’t be sitting around too long before baking.
Step 2: Mix Dry Ingredients
In a medium-sized bowl, whisk together your flour, baking soda, and salt. I like to give it a good whisk to make sure the baking soda is evenly distributed, which helps ensure your banana bread rises beautifully and evenly. If you’re adding any spices like cinnamon or nutmeg directly into the batter, whisk them in here too. Don’t overthink this step; just a good, gentle whisk to combine everything.
Step 3: Mix Wet Ingredients
Now, in a larger bowl (this is where everything will eventually come together), mash your ripe bananas. You want them nice and smooth, with maybe just a few small lumps for texture. Then, add your softened butter, granulated sugar, brown sugar, eggs, and vanilla extract. Beat this mixture together until it’s well combined and looks creamy. I usually use a whisk or an electric mixer on low speed for this. The bananas should be completely incorporated into the wet ingredients.
Step 4: Combine
This is the crucial step where we bring the wet and dry ingredients together. Pour your dry ingredients into the bowl with the wet ingredients. Now, here’s the secret to a tender banana bread: mix until *just* combined. A few streaks of flour are okay! Overmixing develops the gluten in the flour, which can lead to a tough, dry bread. I usually switch to a spatula or wooden spoon for this part and fold everything together gently. If you’re adding in chocolate chips or nuts, gently fold them in now.
Step 5: Prepare Filling (Optional, for Swirls)
If you’re making a swirl variation, this is where you’d prepare your filling. For a classic cinnamon-sugar swirl, mix about 1/4 cup of brown sugar with 1 teaspoon of cinnamon. You can also add a tablespoon of flour to help it bind. If you’re feeling fancy, you could mix cocoa powder with a little sugar and water to make a chocolate swirl. The goal is a thick paste or mixture that you can drizzle or spread.
Step 6: Layer & Swirl (Optional)
Pour about half of the banana bread batter into your prepared loaf pan. If you’re swirling, sprinkle half of your cinnamon-sugar mixture (or other filling) over the batter. Then, pour the remaining batter on top, and sprinkle the rest of your filling over that. If you want a more marbled look, you can gently run a knife or skewer through the batter a few times to create swirls. Don’t overdo it, or you’ll muddy the flavors.
Step 7: Bake
Pop that beautifully prepared pan into your preheated oven. Bake for about 50-65 minutes. The exact time can vary depending on your oven. How do you know it’s done? Insert a toothpick or a thin knife into the center of the loaf. If it comes out clean (or with just a few moist crumbs attached, especially if you have chocolate chips), it’s ready. If there’s wet batter on it, give it another 5-10 minutes and check again. The top should be golden brown and the edges should be starting to pull away from the sides of the pan.
Step 8: Cool & Glaze
Once baked, let the banana bread cool in the pan for about 10-15 minutes. This allows it to firm up slightly. Then, carefully invert it onto a wire rack to cool completely. This is important! If you try to glaze it while it’s still warm, the glaze will just melt off. Once it’s completely cool, whisk together your powdered sugar and liquid for the glaze until you reach your desired drizzling consistency. Drizzle it generously over the top of the cooled loaf. Let the glaze set for about 15-20 minutes before slicing.
Step 9: Slice & Serve
Once the glaze has set (or if you skipped the glaze!), use a serrated knife to slice the banana bread. This type of knife is best for getting clean slices without squishing the loaf. Serve it at room temperature for the best texture and flavor. Enjoy every delicious bite!
What to Serve It With
This banana bread is so versatile, it can be dressed up or down for any occasion! For **Breakfast**, it’s absolutely divine served warm with a generous smear of butter. It pairs perfectly with a steaming mug of coffee or a glass of cold milk. The comforting flavors are the perfect way to start your day. For **Brunch**, I love to present it on a beautiful platter, perhaps with a side of fresh berries or a dollop of Greek yogurt. It feels elegant yet simple. For **Dessert**, slice it thick and serve it warm, maybe with a scoop of vanilla bean ice cream and a drizzle of caramel sauce – pure indulgence! It’s also fantastic toasted and served alongside a cup of tea after dinner. And for those **Cozy Snacks**, when you just need something comforting without much fuss, a simple slice of this banana bread is perfection. Pair it with a hot chocolate on a chilly evening, or just enjoy it on its own with a good book. My family has a tradition of having a slice with a glass of iced tea on sunny afternoons, and it’s one of my favorite simple pleasures.
Top Tips for Perfecting Your Banana Bread
I’ve learned a few tricks over the years that really make a difference in getting that perfect loaf every time. For **Zucchini Prep** (if you ever add zucchini, which I sometimes do for extra moisture!), the key is always to squeeze out as much liquid as possible. Grating it on the larger holes of a box grater usually works best. Make sure your bananas are truly ripe; the darker and spottier, the more natural sweetness and flavor they’ll lend. When it comes to **Mixing Advice**, remember my earlier note: don’t overmix! Seriously, just stir until the dry ingredients are *barely* incorporated. Overmixing is the most common culprit for dry, tough quick breads. You should see a few streaks of flour remaining. For **Swirl Customization**, if you’re making a cinnamon-sugar swirl, don’t pack the batter too tightly when you add it to the pan. This allows the swirl to distribute better. Also, a gentle swirling motion with a knife is all you need; you don’t want to over-mix it into the batter. For **Ingredient Swaps**, if you don’t have brown sugar, you can use all granulated sugar, but you might miss that extra depth of flavor and moisture. You can also try using a good quality oil (like coconut or avocado oil) instead of butter, using about 3/4 cup oil for every 1 cup of butter, but I find butter gives it a richer flavor. For **Baking Tips**, always keep an eye on your oven. Ovens can vary wildly! If the top is browning too quickly before the inside is cooked, you can loosely tent it with aluminum foil for the remainder of the baking time. A good rule of thumb for doneness is the toothpick test, but also gently pressing the top – it should spring back slightly. And for **Glaze Variations**, if your glaze is too thick, add milk or water a teaspoon at a time. If it’s too thin, add more powdered sugar. You can also add a little lemon zest or even a tiny bit of orange juice for a different citrusy kick.
Storing and Reheating Tips
The best part about this banana bread is that it keeps beautifully, making it perfect for a make-ahead treat. For **Room Temperature Storage**, once the loaf is completely cool, you can store it in an airtight container or wrap it tightly in plastic wrap. It will stay fresh and moist on the counter for about 2-3 days. If your kitchen is particularly warm, it might be better to opt for refrigerator storage. For **Refrigerator Storage**, wrap the cooled banana bread well in plastic wrap or place it in an airtight container. It will last in the fridge for about a week. The texture might become slightly denser when chilled, but it’s still delicious! For **Freezer Instructions**, this banana bread freezes like a dream. You can freeze the whole loaf or individual slices. Wrap it very tightly in plastic wrap, then in aluminum foil, or place it in a freezer-safe bag or container. It will keep well in the freezer for up to 3 months. To thaw, let it sit at room temperature for a few hours, or gently reheat slices in the oven or toaster oven. For **Glaze Timing Advice**, if you plan to freeze your banana bread, I highly recommend glazing it *after* it has thawed. Glazing before freezing can sometimes make the glaze weep or become sticky in the freezer. So, store unfrosted if freezing, then glaze once thawed and ready to serve.
Frequently Asked Questions
Final Thoughts
Honestly, this easy banana bread recipe is a true testament to the fact that delicious, comforting baked goods don’t have to be complicated. It’s a recipe that has brought so much joy to my kitchen, and I truly hope it does the same for yours. It’s the perfect example of how simple ingredients can come together to create something truly special. It’s forgiving, it’s fragrant, and it tastes like a warm hug. If you’re looking for easy bread recipes that are reliable and absolutely delicious, give this one a try. You won’t be disappointed! I can’t wait to hear how your loaf turns out! Please leave a comment below to share your experience, any variations you tried, or even just to say hello. Your feedback and stories are what make this community so wonderful. Happy baking, everyone!
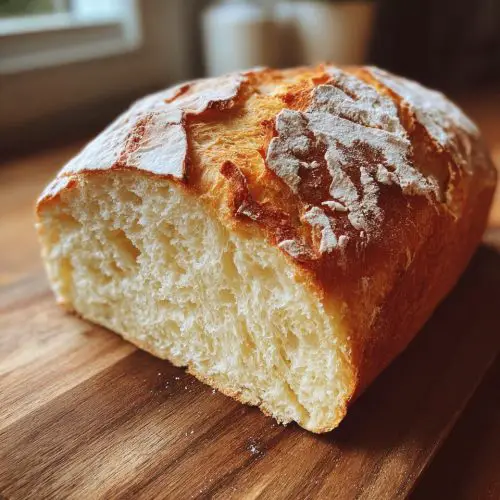
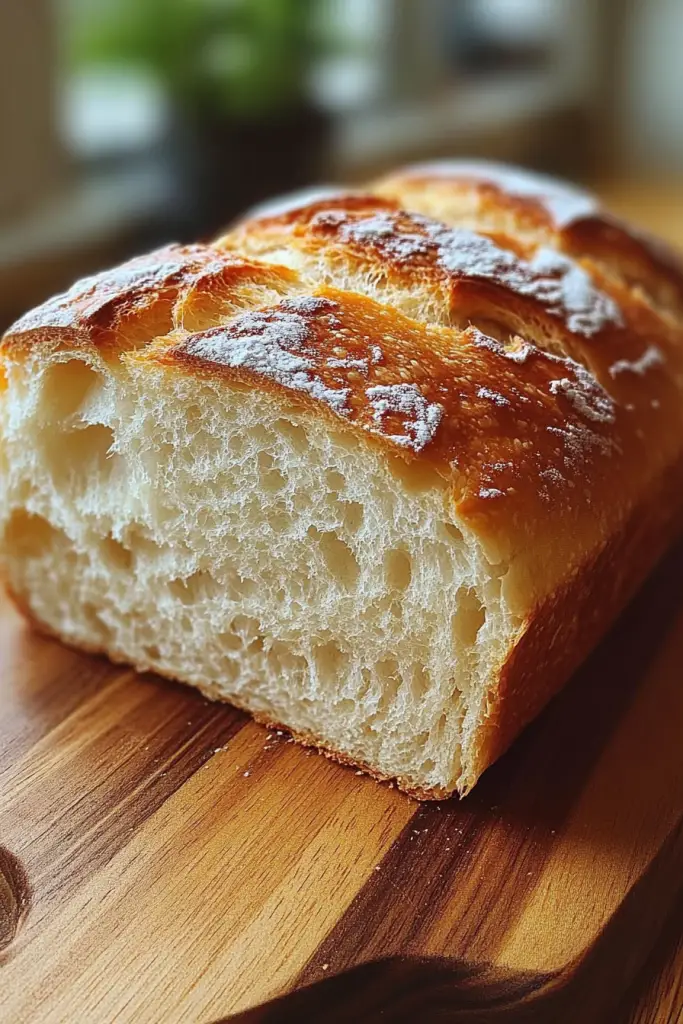
Easy No-Knead Bread
Ingredients
Main Ingredients
- 3 cups all-purpose flour
- 1.5 teaspoons salt
- 0.5 teaspoons instant yeast
- 1.5 cups lukewarm water around 105-115°F
Instructions
Preparation Steps
- In a large bowl, whisk together the flour, salt, and yeast.
- Pour in the lukewarm water and mix with a spoon or spatula until just combined. The dough will be shaggy and sticky.
- Cover the bowl with plastic wrap or a clean kitchen towel and let it rest at room temperature for at least 8 hours, or up to 18 hours.
- After the resting period, the dough will be bubbly and have increased in volume. Turn the dough out onto a well-floured surface. Gently shape it into a ball, being careful not to deflate it too much.
- Place the dough ball on a piece of parchment paper. Let it rest, uncovered, for about 30 minutes while you preheat your oven and a Dutch oven.
- Preheat your oven to 450°F (230°C). Place an empty Dutch oven with its lid on into the preheated oven for at least 30 minutes.
- Carefully remove the hot Dutch oven from the oven. Remove the lid. Using the parchment paper, carefully lower the dough into the hot Dutch oven.
- Cover the Dutch oven with the lid and place it back into the oven. Bake for 30 minutes.
- Remove the lid from the Dutch oven and continue baking for another 10-15 minutes, or until the crust is golden brown and the internal temperature of the bread reaches 200-210°F (93-99°C).
- Carefully remove the bread from the Dutch oven and place it on a wire rack to cool completely before slicing.
Notes
Featured Comments
“Impressed! Clear steps and turned out amazing results. Perfect for busy nights.”
“New favorite here — creamy. crowd-pleaser was spot on.”
“Super easy and turned out amazing! My family asked for seconds. Saving this one.”
“This sweet treat was absolutely loved — the fresh really stands out. Thanks!”
“Made it tonight and wow — restaurant-level! Will definitely make easy bread recipes again.”
“Packed with flavor and so simple. Exactly what I wanted from easy bread recipes.”


