

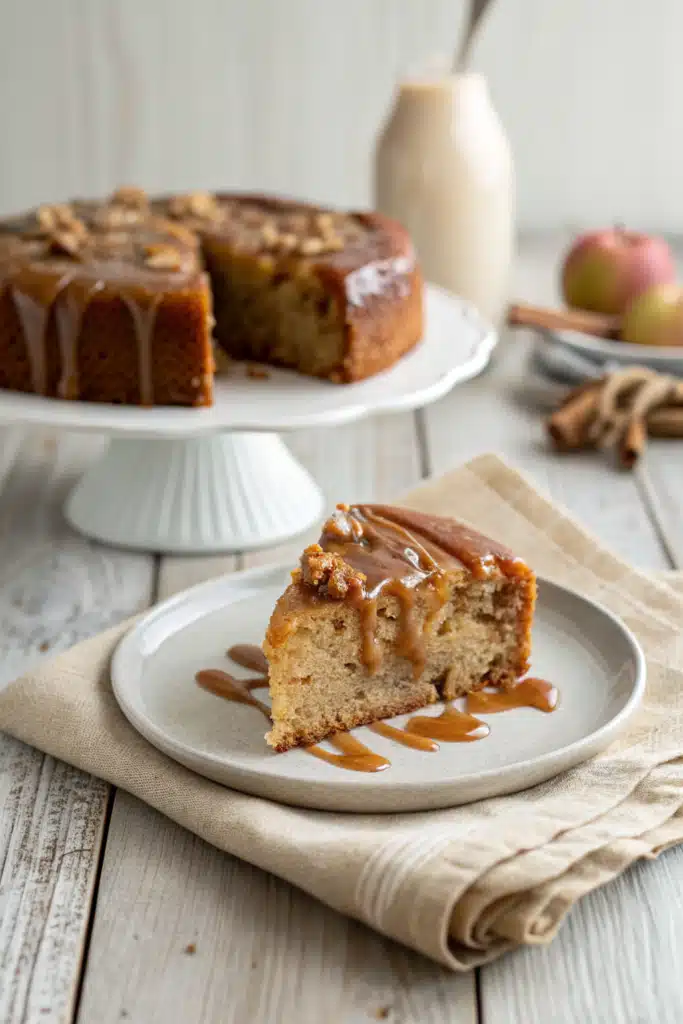
The Ultimate Easy Caramel Apple Cake
There is absolutely nothing quite like the smell of a Caramel Apple Cake baking in the oven on a crisp afternoon. You know that exact smell, right? It’s that warm, cozy blend of cinnamon, sweet baking apples, and buttery caramel that wraps around you like a big, familiar hug. I remember the first time I made this specific recipe; my kitchen was a total disaster zone, but the moment I pulled that golden, bubbling beauty out of the oven, none of the mess mattered.
It’s the kind of dessert that makes your neighbors suddenly “drop by” just to see what you’re up to. If you’ve been searching for a foolproof, incredibly moist cake that screams comfort food, you can officially call off the search. This cake is everything you want in a fall dessert, but honestly, I bake it all year round because my family literally begs for it. Grab your favorite mixing bowl and let’s get baking, because you are going to fall head over heels for this one!
What Is A Caramel Apple Cake?
So, what exactly are we making here? Think of it as the glorious love child of a traditional spiced apple cake and a rich, gooey sticky toffee pudding. At its core, it is a beautifully dense, incredibly moist cake loaded with chunks of fresh, tart apples. But what truly sets it apart—and what will make you close your eyes in pure bliss when you take a bite—is the caramel.
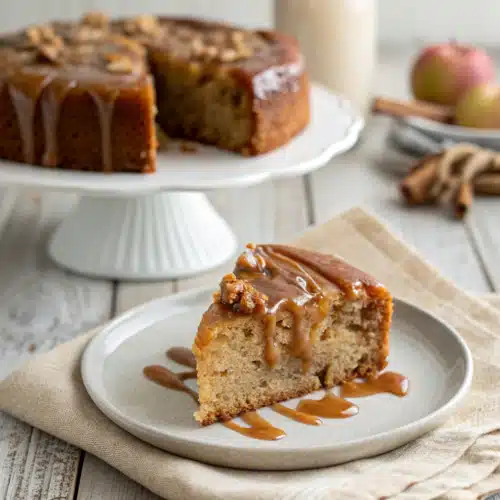
We’re not just talking about a little drizzle on top as an afterthought. This cake features ribbons of rich, buttery caramel baked right into the batter, plus a generous pour over the warm cake the very second it comes out of the oven. The caramel sinks into the crumb, creating these magical, sticky little pockets of joy. It’s rustic, it’s unapologetically decadent, and it doesn’t require any fancy frosting techniques or decorating skills. It is just honest-to-goodness, old-fashioned baking at its absolute finest.
How to Make Caramel Apple Cake
Quick Overview
Making this Caramel Apple Cake is a total breeze, even if you don’t consider yourself much of a “baker.” We’ll start by tossing our chopped apples in a little cinnamon and sugar—this draws out the juices and coats them in flavor. Then, we mix our wet ingredients and dry ingredients separately before gently folding them together. The secret is not to overmix! We’ll layer the batter with the apples and a generous drizzle of caramel sauce right in the pan. After a quick bake in the oven, we finish it off with even more caramel while the cake is still warm, allowing all that sticky goodness to soak right in. It takes maybe twenty minutes of active prep time, tops.
Ingredients
Here is what you will need to grab from your pantry and fridge to get started:
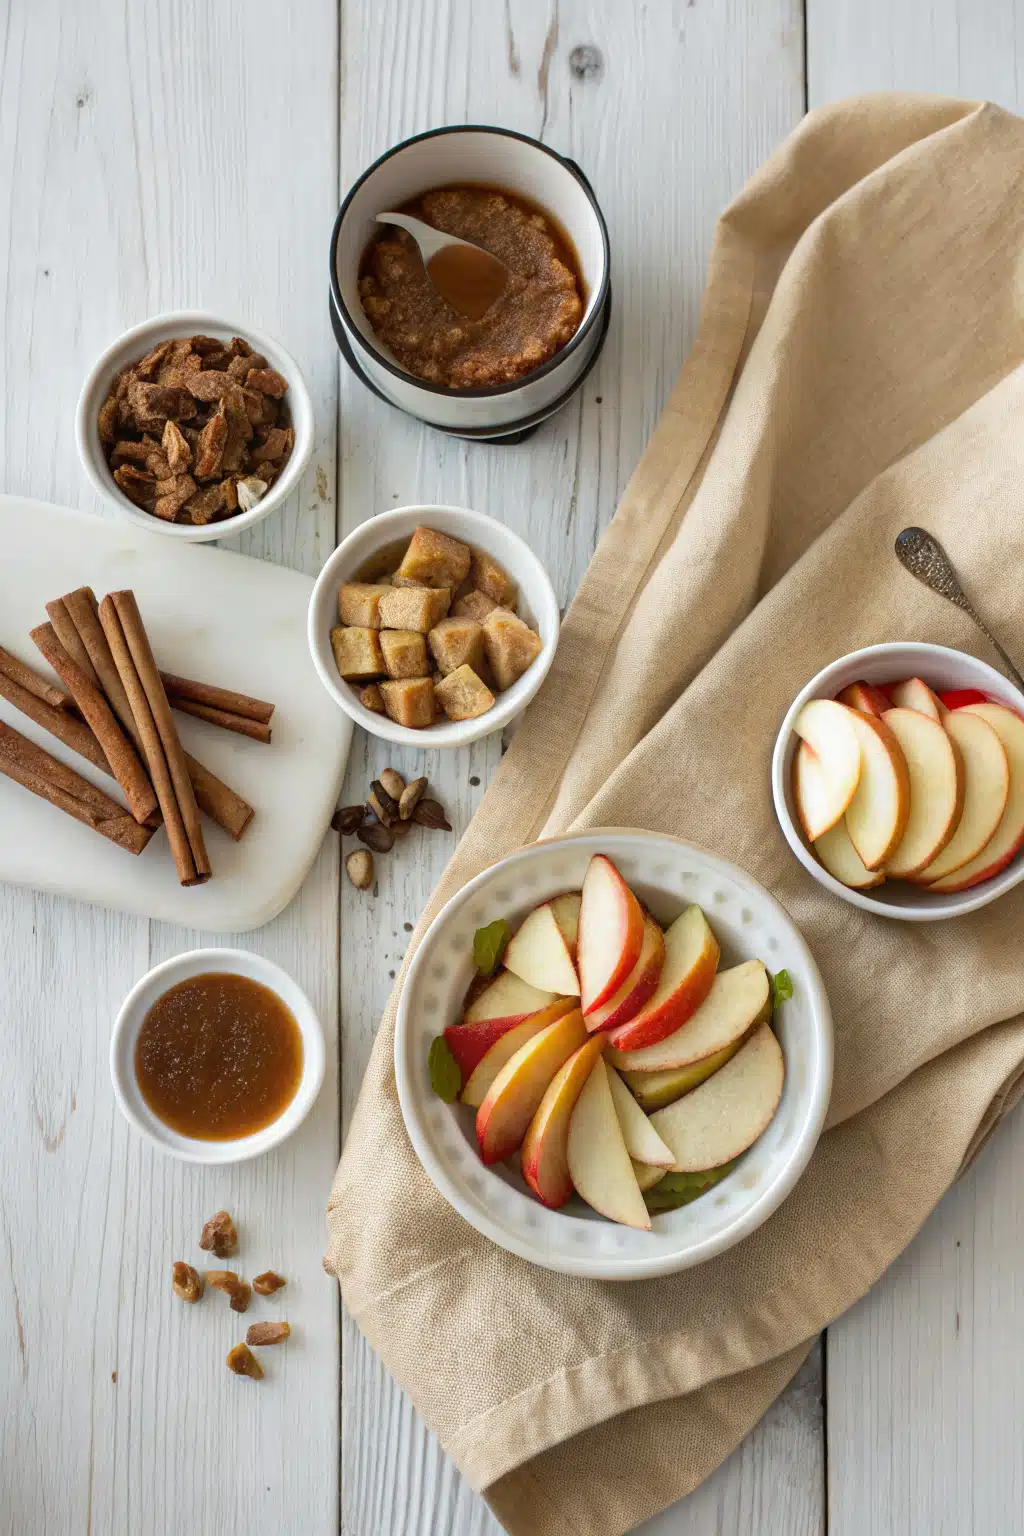
- Apples: 3 large apples, peeled, cored, and diced (Granny Smith or Honeycrisp work best).
- Flour: 2 cups of all-purpose flour.
- Sugars: 1 cup granulated sugar and 1/2 cup packed light brown sugar.
- Spices: 1 tablespoon ground cinnamon and a pinch of nutmeg.
- Leavening: 1 teaspoon baking soda and 1/2 teaspoon baking powder.
- Salt: 1/2 teaspoon of kosher salt to balance the sweetness.
- Wet Ingredients: 3 large eggs, 3/4 cup vegetable oil (or melted butter), and 1 teaspoon vanilla extract.
- Caramel: 1 cup of thick caramel sauce (store-bought or homemade), divided.
Step-by-Step Instructions
Step 1: Preheat & Prep Pan
First things first, preheat your oven to 350°F (175°C). Generously grease a 9×13 inch baking dish with butter or non-stick baking spray. You really want to make sure the corners are coated so the caramel doesn’t stick later!
Step 2: Prepare the Apples
In a medium bowl, toss your diced apples with a couple of tablespoons of the granulated sugar and half of your cinnamon. Set this aside. This little trick helps the apples release some of their natural juices and ensures every single bite is packed with warm fall spices.
Step 3: Mix the Dry Ingredients
In a large mixing bowl, whisk together your flour, the remaining granulated sugar, brown sugar, remaining cinnamon, nutmeg, baking soda, baking powder, and salt. Make sure there are no lumps of brown sugar hiding in there.
Step 4: Combine Wet Ingredients
In a separate bowl, lightly beat the eggs, then whisk in the vegetable oil and vanilla extract until the mixture is smooth and cohesive.
Step 5: Fold and Layer
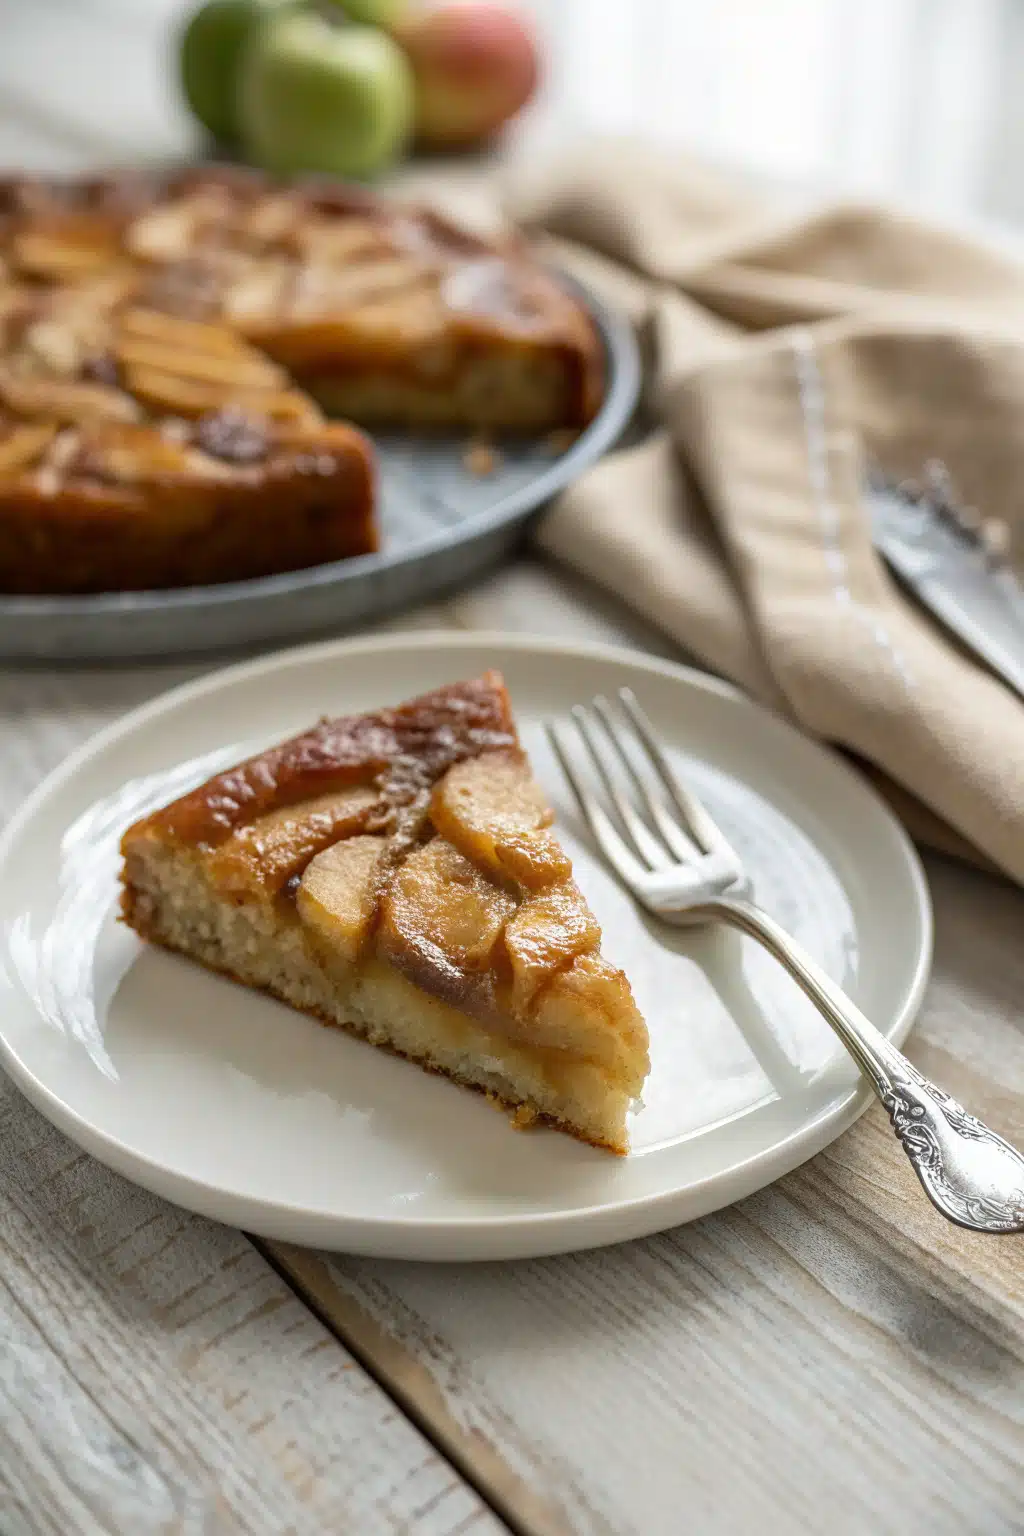
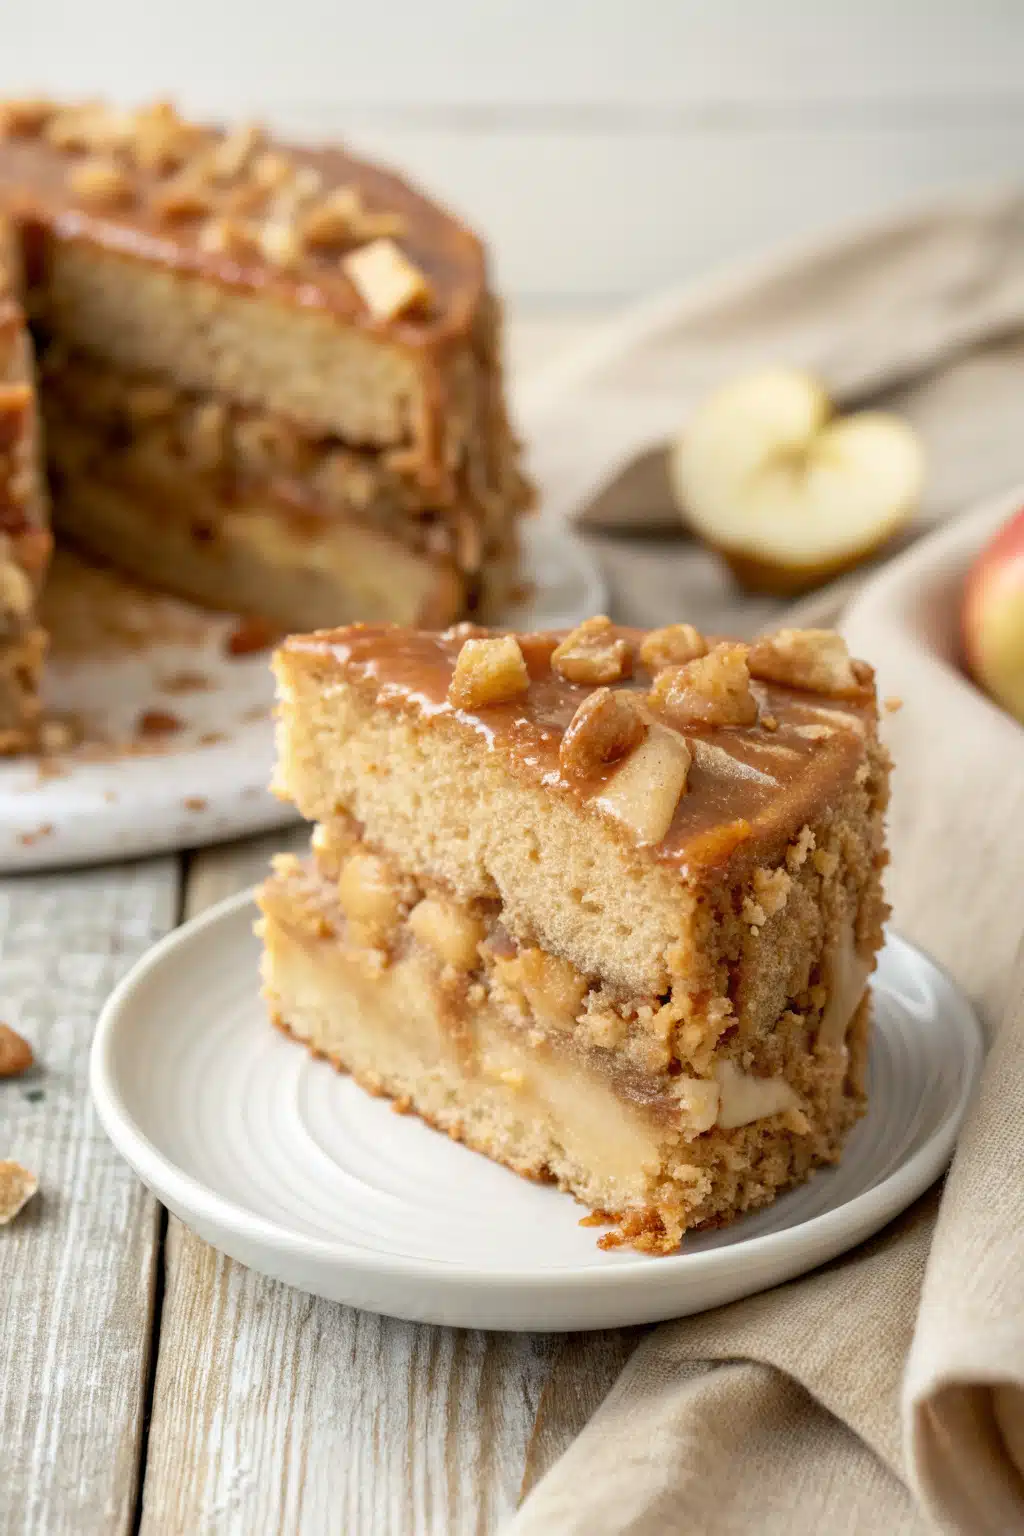
Pour the wet ingredients into the dry ingredients and stir with a wooden spoon until just combined. The batter will be quite thick—don’t panic, that’s exactly what you want! Gently fold in the spiced apples. Spread half of this batter into your prepared baking dish. Drizzle about 1/3 cup of your caramel sauce evenly over the batter. Top with the remaining batter, smoothing it out to the edges.
Step 6: Bake to Perfection
Pop the pan into the oven and bake for 40 to 45 minutes. You’ll know it’s done when the top is golden brown and a toothpick inserted into the center comes out mostly clean (you might hit a gooey apple or a pocket of caramel, which is totally fine, just make sure there’s no raw batter).
Step 7: The Caramel Soak
This is the most important step! As soon as you pull the cake out of the oven, take a skewer or a fork and poke holes all over the top. While the cake is still piping hot, pour the remaining caramel sauce evenly over the top. Let it cool in the pan so it absorbs all that sticky, sweet magic.
What to Serve It With
While I can easily eat a slice of this Caramel Apple Cake standing over the kitchen counter at midnight, it really shines when paired with a little something extra. A generous scoop of vanilla bean or cinnamon ice cream is an absolute must if you’re serving it warm. The cold ice cream melting into the warm, sticky caramel is pure heaven.
If ice cream isn’t your thing, a dollop of freshly whipped cream with a tiny splash of bourbon or vanilla extract adds a lovely lightness. For drinks, you can’t go wrong with a hot cup of dark roast coffee, a spiced chai latte, or even a warm mug of apple cider to really double down on those cozy vibes.
Top Tips for Perfecting Your Caramel Apple Cake
Over the years, I’ve learned a few tricks that take this cake from good to absolutely mind-blowing:
- Pick the right apples: Go for firm, tart apples like Granny Smith, Braeburn, or Honeycrisp. They hold their shape beautifully during baking and provide a much-needed tangy contrast to the sweetness of the caramel.
- Don’t skimp on the caramel: You can absolutely use a high-quality store-bought caramel to save time, or make your own from scratch! Just make sure it’s a thick, rich sauce rather than a thin, watery syrup.
- Room temperature ingredients: Make sure your eggs are at room temperature before you start. This helps the batter emulsify properly, giving you a much softer, fluffier cake.
- The warm soak is crucial: Pouring that final layer of caramel over the cake while it’s still hot from the oven is the secret to getting those gooey, sticky edges that everyone fights over.
Storing and Reheating Tips
If you actually have leftovers (which is a rare occurrence in my house!), this cake stores beautifully. In fact, I think the flavors deepen and get even better the next day. Keep the cake in an airtight container at room temperature for up to three days. If you want to keep it longer, pop it in the fridge for up to a week.
When you’re ready for another slice, I highly recommend reheating it. Just place your slice on a microwave-safe plate and zap it for about 15 to 20 seconds. The heat brings the caramel right back to life and makes the cake taste like it was just freshly baked. You can also freeze the baked cake (without the final caramel drizzle) wrapped tightly in plastic wrap for up to three months!
Frequently Asked Questions
Final Thoughts
Baking this Caramel Apple Cake is honestly one of my favorite ways to spend a lazy weekend afternoon. It’s so much more than just a recipe; it’s a way to fill your home with warmth and create a little moment of joy for the people you love. Whether you’re baking it for a special holiday gathering or just because you survived a long, tiring week, I hope it brings as much happiness to your kitchen as it does to mine.
Don’t be afraid to make it your own—add some chopped pecans or walnuts for crunch, try a dash of cardamom, or go completely overboard with the caramel sauce. I can’t wait to hear how yours turns out. Grab a fork, pour yourself a cup of coffee, and enjoy. Happy baking, friends!
Caramel Apple Cake
Ingredients
Main Ingredients
- 0.5 cup buttermilk
- 0.25 cup cooking oil or melted butter
- 2 large eggs
- 1 tsp vanilla extract
- 0.5 cup white granulated sugar
- 0.5 cup caramel or dulce de leche
- 1 cup all-purpose flour
- 1 tsp baking soda
- 1 tsp baking powder
- 0.125 tsp salt
- 2 large apples diced
- 1 tbsp cornstarch
- 1 tsp ground cinnamon
- 0.5 cup apple butter up to 0.75 cup
- 1 cup heavy cream chilled
- 0.33 cup confectioners sugar
- 0.5 tsp vanilla extract for whipped cream
- Caramel sauce for drizzling
Instructions
Preparation Steps
- Preheat oven to 350°F (177°C).
- In a large mixing bowl, combine the buttermilk, oil, eggs, sugar, 1 tsp vanilla and 0.5 cup caramel. Beat the ingredients together on medium to high speed for 2 to 3 minutes, until the eggs are well beaten.
- In a separate bowl, combine the dry ingredients: flour, baking powder, baking soda and salt. Sift the dry ingredients into the cake batter. Mix the flour into the batter on low speed for about 1 minute, just until it's incorporated.
- Dice the apples into small, pea-sized pieces and place into a bowl. Add the cornstarch and cinnamon and toss the apples until they're well coated.
- Add two-thirds of the diced apples into the cake batter and fold them in. Transfer the cake batter into a prepared pan and then top the cake with the remaining apples.
- Bake in the preheated oven at 350°F (177°C) for 45 to 50 minutes, or until a toothpick inserted into the center comes out clean. Remove the cake from the oven and onto a wire rack to cool completely.
- Make the whipped cream: whisk 1 cup chilled heavy cream, 0.33 cup confectioners sugar, and 0.5 tsp vanilla extract for 3 to 4 minutes until stiff peaks form.
- To assemble the cake, first spread about 0.5 cup to 0.75 cup of prepared apple butter onto the cooled cake. Spread it evenly to the edges.
- Next, add the prepared whipped cream, creating a heaping pile on top of the cake. Sprinkle the cream with a bit of ground cinnamon and drizzle caramel sauce over the top.
Notes
Featured Comments
“This recipe sounds amazing—I love anything with caramel and apples! The nostalgic memory of helping Grandma makes it even better.”
“Impressed! Clear steps and crowd-pleaser results. Perfect for busy nights.”
“New favorite here — creamy. crowd-pleaser was spot on.”
“Super easy and turned out amazing! My family asked for seconds. Saving this one.”
“This sweet treat was absolutely loved — the hearty really stands out. Thanks!”
“Made it tonight and wow — creamy! Will definitely make Easy Caramel Apple Cake Recipe again.”


This recipe sounds amazing—I love anything with caramel and apples! The nostalgic memory of helping Grandma makes it even better.