You know that smell when you walk into grandma’s house? Warm, sweet, a little buttery, and somehow just cozy? That’s exactly how I feel when I make creamed corn. It’s one of those dishes I grew up loving—my mom used to make it for Sunday dinners, and now I do the same for my own family. It’s surprisingly simple, but it packs a flavor punch that always gets everyone excited. The best part? It’s one of those recipes that feel fancy enough for a holiday table but totally doable on a weeknight when you’re craving something nostalgic. I’ve tested this with different types of corn and even swapped out cream for almond milk (trust me on this one—it’s just as good, if not better!). Honestly, if you’re looking for a side dish that’s warm, creamy, and downright addictive, you’ve come to the right place. Let me walk you through how I make my creamed corn, and I promise, it’ll become a family staple at your house too.
What is creamed corn?
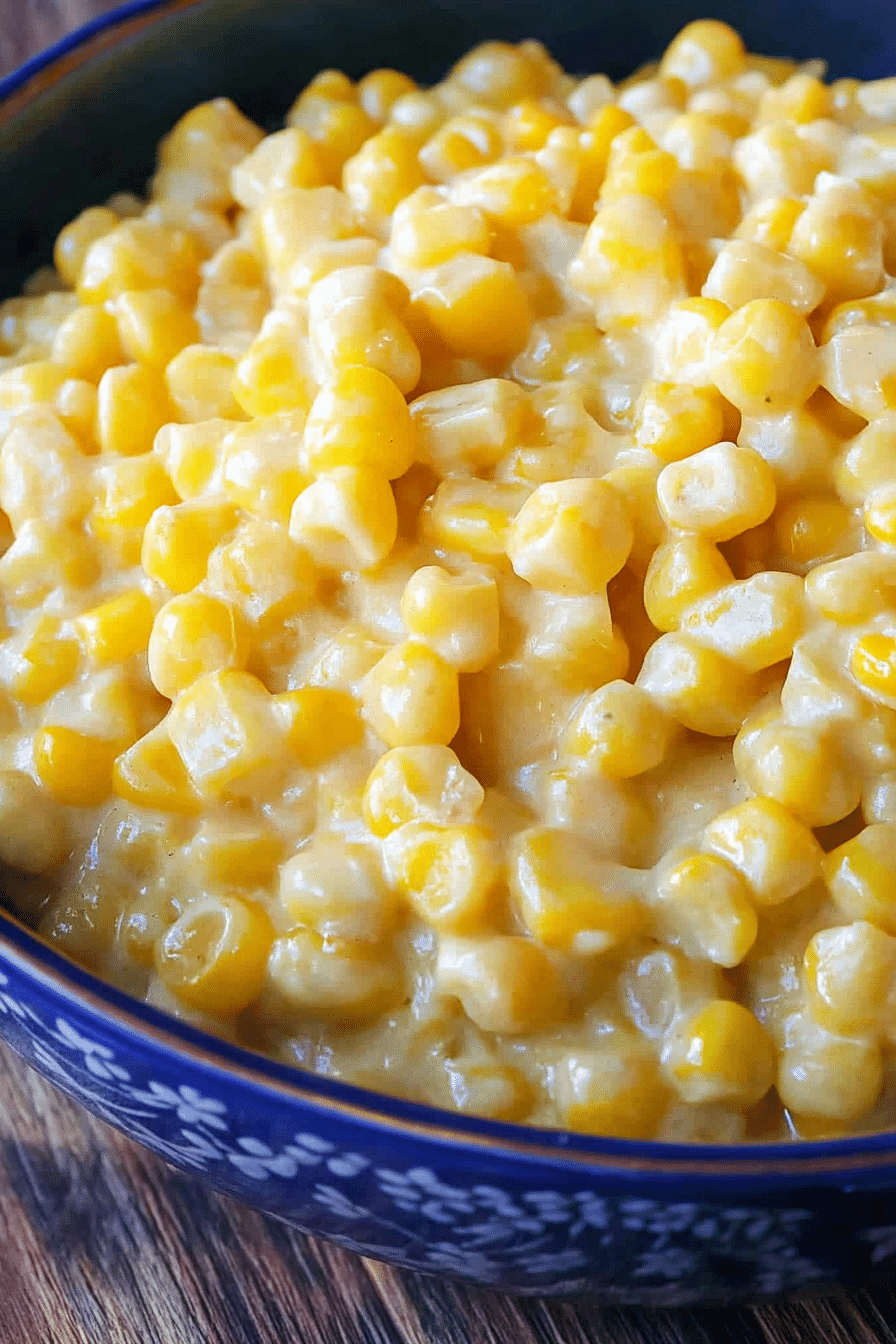
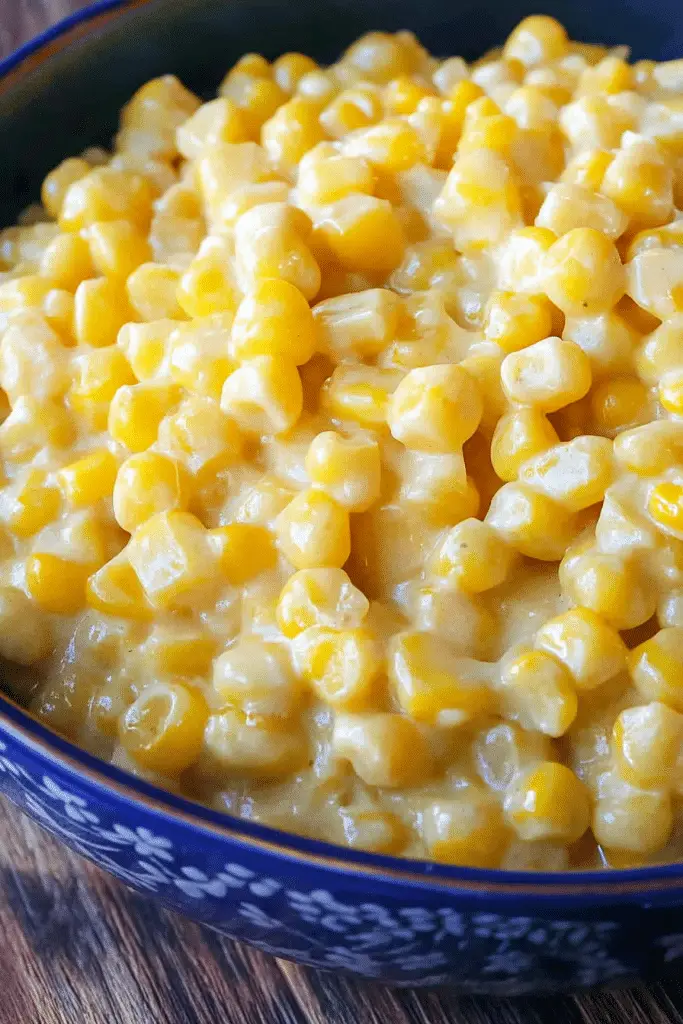
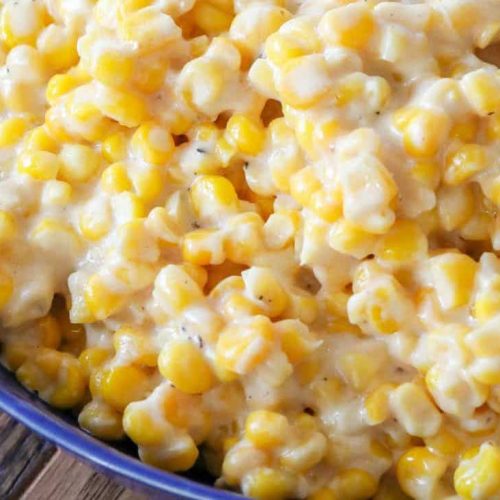
Think of creamed corn as the fancy, velvety sibling of regular corn on the cob. It’s essentially sweet, tender corn kernels finished off in a rich, buttery sauce that’s thick enough to spoon onto your plate. The name “creamed” might make you think it’s heavy—trust me, it’s not at all. It’s all about that silky, smooth texture with bursts of sweetness from the corn itself, balanced with a hint of savory richness. The dish originated as a way to elevate everyday corn into something special—a treat you’d find at family gatherings or holiday dinners. I love how simple ingredients come together to create something so comforting. It’s kind of like a warm hug in a bowl—perfect for cozy nights in or serving alongside roast chicken, crispy fried fish, or even grilled steaks. And because it’s just corn, butter, cream, and a few secret touches, it’s super budget-friendly too. Think of it as your new go-to for when you want something a little indulgent but still easy enough to whip up in a flash.
How do I make creamed corn?
Quick Overview
Making creamed corn is one of those kitchen moments where everything seems a bit more special than it really is. Start by sautéing some onions and garlic in butter, then stir in sweet corn kernels. Add cream or your dairy alternative, a pinch of sugar, salt, and pepper, and let everything simmer until the sauce thickens just enough to coat the corn beautifully. I like to finish it with a touch of fresh herbs—parsley or basil for brightness, or even a sprinkle of paprika for color. It’s quick, straightforward, and perfect for when you want a side dish that feels indulgent but is really just a few pantry staples combined with love. The key is gentle simmering—this allows the flavors to meld and the sauce to develop that silky, velvety texture that makes you want to scoop seconds.
Ingredients
For the main creamed corn: For the creamed corn: For the creamed corn: For the cream
– 4 cups fresh corn kernels (about 6 ears of corn or two 10-ounce cans of kernel corn, drained)
– 2 tablespoons unsalted butter (plus a little extra for richness)
– 1 small onion, finely chopped
– 2 garlic cloves, minced
– 1 cup heavy cream or coconut cream (or almond milk + a tablespoon of cornstarch for thickening)
– 1 teaspoon sugar (to enhance the sweetness)
– Salt and freshly ground black pepper to taste
– Optional: a pinch of smoked paprika or cayenne for a little kick
For Garnish (Optional):
– Fresh chopped parsley or basil
– Grated Parmesan or a dribble of hot sauce for extra flavor
Step-by-Step Instructions
Step 1: Preheat & Prep Pan
Set your oven to a medium heat or prepare your stovetop. I like using a wide, heavy skillet or a saucepan—something that holds heat well. Melt a tablespoon of butter over medium heat, making sure it’s not sizzling too fiercely. Toss in your chopped onion and cook until it’s translucent and fragrant—about 3-4 minutes. Don’t rush this step; those softened onions add a depth of flavor that makes the whole dish sing.
Step 2: Mix Dry Ingredients
Since this is a straightforward dish, there’s not much dry to mix first—just keep your corn ready! If you’re using canned corn, drain it well so the creamed sauce isn’t watery. If using fresh, shuck and rinse thoroughly. This is also a good time to get your garlic chopped fine and your herbs prepped if you’re adding fresh ones later.
Step 3: Mix Wet Ingredients
In a small bowl, whisk your cream or alternative with a pinch of sugar and a pinch of salt—this helps balance the sweetness and saltiness. If you’re using almond or coconut milk, I recommend adding a tablespoon of cornstarch or arrowroot powder to help thicken things up—trust me, it makes a noticeable difference. Keep this mixture nearby so you’re ready to add it directly to the pan.
Step 4: Combine
Add your corn to the skillet and stir well to coat with the onion and garlic. Pour in your cream mixture slowly, stirring constantly. The sauce will start to thicken as it heats. If it seems too thin, don’t worry—just let it simmer on low for a couple more minutes until it’s luxuriously smooth and creamy.
Step 5: Prepare Filling
If you want to add a little extra texture, you can mix in some grated cheese or cooked bacon bits at this stage. I love adding a pinch of smoked paprika here—it gives a subtle smoky flavor that complements the sweet corn beautifully. Taste and adjust seasoning, then remove from heat once it’s velvety and warm throughout.
Step 6: Layer & Swirl
This isn’t a layered dish, but if you want a swirling effect—say, for a presentation—you can spoon half into a serving dish and then swirl the rest on top with a toothpick or skewer, creating a marbled look. It’s a little touch that makes it feel fancy, even if it’s just for your family dinner.
Step 7: Bake
If you prefer it extra bubbly and browned on top, transfer the creamed corn to a baking dish and bake at 375°F (190°C) for 15-20 minutes. Keep an eye on it—nothing beats that golden top, and the house will smell incredible!
Step 8: Cool & Glaze
Let it rest for about 5 minutes after coming out of the oven. That little bit of cool-down helps everything set just right. If you like, drizzle with a bit of honey or honey-infused glaze for a sweet contrast, or keep it pure with just fresh herbs sprinkled on top.
Step 9: Slice & Serve
Use a wide spatula or spoon to serve, making sure you get some of that glorious sauce with each scoop. It’s amazing spooned over roasted chicken or even served as a dip with crusty bread. My kids ask for seconds every time, and I don’t blame them—this creamed corn is basically happiness on a plate.
What to Serve It With
This creamed corn is like the Swiss Army knife of sides — it goes with so many dishes. For breakfast, you can serve it alongside fluffy scrambled eggs and crispy bacon, with a splash of hot sauce. It’s a crowd-pleaser at brunch too—paired with fried chicken and a fresh green salad. When dinner rolls around, I love serving it with roasted or grilled meats, especially smoky ribs or juicy steaks. And for dessert? Well, I’ve snuck a spoonful after dinner, pretending it’s pudding because of how creamy and sweet it is! Sometimes, I dress it up with a sprinkle of toasted breadcrumbs or a dash of chopped chives to add a little crunch. Honestly, I’ve even stirred in a little shredded cheese to make it more filling. That flexibility makes creamed corn a stand-out for any occasion, and the warm, homey flavor makes everyone feel right at home.
Top Tips for Perfecting Your Creamed Corn
Over the years, I’ve picked up a few tricks to make this dish perfect every time. First, if you’re using fresh corn, always cook it just a bit longer before adding the cream—it softens the kernels and releases their sweetness. When you sauté the onions and garlic, don’t rush it; patience here develops that deep, caramelized flavor. In terms of mixing, don’t overdo it—stir gently to keep the corn’s texture intact, otherwise, it can turn mushy. I learned that the cornstarch slurry (if you’re using plant-based milk) REALLY helps thicken the sauce beautifully and keeps it from becoming soupy. For swirling, try using a toothpick or skewer in figure eights for a pretty marbled effect. Ingredient swaps? Absolutely! You can swap in different cheeses, add chopped jalapeños for heat, or sprinkle crispy bacon bits on top for crunch. In baking, oven placement matters—pop the dish in the middle rack for even browning. And when it comes to glazing, I like a quick drizzle of honey or maple syrup for added sweetness, especially if the corn is on the sweeter side. I’ve made this dish with all sorts of variations—I even tested it with coconut milk and a touch of curry powder for a totally different vibe. Adapt and test; that’s the fun part. Just remember, patience and gentle stirring are your best friends here. If you keep an eye on it, it’ll turn out creamy, silky, and utterly irresistible, every single time.
Storing and Reheating Tips
Because this creamed corn is so good, I often make extras—and it keeps well! Let it cool to room temperature before storing. If you’re planning to eat it within a day or two, keep it in an airtight container in the fridge. Reheat gently on the stovetop over low heat, adding a splash of milk or water if it thickens too much. For longer storage, wrap it tightly with plastic or foil and freeze for up to 3 months. When reheating from frozen, let it thaw in the fridge overnight, then warm it up slowly—stirring frequently to restore its creamy consistency. Be careful not to microwave it directly from frozen; it might turn uneven or rubbery. If the sauce seems a little thick, stirred in extra milk or broth will bring it back to life. As for the glaze, I usually wait until just before serving to add it fresh because it tastes best when it’s still vibrant and drizzly. The flavors do mellow a bit after storing, but I promise, it’s still just as comforting. Just reheat gently, and you’ll have that warm goodness ready to go. Leftovers are perfect for lunch the next day—you can even fold them into scrambled eggs for breakfast or toss into a pasta salad for a smoky, sweet note.
Frequently Asked Questions
Final Thoughts
Honestly, creamed corn is one of those dishes that makes me feel like a kitchen magician. It’s simple, budget-friendly, and packed with flavor—and every time I serve it, it brings a little magic to the table. It’s become a requested side in my family, my friends ask for the recipe, and I love knowing that I’m sharing something so comforting with the people I care about. Once you get the hang of it, you’ll see how versatile it is—mix in spices, herbs, or cheeses to personalize it to your taste. Plus, it’s one of those recipes that taste even better as leftovers, if there are any left! I really hope you give this a try and that it brings a little warmth and sweetness to your table. If you make any tweaks or have your own tips, I’d love to hear! Drop a comment or share a photo—I always love seeing how my friends put their spin on it. Happy baking, and enjoy every spoonful of this creamy, dreamy corn!
creamed corn
Ingredients
Main Ingredients
- 32 oz frozen corn
- 8 oz cream cheese cut into 1 inch cubes
- 0.33 cup heavy cream
- 0.25 cup butter
- 2 tablespoons sugar
- 0.5 teaspoon black pepper freshly ground
- 0.25 teaspoon kosher salt adjust to taste
Instructions
Preparation Steps
- Combine all ingredients in a large saucepan over medium heat. Cook, stirring occasionally, until the cream cheese melts completely and the mixture thickens, about 10 minutes.
- Reduce heat to low and simmer for an additional 10 minutes to allow flavors to meld. Serve warm.
Notes
Featured Comments
“Impressed! Clear steps and turned out amazing results. Perfect for busy nights.”
“New favorite here — crowd-pleaser. crowd-pleaser was spot on.”
“Super easy and turned out amazing! My family asked for seconds. Saving this one.”
“This sweet treat was absolutely loved — the light really stands out. Thanks!”
“Made it tonight and wow — quick weeknight win! Will definitely make Easy Crockpot Creamed Corn Recipe again.”
“Packed with flavor and so simple. Exactly what I wanted from Easy Crockpot Creamed Corn Recipe.”