

There’s just something about the smell of chocolate baking that instantly lifts my mood. I remember growing up, my mom used to whip up these incredible chocolate muffins on lazy Saturday mornings, filling the house with warmth and that irresistible aroma. Even now, whenever I bake a batch, I’m transported right back to those cozy, carefree days. Honestly, I think chocolate muffins are one of the most comforting treats out there—they’re simple, sweet, and downright addictive. They’re perfect for breakfast, a quick snack, or even a family dessert to end the day on a high note. And the best part? You don’t have to be a professional baker to master them. This recipe has become my go-to because it’s fuss-free, budget-friendly, and always turns out beautifully—crispy edges with a gooey center that disappears in minutes at my house. Trust me, once you try these, they’ll become a staple you reach for whenever that chocolate craving strikes. Plus, I love mixing things up with add-ins like nuts or a swirl of peanut butter—I’ll share all my tips later on!
What is chocolate muffin?
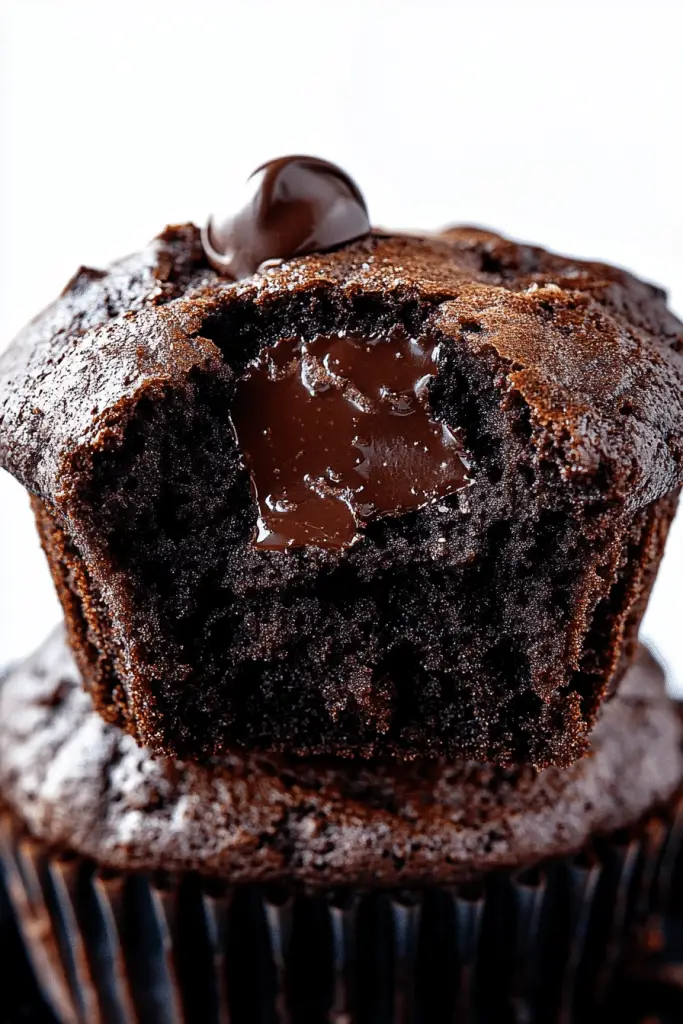
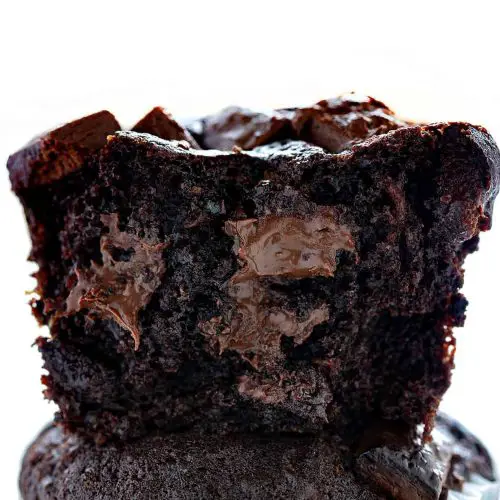
Think of chocolate muffins as the lovechild of a rich chocolate cake and a portable, snackable muffin. They’re essentially small loaves of moist, chocolatey goodness in a handy little package. The name “muffin” might make you picture a breakfast option, but these are more like soft, crumbly brownies in disguise—only easier to grab-and-go. It’s a classic baked good that combines cocoa, sugar, flour, and a few secret ingredients to create that perfect balance of sweetness and chocolate depth. The beauty of chocolate muffins is that they’re versatile; you can enjoy them warm with melted chocolate gooey in the middle or cooled with a dusting of powdered sugar. Sometimes, I even toss in a handful of mini chocolate chips or chopped nuts for extra texture. They’re great for feeding a crowd, but honestly, I often make a batch just for myself—because why not? Each bite feels like a little cozy hug, and trust me, once you master this recipe, it’s going to be your new go-to whenever you need a sweet pick-me-up.
How do I make chocolate muffins?
Quick Overview
This recipe is as easy as mixing dry ingredients, whisking together wet ingredients, then gently combining everything to form a luscious batter. Once that’s done, you simply scoop the batter into a muffin pan, add any fillings if you like, and bake until golden and fragrant. The magic is in the balance—don’t overmix, or the muffins might turn out dense. Baking at a moderate temperature ensures they rise just right with a crackly top and tender crumb inside. It’s perfect for busy mornings or lazy weekends when you want a homemade treat without a lot of fuss. The best part? You’ll end up with perfectly fudgy, chocolatey muffins every single time, no matter your experience level.
Ingredients
For the Main Batter:
- 1 1/2 cups all-purpose flour — I like to use unbleached for a richer flavor
- 1/2 cup cocoa powder — unsweetened, of course, for that deep chocolate hit
- 1 cup granulated sugar — feel free to reduce if you prefer less sweetness
- 1 teaspoon baking powder — makes them nice and fluffy
- 1/2 teaspoon salt — to balance the flavors
- 1/2 cup melted unsalted butter — for richness; you can swap half for applesauce for a healthier twist
- 2 large eggs — at room temperature for best emulsification
- 1 teaspoon vanilla extract — adds warmth and depth
- 3/4 cup milk (dairy or plant-based) — I’ve used almond and coconut, both work beautifully
For the Filling (optional but so worth it):
- Mini chocolate chips or chunks — sprinkle on top or fold into the batter
- Peanut butter or Nutella — swirl in before baking for a surprise gooey center
- Chopped nuts — walnuts or pecans add crunch and flavor
For the Glaze (optional but pretty):
- 1/2 cup powdered sugar
- 2 tablespoons milk or cream
- 1 teaspoon vanilla extract
Step-by-Step Instructions
Step 1: Preheat & Prep Pan
Preheat your oven to 350°F (180°C). Line a muffin tin with paper liners or lightly grease your pan with butter. I always do this first because I’m notoriously forgetful—nothing worse than having to scrub baked-on muffins after they cool!
Step 2: Mix Dry Ingredients
In a large bowl, whisk together the flour, cocoa powder, sugar, baking powder, and salt. I always sift the cocoa in to avoid lumps—trust me, it makes a difference. Mix until everything’s evenly distributed; this ensures each muffin will have that perfect chocolatey burst in every bite.
Step 3: Mix Wet Ingredients
In a separate bowl, whisk the eggs, melted butter, vanilla, and milk until smooth. I like to make sure the eggs are at room temperature—this helps everything emulsify better and keeps the muffins tender and moist. If I’m in a rush, I just warm the milk slightly before mixing.
Step 4: Combine
Pour the wet mixture into the dry ingredients and fold gently—no overmixing! You want just combined batter—lumps are okay; it keeps the muffins light. Overmixing can lead to dense, chewy muffins, and nobody wants that.
Step 5: Prepare Filling
If you’re adding chocolate chips or other mix-ins, fold them gently into the batter now. For a fun swirl, spoon in some peanut butter on top of the batter in each cup and use a toothpick or skewer to create pretty marbled patterns.
Step 6: Layer & Swirl
For extra flair, I love layering a spoonful of batter, then a splash of filling, and swirling gently. It creates a beautiful marbled effect when baked, and each bite feels like a mini chocolate surprise.
Step 7: Bake
Bake for about 18-22 minutes, or until a toothpick inserted into the center comes out with a few moist crumbs. Every oven bakes a little differently—mine’s at altitude, so I sometimes add an extra minute or two. Keep an eye on that gorgeous crackly top—that’s your sign they’re ready!
Step 8: Cool & Glaze
Let the muffins cool for 5 minutes in the pan, then transfer to a wire rack. If you’re glazing, stir together powdered sugar, vanilla, and milk until smooth. Drizzle over the muffins once they’re just slightly warm—you want the glaze to set without melting all over. This creates that shiny, professional look I love.
Step 9: Slice & Serve
This is the hard part—waiting for them to cool enough to enjoy! I swear, the texture is so tender and fudgy that I often have to remind myself to let them settle. Serve warm or at room temperature, with a glass of milk or a cup of coffee—either way, everyone’s going to ask for seconds.
What to Serve It With
These chocolate muffins are versatile enough to shine in many settings. For breakfast, pair with a steaming cup of coffee and a smear of butter—truly, a winning combo on slow weekend mornings. My family loves them for brunch, topped with fresh berries and a dollop of whipped cream; it feels fancy but is oh-so-easy. They’re fantastic as an after-dinner treat with a scoop of vanilla ice cream or a drizzle of caramel sauce—warm, gooey, and decadent. For a cozy snack, I just pop one in my lunchbox or stash a few in the freezer for a midnight chocolate fix. I always make an extra batch because they freeze beautifully—just microwave for 15-20 seconds and they’re just as good as fresh. My kids actually ask for these more than store-bought cookies, and I’m all too happy to oblige—they’re simply that good.
Top Tips for Perfecting Your Chocolate Muffins
Over the years, I’ve learned a few tricks that make all the difference with these muffins. First, always measure your flour carefully—using the spoon-and-level method prevents dense muffins. When adding the dry to wet ingredients, fold gently and avoid overmixing; this is key to achieving that tender crumb. I’ve experimented with different cocoa powders—Dutch-processed vs natural—and prefer the Dutch-processed for a richer flavor and darker color. If you want even more chocolate intensity, stir in a handful of mini chocolate chips or chopped dark chocolate into the batter—trust me, it takes the muffins over the top! For a glossy, shiny top, I recommend brushing the muffins with a little melted butter or butter glaze right out of the oven. As for ingredient swaps, almond milk works beautifully, and if you’re paleo or grain-free, you can try substituting almond or coconut flour, but be mindful that the texture might change. I’ve learned not to open the oven door too often—resist the temptation! The muffins are best baked in the middle rack, and I always do the toothpick test before removing. Oh, and I prefer to cool my muffins for about 10 minutes before glazing or serving—they hold together better and the flavors meld. Little tweaks like these make all the difference when you’re baking chocolate muffins that look professional and taste divine.
Storing and Reheating Tips
These muffins are best enjoyed within a couple of days, but they store surprisingly well. Keep them in an airtight container at room temperature for about 2 days—cover with a paper towel or a clean kitchen towel to prevent them from drying out. If you want to keep them longer, stash them in an airtight container in the fridge—up to 5 days. Just note they’ll retain moisture but may lose a bit of their original fudginess; I recommend warming them slightly before serving. To freeze, wrap each muffin tightly in plastic wrap and place in a freezer-safe bag or container. They’ll last up to 3 months. When ready to enjoy, microwave them for 15-20 seconds for an instant warm, melty experience. For best results, add a fresh drizzle of glaze after reheating, or sprinkle with powdered sugar for a quick presentation. If you’re making these ahead, I suggest glazing just before serving to keep that shiny, irresistible appearance. Trust me, these muffins are so easy to reheat and enjoy—they taste just as good, if not better, the next day.
Frequently Asked Questions
Final Thoughts
There’s something undeniably comforting about biting into a warm, chocolaty muffin—it’s a little moment of happiness in your day. I’ve made these countless times, tweaking a little here and there, but the core recipe remains my favorite for its simplicity and incredible flavor. These muffins are perfect for surprising friends, treating your kids, or even just indulging your sweet tooth on a quiet weekend afternoon. Once you get your timing down and find your favorite add-ins, I promise they’ll become a staple in your baking repertoire too. Don’t be shy about experimenting—add spices like cinnamon or a pinch of chili powder for a smoky kick, or swap in different chocolates for that personalized touch. Happy baking! And I’d love to hear how yours turn out—feel free to leave a comment or share your own tweaks. Enjoy every bite of your homemade chocolate muffins—they truly are a little slice of happiness.
chocolate muffins
Ingredients
Main Ingredients
- 0.5 cup vegetable oil
- 1.5 cups granulated sugar
- 1 tablespoon vanilla extract
- 2 cups all-purpose flour
- 0.5 cup unsweetened cocoa powder
- 1.5 teaspoons baking soda
- 1 teaspoon baking powder
- 1 teaspoon kosher salt
- 3 cups finely shredded zucchini do not drain
- 1.25 cups semi-sweet chocolate chunks
Instructions
Preparation Steps
- Preheat oven to 350°F and prepare two muffin pans with 18 cupcake liners.
- In a large bowl or in the bowl of a stand mixer, combine oil, sugar, and vanilla until fully incorporated.
- Add the flour, cocoa, baking soda, baking powder, and salt. Slowly stir the dry ingredients into the sugar mixture and mix until just combined.
- Fold in zucchini and the chocolate chunks by hand.
- Scoop 3 tablespoons of muffin batter into each cupcake liner. Bake for 25-30 minutes.
Notes
Featured Comments
“Love the nostalgia! The smell of chocolate baking really does feel comforting. These sound like a perfect rainy-day treat.”
“Impressed! Clear steps and absolutely loved results. Perfect for busy nights.”
“New favorite here — spot on. crowd-pleaser was spot on.”
“Super easy and turned out amazing! My family asked for seconds. Saving this one.”
“This sweet treat was absolutely loved — the rich really stands out. Thanks!”
“Made it tonight and wow — so flavorful! Will definitely make Easy Dark Chocolate Zucchini Muffins again.”


Love the nostalgia! The smell of chocolate baking really does feel comforting. These sound like a perfect rainy-day treat.