

Oh, you guys. Let me tell you about these nutella pastries. They’re not just pastries; they’re like little pockets of pure joy. I can still remember the first time I made these. It was a chilly Saturday morning, and I was craving something warm, sweet, and utterly decadent. I had a jar of Nutella staring at me from the pantry, and a few basic ingredients sitting on the counter. Honestly, I wasn’t sure if it was going to work out. But oh. My. Goodness. The smell that filled the kitchen was just heavenly, a mix of warm butter, toasted nuts, and that unmistakable chocolate-hazelnut goodness. When they came out of the oven, golden brown and still warm, I swear I felt a little giddy. And the taste? Divine. They’re so much better than anything you can buy at the store, and surprisingly simple to whip up. If you’re a fan of Nutella, or just looking for a truly delightful treat that’ll impress everyone, you absolutely have to try these nutella pastries. They’re right up there with my mom’s famous Chocolate Chip Cookies, but with that magical hazelnut twist!
What is Nutella Pastry?
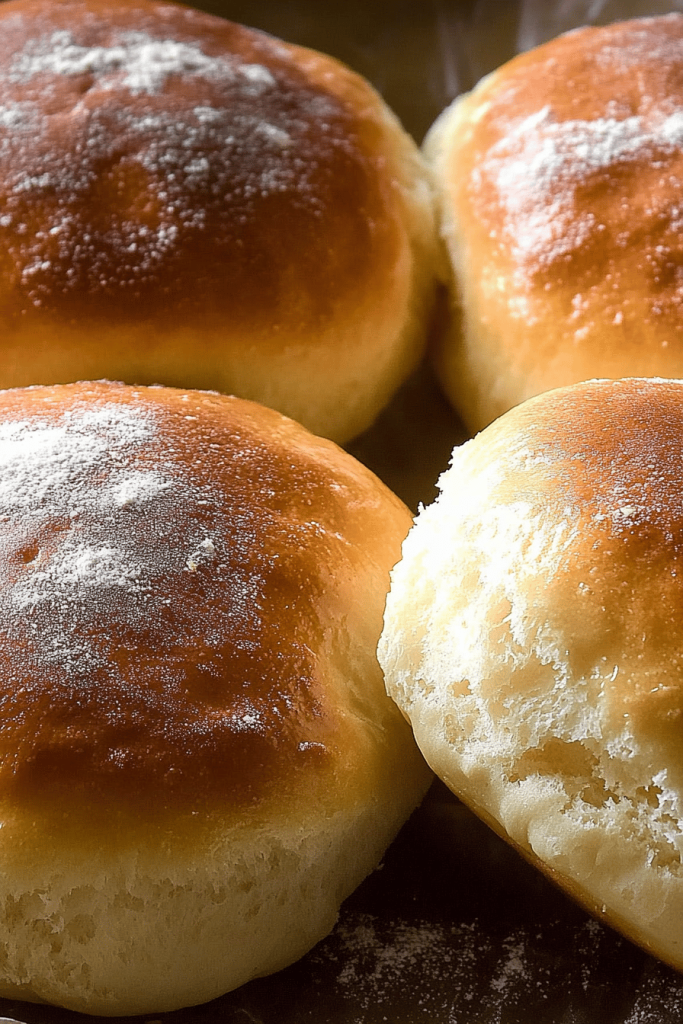
So, what exactly are these little wonders? Think of them as a super-simplified, utterly delicious take on a classic pastry, but with Nutella as the star ingredient. They’re essentially a rich, buttery dough wrapped around a generous swirl of creamy Nutella. It’s not a complicated laminated dough like you’d find in a croissant, no no. This is much more approachable for us home bakers. It’s more akin to a tender, slightly sweet biscuit or scone dough, but made richer and more pliable to embrace that luscious Nutella filling. The beauty of these nutella pastries is their versatility. You can make them into little hand pies, pinwheels, or even swirls that look like mini Cinnamon Rolls, but packed with chocolatey hazelnut flavor instead of cinnamon. The name itself just evokes comfort and indulgence, doesn’t it? It’s that familiar taste of childhood, but elevated into something a little more special, perfect for a weekend brunch or just a treat to brighten your day.
How do I make Nutella Pastries?
Quick Overview
Making these nutella pastries is surprisingly straightforward. You’ll mix up a simple, tender dough, then roll it out and spread a generous layer of Nutella. After rolling it up and slicing it into individual pastries, they go straight into the oven to bake until golden and glorious. The whole process, from start to finish, takes less time than you might think, making it perfect for those mornings when you want something special but are short on time. The key is not to overwork the dough and to get that perfect swirl of Nutella before baking. It’s really that easy!
Ingredients
For the Main Pastry Dough: For the main Pastry Dough: For the main Pastry Dough: For the main Pastry Dough
- 2 ½ cups all-purpose flour, plus more for dusting
- ½ cup granulated sugar
- 2 ½ teaspoons baking powder
- ½ teaspoon salt
- 1 cup (2 sticks) unsalted butter, cold and cut into cubes
- 2 large eggs, lightly beaten
- ½ cup milk (whole milk or even buttermilk works wonderfully here)
- 1 teaspoon vanilla extract
For the Filling:
- 1 cup creamy Nutella (or your favorite hazelnut spread)
- Optional: 1-2 tablespoons unsalted butter, softened (helps with spreadability if Nutella is very firm)
For the Glaze (Optional, but highly recommended!):
- 1 cup powdered sugar
- 2-3 tablespoons milk or cream
- ½ teaspoon vanilla extract
- Optional: A few tablespoons of Nutella, warmed slightly, for drizzling
Step-by-Step Instructions
Step 1: Preheat & Prep Pan
First things first, let’s get that oven ready. Preheat your oven to 375°F (190°C). While it’s warming up, grab a couple of baking sheets and line them with parchment paper. This is a trick I learned years ago – parchment paper makes cleanup a breeze and ensures nothing sticks. If you don’t have parchment, a lightly greased baking sheet will do, but trust me, parchment is your friend here!
Step 2: Mix Dry Ingredients
In a large mixing bowl, whisk together the flour, granulated sugar, baking powder, and salt. Give it a good mix to ensure everything is evenly distributed. This is important because you want that leavening to be consistent throughout your dough, giving you nice, fluffy pastries.
Step 3: Mix Wet Ingredients
In a separate, smaller bowl, whisk together the lightly beaten eggs, milk, and Vanilla Extract until well combined. Having your wet ingredients ready to go makes the whole process flow so much smoother.
Step 4: Combine
Now for the magic! Add the cold, cubed butter to the dry ingredients. Using a pastry blender, two knives, or your fingertips, cut the butter into the flour mixture until it resembles coarse crumbs, with some pea-sized pieces of butter still visible. Don’t overwork it! Those little butter pieces are what create those lovely flaky layers. Then, pour the wet ingredients into the dry ingredients. Gently mix with a fork or spatula just until a shaggy dough begins to form. Be careful not to overmix; we want a tender pastry, not a tough one!
Step 5: Prepare Filling
This is the fun part! If your Nutella is very firm straight from the jar, you can gently warm it in the microwave for about 10-15 seconds, or stir in a tablespoon of softened butter. This makes it much easier to spread. You want it pliable, but not runny. Just get it to a spreadable consistency.
Step 6: Layer & Swirl
Turn the dough out onto a lightly floured surface. Gently bring it together into a ball and then pat it into a rough rectangle. Roll the dough out into a rectangle, about 10×14 inches and about ¼-inch thick. Now, generously spread the Nutella evenly over the entire surface of the dough, leaving about a ½-inch border along one of the long edges. Starting from the long edge with the Nutella, tightly roll up the dough, like you’re making a jelly roll. Once rolled, pinch the seam gently to seal it. If the dough feels a bit soft to work with, don’t hesitate to pop it in the fridge for about 10-15 minutes to firm up before slicing. This makes it so much easier to cut clean rounds.
Step 7: Bake
Using a sharp knife, slice the log into ½-inch thick rounds. You should get about 12-15 pastries. Place them cut-side up on your prepared baking sheets, leaving a little space between each one as they will puff up slightly. Bake for 18-22 minutes, or until they are beautifully golden brown and the Nutella is gooey and bubbly. The smell is going to be incredible!
Step 8: Cool & Glaze
Once baked, remove the pastries from the oven and let them cool on the baking sheets for about 5-10 minutes. This allows them to set up a bit. While they’re cooling, whisk together the powdered sugar, milk or cream, and vanilla extract in a small bowl until you have a smooth, pourable glaze. You can adjust the consistency by adding more milk for a thinner glaze or more powdered sugar for a thicker one. Drizzle the glaze over the warm pastries. If you’re feeling extra indulgent, warm up a little extra Nutella and drizzle that over the top as well!
Step 9: Slice & Serve
These are best served warm, when the Nutella is still gloriously gooey. Use a serrated knife for a clean cut if needed. Arrange them on a platter and watch them disappear!
What to Serve It With
These nutella pastries are wonderfully versatile and fit into so many occasions. For breakfast, they’re simply divine alongside a steaming mug of coffee or a tall glass of cold milk. The rich chocolate flavor is the perfect wake-up call. If you’re hosting brunch, these are a showstopper! Serve them on a tiered stand with a side of fresh berries or a dollop of whipped cream for an elegant touch. They pair beautifully with mimosas or a light sparkling rosé. As a dessert, they’re a dream. Imagine them warm, with a scoop of vanilla bean Ice Cream melting into the gooey Nutella – pure bliss! A dusting of cocoa powder or a raspberry coulis also adds a sophisticated flair. And for those cozy snack moments, when you just need a little pick-me-up, these pastries are perfect. Pair them with a cup of hot chocolate or a comforting herbal tea. My family has a tradition of making these on movie nights; we just grab a stack and curl up on the sofa. They’re also surprisingly good at room temperature for a quick afternoon treat, especially if you’ve made a batch ahead of time.
Top Tips for Perfecting Your Nutella Pastries
I’ve made these nutella pastries more times than I can count, and through those batches, I’ve picked up a few tricks that I think can really elevate your experience. When you’re dealing with the dough, the most crucial thing is to keep everything cold, especially the butter. Cold butter creates steam pockets as it bakes, which gives you that lovely tender texture. Don’t be afraid to use your hands to mix the dough, but work quickly to avoid warming the butter too much. If the dough feels sticky or difficult to handle when you’re rolling and spreading the Nutella, don’t hesitate to pop it in the freezer for 10-15 minutes. This will firm it up beautifully and make slicing much cleaner. For the Nutella swirl, a thin, even layer is key. Too much, and it might ooze out too much during baking; too little, and you won’t get that satisfying Nutella hit in every bite. When it comes to slicing the roll, a sharp, thin knife is your best friend. A gentle sawing motion works better than pressing straight down, which can squash the delicate layers. If you find your Nutella is too stiff to spread easily, a minute or two in the microwave or stirring in a little softened butter makes a world of difference. For baking, ovens can be so different! Keep an eye on your pastries after the 18-minute mark. You’re looking for a lovely golden-brown hue. If some are browning faster than others, you can always rotate the pans halfway through. For the glaze, the consistency is really up to you. I like mine a bit thinner so it drips down the sides, but if you prefer a thicker, more opaque topping, just add less liquid. And remember, these are best enjoyed fresh and warm, but if you have leftovers, they’re still delicious at room temperature or gently rewarmed. I once tried using a hazelnut spread that was very oily, and it made the pastries a bit greasy, so sticking to a good quality, creamy Nutella or a similar spread is usually the best bet!
Storing and Reheating Tips
These nutella pastries are absolutely heavenly when they’re fresh and warm, but they hold up pretty well for a few days, making them great for making ahead. If you have any leftovers (and that’s a big if in my house!), you can store them at room temperature in an airtight container for up to 2 days. Just make sure they’ve cooled completely before sealing them up. For longer storage, or if your kitchen is quite warm, the refrigerator is your best bet. Store them in an airtight container in the fridge for up to 4 days. When you’re ready to enjoy them again, I highly recommend a quick reheat. Pop them in a 300°F (150°C) oven for about 5-8 minutes. This will warm them through and bring back that wonderful gooey Nutella center and slightly crisp pastry texture. You can also microwave them for about 10-15 seconds, but be careful not to overheat, or they can become a bit chewy. If you’ve glazed them and stored them in the fridge, they’ll be perfectly fine. If you’ve frosted them with something that needs to stay firm, it’s usually best to glaze or frost them *after* reheating. For freezing, these are fantastic! After they’ve cooled completely, wrap each pastry individually in plastic wrap, then place them in a freezer-safe bag or container. They’ll stay good in the freezer for up to 2-3 months. To thaw, you can either let them come to room temperature for a few hours or reheat them directly from frozen in a 300°F (150°C) oven for about 10-15 minutes, until warmed through. The reheating process really brings them back to life!
Frequently Asked Questions
Final Thoughts
There you have it – my beloved nutella pastries! I truly believe this recipe is a winner for so many reasons. It’s incredibly delicious, surprisingly easy to make, and always brings a smile to people’s faces. Whether you’re a seasoned baker or just starting out, you can achieve fantastic results with these. They’re perfect for a weekend treat, a special breakfast, or even a delightful dessert. If you love these nutella pastries, you might also enjoy my recipe for [Link to another relevant recipe, e.g., Double Chocolate Chip Cookies] or my easy [Link to another relevant recipe, e.g., Lemon Blueberry Scones]. Give these nutella pastries a try, and I promise you won’t regret it. I can’t wait to hear how yours turn out! Please leave a comment below and tell me what you think, or share your own creative twists on this recipe. Happy baking!
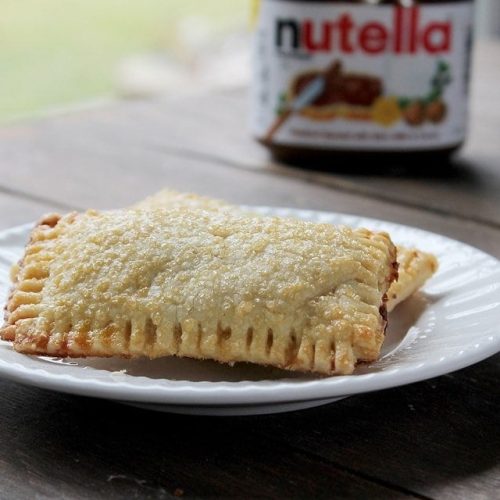
Nutella Pastries
Ingredients
Dough
- 2 refrigerated pie crusts pie crusts store-bought or homemade
Filling
- 1 cup Nutella
Egg Wash
- 1 egg yolk
- 1 teaspoon water
Topping
- Turbinado Sugar
Instructions
Preparation Steps
- Preheat oven to 350°F (175°C). Line a baking sheet with parchment paper or a silicone mat.
- Lightly dust a work surface with flour and roll out one pie crust to about 1/8-inch thickness. Repeat with the second pie crust.
- Cut out 6 to 8 rectangles (around 2 inches wide by 3 inches tall) from each pie crust. You can reroll dough scraps to make additional pastries.
- Transfer half of the rectangles to the prepared baking sheet, leaving about 2 inches of space between them.
- Spread a heaping tablespoon of Nutella onto the center of each rectangle on the baking sheet.2 refrigerated pie crusts pie crusts
- Using a fork, lightly prick a couple of holes in the remaining pie crust rectangles. These will be the tops of your pastries.
- Carefully place the pricked rectangles on top of the Nutella-filled bottoms.
- Crimp the edges of each pastry with a fork to seal them.
- In a small bowl, whisk together the egg yolk and water. Brush the top of each pastry with the egg wash.2 refrigerated pie crusts pie crusts
- Sprinkle Turbinado Sugar generously over the top of each pastry.2 refrigerated pie crusts pie crusts
- Bake for 13 to 15 minutes, or until the pastries are golden brown and the filling is warm.
- Let the pastries cool on the baking sheet for a few minutes before serving.
Notes
Featured Comments
“Oh my gosh, these look incredible! The flaky layers and nutella filling must be absolutely irresistible—can’t wait to try making them!”
“Impressed! Clear steps and so flavorful results. Perfect for busy nights.”
“New favorite here — super easy. crowd-pleaser was spot on.”
“Super easy and turned out amazing! My family asked for seconds. Saving this one.”
“This sweet treat was absolutely loved — the buttery really stands out. Thanks!”
“Made it tonight and wow — turned out amazing! Will definitely make Easy Homemade Nutella Pastries again.”


Oh my gosh, these look incredible! The flaky layers and nutella filling must be absolutely irresistible—can’t wait to try making them!