


Oh, friends, gather ’round! Today, I’m spilling the beans on a recipe that holds a really special place in my heart, and more importantly, in my recipe box. It’s my absolute go-to strawberry jello pie. Now, I know what you might be thinking – “Jello pie? Is that just for kids’ parties?” And honestly, I used to think that too! But this isn’t your average wobbly, overly sweet jello mold. This strawberry jello pie is something else entirely. It’s got this incredible lightness, a delicate sweetness that’s just right, and a texture that’s pure bliss. It’s the kind of dessert that makes everyone gasp a little when they take their first bite, asking, “What *is* this?!” It’s the perfect answer when you want something truly delightful without spending hours in the kitchen. It’s my secret weapon for potlucks, weeknight treats, and whenever a sweet craving hits hard. Honestly, it rivals even my most elaborate cheesecakes in terms of sheer “wow” factor, but takes a fraction of the effort.
What is strawberry jello pie?
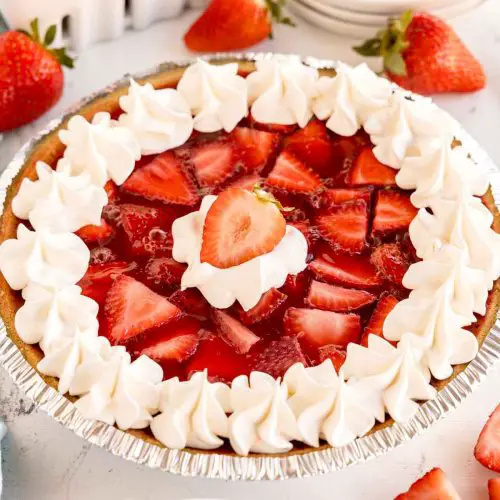
So, what exactly *is* this magical creation we call strawberry jello pie? Think of it as the most elegant, grown-up version of a childhood favorite, elevated to dessert royalty. It’s essentially a vibrant, refreshing pie that uses strawberry gelatin as its star ingredient, but with a few clever twists that give it incredible flavor and a sophisticated texture. It’s not just about the jello; we’re talking about a creamy, dreamy filling that’s smooth as silk and bursting with that quintessential strawberry goodness. The “pie” part comes from its presentation, often served in a crust or a charming dish that makes it look as stunning as it tastes. It’s like a cool, sweet cloud that melts in your mouth, reminiscent of sunny afternoons and simple joys, but with a refined touch that makes it perfect for any occasion. It’s the kind of dessert that brings a smile to your face from the moment you see it.
Why you
What are some of the Best Reasons to make strawberry jello pie?flavorIs it out of this world?simplicity. Honestly, this recipe is a lifesaver on busy nights. You can whip it up with minimal fuss, and it still looks and tastes like you’ve slaved away for hours. It’s deceptively easy, which is always a win in my book. And let’s talk about cost-efficiency! The ingredients are super budget-friendly, making it a fantastic option when you want to impress without breaking the bank. Plus, it’s incredibly versatile. I’ve served this as a light dessert after a big meal, as a refreshing treat on a hot summer day, and even as a sweet breakfast option (shhh, don’t tell anyone!). What I love most about this particular strawberry jello pie is that it’s so adaptable. You can play with the crust, add different fruits, or even swirl in a bit of cream cheese for extra decadence. It’s a recipe that feels both classic and completely your own. It’s the kind of dessert that makes people ask for the recipe immediately, and then they’re always surprised by how easy it was!
How to Make Strawberry Jello Pie
Quick Overview
This strawberry jello pie is all about combining simple ingredients to create something truly special. We’ll start by preparing a simple crust, then mix up a luscious, creamy strawberry filling using a few pantry staples, and finally, bring it all together for a stunning, no-bake dessert. The beauty of this recipe is its straightforwardness; there are no complicated techniques or hard-to-find ingredients. It’s designed to be approachable for even the most novice bakers, and the results are consistently impressive. You’ll be amazed at how quickly you can have a gorgeous dessert ready to chill.
Ingredients
For the Crust:
* 2 cups graham cracker crumbs (about 14 full graham crackers)
* 1/4 cup granulated sugar
* 1/2 cup unsalted butter, melted
I always use graham crackers because they give a lovely classic flavor that complements the strawberries perfectly. If you can’t find them, vanilla wafers or even crushed shortbread cookies work wonderfully. Just make sure they’re finely crushed – I usually pulse mine in a food processor until they resemble coarse sand.
For the Filling:
* 1 (3-ounce) package strawberry-flavored gelatin
* 1 cup boiling water
* 1/2 cup cold water
* 1 (14-ounce) can sweetened condensed milk
* 1/4 cup fresh lemon juice
* 1 cup fresh strawberries, hulled and finely chopped or pureed
This is where the magic happens! The boiling water helps the gelatin dissolve completely, ensuring no grainy texture. The cold water stops the cooking process and helps it set up nicely. Sweetened condensed milk is key for that creamy, rich texture without needing eggs or cooking on the stovetop. And fresh lemon juice brightens everything up, balancing the sweetness. The fresh strawberries are non-negotiable for that authentic, vibrant flavor!
For the Glaze (Optional, but recommended!):
* 1 cup fresh strawberries, pureed
* 2 tablespoons granulated sugar (or to taste)
* 1 tablespoon cornstarch
* 2 tablespoons cold water
This glaze adds an extra layer of intense strawberry flavor and a beautiful sheen. It’s super simple to make and really elevates the whole pie. You can adjust the sugar to your liking, depending on how sweet your strawberries are.
Step-by-Step Instructions
Step 1: Preheat & Prep Pan
First things first, preheat your oven to 350°F (175°C). This is for the crust, which needs a little bake to get nice and crisp. Grab a 9-inch pie plate. I like to lightly grease mine with a little cooking spray or butter, though it’s not always strictly necessary if your pie plate is well-seasoned. Once preheated, we’ll bake the crust for about 8-10 minutes, just until it’s lightly golden around the edges. This step is crucial to prevent a soggy bottom – nobody likes a soggy bottom!
Step 2: Mix Dry Ingredients
In a medium bowl, combine the graham cracker crumbs and the granulated sugar. Give them a good whisk to make sure the sugar is evenly distributed. This simple step ensures that every bite of your crust has a balanced sweetness and a nice texture. It’s the foundation of our delicious pie, so don’t skip it!
Step 3: Mix Wet Ingredients
Pour the melted butter over the graham cracker and sugar mixture. Stir everything together until the crumbs are evenly moistened and clump together when you press them. It should look and feel like wet sand. This is the perfect consistency to ensure your crust holds its shape when pressed into the pie plate.
Step 4: Combine
Press the crumb mixture firmly and evenly into the bottom and up the sides of your prepared pie plate. I find using the bottom of a glass or a measuring cup helps create a nice, compact, and even layer. Make sure it’s packed well, especially up the sides, to prevent the filling from seeping through. Bake for 8-10 minutes until lightly golden. Let it cool completely on a wire rack while you prepare the filling.
Step 5: Prepare Filling
In a medium bowl, combine the strawberry gelatin powder and the boiling water. Stir until the gelatin is completely dissolved – make sure there are no granules left at the bottom. This is really important for a smooth texture. Stir in the cold water, then whisk in the sweetened condensed milk until smooth. Next, add the fresh lemon juice and stir again. The lemon juice is a secret weapon here; it actually helps the gelatin set and adds a wonderful brightness that cuts through the sweetness. Finally, gently fold in the finely chopped or pureed fresh strawberries. I like to have some little bits of strawberry in there for texture, but you can puree them if you prefer a smoother filling.
Step 6: Layer & Swirl
Pour the strawberry filling into the cooled pie crust. If you like, you can reserve a little bit of the filling and add a few drops of red food coloring for a deeper swirl effect, or even some plain yogurt for a marbled look. Gently swirl with a knife or toothpick for a pretty pattern, but don’t overdo it. You want distinct layers, not a muddy mess!
Step 7: Bake
Now for the most important part: chilling! Cover the pie loosely with plastic wrap (try not to let it touch the surface of the filling) and refrigerate for at least 4-6 hours, or until completely set and firm. Overnight is even better if you have the time! This waiting game is the hardest part, but trust me, it’s worth it. The pie needs to be thoroughly chilled to hold its shape when sliced.
Step 8: Cool & Glaze
While the pie is chilling, you can prepare the optional glaze. In a small saucepan, combine the pureed strawberries and sugar. In a small bowl, whisk together the cornstarch and cold water until smooth. Pour this slurry into the strawberry mixture in the saucepan. Cook over medium heat, stirring constantly, until the mixture thickens and becomes glossy, about 3-5 minutes. Let it cool completely. Once the pie is fully set, gently pour the cooled glaze over the top, spreading it evenly. If you’re adding fresh strawberries as a garnish, now’s the time to place them artfully on top of the glaze.
Step 9: Slice & Serve
Once the glaze has set (or if you’re skipping the glaze), carefully slice the strawberry jello pie. I find using a sharp knife dipped in hot water and wiped dry between slices helps create clean cuts. Serve chilled and enjoy the delightful taste of summer! It’s perfect on its own, or with a dollop of Whipped Cream or a sprig of fresh mint.
What to Serve It With
This strawberry jello pie is so wonderfully versatile, it fits in beautifully no matter the occasion. For a delightful breakfast, I love serving a small slice with a good cup of coffee. The lightness of the pie is a perfect start to the day without feeling too heavy. A sprinkle of fresh berries on top makes it even more appealing. For a more elegant brunch, I usually plate it a little fancier. A small dollop of crème fraîche and a few edible flowers can make this simple pie look like a gourmet creation. It pairs wonderfully with mimosas or a sparkling rosé. As a stand-alone dessert, especially after a hearty meal, it’s pure perfection. I often serve it with a side of homemade whipped cream or a scoop of vanilla bean ice cream. For those moments when you just need a little something sweet, it’s ideal for cozy snacks. I’ll just cut a wedge, curl up with a good book, and maybe have a glass of milk or some herbal tea. My family has a tradition of making this on the last day of school, and we always serve it with extra whipped cream and sprinkles – pure joy!
Top Tips for Perfecting Your Strawberry Jello Pie
I’ve made this strawberry jello pie more times than I can count, and along the way, I’ve picked up a few tricks that I think really make a difference. For the crust prep, the most important thing is to get those crumbs finely ground. Coarser crumbs can lead to a crust that crumbles apart too easily. Also, don’t skip the gentle bake; it really helps solidify the crust and prevents that dreaded sogginess. When it comes to mixing advice, the key for the filling is dissolving that gelatin completely in the boiling water. I’ve had batches that were a little grainy because I rushed this step. Make sure it’s smooth before adding anything else. Don’t overmix once you add the strawberries; you want to keep some of their natural texture. For the swirl customization, less is often more. A few gentle swirls with a knife or skewer create a beautiful marbled effect. If you swirl too much, you’ll just end up with a uniformly pink pie, which is still tasty, but the marbling adds that extra visual appeal. For ingredient swaps, I’ve experimented a lot! If you want a tangier flavor, you can reduce the sweetened condensed milk slightly and add a bit more lemon juice, but be careful not to add too much liquid, or it might not set properly. You can also try different gelatin flavors – raspberry or mixed berry make delicious variations! When it comes to baking tips (for the crust, that is!), make sure your oven rack is in the center position for even heating. And remember, the crust bakes quickly, so keep an eye on it to prevent burning. For the glaze variations, if you want a firmer glaze, you can add a touch more cornstarch. If it’s too thick, a teaspoon of water at a time can thin it out. Some people also like to add a splash of strawberry liqueur to the glaze for an adult twist!
Storing and Reheating Tips
Keeping your strawberry jello pie perfectly fresh is thankfully quite easy. For room temperature storage, it’s generally best to keep it chilled. If you absolutely must leave it out for a short period, I’d say no more than 2 hours, especially if your kitchen is warm. After that, the gelatin can start to soften, and you risk a breakdown. For refrigerator storage, this is where your pie will be happiest. Make sure to cover it tightly with plastic wrap or transfer it to an airtight container. It will stay delicious for about 3-4 days. The texture might change slightly after the first day, becoming a bit firmer, but it’s still wonderful. I’ve never had any luck with freezer instructions for this particular pie. The gelatin and dairy components tend to separate and become watery upon thawing, so I strongly advise against freezing it. It’s best enjoyed fresh or within a few days of refrigeration. As for glaze timing advice, if you’re refrigerating the pie for a day or two, it’s best to add the glaze just before serving. This keeps the glaze from getting too firm or sticky. However, if you plan to serve it within 24 hours, you can apply the glaze after the pie has set but before refrigerating it fully. It will firm up nicely in the fridge!
Frequently Asked Questions
Final Thoughts
So there you have it, my absolute favorite strawberry jello Pie Recipe! I truly believe this is one of those recipes that everyone should have in their repertoire. It’s proof that you don’t need complicated techniques or fancy ingredients to create something utterly delicious and impressive. It’s the perfect balance of sweet, tart, creamy, and light, and that vibrant strawberry flavor is just irresistible. I hope you feel inspired to give it a try, whether it’s for a special occasion or just because you deserve a treat. If you love this recipe, you might also enjoy my No-Bake Lemon Raspberry Mousse or my classic no-bake cheesecake. Both have that same easy-yet-elegant vibe. I can’t wait to hear how your strawberry jello pie turns out! Please leave a comment below and tell me what you think, or share any fun variations you come up with. Happy baking (or, in this case, chilling)!
No-Bake Strawberry Jello Pie
Ingredients
Crust
- 1.5 cups graham cracker crumbs
- 5 tablespoons melted butter
- 2 tablespoons granulated sugar
Strawberry Filling
- 3 ounces strawberry jello
- 1 cup boiling water
- 0.5 cup cold water
- 1 pint fresh strawberries sliced
Topping (Optional)
- whipped topping such as Cool Whip, for serving
- fresh strawberries for garnish
Instructions
Preparation Steps
- Preheat your oven to 350°F (175°C).
- In a medium bowl, combine graham cracker crumbs, melted butter, and sugar. Mix until well combined.
- Press the graham cracker mixture evenly into the bottom and up the sides of a 9-inch pie plate.
- Bake the crust for 8-10 minutes, or until lightly golden. Let cool completely.
- In a heatproof bowl, combine the strawberry jello powder with the boiling water. Stir until dissolved.
- Stir in the cold water. Let the mixture cool to room temperature, then refrigerate until slightly thickened but not set (about 30-45 minutes).
- Arrange the sliced fresh strawberries in a single layer on the bottom of the cooled pie crust.
- Carefully pour the thickened strawberry jello mixture over the strawberries.
- Refrigerate for at least 4 hours, or preferably overnight, until the pie is firm and set.
- Before serving, top with whipped topping and garnish with fresh strawberries, if desired.
Notes
Featured Comments
“This looks absolutely delicious—simple ingredients but such a crowd-pleaser! Can’t wait to try it this weekend.”
“Impressed! Clear steps and creamy results. Perfect for busy nights.”
“New favorite here — family favorite. crowd-pleaser was spot on.”
“Super easy and turned out amazing! My family asked for seconds. Saving this one.”
“This sweet treat was absolutely loved — the silky really stands out. Thanks!”
“Made it tonight and wow — restaurant-level! Will definitely make Easy Jello Strawberry Pie Perfection again.”


This looks absolutely delicious—simple ingredients but such a crowd-pleaser! Can’t wait to try it this weekend.