


There’s something about the first hint of peppermint that instantly transports me back to cozy winter evenings by the fireplace, Christmas carols softly playing in the background, and the whole family gathered around with mugs of hot cocoa. And honestly, peppermint cookies have become my go-to treat during the holiday season—or really, anytime I need a little pick-me-up that feels festive and nostalgic. I always do this when I’m craving something sweet yet refreshingly minty — they’re like the perfect spoonful of holiday cheer wrapped up in a cookie. I’ve made these countless times, and I swear, they disappear in minutes at my house. The aroma alone is enough to bring everyone running into the kitchen, asking, “What’s baking?” Trust me, once you smell that minty sweetness filling your home, you’ll be hooked—and they’re so simple to whip up, no fancy ingredients required. Ready to dive into this peppermint cookies recipe? It’s one of those baked goodies that’s equal parts cozy and downright addictive!
What is Peppermint Cookies?
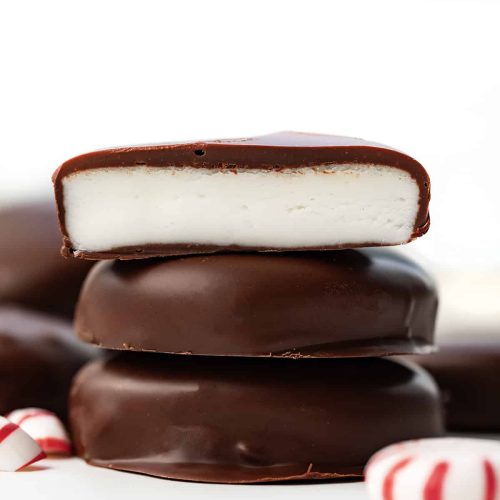
Think of peppermint cookies as little bites of holiday magic—soft, chewy cookies infused with peppermint flavor and often topped or filled with rich chocolate or a sprinkle of crushed candy canes. It’s essentially a peppermint-flavored take on classic cookies, but what makes them stand out is that zingy, refreshing mint note that’s perfectly balanced with sweetness. The name pretty much says it all: peppermint cookies. But I like to think of them as a cozy, edible hug—ideal for sharing with loved ones, slipping into a care package, or just enjoying with a cup of tea or hot chocolate. These cookies are versatile; you can make them as simple or as fancy as you want, adding extra chocolate chips or even a drizzle of white chocolate on top. And the best part? They come together easily, making them a fantastic go-to for busy holiday baking or last-minute sweet cravings. No complicated tricks—just good old-fashioned comfort in cookie form.
How do I make Peppermint Cookies?
Quick Overview
This recipe is a breeze—a straightforward mix-and-bake that results in soft, chewy cookies bursting with peppermint flavor. I love how I can throw everything together in one bowl, refrigerate the dough if I want thicker cookies, and then bake in just about 10-12 minutes. The secret is not overmixing the dough, which keeps the cookies light and tender. Plus, you can customize the peppermint experience—use peppermint extract for a gentle mint flavor or crush candy canes for added crunch and color. Honestly, once you’ve got the basic technique down, it’s like having a little Christmas in your oven anytime you want.
Ingredients
For the Main Batter:
- 1 cup unsalted butter, softened (a good quality butter makes all the difference)
- 3/4 cup granulated sugar
- 3/4 cup packed light brown sugar
- 2 large eggs
- 1 teaspoon vanilla extract
- 1 teaspoon peppermint extract (trust me, it’s worth using real extract here)
- 2 1/4 cups all-purpose flour
- 1 teaspoon baking soda
- 1/2 teaspoon salt
For the Filling:
- 1/2 cup crushed candy canes or peppermint candies (use mini ones for easier mixing)
For the Glaze:
- 1 cup powdered sugar
- 2-3 teaspoons milk or cream
- 1/4 teaspoon peppermint extract
- Optional: red or green food coloring for a festive touch
Step-by-Step Instructions
Step 1: Preheat & Prep Pan
Start by preheating your oven to 350°F (175°C). Line your baking sheets with parchment paper—trust me, it keeps the cookies from sticking and makes cleanup a breeze. If you want your cookies to be thicker and soft, you might refrigerate the dough for about 30 minutes, but honestly, I usually bake them right away—they still turn out perfect.
Step 2: Mix Dry Ingredients
In a small bowl, whisk together the flour, baking soda, and salt. This step ensures your leavening agents are evenly distributed. I always do this first because it’s such a simple way to prevent clumping later—plus, it gives me that satisfying sensation of sorting ingredients before I dive into mixing the wet stuff.
Step 3: Mix Wet Ingredients
In a large mixing bowl, cream the softened butter with the sugars until fluffy—about 2-3 minutes. I use a hand mixer here, but a stand mixer works great too. Then, beat in the eggs one at a time, followed by vanilla and peppermint extracts. The smell alone is delightful—like a candy shop! Make sure everything’s well combined but don’t overmix, as that can make the cookies tough.
Step 4: Combine
Gradually add the dry ingredients into the wet mixture, mixing on low speed just until combined. I do this in steps to avoid flour flying everywhere—and overmixing at this stage keeps your cookies tender.
Step 5: Prepare Filling
Crush your peppermint candies or mini candy canes into small bits—about the size of rice grains. Be careful—they tend to shatter into a lot of pieces, so using a rolling pin or your food processor helps. Mix the crushed candies into the cookie dough for that perfect peppermint punch.
Step 6: Layer & Swirl
Drop rounded tablespoons of dough onto your prepared baking sheet. If you want to get fancy, dab a tiny bit of extra peppermint extract on top or gently press a few candy cane bits into the dough for extra flair. For a marbled effect, I like to gently swirl a tiny bit of red or green gel food coloring into the dough before baking—just a few streaks does the trick.
Step 7: Bake
Bake in your preheated oven for 10-12 minutes. Keep an eye on them—when the edges turn golden and the centers look just set, you’re good. Every oven is a bit different; I’ve learned to check at the 10-minute mark if I want melt-in-your-mouth softness or a bit more crunch.
Step 8: Cool & Glaze
Let the cookies cool on the baking sheet for 5 minutes before transferring them to a wire rack. This helps them set without breaking. Once cooled slightly, mix the powdered sugar with a teaspoon or two of milk and peppermint extract to create a smooth glaze. Drizzle over the tops or dip the cookies if you prefer. I love adding a few drops of red or green food coloring here for a festive look—makes them extra cheerful!
Step 9: Slice & Serve
This recipe doesn’t really require slicing—I do shape them into nice rounded cookies from the start. Serve these with hot chocolate or a peppermint latte, and watch everyone’s face light up. They’re best enjoyed fresh, but if you have leftovers, store them in an airtight container for up to a week. Just re-glaze if you want that shiny, sweet finish again!
What to Serve It With
These peppermint cookies pair beautifully with all sorts of drinks and snacks! For breakfast or brunch, serve them alongside a mug of peppermint mocha or a glass of cold milk—because hey, why not start the day with a little holiday magic? I love to serve them at family gatherings, stacked on a pretty plate, with mini cups of hot cocoa on the side. And after dinner, they’re perfect for a quick treat—pair them with a scoop of vanilla ice cream for an unexpected twist. When I have friends over, I put out a platter of cookies with some peppermint bark and a few sprigs of fresh rosemary for contrast. My kids ask for these all the time, and I often make a double batch so I can keep some in the freezer for when those sudden sweet cravings hit. Whether you’re baking for a crowd or just a quiet night in, these peppermint cookies bring the cheer every time.
Top Tips for Perfecting Your Peppermint Cookies
I’ve made these cookies so many times that I’ve picked up a few tricks along the way. First, don’t skip chilling the dough! Even 30 minutes in the fridge makes a noticeable difference—cookies are more uniform and less flat. When mixing the dry ingredients, always sift the flour and baking soda—trust me, it prevents lumps and promotes even mixing. For that peppermint punch, I prefer using real peppermint extract—artificial flavors just don’t quite hit the same note. To get those beautiful marbled streaks, I use a toothpick or skewer to swirl food coloring through the dough before baking; it looks adorable and feels special. And if you want a more decadent treat, fold in some dark chocolate chips—trust me on this one. I’ve tried baking these at a slightly lower temperature for a softer, chewier texture, and it worked beautifully. Overbaking is the enemy here—aim for just golden edges and slightly soft centers, so they stay tender. A little bit of extra crushed candy cane on top before baking also adds that perfect crunch and burst of mint flavor. The one mistake I often make is overmixing the dough once dry ingredients are added—that’s what makes the cookies tough. Usually, I just gently fold until everything looks combined. Learning these little tricks has really elevated my peppermint cookies game!
Storing and Reheating Tips
Ah, storage—because I hate when my cookies go stale too fast! Once completely cooled, store them in an airtight container at room temperature for up to a week. I layer them with parchment paper to avoid sticking and keep their shape. If you want them to stay extra fresh—especially if it’s humid outside—I recommend refrigerating them in a sealed container. For longer storage, pop them into a freezer-safe bag or container and stash them in the freezer for up to three months. Thaw at room temperature, and if you want that shiny glaze to look its best, add it just before serving again. Reheating isn’t usually necessary, but if you prefer warm cookies, microwave one at medium power for about 10-15 seconds—this will soften them right up, and the peppermint aroma will fill the room again. I’ve tested re-glazing after freezing, and it still looks beautiful—so don’t worry if you want to make these ahead. Just remember, the fresher, the better—nothing beats that just-baked feel and smell!
Frequently Asked Questions
Final Thoughts
There’s something so heartwarming about these peppermint cookies—they’re like a hug wrapped in a bite, perfect for when you want a little holiday magic or just need a quick moment of sweetness. I’ve tested plenty of variations, and honestly, following this simple recipe never fails to bring smiles around my table. Whether you’re baking these for family, friends, or yourself (because, really, you deserve it), I promise they’ll become a cherished part of your cookie repertoire. Don’t be afraid to experiment—add extra chocolate, sprinkle some colored sugar, or try different peppermint intensities. It’s truly adaptable, and that’s what makes it fun. I’d love to hear how yours turn out—leave a comment below or tag me in your photos. Happy baking, and may your season be filled with warmth, the smell of fresh cookies, and plenty of peppermint cheer!
peppermint cookies
Ingredients
Main Ingredients
- 2.5 cups all-purpose flour
- 1 cup granulated sugar
- 0.5 cup unsalted butter softened
- 1 teaspoon peppermint extract
- 1 large egg
- 0.25 teaspoon salt
Instructions
Preparation Steps
- In a large bowl, cream together the softened butter and sugar until light and fluffy.
- Add the egg and peppermint extract, mixing well to combine.
- Gradually add the flour and salt, mixing until just combined.
- Divide the dough into 2 parts, wrap in plastic wrap, and chill in the refrigerator for 30 minutes.
- Preheat the oven to 350°F (175°C). Roll out the dough on a floured surface to about 1/4-inch thickness.
- Cut out cookies using your favorite cookie cutter and place them on a baking sheet lined with parchment paper.
- Bake for 10 minutes or until the edges are golden brown. Allow to cool completely on a wire rack.
Notes
Featured Comments
“Impressed! Clear steps and restaurant-level results. Perfect for busy nights.”
“New favorite here — turned out amazing. crowd-pleaser was spot on.”
“Super easy and turned out amazing! My family asked for seconds. Saving this one.”
“This sweet treat was absolutely loved — the silky really stands out. Thanks!”
“Made it tonight and wow — spot on! Will definitely make Easy Peppermint Candy Cookies Recipe again.”
“Packed with flavor and so simple. Exactly what I wanted from Easy Peppermint Candy Cookies Recipe.”


