

The Ultimate Easy Rocky Road Fudge
I don’t know about you, but whenever the holiday season rolls around—or honestly, just a random Tuesday when I’m craving something intensely sweet—I immediately think of making candy. For the longest time, I was terrified of candy thermometers and double boilers. It felt like some magical science experiment I was bound to mess up. But then I discovered the absolute joy of homemade fudge, and everything changed.
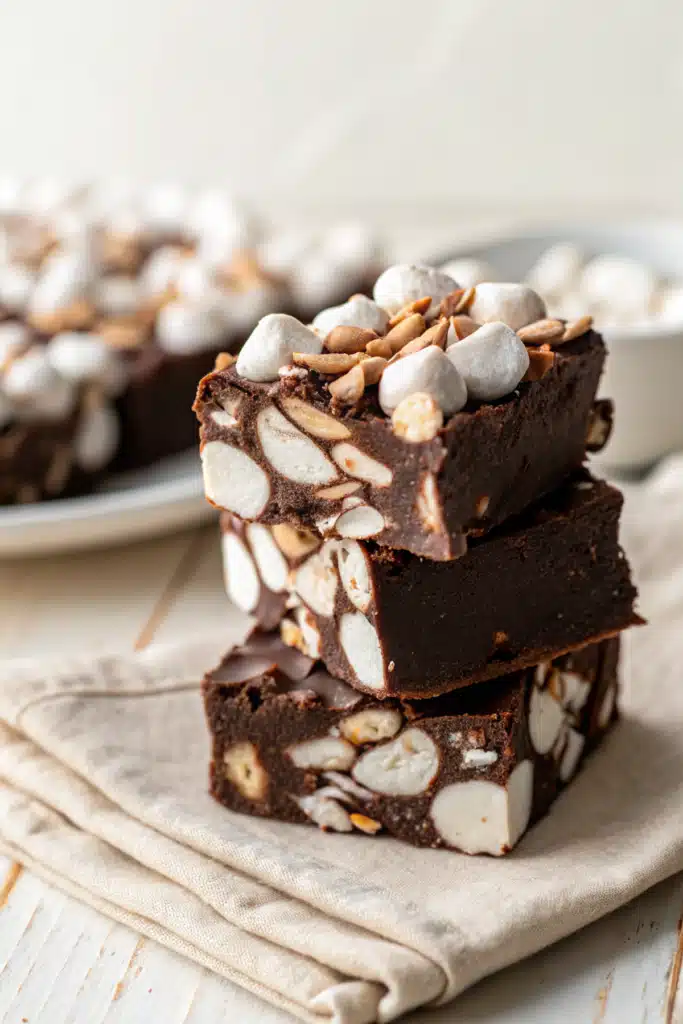
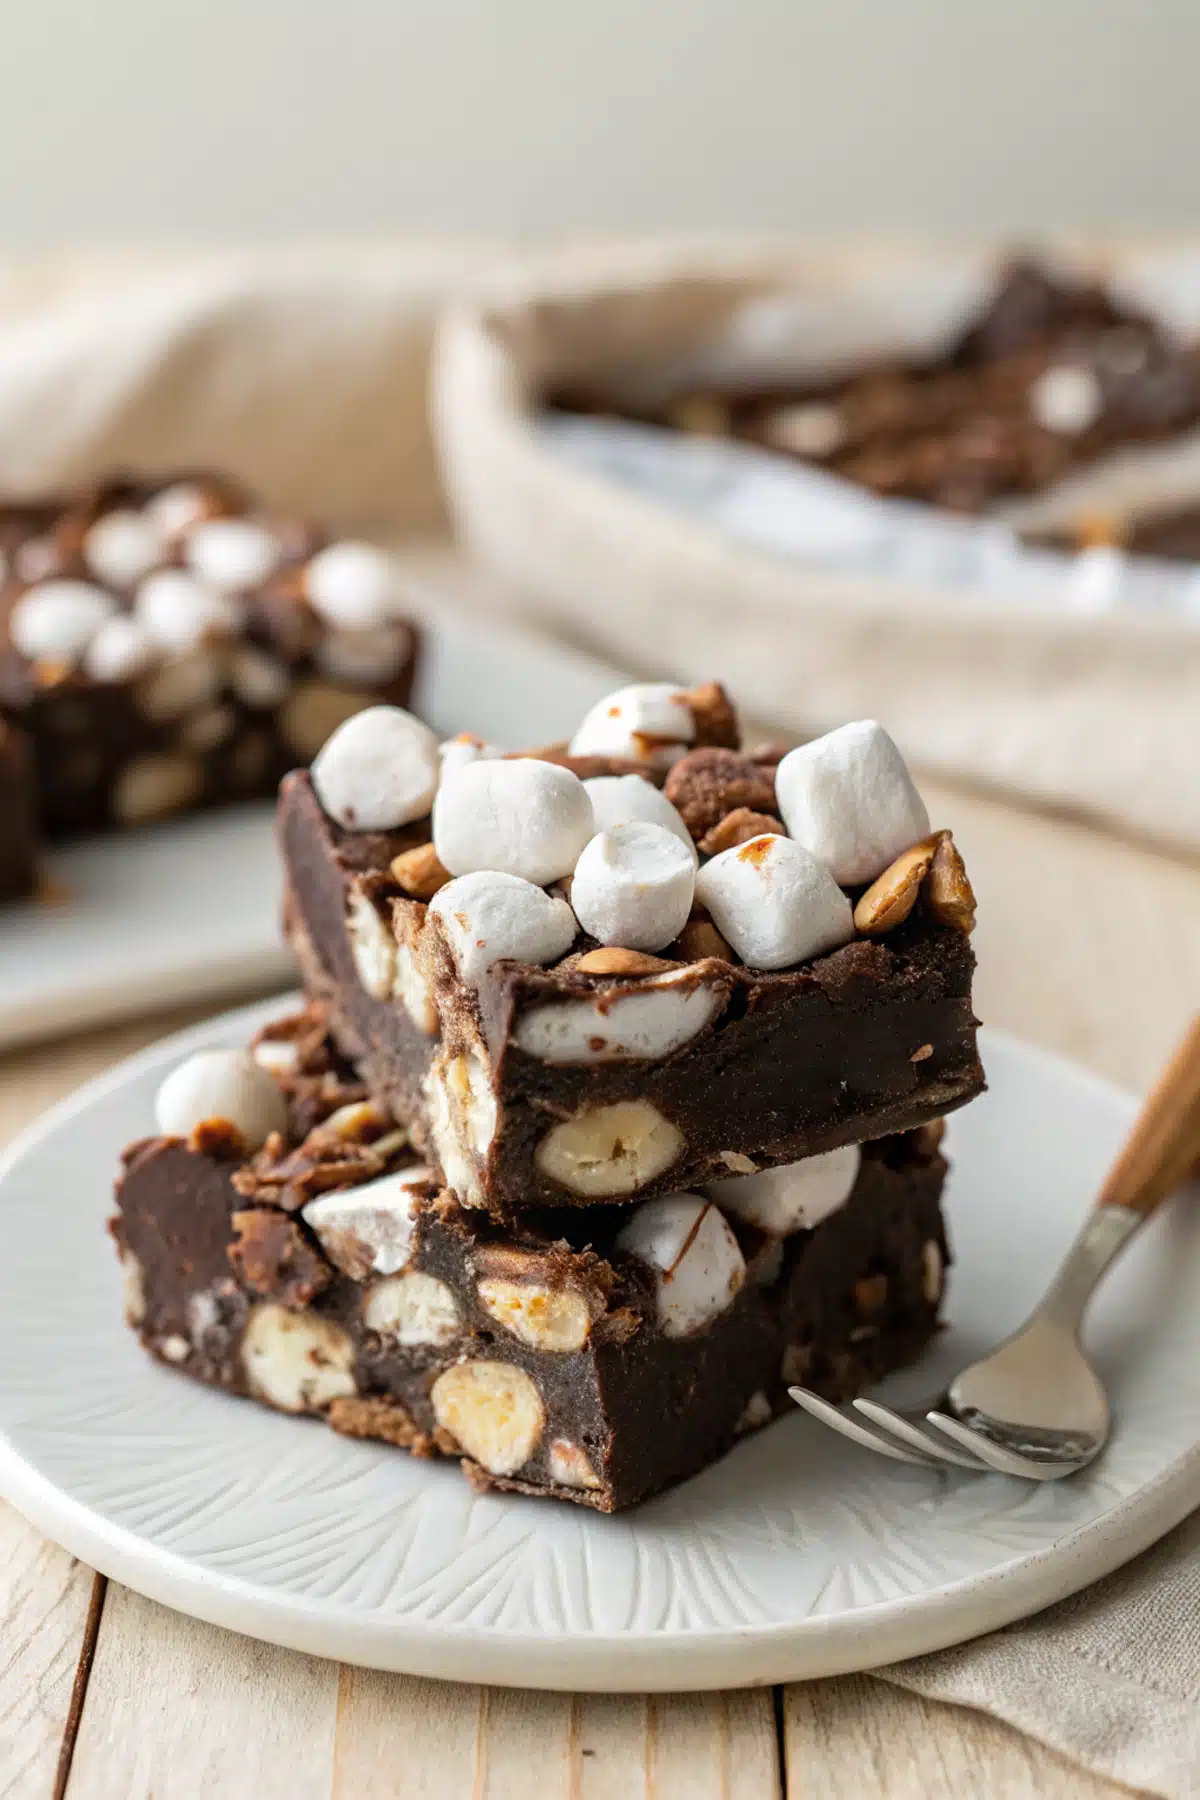
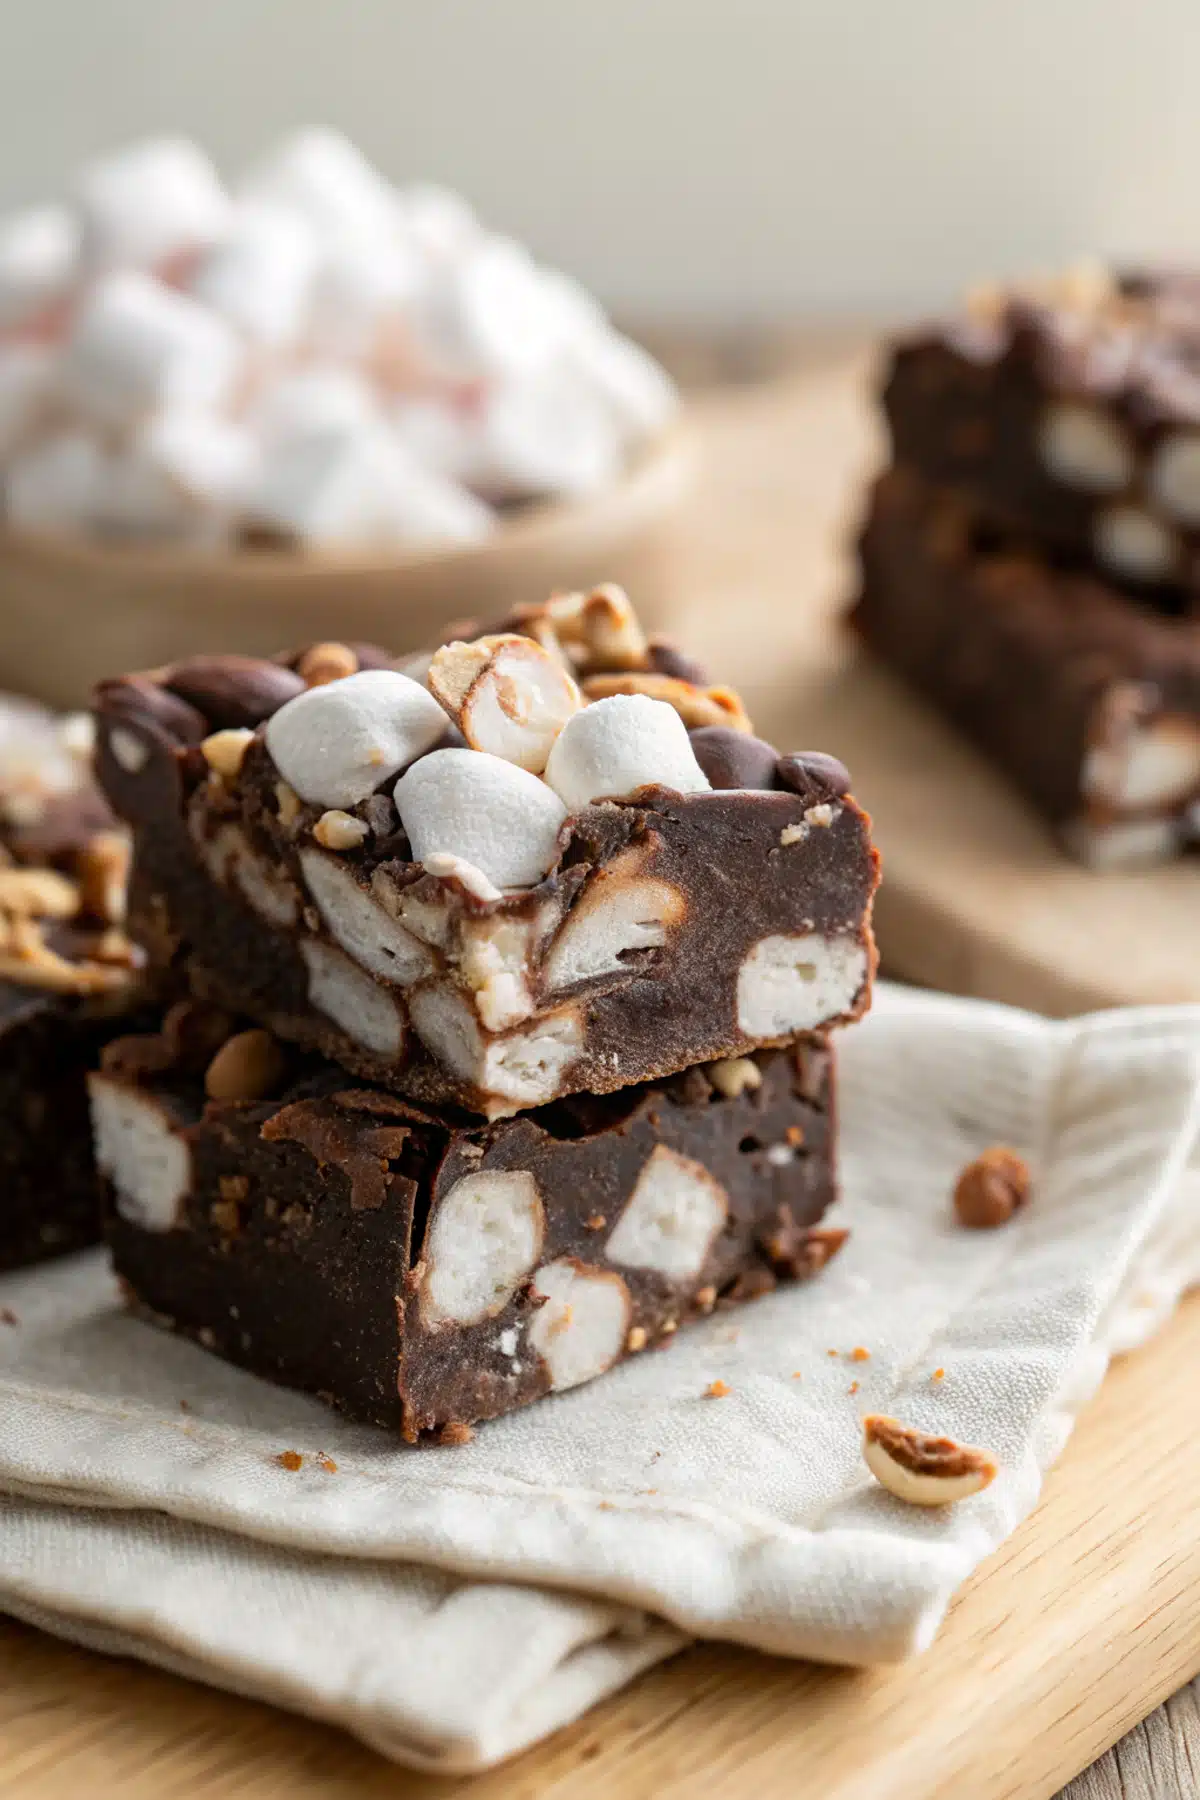
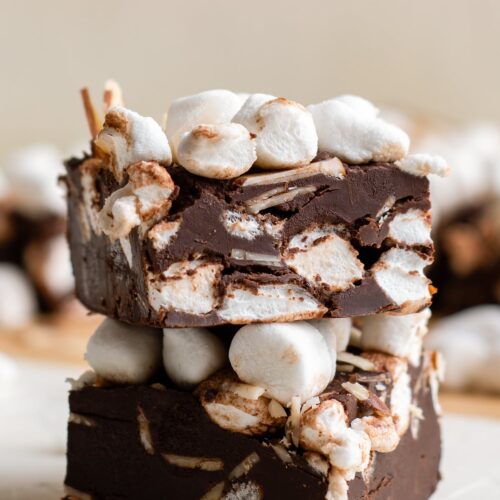
If you want a treat that looks incredibly impressive but takes barely ten minutes of actual work, you have to try this Rocky Road Fudge. It is completely foolproof, incredibly rich, and packed with that nostalgic combination of fluffy marshmallows, crunchy nuts, and velvety chocolate. You don’t need any special equipment, just a saucepan and a serious sweet tooth. Whether you’re putting together holiday gift tins for your neighbors or just want a decadent late-night snack, this rocky road fudge is going to become your new best friend. Grab your favorite mixing bowl, and let’s make some magic happen in the kitchen!
What Is Rocky Road Fudge?
You have probably had a scoop (or three) of rocky road ice cream, but how does that translate into candy? Basically, Rocky Road Fudge is a rich, creamy chocolate base loaded with soft, chewy marshmallows and crunchy nuts. The name “rocky road” actually dates back to the late 1920s, originally created to give folks something sweet to smile about during tough economic times. The “rocks” are the nuts, and the “road” is the smooth chocolate, dotted with marshmallow clouds.
While traditional fudge can be finicky and requires boiling sugar to exact temperatures, this version is a delightful shortcut. We use sweetened condensed milk to guarantee a perfectly soft, melt-in-your-mouth texture every single time without the stress. It is a beautifully messy, textured treat that balances the intense sweetness of the fudge with the light, airy bite of mini marshmallows and the savory crunch of almonds or walnuts. Some folks confuse it with “Heavenly Hash,” which is super similar but often has chocolate chunks or marshmallow swirls instead of whole mini marshmallows. Either way, it is chocolatey perfection!
How to Make Rocky Road Fudge
Quick Overview
Making this treat is incredibly straightforward. You will simply melt your chocolate, butter, and sweetened condensed milk together on the stove until smooth. Then, you stir in half of your mix-ins, press the mixture into a lined pan, and top it with the rest of the marshmallows and nuts. After a quick chill in the fridge to set, you are ready to slice and serve!
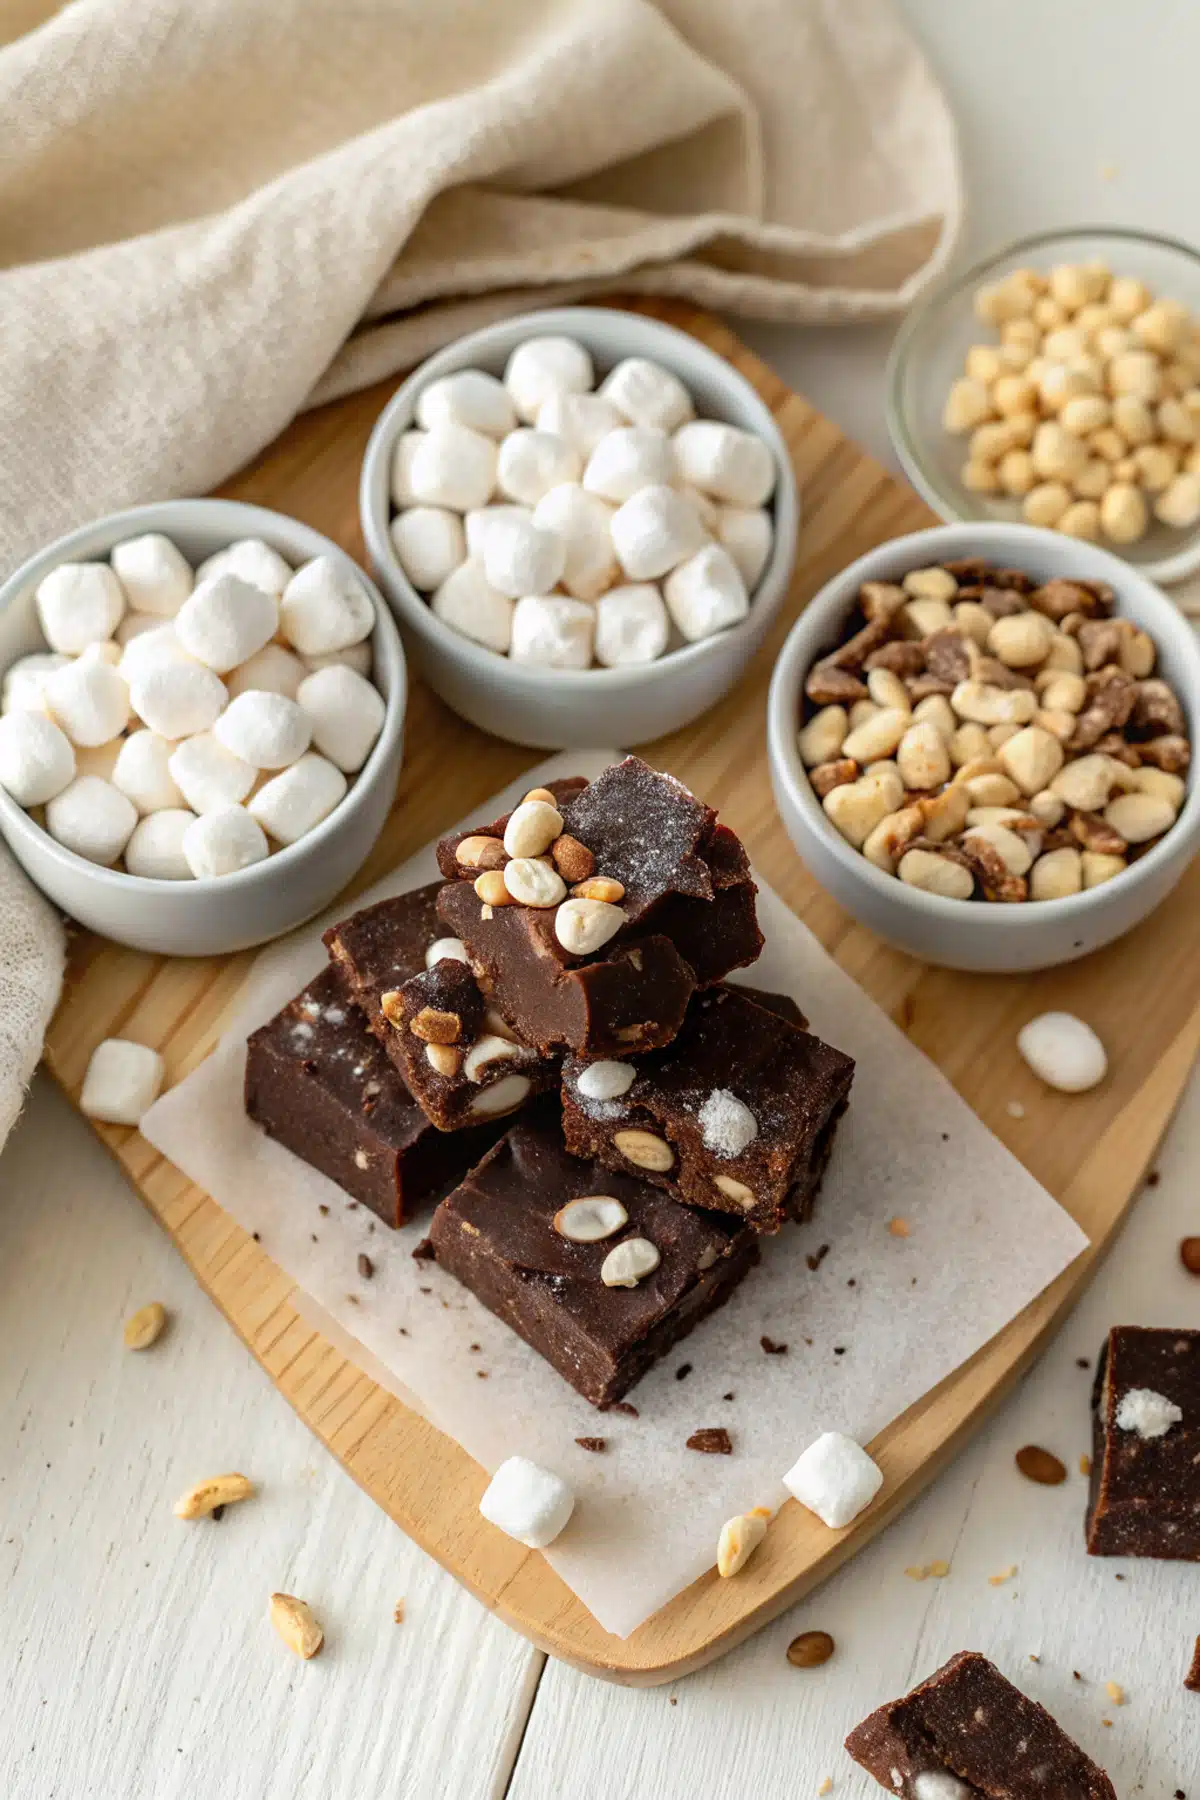
Ingredients
- Semi-sweet or dark chocolate chips: 3 cups (about 18 ounces). Semi-sweet gives you that classic, rich fudge flavor without being overly sweet.
- Sweetened condensed milk: One 14-ounce can. Do not swap this for evaporated milk—this is the secret ingredient for that creamy texture!
- Butter: 4 tablespoons. This adds a beautiful shine and a luscious, buttery finish to the candy.
- Mini marshmallows: 5 ounces. Mini is the way to go so they distribute evenly throughout the fudge.
- Nuts: 4 ounces of sliced almonds or chopped walnuts. (Feel free to use peanuts if you prefer!)
Step-by-Step Instructions
Step 1: Preheat & Prep Pan
Start by lining an 8×8-inch square baking dish with parchment paper or wax paper. Leave a little overhang on the sides so you can easily lift the fudge out later. Set this aside.
Step 2: Melt the Base
In a medium saucepan, combine your chocolate chips, sweetened condensed milk, and butter. Place the pan over medium heat. Stir continuously, making sure to scrape the bottom so nothing burns. Keep stirring until the chocolate is completely melted and the mixture is smooth and glossy.
Step 3: Add the Mix-ins
Remove the saucepan from the heat. Working quickly before the fudge starts to set, fold in exactly half of your mini marshmallows and half of your sliced almonds (or walnuts).
Step 4: Pour and Top
Quickly pour the warm fudge mixture into your prepared baking dish. Use a spatula to spread it out into an even layer. Immediately sprinkle the remaining marshmallows and nuts evenly over the top, pressing them down just a tiny bit gently so they stick to the fudge.
Step 5: Chill and Serve
Cover the baking dish and pop it into the refrigerator for at least 2 hours. Once it is firm to the touch, lift the fudge out using the parchment paper overhang, place it on a cutting board, and slice it into squares.
What to Serve It With
Because this Rocky Road Fudge is wonderfully rich and decadent, it pairs beautifully with things that balance out its sweetness. I absolutely love serving a plate of these fudge squares alongside a piping hot cup of black coffee or a strong espresso; the bitterness of the coffee cuts right through the sweet chocolate and marshmallows.
If you are putting together a holiday dessert spread, this fudge looks gorgeous on a platter next to buttery shortbread cookies, tart lemon bars, or salty pretzels. The contrast in flavors and textures makes for a perfect dessert board! For a truly indulgent winter night, serve a square of this fudge with a mug of warm, unsweetened almond milk or even a glass of dry red wine like a Cabernet Sauvignon, which naturally complements dark and semi-sweet chocolate.
Top Tips for Perfecting Your Rocky Road Fudge
Even though this recipe is incredibly simple, a few little tricks will guarantee you get bakery-quality results every single time.
- Stick to Sweetened Condensed Milk: I can’t stress this enough! Please don’t try to substitute evaporated milk, regular milk, or coconut milk. Sweetened condensed milk is thick, syrupy, and crucial for the fudge to set properly.
- Choose the Right Chocolate: Use semi-sweet or dark chocolate chips. Milk chocolate chips will make the fudge far too sweet once combined with the condensed milk and marshmallows. You want that deep, robust cocoa flavor to shine through.
- Work Quickly: Once you take the saucepan off the heat, the fudge will start to cool and thicken fast. Have your marshmallows and nuts pre-measured and ready to go so you can fold them in and get the mixture into the pan before it stiffens up.
- The Hot Knife Trick: When you are ready to cut the chilled fudge, run a large, sharp chef’s knife under hot water, wipe it completely dry, and then slice. The warm blade will glide through the chocolate and marshmallows, giving you perfectly clean edges.
Storing and Reheating Tips
One of the best things about homemade fudge is how wonderfully it keeps! If you have leftovers (which is a big “if” in my house), storing them is a breeze.
Room Temperature or Fridge: Place your cut fudge squares in an airtight container. I like to put a sheet of wax paper or parchment paper between the layers so they don’t stick together. You can keep the container in the refrigerator for up to two weeks. Some people prefer eating it cold right out of the fridge, while others like to let it sit on the counter for 10 minutes to soften up a bit before enjoying.
Freezing: Yes, you can absolutely freeze this! Wrap the block of fudge (or individual squares) tightly in plastic wrap, then place it inside a heavy-duty freezer bag, squeezing out as much air as possible. It will keep in the freezer for up to 2 months. When you are ready for a treat, just let it thaw overnight in the fridge.
A Quick Note: We strongly recommend against reheating fudge. Melting it again will ruin the texture and turn your beautiful marshmallows into a gooey puddle!
Frequently Asked Questions
Final Thoughts
There you have it, my friends! A completely foolproof, ridiculously delicious Rocky Road Fudge that you can whip up in practically no time. It brings back so many fond memories of cooking with my family, and I genuinely hope it brings a little bit of that same joy into your kitchen. Whether you are making a batch to share at a holiday party, wrapping it up as a sweet homemade gift, or just hoarding it in the fridge for your own midnight snacking (no judgment here, I do it too!), this recipe is a guaranteed winner.
Don’t be afraid to make it your own by swapping the nuts or tossing in a handful of M&Ms or chopped peanut butter cups if you are feeling adventurous. If you decide to give this recipe a try, I would love to hear how it turns out for you. Grab your ingredients, have fun with it, and enjoy every single chocolatey, marshmallowy bite!
Rocky Road Fudge
Ingredients
Main Ingredients
- 3 cups dark or semi-sweet chocolate chips about 18 ounces
- 14 ounces sweetened condensed milk 1 can
- 4 tablespoons butter
- 5 ounces mini marshmallows
- 4 ounces sliced almonds or walnuts
Instructions
Preparation Steps
- Line an 8x8 baking dish with parchment paper or wax paper, and set aside.
- Add the chocolate chips, sweetened condensed milk, and butter to a medium saucepan. Heat on medium, stirring well all the way to the bottom of the saucepan, until the chocolate melts and everything is well combined.
- Remove the mixture from the heat, and mix in half of the marshmallows and almonds.
- Quickly pour the fudge into the baking dish, and spread into an even layer.
- Sprinkle the remaining marshmallows and almond slices over the top of the fudge.
- Cover and refrigerate for 2 hours, before cutting into squares.
Notes
Featured Comments
“This brings back such sweet memories! I love how simple ingredients can create something so nostalgic and delicious.”
“Impressed! Clear steps and crowd-pleaser results. Perfect for busy nights.”
“New favorite here — super easy. crowd-pleaser was spot on.”
“Super easy and turned out amazing! My family asked for seconds. Saving this one.”
“This sweet treat was absolutely loved — the silky really stands out. Thanks!”
“Made it tonight and wow — so flavorful! Will definitely make easy rocky road fudge again.”


This brings back such sweet memories! I love how simple ingredients can create something so nostalgic and delicious.