

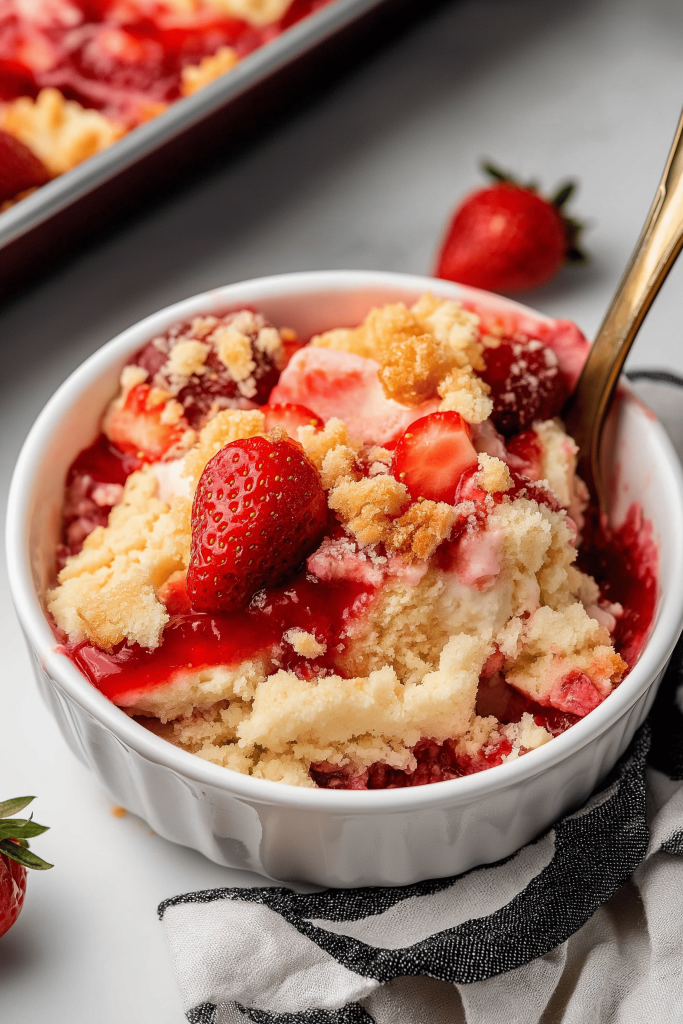
Oh, friends, can we talk about those days when the heat just won’t quit and the last thing you want to do is turn on the oven? I know I’ve been there more times than I can count! That’s exactly when my absolute favorite strawberry icebox cake comes to the rescue. It’s like a big, cool hug in dessert form, and honestly, it’s so simple my kids can practically make it themselves. This isn’t your typical layered cake that requires hours of baking and decorating; it’s more like a magical assembly of pure, unadulterated summer joy. Picture this: delicate layers of fluffy Whipped Cream, bright, juicy strawberries, and soft cookies that meld together into a dreamy, no-bake masterpiece. It’s honestly one of the best strawberry icebox cake recipes I’ve ever discovered, and it’s become a staple in my home, especially during the warmer months. It truly rivals any fancy dessert you’d find at a bakery, but with none of the fuss. I’m so excited to share this with you!
What is an Icebox cake?
So, what exactly is this delightful creation we call a strawberry icebox cake? At its heart, it’s a no-bake dessert that relies on a bit of magic to transform simple ingredients into something truly spectacular. Think of it as a sophisticated, grown-up version of a childhood favorite, but with a vibrant strawberry twist. Instead of traditional Cake Layers baked in an oven, we use cookies – usually graham crackers or vanilla wafers – that soften beautifully in the refrigerator, creating a texture that’s almost cake-like but much more tender and yielding. These layers are then alternated with luscious whipped cream and, of course, loads of fresh strawberries. The “icebox” part of the name comes from the fact that it needs to chill in the refrigerator, or “icebox” as we used to call them, for several hours to allow everything to meld together and set. It’s essentially a chilled, deconstructed strawberry shortcake, but with an unbelievably creamy, melt-in-your-mouth quality that’s just *chef’s kiss*.
How do you make an Icebox cake?
Quick Overview
Making this strawberry icebox cake is a breeze, and the process is all about gentle assembly. You’ll be whipping up some dreamy cream, gently folding in fresh strawberries, and then layering it all with soft cookies in a dish. The real magic happens in the refrigerator, where it chills and sets into a perfectly sliceable, incredibly delicious dessert. It’s honestly more about thoughtful layering than complex techniques, which is why it’s such a winner for busy days. You truly don’t need to be a master baker for this one!
Ingredients
For the Main Batter:
We don’t really have a “batter” in the traditional sense for an icebox cake, but this section is where you’ll find the foundation of your cookie layers.
- 2 (14.5 ounce) packages graham crackers: You can use plain graham crackers, or if you want a little something extra, try honey graham crackers. I’ve also experimented with vanilla wafers in a pinch, and they work beautifully too! Make sure they are fresh and not stale; they absorb moisture so you want them to have a good base.
- Optional: 1/4 cup granulated sugar (if your cookies aren’t very sweet, or if you like a sweeter cookie layer)
For the Filling:
This is where the creamy, dreamy goodness comes from!
- 3 cups heavy whipping cream: Make sure it’s nice and cold! This is crucial for getting it to whip up properly.
- 1 cup powdered sugar: Also known as confectioners’ sugar. It dissolves easily and keeps the cream smooth and light.
- 2 teaspoons vanilla extract: Pure vanilla extract will give you the best flavor.
- 1/4 teaspoon salt: Just a pinch to balance the sweetness.
- 4 cups fresh strawberries, hulled and sliced: You want ripe, juicy strawberries for the best flavor. About 1.5 to 2 pounds should do it.
- Optional: 2 tablespoons granulated sugar (for tossing with strawberries if they aren’t super sweet)
For the Glaze:
This is an optional but highly recommended finishing touch for extra shine and flavor.
- 1/2 cup strawberry jam or preserves: Use a good quality one with lots of fruit.
- 1 tablespoon water (if needed to thin)
Step-by-Step Instructions
Step 1: Preheat & Prep Pan
Okay, so technically, we’re not preheating an oven because this is a no-bake wonder! The main “prep” here is choosing your vessel. I usually reach for a 9×13 inch baking dish. It’s the perfect size for getting nice, even layers. You don’t need to grease it or anything; the cookies and cream will create their own non-stick magic. Make sure it’s clean and ready to go for assembly.
Step 2: Mix Dry Ingredients
In this recipe, the “dry ingredients” are really just your graham crackers. If you’re using the optional granulated sugar to sweeten them up a bit, you can gently toss them together in a separate bowl. The main thing here is to have your graham crackers ready to go. Some people like to break them into halves or thirds to fit the dish better, but I usually just lay them whole. It’s up to you how you want to assemble!
Step 3: Mix Wet Ingredients
This is where the magic happens! In a large, chilled bowl (seriously, chilling your bowl and beaters beforehand makes a HUGE difference!), pour in your cold heavy whipping cream. Add the powdered sugar, Vanilla Extract, and salt. Start mixing on low speed with your electric mixer, gradually increasing to medium-high. Whip until stiff peaks form. This means when you lift the beaters, the cream should stand up straight without curling over. Be careful not to overmix, or you’ll end up with butter!
Step 4: Prepare Strawberries
While your cream is chilling or after you’ve whipped it, prep your strawberries. Hull them (that means removing the leafy green tops) and slice them. If your strawberries aren’t super sweet or you want a little extra fruity punch, you can toss them in a separate bowl with the optional 2 tablespoons of granulated sugar. Let them sit for about 5-10 minutes; this helps them release some of their juices, which adds even more flavor to the cake.
Step 5: Prepare Filling
Your filling is essentially the whipped cream you just made, mixed with about half of your sliced strawberries. Gently fold about half of the sliced strawberries into the whipped cream. You want to be careful here not to deflate the cream. Just a few gentle folds will do. We’re saving the other half of the strawberries to layer directly, which gives you those lovely pops of fresh berry throughout.
Step 6: Layer & Swirl
Now for the assembly! Start by arranging a layer of graham crackers on the bottom of your baking dish, breaking them as needed to fit snugly. Spread about half of the strawberry-whipped cream mixture evenly over the crackers. Then, scatter about half of the remaining plain sliced strawberries over the cream layer. Repeat this with another layer of graham crackers, the remaining strawberry-whipped cream, and finally, top with the rest of the sliced strawberries. You don’t need to swirl anything here; the layers will naturally meld together as it chills. The visual appeal comes from the vibrant red of the strawberries peeking through the cream!
Step 7: Bake
You guessed it – no baking required! This is where the “icebox” part comes in. Cover your dish tightly with plastic wrap or foil and pop it into the refrigerator. You’ll want to let it chill for at least 6 hours, but honestly, overnight is even better. This gives the crackers ample time to soften and absorb the flavors, and the cream to firm up beautifully. It’s all about patience and letting the fridge do the work!
Step 8: Cool & Glaze
Once your icebox cake has had ample time to chill and set (at least 6 hours, or preferably overnight), it’s ready for its final touches. You can serve it as is, but I love adding a simple glaze for a little extra oomph. Gently warm your strawberry jam or preserves in a small saucepan over low heat with the tablespoon of water, just until it’s pourable. If it’s already quite loose, you might not need the water. Drizzle this warm glaze over the top of the cake, letting it drip down the sides. This adds a beautiful sheen and an extra layer of intense strawberry flavor.
Step 9: Slice & Serve
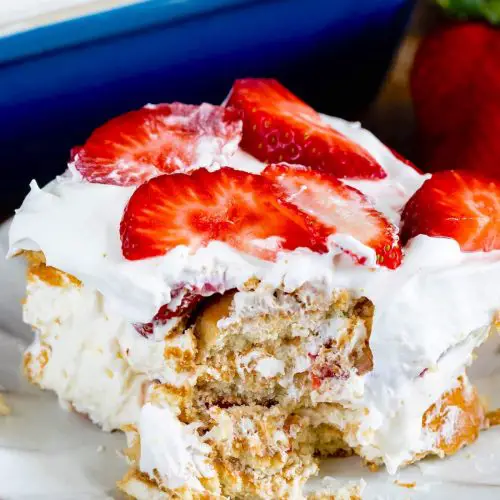
This is the moment of truth! Carefully slice the strawberry icebox cake into portions. Because it’s so soft and creamy, a sharp knife works best. I usually serve it chilled, right from the refrigerator. It’s absolutely divine on its own, but a dollop of extra whipped cream or even a few fresh berries on the side never hurt anyone! The texture should be wonderfully soft, with the cookies having softened to a perfect cake-like consistency.
What to Serve It With
This strawberry icebox cake is so versatile, it fits into almost any meal or occasion! For breakfast, imagine a slice of this cool, fruity goodness alongside a steaming cup of coffee. It’s a far cry from a boring bowl of cereal, and it feels like a special treat to kick off the day. For brunch, this cake is an absolute showstopper. You can elevate it with a few edible flowers on top or serve it with a side of fresh mint. Pair it with a refreshing glass of sparkling rosé or a bright mimosa. As dessert, it’s naturally perfect. After a hearty meal, this light and refreshing cake is the ideal palate cleanser. Serve it with a light dessert wine or even just a glass of iced tea. For cozy snacks, if you’re craving something sweet in the afternoon or late evening, a small slice of this icebox cake is pure comfort. It’s so satisfying but not overly heavy. My family traditions often involve this cake for summer birthdays or just because the weather is nice. We’ve also found it pairs wonderfully with a scoop of vanilla bean Ice Cream, though it’s truly wonderful on its own.
Top Tips for Perfecting Your Strawberry Icebox Cake
I’ve made this strawberry icebox cake more times than I can count, and over the years, I’ve picked up a few tricks that make it even better. For the strawberry prep, I always make sure my berries are ripe and flavorful. If they seem a bit dull, the optional sugar toss really makes a difference. And don’t skip hulling them – nobody wants to bite into a tough stem! When it comes to mixing the cream, the key is cold. Cold cream, cold bowl, cold beaters. It’s the secret to getting those beautiful, stiff peaks without the risk of over-whipping. I learned the hard way that you can go from perfect whipped cream to grainy butter in seconds! For swirl customization, while I usually just layer the strawberries, you could get fancy and reserve some whipped cream, color it pink with a tiny drop of food coloring, and swirl that in for a marbled effect. For ingredient swaps, if you can’t find graham crackers, vanilla wafers are a fantastic substitute, offering a slightly different, sweeter base. If you’re dairy-free, you can experiment with full-fat coconut cream (chilled overnight and only using the solid part) for the whipped cream – it works surprisingly well! For baking tips (or rather, chilling tips!), give it that full 6-8 hours, or ideally overnight. This is crucial for the cookies to soften properly. Rushing this step is the biggest mistake people make. Finally, for glaze variations, if you’re not a jam fan, you could dust the top with a little powdered sugar or even drizzle a little melted white chocolate for a different kind of sweetness.
Storing and Reheating Tips
One of the best things about this strawberry icebox cake is how well it stores, making it perfect for leftovers (if you even have any!). If you’re keeping it at room temperature, I’d say it’s best to eat it within a couple of hours. After that, the cookies can get a bit too soggy. For refrigerator storage, this is where it shines! Once it’s chilled and set, cover it tightly with plastic wrap or foil. It will stay delicious in the fridge for about 3-4 days. The texture will continue to soften and meld, which is part of its charm. Make sure to use an airtight container to prevent it from absorbing other fridge odors. Freezer instructions are a bit trickier because of the cream, but it is possible! It’s best to freeze it before adding the glaze. Wrap the entire cake very well in plastic wrap, then in a layer of foil. It should keep in the freezer for up to 2 weeks. Thaw it overnight in the refrigerator before serving. If you freeze it, I recommend adding the glaze right before serving for the best texture and appearance. The key is always to ensure it’s well-covered to avoid freezer burn.
Frequently Asked Questions
Final Thoughts
I truly hope you give this strawberry icebox cake a try. It’s one of those recipes that just makes me happy every single time I make it, and more importantly, every time we eat it. It embodies everything I love about summer: fresh, vibrant flavors and the joy of simple, delicious desserts that bring everyone together. It’s proof that you don’t need a complicated recipe or a hot oven to create something truly spectacular. If you’re a fan of no-bake desserts or are looking for that perfect sweet treat that requires minimal effort but delivers maximum flavor, this is it. It’s the kind of cake that makes people think you spent hours in the kitchen, and the secret is that you probably spent less than 30 minutes actually assembling it. If you enjoy this, you might also love my no-bake lemon cheesecake or my easy chocolate mousse recipe for more effortless indulgence. I can’t wait to hear what you think! Please leave a comment below and let me know how your strawberry icebox cake turns out, or if you have any fun variations you tried. Happy baking (or rather, happy chilling)!
Strawberry Icebox Cake
Ingredients
Main Ingredients
- 226 g cream cheese room temperature
- 0.5 cup powdered sugar
- 1 teaspoon vanilla extract
- 1 cup heavy whipping cream cold
- 2 pounds strawberries
- 11 ounce Nilla Wafers
- Additional whipped cream or cool whip for topping
Instructions
Preparation Steps
- Beat cream cheese with hand mixer until smooth. Mix in powdered sugar and vanilla until smooth. Slowly mix in heavy whipping cream and beat until mixture is fluffy but stands up on its own.
- Hull and slice about 1.5 pounds of the strawberries.
- In a 9x9-inch pan, place a layer of Nilla Wafers, then a layer of strawberries and a thin layer of the cream cheese mixture (1/3 of the mixture). Repeat the layers until you're out of all three.
- Cover and chill at least 4 hours.
- Before serving: top with about 4 ounces (half a normal size container) of whipped topping or make some fresh whipped cream (1/2 cup heavy whipping cream + 1 tablespoon powdered sugar until stiff peaks form). Slice remaining strawberries and place on top.
- Will keep in refrigerator up to 2 days. Store covered.
Notes
Featured Comments
“Impressed! Clear steps and comforting results. Perfect for busy nights.”
“New favorite here — comforting. crowd-pleaser was spot on.”
“Super easy and turned out amazing! My family asked for seconds. Saving this one.”
“This sweet treat was absolutely loved — the hearty really stands out. Thanks!”
“Made it tonight and wow — turned out amazing! Will definitely make Easy Strawberry Cake Icebox Delight again.”
“Packed with flavor and so simple. Exactly what I wanted from Easy Strawberry Cake Icebox Delight.”


