

There’s something magical about topping a cake or cupcake with that fluffy, snowy white cloud icing — it’s like a little piece of heaven resting on your sweet creation. I remember the first time I tasted it; the softness, the sweet creaminess melting in my mouth, and the way it makes any dessert look like an art piece. Honestly, this particular icing has become my go-to whenever I want that perfect, picture-perfect finish. It’s not just beautiful — it’s also incredibly easy to whip up, which is a lifesaver on busy nights or when I’m feeling a bit lazy but still want that “wow” factor. My kids ask for this all the time, especially on their birthday cakes, and I swear I’ve used it for everything from cookies to pie toppings when I want a little extra something. Trust me, once you try making this white cloud icing, you’ll understand why I keep coming back to it. It’s surprisingly forgiving, and the taste? Light, sweet, and just the right touch of decadence — like a sweet little cloud directly from your kitchen!
What is white cloud icing?
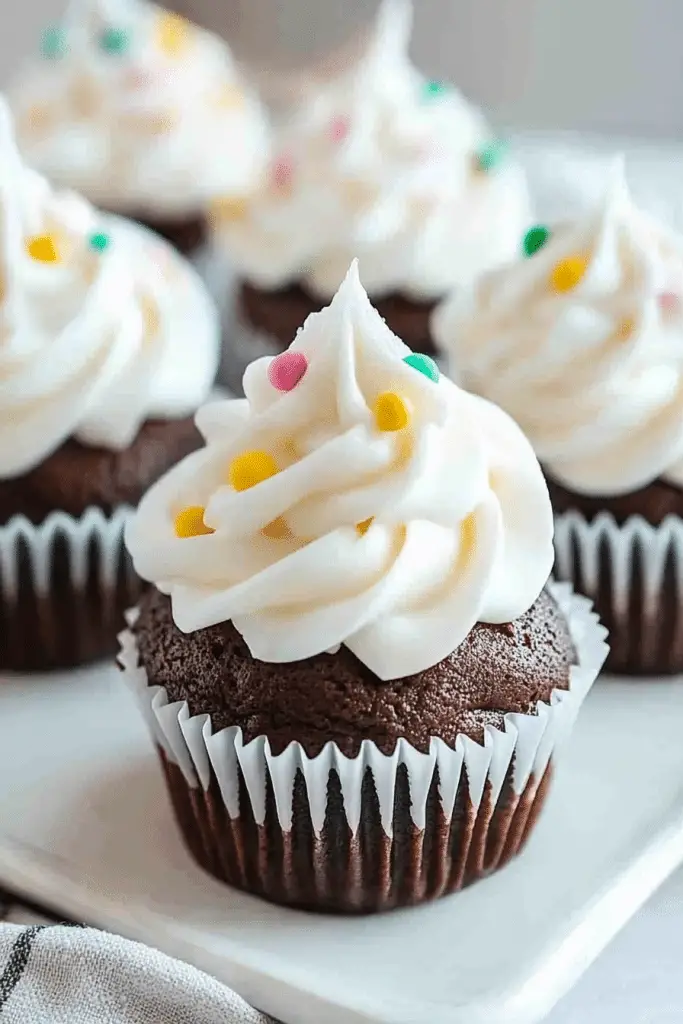
Think of white cloud icing as the soft, pillowy topping that looks almost too beautiful to eat. It’s essentially a whipped frosting whose airy texture resembles the fluffiness of a cloud — hence the name. The secret lies in how it’s whipped to perfection, making it light as air yet sturdy enough to hold its shape. This icing isn’t overly sweet; instead, it’s delicate with just enough sugar to satisfy your craving without overwhelming your taste buds. Its innocent white hue and fluffy texture lend that charming, bakery-quality look that instantly elevates any dessert. Originally, this icing was popular in vintage cake decorating, but I’ve found it works beautifully for anything that needs a little touch of whimsy, like cupcakes, layered cakes, or even as a fancy topping for fruit salads. Think of it as a blank canvas ready for sprinkles, edible glitter, or a few berries — whatever makes your dessert feel special. It’s quick, simple, and frankly, addictive once you get the hang of it.
How do I make white cloud icing?
Quick Overview
This white cloud icing is as easy to make as whipping cream — and just as fun! Basically, you whip heavy cream with powdered sugar and vanilla until it’s light and airy, then pipe or dollop it onto your dessert. The magic really happens when you whip it just enough so that it holds peaks but doesn’t turn into butter. It’s the perfect topping for cakes, cupcakes, or even fresh fruit — and it comes together in minutes. What makes this method special is how airy it is; it’s like spreading little clouds over your sweet treats. I always do this when I want something quick and show-stopping, especially because it’s so forgiving. Even if it’s not perfectly whipped, it still looks rustic and charming — which, let’s be honest, adds character! Trust me, once you master this simple technique, you’ll find yourself reaching for it all the time.
Ingredients
For the Main Batter:
– 1 cup heavy cream (chill your bowl and beaters — cold cream whips faster and better!)
– 2-3 tablespoons powdered sugar (adjust based on your sweetness preference)
– 1 teaspoon vanilla extract (pure vanilla for that warm flavor)
For the Filling:
– Optional: fruit jams, chocolate spread, or fresh fruit for layering inside cakes
– Easy to customize or leave plain for simple elegance.
For the Glaze:
– A squeeze of lemon juice mixed with a little powdered sugar for a tangy-sweet twist, or try cocoa powder for a chocolatey version. The key is a smooth, pourable consistency – not too runny, not too thick.
Step-by-Step Instructions
Step 1: Preheat & Prep Pan
If you’re decorating a cake or cupcakes, make sure your pan and tools are cool and clean. For piping, a piping bag fitted with a star tip or round tip works wonders. No need to preheat the oven here, but I always have my mixing bowl chilled — it helps the cream whip up faster and fluffier.
Step 2: Mix Dry Ingredients
Since there are no dry ingredients in this icing, we’ll jump straight into the wet stuff! But if you’re adding flavors or color, now’s the time to prep those. Just have your vanilla ready and any extra flavorings you want to incorporate later.
Step 3: Mix Wet Ingredients
Pour your heavy cream into the chilled bowl. Add powdered sugar and vanilla. The sugar dissolves quickly and helps stabilize the whipped cream. You can start whipping on medium speed, and watch for bubbles forming. At this stage, the mixture should be just beginning to thicken.
Step 4: Combine
Increase the speed to high and whip until soft peaks form. This means the cream will hold a gentle mound — not drooping, but not stiff as a rock either. Be careful not to overwhip, or you risk turning it into butter. If you go too far, don’t panic; you can fold in a little more cream to loosen it back up.
Step 5: Prepare Filling
If you’re adding a filling inside layers or creating a marble effect with food coloring, prepare that now. For fillings, a spoonful of jam or fruit compote works beautifully. For a marbled look, add a few drops of food coloring and gently swirl — remember, less is more here.
Step 6: Layer & Swirl
If you’re decorating a cake, spread a layer of icing, add your filling, then top with more icing. For cupcakes, pipe big dollops or elegant rosettes. For a marbled effect, drop spoonfuls of colored icing on top and gently swirl with a toothpick or skewer. It’s all about visual fun and texture.
Step 7: Bake
This icing doesn’t require baking, but if you’re using it as a topping for freshly baked items, wait until the baked goods are cooled to room temperature. For cupcakes or cakes, a short chill in the fridge helps set the icing if you’re going for a firmer look.
Step 8: Cool & Glaze
If you want to add some shine or extra flavor, gently drizzle a glaze over the fluffy clouds. Be sure your cake is cooled, so the glaze doesn’t melt away. This is also the moment to add sprinkles or edible glitter for that extra wow factor.
Step 9: Slice & Serve
Use a sharp, warm knife for clean cuts — run it under hot water then wipe dry between slices. Serve your masterpiece with a smile, and watch how everyone’s eyes light up at that cloud-like topping. I love serving it with a cup of coffee or tea, making the perfect little moment of indulgence.
What to Serve It With
This fluffy white cloud icing is incredibly versatile! For breakfast, I love dolloping it over banana and berry parfaits — it makes the fruit feel like dessert. For brunch, try spreading it on muffins with a drizzle of honey and some fresh mint. As a dessert topping, it pairs beautifully with rich chocolate cake or lemon drizzle — the contrast of flavors makes everything feel fancy but still comfortingly familiar. Sometimes, I just scoop a spoonful for an instant sweet fix when I’m craving comfort food late at night. My family’s a big fan of layering it on layered cakes, especially when I decorate with sprinkles, edible gold, or fresh strawberries. It’s also surprisingly good on simple shortbread cookies or as a topping for scones. Honestly, this icing elevates pretty much any treat — it’s like giving your dessert a soft, elegant hug in a cloud!
Top Tips for Perfecting Your White Cloud Icing
Making this icing perfect is all about the technique and a little patience. First, always chill your bowl and beaters — cold tools help the cream whip faster and stay stable for longer. When whipping, start at medium speed, then jump to high for that fluffy start. Be careful not to overwhip; you want those soft peaks, not butter! If you accidentally go too far, don’t stress — fold in a little more cream to loosen it or start over, depending on how much you whipped. For that marble effect, add food coloring sparingly; less is more because it can overwhelm the airy texture if you add too much. When swirling, use a toothpick or skewer to create pretty patterns without blending the colors completely. If you prefer a sweeter icing, add more powdered sugar gradually — but don’t go overboard, or it becomes stiff. I learned that using pure vanilla extract boosts the flavor, but almond or coconut extracts can add a lovely twist. Baking tips? Make sure your oven is correctly calibrated, and don’t forget to test for doneness with a toothpick — moist crumbs are perfect, overbaking can dry out your cake. For glazing, keep the glaze a pourable consistency; it should glide smoothly but not run everywhere. Lastly, don’t forget: practice makes perfect, and a little trial and error helps you find that perfect fluffiness you love most!
Storing and Reheating Tips
This fluffy icing is best enjoyed fresh, but here’s how to keep it perfect. If you have any leftovers, cover them tightly with plastic wrap or store in an airtight container. At room temperature, it’s good for a few hours, but I wouldn’t leave it out overnight — it’s better to refrigerate. Once chilled, it firm up a little, which is great for stability but can sometimes deflate slightly. To re-whip after refrigeration, just give it a quick spin with your mixer until light and fluffy again. If you’re storing in the fridge, bring it back to room temperature before piping or spreading — it’ll be smoother and easier to work with. For freezing, I usually pipe leftover clouds onto parchment paper, then freeze and pop them into a zip-top bag. To thaw, let them sit at room temperature a bit and give a gentle re-whip if needed. A quick tip? Don’t add glaze or fruit toppings until just before serving — moisture can make the whipped cream weep or deflate. Trust me, with proper storage, this cloud can stay soft and beautiful for a day or two, ready to dress up your desserts again.
Frequently Asked Questions
Final Thoughts
There’s a certain joy in crafting something that looks as enchanting as a cloud but tastes like a dream. White cloud icing has become my secret weapon for turning everyday desserts into something special — it elevates simple cupcakes, adds a regal touch to layered cakes, and even works as a charming fruit topper. The best part? It’s so straightforward that even beginners can master it with just a little patience. Over the years, I’ve experimented with flavors, colors, and decorating techniques, and I swear every time I whip this up, it sparks a bit of joy in my kitchen. I encourage you to give it a try — I bet it’ll become a staple in your dessert toolbox too. Whether you’re baking for a cozy family gathering or just want a little sweet pick-me-up, this white cloud icing will never let you down. Happy baking, and I can’t wait to see how you make it your own! Don’t forget to leave a comment or share your creations — I love hearing your stories and seeing your gorgeous desserts.

white cloud icing
Ingredients
Main Ingredients
- 2 large egg whites Egg whites
- 0.25 teaspoon Salt
- 0.25 cup Granulated sugar
- 0.75 cup Light corn syrup
- 1 teaspoon Vanilla extract
Instructions
Preparation Steps
- Use a stand mixer. Beat egg whites and salt on high until foamy.
- Slowly add sugar while beating until stiff peaks form.
- Bring corn syrup to a boil in a small saucepan. Remove from heat.
- Slowly pour hot corn syrup into egg whites while beating on high. Add vanilla and beat until peaks are stiff.
- Use immediately.
Notes
Featured Comments
“Impressed! Clear steps and super easy results. Perfect for busy nights.”
“New favorite here — quick weeknight win. crowd-pleaser was spot on.”
“Super easy and turned out amazing! My family asked for seconds. Saving this one.”
“This sweet treat was absolutely loved — the silky really stands out. Thanks!”
“Made it tonight and wow — family favorite! Will definitely make Fluffy Frosting How to Make White Cloud Icing again.”
“Packed with flavor and so simple. Exactly what I wanted from Fluffy Frosting How to Make White Cloud Icing.”


