

The Ultimate Soft & Squishy Gluten Free Hot Dog Buns
Let’s be completely honest for a second. If you eat gluten-free, you already know the absolute tragedy that is a summer barbecue. You’re usually stuck making a tough choice: do you eat your hot dog off a flimsy paper plate with a fork, or do you risk it all on a store-bought gluten free hot dog bun that crumbles into dry, sad dust the moment you pick it up?
I was so tired of my food falling apart in my hands. I missed the simple joy of a soft, squishy bun that actually holds together when you load it up with mustard, ketchup, and relish. So, I spent weeks testing, tweaking, and eating way too many hot dogs until I finally nailed this recipe.
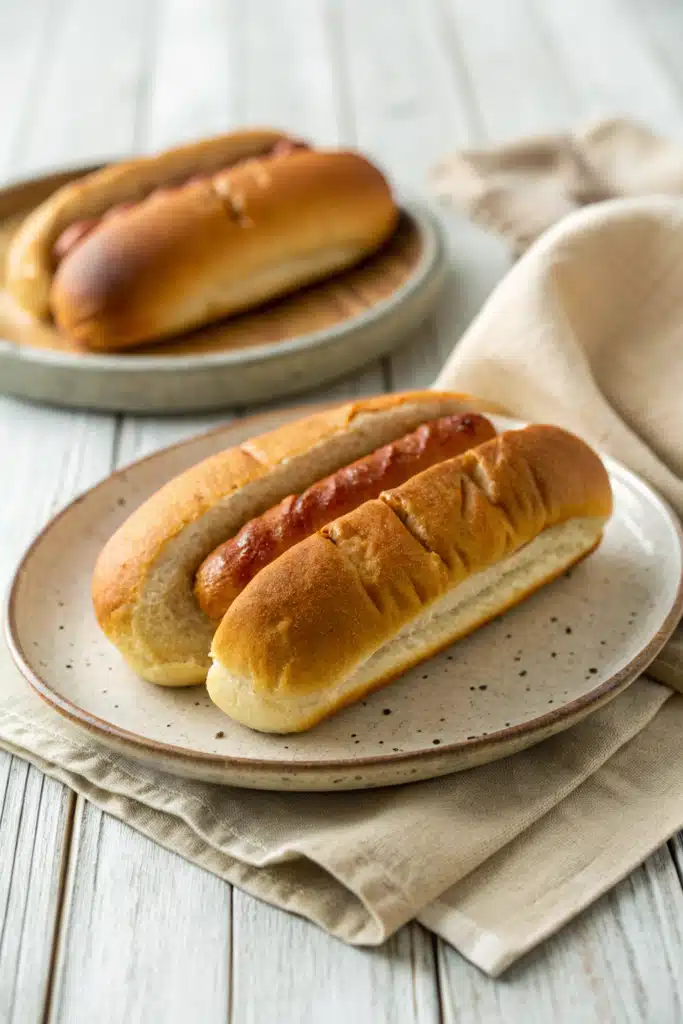
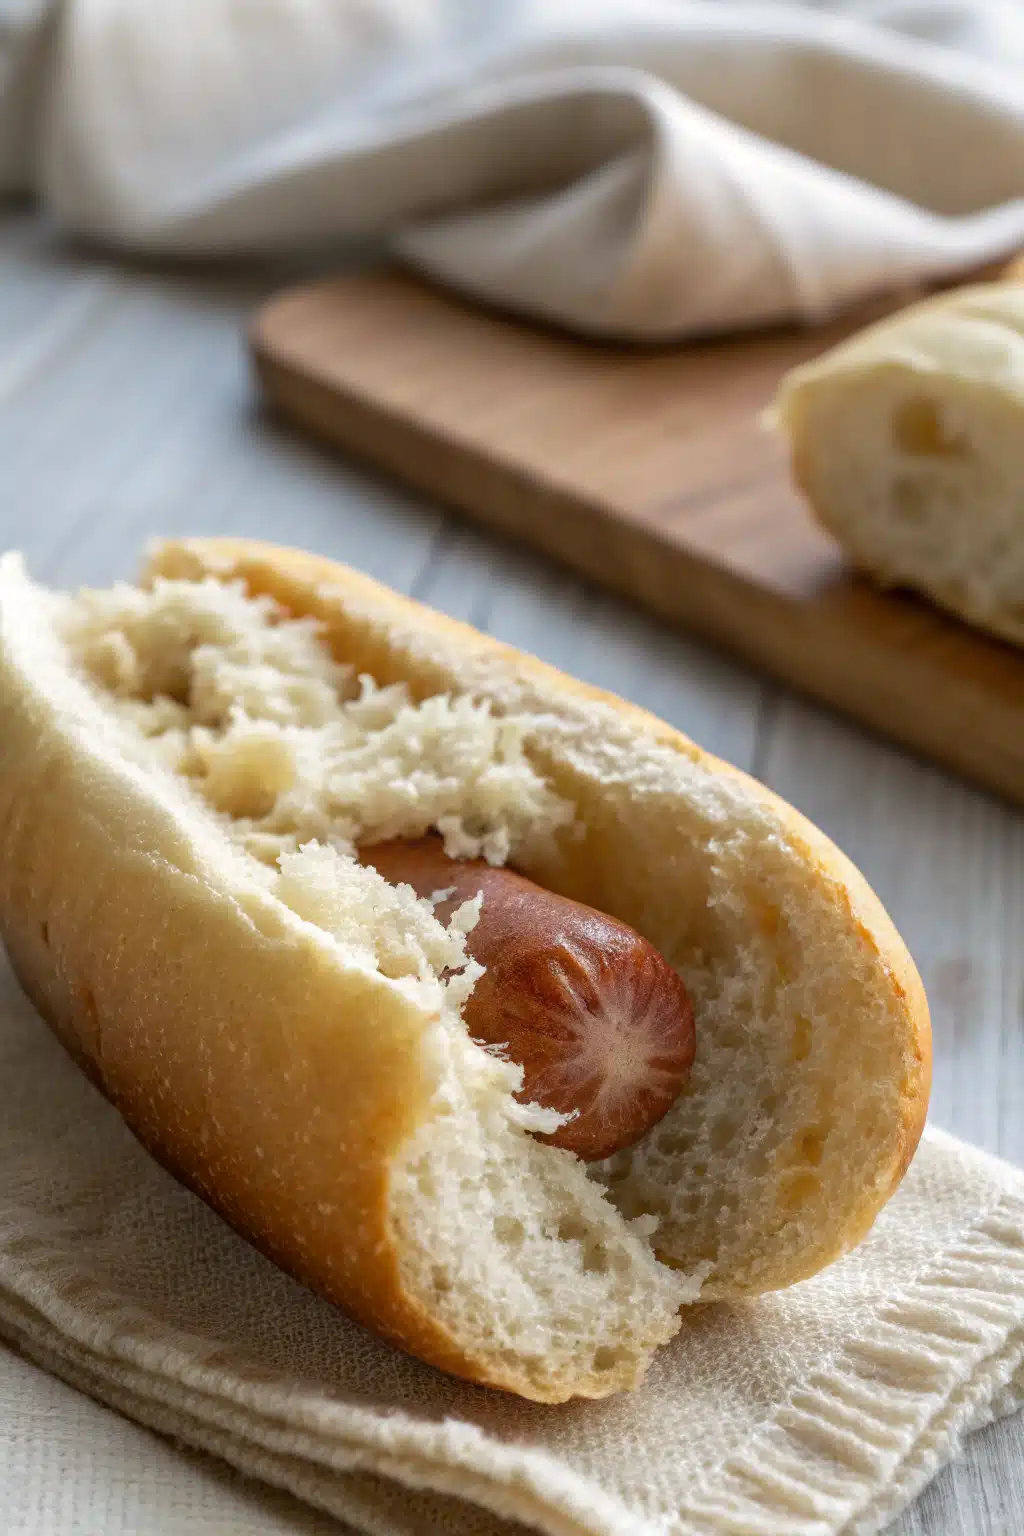
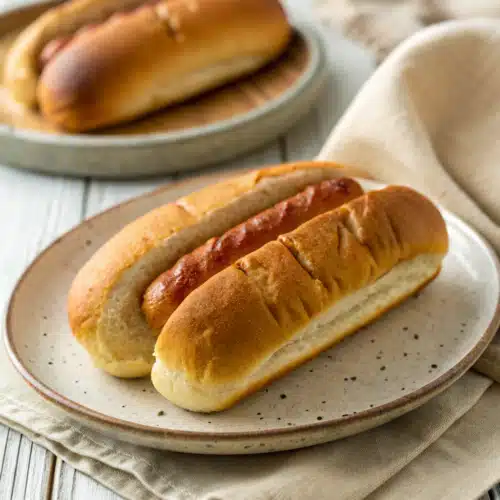
These homemade gluten free hot dog buns are a total game changer. They are incredibly soft, they don’t have that weird gritty texture, and best of all? They won’t shatter when you take a bite. Whether you’re grilling out with friends or just craving a classic chili dog on a Tuesday night, this recipe is going to bring the joy back to your cookouts.
What Are Gluten Free Hot Dog Buns?
If you’ve never baked gluten-free bread before, you might be wondering what makes these buns different from the traditional wheat versions. Normal bread relies on gluten to create an elastic, stretchy dough that holds air bubbles and gives the bread its chew. Without gluten, we have to get a little creative.
These gluten free hot dog buns are made from a carefully balanced blend of gluten-free flours, a touch of xanthan gum for structure, and yeast for that classic bakery flavor and fluffy rise. The dough itself doesn’t look like traditional bread dough—it actually looks more like a thick cake batter. But don’t let that panic you! That high moisture content is exactly what keeps these buns soft and prevents them from turning into the heavy bricks we’re all too familiar with.
How to Make Gluten Free Hot Dog Buns
Quick Overview
Making these buns is surprisingly straightforward. You’re going to activate your yeast, mix your wet and dry ingredients together to form a wet dough, shape them, let them rise until puffy, and bake. The whole process takes about an hour and a half, but most of that is just hands-off rising time while you prep your hot dogs or relax with a drink.
Ingredients
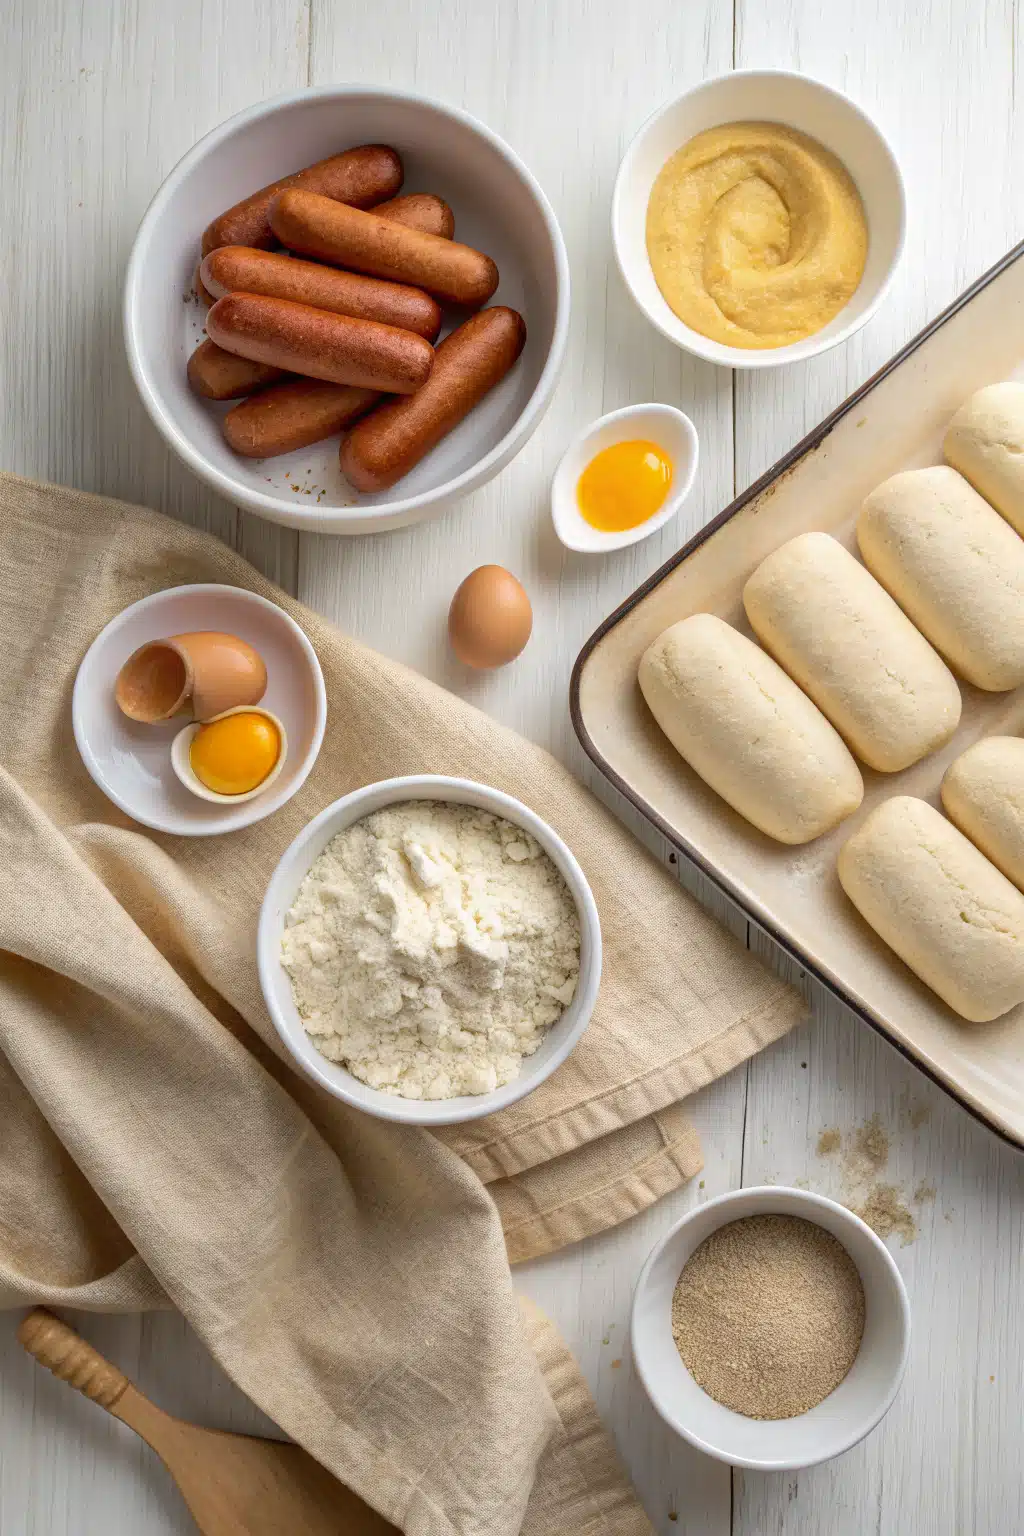
Here is what you’ll need to grab from the pantry to make the magic happen:
- Gluten-Free Flour Blend: Make sure it contains xanthan gum. If yours doesn’t, add 1 teaspoon to the mix.
- Active Dry Yeast: This gives us that fluffy texture and amazing bakery smell.
- Warm Milk: I use whole milk for richness, but almond or oat milk works perfectly if you’re dairy-free.
- Butter: Melted. This adds tenderness to the crumb. (Swap for vegan butter if needed!)
- Egg: Room temperature is crucial here. It provides structure and lift.
- Sugar: Just a little bit to feed the yeast and help the buns brown in the oven.
- Baking Powder & Salt: For an extra lift and essential flavor balance.
Step-by-Step Instructions
Step 1: Proof the Yeast
In a small bowl, whisk together your warm milk, sugar, and yeast. Let it sit for about 5 to 10 minutes. You want it to get nice and frothy. If it doesn’t bubble up, your yeast might be expired, or your milk was too hot. Don’t skip this check!
Step 2: Mix the Dough
In a large mixing bowl, combine your gluten-free flour, baking powder, and salt. Pour in the frothy yeast mixture, the melted butter, and the egg. Beat everything together on medium speed for about 3 minutes. The dough will be sticky and thick—almost like a stiff cookie dough. This is exactly what you want.
Step 3: Shape the Buns
Here is my secret trick: use a hot dog bun pan if you have one. If you don’t, no worries! You can shape foil into little boat-like molds, or just wet your hands with warm water and gently shape the dough into 6 small logs on a parchment-lined baking sheet. The wet hands keep the dough from sticking to you and help smooth out the tops.
Step 4: Let Them Rise
Cover the buns loosely with a damp towel or plastic wrap. Set them in a warm, draft-free spot in your kitchen and let them rise for about 45 minutes. They should roughly double in size and look puffy and delicate.
Step 5: Bake to Perfection
Preheat your oven to 375 degrees Fahrenheit. Once the buns have risen, gently brush the tops with a little extra melted butter or an egg wash if you want them shiny. Bake for 15 to 18 minutes until they are a beautiful golden brown. Let them cool completely before slicing—if you cut them while they’re hot, the inside will turn gummy.
What to Serve It With
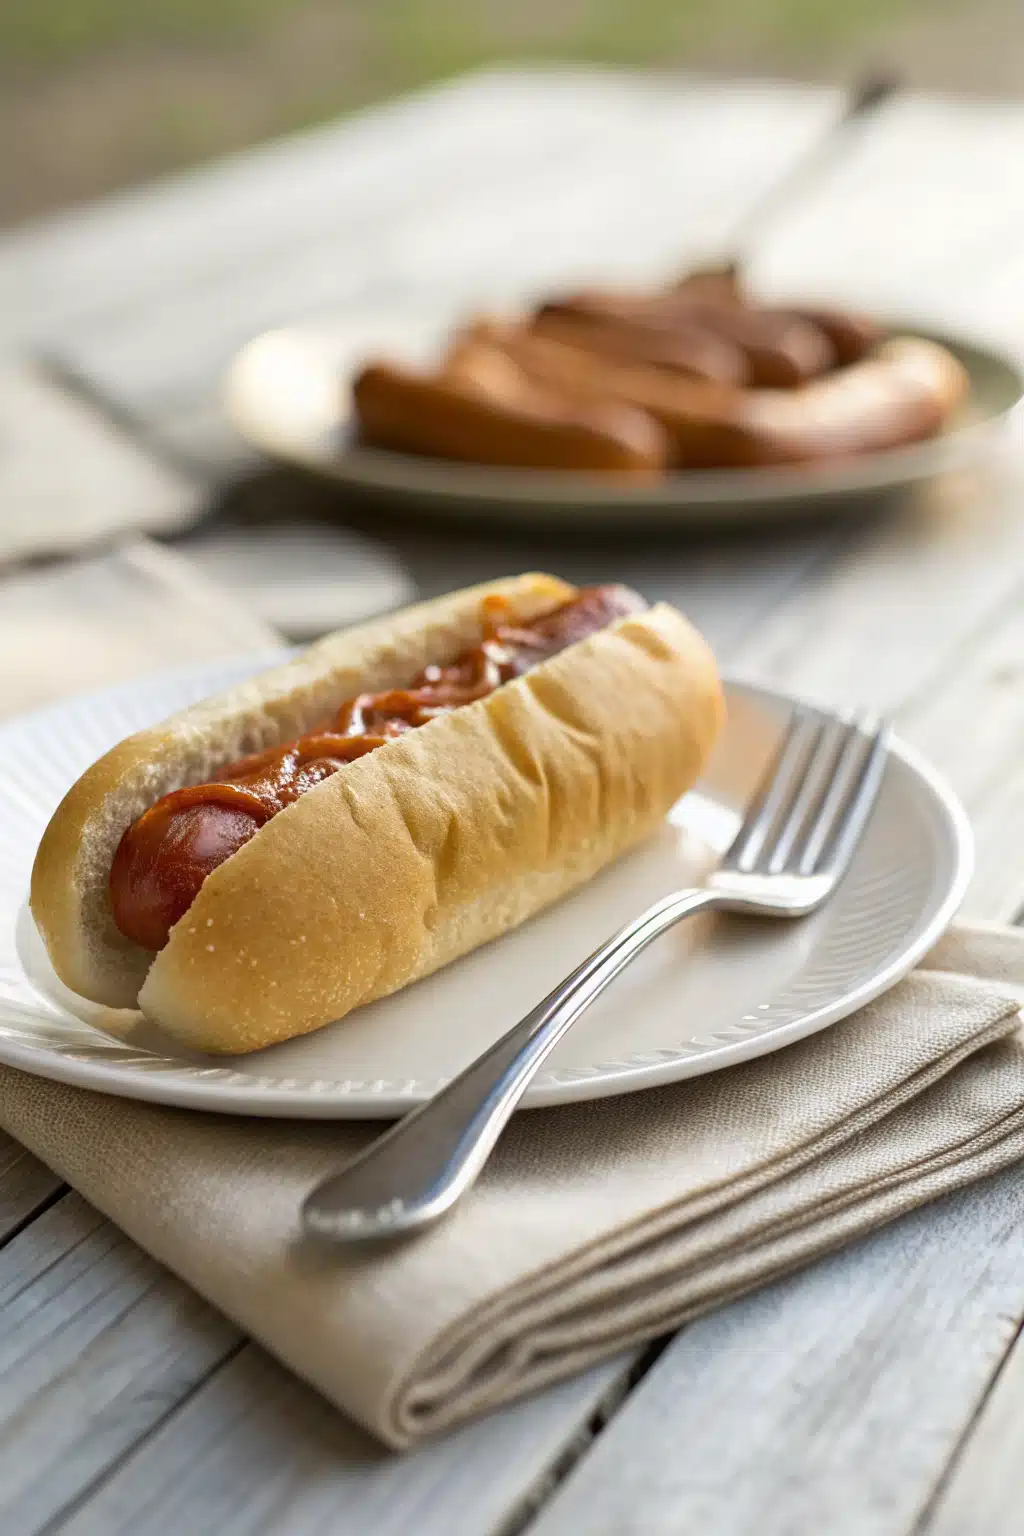
Now for the fun part. These buns are incredibly versatile. Obviously, they are meant for a classic grilled hot dog, but don’t stop there. I love using them for loaded chili cheese dogs, smoky bratwursts with heaps of sauerkraut, or even Italian sausages with grilled peppers and onions.
They also make fantastic sandwich rolls. I’ve used them for mini meatball subs, lobster rolls (the soft texture is perfect for this!), and even simple turkey and cheese sandwiches for my kids’ lunchboxes. Pair them with a side of creamy potato salad, some grilled corn on the cob, and a cold iced tea, and you’ve got the ultimate summer meal.
Top Tips for Perfecting Your Gluten Free Hot Dog Buns
Gluten-free baking can be a little finicky, but keep these tips in mind and you’ll be golden:
- Spoon and level your flour: Never scoop your measuring cup directly into the flour bag. It packs the flour down, and you’ll end up with way too much, leading to dense, heavy buns. Spoon the flour into the cup and level it off with a knife.
- Room temperature matters: If your egg or milk is cold, it will shock the yeast and your dough won’t rise. Make sure everything is slightly warm or at room temperature.
- Invest in a bun pan: You absolutely can make these free-form, but a silicone hot dog bun pan gives you that perfect, uniform bakery shape and helps the dough rise up instead of spreading out flat.
- Patience during cooling: I know it’s tempting to rip into a warm bun, but gluten-free baked goods need to cool completely to finish setting up. Cutting them early ruins the texture.
Storing and Reheating Tips
Because gluten-free baked goods don’t have the same preservatives as store-bought bread, they tend to dry out faster. Keep any leftover buns in an airtight container at room temperature for up to 2 days. I don’t recommend keeping them in the fridge, as that actually speeds up the staling process.
If you aren’t going to eat them within a couple of days, freeze them! Slice them first, then store them in a freezer-safe bag for up to 3 months. When you’re ready to eat, my favorite way to revive them is to wrap a frozen bun in a slightly damp paper towel and microwave it for 20-30 seconds. It comes out steaming, soft, and squishy—just like it came out of the oven.
Frequently Asked Questions
Final Thoughts
Finding a good bread replacement is usually the hardest part of going gluten-free, but it doesn’t have to be. Taking a little time to bake your own gluten free hot dog buns is so incredibly worth it. There is just nothing like holding a real, soft bun at a barbecue and feeling totally normal again.
I really hope you give this recipe a try the next time you fire up the grill. Once you see how easy they are to throw together, you’ll never want to go back to the crumbly store-bought ones again. Grab your favorite sausages, pile on the toppings, and enjoy every single bite!
Gluten Free Hot Dog Buns
Ingredients
Main Ingredients
- 1.5 cups gluten-free flour blend
- 2 teaspoons sugar
- 1.5 teaspoons psyllium husk powder
- 1 teaspoon instant yeast
- 0.5 teaspoon table salt
- 3.5 fluid ounces 2% milk
- 3 tablespoons butter melted
- 1 tablespoon oil
- 1 large egg room temperature
- 1 tablespoon sesame seeds for topping
Instructions
Preparation Steps
- In the bowl of a stand mixer, whisk together the gluten-free flour, sugar, psyllium husk powder, instant yeast, and salt.
- Warm the milk, butter, and oil to 120-130°F. Slowly whisk in the egg until well combined.
- Add the warmed wet ingredients to the dry ingredients and mix until a smooth dough forms.
- Divide the dough into 4 equal portions and shape into logs about 5 inches long.
- Place the shaped buns about 0.5 inch apart on a parchment-lined baking sheet, cover, and let rise until visibly puffy.
- Gently brush the tops of the buns with an egg wash and sprinkle with sesame seeds if desired.
- Bake in a preheated 350°F oven for about 30 minutes, or until golden brown.
Notes
Featured Comments
“Impressed! Clear steps and creamy results. Perfect for busy nights.”
“New favorite here — comforting. crowd-pleaser was spot on.”
“Super easy and turned out amazing! My family asked for seconds. Saving this one.”
“This sweet treat was absolutely loved — the light really stands out. Thanks!”
“Made it tonight and wow — comforting! Will definitely make gluten-free hot dog buns again.”
“Packed with flavor and so simple. Exactly what I wanted from gluten-free hot dog buns.”


