

The Ultimate Fudgy Cottage Cheese Brownies
Let’s be real for a second. If you told me a year ago that I would be sneaking cottage cheese into my dessert recipes, I probably would have laughed out loud. Cottage cheese belongs in a savory bowl with lots of black pepper, right? Well, I am here to formally apologize to the internet, because I was so entirely wrong. The cottage cheese trend has been taking over everywhere recently, and for a very good reason. I finally caved, pulled out my blender, and decided to test out a batch of cottage cheese brownies. Oh my goodness, my life is forever changed.
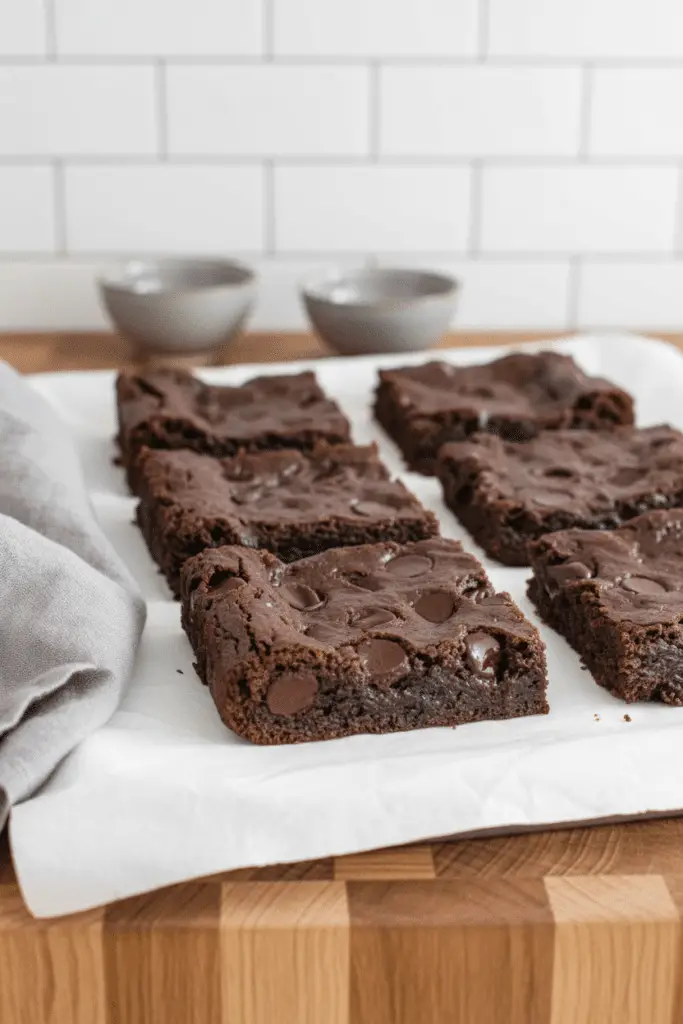
These are not your average “healthy” brownies that taste like dry cardboard. They are insanely moist, incredibly gooey, and pack a rich chocolate punch that completely masks any hint of cheese. You get all the comforting, nostalgic joy of a classic decadent chocolate brownie, but with a sneaky boost of protein. Whether you are baking for picky kids or just trying to satisfy your own late-night sweet tooth without totally derailing your goals, you have to give these a try. Trust me, I was a massive skeptic too, but now I’m making these on repeat!
What Are Cottage Cheese Brownies?
So, what exactly is the deal with cottage cheese brownies? At their core, they are a clever, high-protein twist on traditional chocolate brownies. Instead of relying entirely on heavy amounts of butter and oil to get that signature fudgy texture, we blend up cottage cheese until it is perfectly smooth and velvety. This magical ingredient acts as the ultimate moisture-provider and binder for the batter.
When you mix that creamy blended base with classic baking staples like eggs, a touch of butter, sugar, and rich Dutch-processed cocoa powder, something amazing happens in the oven. The curds melt away completely, leaving behind zero lumps and absolutely no savory cheese flavor. What you get is a dense, chocolatey square that tastes remarkably like a bakery-style treat. It is basically the ultimate baking hack for anyone who wants a slightly lighter dessert that doesn’t compromise on that gooey, melt-in-your-mouth brownie experience. If you love a center piece that is soft and a little chewy on the edges, this recipe is going to blow your mind.
How to Make Cottage Cheese Brownies
Quick Overview
Making these brownies is a total breeze, even if you aren’t an experienced baker. The absolute secret to the whole process is your blender. By blending the wet ingredients first, we completely eliminate those cottage cheese curds, ensuring your batter is silky smooth. From there, it is just a matter of combining the wet and dry ingredients in a bowl, folding in a generous handful of chocolate chips, and spreading it into your pan. The oven does the rest of the work! Just remember to let them cool properly before slicing. I know waiting is the hardest part, but letting them set guarantees those perfectly clean, fudgy slices we all crave.
Ingredients
You only need a handful of simple pantry staples to bring this magic to life:
- Cottage cheese: The star of the show. Full-fat yields the richest texture, but low-fat works perfectly fine too.
- Eggs: Crucial for binding the batter and giving the brownies structure.
- Granulated sugar: Adds the perfect amount of sweetness and helps form that lovely shiny top.
- Vanilla extract: Enhances all those gorgeous chocolatey notes.
- Melted butter: Just a third of a cup brings the classic buttery richness we expect in a brownie.
- Dutch-processed cocoa powder: This is key! It provides a deeper, darker, and smoother chocolate flavor than standard cocoa.
- All-purpose flour: Gives our brownies just enough structure to hold together when sliced.
- Sea salt & Baking soda: Salt balances the sweet, and baking soda gives a tiny lift so they aren’t overly heavy.
- Chocolate chips: Because more chocolate is always a good idea!
Step-by-Step Instructions
Step 1: Preheat & Prep Pan
Preheat your oven to 350°F. Grab an 8×8-inch baking dish and line it with parchment paper. Leave a little overhang on the sides so you can easily lift the brownies out later. If you don’t have parchment, a light coating of nonstick baking spray works too.
Step 2: Blend the Wet Ingredients
In your blender or food processor, combine the cottage cheese, eggs, granulated sugar, vanilla extract, and slightly cooled melted butter. Blend this mixture on high until it is completely smooth. You want absolutely zero lumps—this is what keeps the secret ingredient a secret!
Step 3: Whisk the Dry Ingredients
In a large mixing bowl, toss together the Dutch-processed cocoa powder, all-purpose flour, sea salt, and baking soda. Give it a good whisk to break up any stubborn cocoa clumps.
Step 4: Combine and Fold
Pour your smooth cottage cheese mixture into the bowl with the dry ingredients. Stir gently with a rubber spatula until just combined. Be careful not to overmix! Finally, gently fold in those delicious chocolate chips.
Step 5: Bake to Perfection
Spread the batter evenly into your prepared pan, smoothing the top with your spatula. Sprinkle a few extra chocolate chips on top if you are feeling indulgent. Bake for 25 to 30 minutes. You want the edges to be set, but the center should still look slightly soft.
Step 6: Cool and Slice
Remove the pan from the oven and let them cool for at least 25 to 30 minutes. The brownies will continue to set up as they cool down, leading to the ultimate fudgy texture. Lift them out using the parchment paper overhang, slice into nine squares, and enjoy!
What to Serve It With
Honestly, I usually eat these straight out of the pan while standing in the kitchen, but if you want to be a bit more civilized, there are so many fun ways to serve them. A warm cottage cheese brownie topped with a massive scoop of vanilla bean ice cream is absolute heaven on earth. The cold ice cream melting into the gooey, warm chocolate chunks is pure perfection.
If you want something a little fresher to cut through the richness, try serving them alongside a bright berry salad—strawberries and raspberries pair beautifully with dark chocolate. A simple dusting of powdered sugar also looks beautiful for presentation. And of course, you absolutely cannot go wrong with a hot cup of black coffee or an ice-cold glass of milk on the side.
Top Tips for Perfecting Your Cottage Cheese Brownies
Over the years, I have made so many batches of these, and I’ve picked up a few crucial tricks along the way to make sure they come out flawless every single time.
- Blend it thoroughly: I cannot stress this enough. Let your blender run a little longer than you think you need to. You want that cottage cheese completely liquefied. If you see curds, keep blending!
- Use Dutch-processed cocoa: While regular unsweetened cocoa powder will work in a pinch, Dutch-processed cocoa is smoother, darker, and less acidic. It genuinely gives these brownies that rich, bakery-level flavor.
- Do not overbake: The center should still look a tiny bit soft when you pull them from the oven. Because of the cottage cheese, they will firm up beautifully as they sit. If you bake them until a toothpick comes out completely clean, they might end up dry.
- Patience is a virtue: Do not skip the cooling time! Slicing into them while they are piping hot will give you a crumbly mess. Letting them rest for 30 minutes ensures clean cuts and that signature dense bite.
Storing and Reheating Tips
If you somehow manage not to eat the entire pan in one day, these store wonderfully. Place the cooled brownie squares in an airtight container. They will stay perfectly soft and fresh at room temperature for up to two days. If you want to extend their lifespan, pop the container into the refrigerator, where they will keep beautifully for up to five days.
Want to save a stash for later? They freeze like an absolute dream! Wrap individual squares tightly in plastic wrap and place them in a freezer-safe zip-top bag for up to two months. When a serious chocolate craving strikes, just let a brownie thaw at room temperature for an hour, or zap it in the microwave for 15 to 20 seconds. Microwaving them makes the chocolate chips melty all over again, which is highly recommended!
Frequently Asked Questions
Final Thoughts
I genuinely hope you give these cottage cheese brownies a permanent spot in your baking rotation. They really are the perfect compromise when you want a rich, indulgent chocolate treat but wouldn’t mind a little extra protein to keep you going through the afternoon. Watching my skeptical friends take a bite, roll their eyes in delight, and then gasp when I tell them the secret ingredient never gets old!
Baking should be fun, a little experimental, and always delicious, and this recipe checks every single one of those boxes. If you whip up a batch in your kitchen, please let me know how they turned out for you. I love hearing about your baking adventures! Happy baking, friends!

Cottage Cheese Brownies
Ingredients
Main Ingredients
- 1 cup cottage cheese
- 2 large eggs
- 0.5 cup granulated sugar
- 1 teaspoon vanilla extract
- 0.33 cup melted butter slightly cooled
- 0.5 cup dutch-processed cocoa powder
- 0.5 cup all-purpose flour
- 0.25 teaspoon sea salt
- 0.5 teaspoon baking soda
- 0.33 cup chocolate chips plus more for topping
Instructions
Preparation Steps
- Preheat the oven to 350°F. Line an 8×8-inch baking dish with parchment paper or lightly grease it with nonstick spray.
- Add the cottage cheese, eggs, sugar, vanilla, and melted butter to a blender or food processor. Blend until completely smooth. No lumps!
- In a large bowl, whisk together the cocoa powder, flour, salt, and baking soda.
- Pour the blended cottage cheese mixture into the dry ingredients and stir until just combined.
- Fold in the chocolate chips.
- Spread the batter into the prepared pan and smooth the top. Sprinkle a few extra chocolate chips over the surface if you’d like.
- Bake for 25–30 minutes, until the edges are set but the center still looks slightly soft. Let them cool for at least 25–30 minutes before slicing so they can firm up properly.
Featured Comments
“Impressed! Clear steps and spot on results. Perfect for busy nights.”
“New favorite here — spot on. crowd-pleaser was spot on.”
“Super easy and turned out amazing! My family asked for seconds. Saving this one.”
“This sweet treat was absolutely loved — the buttery really stands out. Thanks!”
“Made it tonight and wow — turned out amazing! Will definitely make Greek yogurt brownies again.”
“Packed with flavor and so simple. Exactly what I wanted from Greek yogurt brownies.”


