

There’s something about the rich, gooey goodness of Nutella that instantly transports me back to lazy Sunday afternoons in my childhood. I remember sneaking a spoonful straight from the jar and getting that perfect, chocolaty-sweet hit that made everything feel a little bit brighter. Fast forward to today, I still crave that comforting flavor combo — and trust me, I’ve finally found a way to incorporate it into a brownie that’s gooey, fudgy, and utterly addictive. Honestly, these Nutella swirl brownies are my secret weapon for when I want something indulgent but easy to whip up on a busy night. They’re seriously a crowd-pleaser, whether you’re sharing with family or just treating yourself after a long day. The best part? They come together with simple ingredients, and the hazelnut-chocolate swirl makes each bite feel like a cozy hug. If you’re a Nutella fanatic like me, get ready — this recipe will become part of your regular rotation!
What is Nutella Swirl Brownies?
Nutella swirl brownies are essentially your classic, rich chocolate brownies with a luscious twist — a generous swirl of Nutella baked right into the batter. Think of it as chocolate’s silky, hazelnutty cousin stepping up the flavor game. The concept is pretty simple: whip up a batch of fudgy brownies, then dollop and swirl warm Nutella into the surface before baking. As they bake, the Nutella melts into the chocolatey goodness, creating gooey pockets and a marbled cake that’s as beautiful as it is delicious. The name “Nutella swirl” is one I came up with because it perfectly captures that beautiful, marbled pattern you get on top. These are what I call a “layer of decadence,” perfect for anyone who loves the rich, nutty flavor of Nutella combined with the deep chocolate of a brownie. Think of it as an elevated classic — simple, satisfying, and totally irresistible.
How do I make Nutella swirl brownies?
Quick Overview
This recipe is all about simplicity and indulgence. You start by melting butter and mixing it with sugar and cocoa to create a rich chocolate base. Then, you gently fold in eggs and flour to build that perfect fudgy texture. The magic happens when, after pouring the batter into your baking pan, you dollop spoonfuls of warm Nutella over the surface and use a butter knife or skewer to swirl it beautifully through the batter. Bake it till the top is just set with a crackly crust, and the center stays irresistibly moist. Once cooled, you get gorgeous marbled brownies that are as pretty as they are delicious. I love that this method keeps the process straightforward but yields a wow-worthy dessert. Plus, the smell that fills your kitchen while baking? Pure, chocolatey heaven.
Ingredients
For the Brownie Batter:
– 1 cup (225g) unsalted butter, melted — I always go for good quality, it makes all the difference.
– 1 1/2 cups (300g) granulated sugar — don’t cut down on sugar here; it’s what gives the brownies that perfect fudgy texture.
– 3/4 cup (75g) unsweetened cocoa powder — I prefer natural cocoa for a richer flavor.
– 4 large eggs — room temperature makes mixing easier.
– 1 teaspoon vanilla extract — a splash of vanilla heightens all the flavors.
– 1 1/2 cups (180g) all-purpose flour — I like to use a good quality brand for consistency.
For the Nutella Swirl:
– 1/2 cup (150g) Nutella — I always microwave mine for 10 seconds to soften it up before dolloping on the batter.
– Optional: chopped hazelnuts or chocolate chips for extra texture
For the Glaze (Optional but pretty):
– A few spoons of Nutella or melted chocolate — for drizzling on top when the brownies are cooled.
Step-by-Step Instructions
Step 1: Preheat & Prep Pan
Heat your oven to 350°F (180°C). Line a square baking pan (8×8 or 9×9 inches) with parchment paper or lightly grease it with butter. This helps make removal a breeze and keeps the edges crispy but tender inside.
Step 2: Mix Dry Ingredients
In a small bowl, sift together the cocoa powder, flour, and a pinch of salt. This ensures no lumps and gives the brownies a uniform texture. Set aside.
Step 3: Mix Wet Ingredients
In a large bowl, whisk the melted butter and sugar until combined and slightly glossy. Add eggs one at a time, whisking well after each addition. Stir in vanilla. I always test by lifting the whisk — the mixture should fall in thick ribbons, not that thin runny stuff.
Step 4: Combine
Gradually fold the dry ingredients into the wet mixture, mixing gently just until combined. Don’t overmix — overworking the batter can lead to denser brownies. You want that tender crumb, so mix until just incorporated.
Step 5: Prepare Filling
Warm the Nutella in the microwave for about 10 seconds—it softens and makes dolloping easier. You can also slightly warm it on the stovetop if you prefer. Then, dollop spoonfuls evenly across the batter in the pan.
Step 6: Layer & Swirl
Using a butter knife or wooden skewer, swirl the Nutella into the brownie batter. Don’t overdo it — a handful of gentle figure-eights creates a beautiful marbled effect. It’s a visual thing that makes these brownies stand out.
Step 7: Bake
Pop into the oven and bake for about 25-30 minutes. Check doneness with a toothpick inserted in the center — it should come out with moist crumbs but not wet batter. Keep in mind, every oven is different, so start checking around 25 minutes.
Step 8: Cool & Glaze
Allow the brownies to cool completely in the pan on a wire rack—this preserves that fudgy texture. Once cooled, if you’re feeling fancy, melt some additional Nutella or chocolate chips and drizzle over the top for an extra glossy finish.
Step 9: Slice & Serve
Use a sharp knife to cut clean squares, wiping it between cuts for neat edges. Serve slightly warmed or at room temperature, with a dollop of whipped cream or vanilla ice cream if you’re feeling decadent. These brownies are delicious on their own, but the extra touch makes them irresistible.
What to Serve It With
When it comes to serving these Nutella swirl brownies, oh, I have some favorites. For mornings, I love slicing a warm square and pairing it with a strong black coffee or a frothy cappuccino — that warm, melty Nutella flavor makes even a simple breakfast feel special. If you’re hosting brunch, arrange the brownies on a pretty platter — maybe sprinkle some chopped hazelnuts or a dusting of powdered sugar on top. They’re also perfect served as a dessert after dinner, paired with a scoop of vanilla or coffee ice cream. My kids go crazy for that combo! On lazy weekends, I sometimes just warm a brownie for five seconds in the microwave, add a scoop of ice cream, and call it a day. For cozy cafés at home, a hot cup of milk or café latte alongside one of these cuties turns an ordinary moment into a little celebration.
Top Tips for Perfecting Your Nutella Swirl Brownies
After making these a handful of times, I’ve gathered some tips to make yours turn out absolutely perfect every time. First, make sure your butter is melted but not too hot — hot enough to mix easily, but not so hot that it cooks the eggs when you add them. When mixing the dry ingredients, sift everything; lumps are the enemy here. I’ve learned that overmixing after adding the flour leads to dense brownies, so fold gently and stop as soon as it’s just combined. For the swirl pattern, I recommend dolloping the Nutella in random spots and swirling from the center outward — it looks prettier and more natural that way. You can even add a handful of chopped hazelnuts or chocolate chips into the batter for extra texture. Baking times can vary based on your oven, so start checking around 25 minutes. When the edges look crackly and the center bounces back just slightly, you’re good to go. If you want an extra glossy top, brush a little melted Nutella or chocolate over the surface once cooled. And trust me, don’t skip cooling — the brownies set and slice much better when cooled completely.
Storing and Reheating Tips
These brownies are best enjoyed within a few days, but they do keep well. Store leftovers in an airtight container at room temperature for up to 3 days; just make sure they’re covered tightly to prevent drying out. If you want to keep them longer, pop them in an airtight container in the fridge for up to a week. The flavor actually intensifies after a day or two, which is kinda nice. To freeze, wrap individual squares in plastic wrap, then place them in a zip-top bag — they’ll last up to three months. When ready to enjoy, let them thaw at room temperature or warm in the microwave for 10-15 seconds. If you’ve added a glaze, wait until the brownies are fully cooled before applying to keep it glossy and fresh. Reheating slightly softens the brownie and melts the Nutella swirl just enough to make each bite even more decadent. Trust me — a warm brownie fresh from the microwave, topped with a scoop of vanilla ice cream, is pure bliss!
Frequently Asked Questions
Final Thoughts
Honestly, these Nutella swirl brownies have become my go-to sweet treat — they’re cozy, rich, and just fancy enough to impress. I love how the swirl pattern makes each piece a little work of art, and the flavor? Complete decadence in every bite. Over the years, I’ve experimented with adding chopped hazelnuts or even a touch of sea salt on top, and let me tell you — those simple tweaks elevate the whole experience. They’re perfect for any occasion: a quick family dessert, a gift for friends, or just a special treat for yourself when you need a little pick-me-up. I can’t wait for you to try this recipe — I know it’ll be a new favorite in your kitchen too. Happy baking! And don’t forget to leave a comment below with your own twists and feedback — I love hearing how your creations turn out!
Nutella
Ingredients
Main Ingredients
- 1.5 cups Hazelnuts
- 0.5 cups Sugar
- 0.25 cups Cocoa Powder
- 0.25 cups Vegetable Oil
- 0.125 cups Vanilla Extract
- 0.125 teaspoons Salt
Instructions
Preparation Steps
- Preheat your oven to 350°F. Spread hazelnuts on a baking sheet and roast for 10 minutes until fragrant.
- Remove hazelnuts from oven and rub off skins with a clean towel. Let cool.
- In a food processor, blend the hazelnuts until finely ground.
- Add sugar, cocoa powder, vegetable oil, vanilla extract, and salt to the food processor. Blend until smooth.
- Transfer to a jar or container and store at room temperature. Enjoy!
Notes
Featured Comments
“Ah, Nutella brings back such sweet memories—I still do the same as a kid, sneaking from the jar! Perfect comfort food.”
“Impressed! Clear steps and perfect for busy nights results. Perfect for busy nights.”
“New favorite here — turned out amazing. crowd-pleaser was spot on.”
“Super easy and turned out amazing! My family asked for seconds. Saving this one.”
“This sweet treat was absolutely loved — the zingy really stands out. Thanks!”
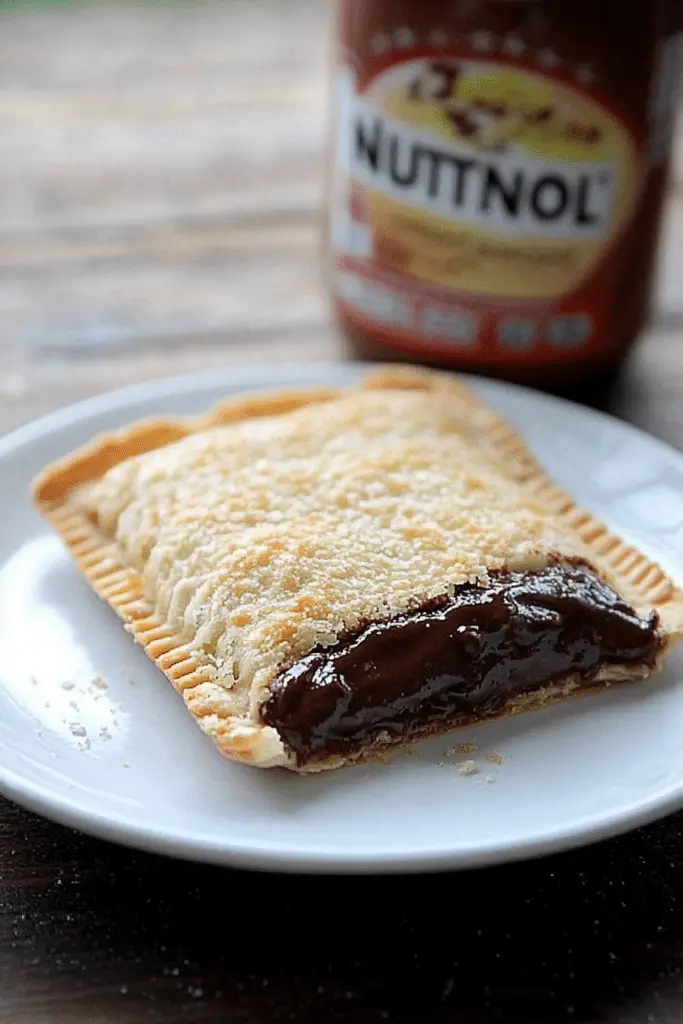
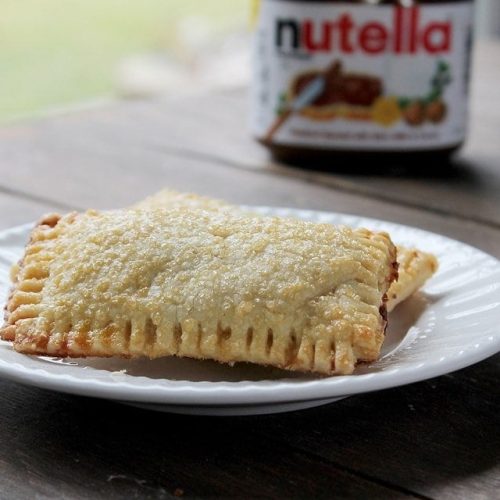
“Made it tonight and wow — spot on! Will definitely make Hazelnut Spread Pop-Tarts A Sweet Treat again.”


Ah, Nutella brings back such sweet memories—I still do the same as a kid, sneaking from the jar! Perfect comfort food.