

There’s something about the combination of cherry and chocolate that always makes me nostalgic—like a little sip of childhood wrapped in a fancy dessert. I remember my grandma’s kitchen come springtime, with bowls of bright red cherries and her secret layer of deep, rich chocolate cake. This cherry chocolate cake is my grown-up version of that memory, but honestly, I think it’s just as good as my grandma’s. It’s kind of my go-to when I need a little sweet pick-me-up or a show-stopper dessert for family get-togethers. Trust me, this one’s a lifesaver on busy nights or last-minute dinner parties. Plus, it’s surprisingly simple to make—no fancy gadgets or weird ingredients, just good old-fashioned baking love. It’s the kind of dessert that disappears in minutes at my house, with everyone asking for seconds. Honestly, I can’t keep this off my baking list, especially when cherry season hits. Once you try it, I have a feeling you’ll keep coming back for more, just like I do.
What is cherry chocolate?
Think of cherry chocolate as a luscious, layered cake that brings together the sweet tartness of cherries with velvety chocolate goodness. It’s essentially a moist chocolate sponge layered with fresh or preserved cherries and topped with a shiny chocolate glaze. The origin of the name is pretty straightforward—it’s all about what the cake’s meant to showcase: those vibrant, juicy cherries, paired perfectly with the decadence of rich chocolate. It’s a dessert that feels fancy but is actually super approachable. I love how the tartness of cherries cuts through the richness of chocolate, creating a flavor combo that’s downright addictive. Whether you use fresh cherries or a jar of preserves, it’s adaptable and forgiving, making it perfect for all kinds of cooks. The best part? Each bite offers a beautiful contrast of textures—the soft sponge, the juicy cherry, and the smooth, glossy chocolate topping. Think of it as the kind of cake that comforts you but also feels special enough for celebrations.
How do I make a Cherry Chocolate Cake?
Quick Overview
This cake comes together in a few simple steps. You start by mixing a moist chocolate sponge, then layer it with cherry preserves or fresh cherries (your choice!), and finally top it with a smooth chocolate glaze. The secret is not overmixing the batter, which keeps it light and airy, perfect for holding those juicy cherries. Once baked and cooled, a glossy chocolate glaze transforms the look, making it as pretty as it is delicious. With minimal fuss, you’ll have a stunning dessert that looks straight out of a bakery, but it’s actually foolproof at home. Trust me, making this is as enjoyable as eating it—good music, a little coffee, and you’re all set for a cozy baking session that ends with some serious wow factor.
Ingredients
For the Main Batter:
– 1 ¾ cups all-purpose flour (I always opt for unbleached for a richer flavor)
– ¾ cup unsweetened cocoa powder (preferably Dutch-processed)
– 2 teaspoons baking powder
– ½ teaspoon baking soda
– ½ teaspoon salt
– 1 cup granulated sugar
– ½ cup brown sugar (for extra caramel notes)
– 3 large eggs
– ½ cup vegetable oil or melted butter
– 1 teaspoon vanilla extract
– 1 cup buttermilk (or whole milk with a splash of lemon juice)
– 1 cup hot water (this makes the batter extra moist)
For the Filling:
– 1 cup cherry preserves or chunky maraschino cherries drained
– or 2 cups fresh cherries pitted and chopped
– optional: a splash of cherry liqueur for an adult touch
For the Glaze:
– ½ cup heavy cream
– 1 cup good-quality semi-sweet chocolate, chopped
– 1 teaspoon unsalted butter (for shine and smoothness)
– a pinch of sea salt (if you like a little contrast)
Step-by-Step Instructions
Step 1: Preheat & Prep Pan
Kick things off by preheating your oven to 350°F (175°C). Grease your cake pans well—an extra swipe of butter and dusting with cocoa powder helps no sticking here. Then line the bottoms with parchment for foolproof removal. I usually use two 8-inch round pans for a classic layered look, but a 9×13 works just fine if you want a single sheet and cut it later. While the oven heats, get all your ingredients ready—you’ll thank yourself later for the smooth process.
Step 2: Mix Dry Ingredients
In a large bowl, sift together the flour, cocoa powder, baking powder, baking soda, and salt. This step keeps the dry ingredients evenly distributed, which is super important for a consistent crumb. I’ve learned that whisking these dry ingredients instead of just stirring with a spoon helps prevent clumps and ensures everything’s well incorporated.
Step 3: Mix Wet Ingredients
In another bowl, whisk the eggs, sugar, brown sugar, oil, and vanilla until smooth. Once combined, stir in the buttermilk until everything’s nicely blended—you want a glossy, cohesive mixture. Add the hot water last; it might seem like a lot, but don’t worry. The batter will look thin, but that’s what keeps the cake extra moist. I do this step by hand—I find it’s gentler and prevents overmixing.
Step 4: Combine
Pour the wet mixture into the dry ingredients, mixing gently with a spatula or a whisk until just combined—no tough streaks! Overmixing can make the cake dense, and that’s something I definitely learned the hard way. The batter should be smooth but not gloopy. It’s okay if a few lumps remain; they’ll vanish in the baking.
Step 5: Prepare Filling
If you’re using cherry preserves, have it ready in a bowl. If fresh cherries, chop them finely. This way, they’ll distribute evenly without sinking to the bottom during baking. For an extra cherry kick, I sometimes stir in a splash of cherry liqueur—my secret weapon for a more pronounced flavor. Be sure your cherries are drained well if they’re juicy chunks, so the batter stays from becoming too wet.
Step 6: Layer & Swirl
Once your batter is ready, pour a layer into each prepared pan. Then spread a generous layer of cherries or preserves on top. Using a skewer or a butter knife, gently swirl them into the batter—don’t overdo it; you want nice ribbons of cherry and chocolate, not a muddled mess. I love creating a marbled look that’s both pretty and tastes amazing.
Step 7: Bake
Pop those into your preheated oven and bake for about 30-35 minutes. A toothpick inserted into the center should come out with a few moist crumbs—no wet batter! My oven runs a little hot, so I start checking around the 28-minute mark. Once done, let the cakes cool in the pans for ten minutes, then transfer to a wire rack to cool completely. This step keeps your cake from becoming damp or soggy.
Step 8: Cool & Glaze
While the cake cools, make your chocolate glaze. Heat the heavy cream until just boiling, then pour over the chopped chocolate and let sit for a minute before stirring until silky smooth. Add butter and a pinch of salt for that glossy finish. Wait until the cake is completely cool—very important so the glaze doesn’t melt—and then pour the glaze over the top. Use a spatula to spread it evenly, letting it drip down the sides just enough for a beautiful finish.
Step 9: Slice & Serve
Once glazed and set, slice with a serrated knife. I like to run the knife under hot water first—makes clean cuts through the rich layers. Serve at room temperature, maybe with a little dollop of whipped cream or a scoop of vanilla ice cream for extra indulgence. This cake is so pretty that I often leave it uncovered for a little while so the shiny glaze catches the light. Your friends will be wowed, I promise!
What to Serve It With
This cherry chocolate cake is versatile enough to serve in many ways, depending on your mood and occasion. In the morning, it pairs beautifully with a steaming cup of coffee or a glass of cold milk. My kids love breakfast slices with just a dusting of powdered sugar and a drizzle of leftover cherry preserves—easy, sweet, and satisfying. For brunch, serve a slice alongside fresh fruit and a flavored latte or mimosa for an elegant touch. It’s definitely a showstopper dessert after dinner—think a scoop of vanilla bean ice cream melting into the warm cake or a tiny dusting of powdered sugar for that bakery look. And when I need a cozy pick-me-up, a small square with a cup of tea hits the spot. Over the years, I’ve found that this cake holds up well in the fridge for a day or two, so you can make it ahead for parties or just a weekend treat. Honestly, it’s become a family favorite, and often I hide a slice for later—not that it lasts long! The flavor combo is addictive, and the visuals are just too pretty to resist.
Top Tips for Perfecting Your Cherry Chocolate Cake
After making this cake a dozen times, I’ve picked up a few tricks that guarantee success every single time. First, when prep the cherries, I always drain them well—extra moisture can make your batter too thin, resulting in a flatter cake. If you’re using fresh cherries, give them a quick rinse and pat them dry; I’ve learned that excess juice can cause issues with the batter’s consistency. For the batter, don’t overmix! It’s tempting to keep stirring until everything’s smooth, but that can develop too much gluten and make the cake dense. Mix until just combined, and fold gently. When swirling cherries into the batter, I use a toothpick and make gentle figure-eight motions; it creates a pretty marbled effect without over-mixing. For the glaze, I’ve tested different chocolates, but I swear that using a good-quality semi-sweet chocolate makes all the difference—richer, smoother, and shinier. I’ve also learned that adding a teaspoon of butter to the glaze gives it a lovely gloss and velvety texture. Baking times can vary based on your oven, so keep an eye on the cake and do the toothpick test. If it emerges moist but not wet, you’re golden. Sometimes I bump the oven temp up slightly if I want a slightly sturdier crumb, but stick to the timings as a guide first. Lastly, for storage, wrapping the cake well keeps it fresh and moist—I like to keep it in a cake dome or covered with foil. Reheating individual slices briefly in the microwave (about 10 seconds) brings back the gooey, chocolatey goodness heaven!
Storing and Reheating Tips
This cake keeps pretty well, especially if stored properly. If you’re eating it within the first day, keep it covered at room temperature in a cake dome or an airtight container—it stays moist and the glaze keeps shiny. If you want to enjoy it a day or two later, pop it into the fridge, loosely covered, to maintain freshness without drying out. Just bring it back to room temperature before slicing for the best texture. For longer storage, wrap individual slices tightly in plastic wrap and freeze—this works like a charm! When I want to serve a frozen slice, I let it thaw at room temperature for about 30 minutes, and it tastes just as decadent. A quick note about glaze: I recommend adding it just before serving, especially if you plan to keep the cake refrigerated. If the glaze starts to dull, a quick reheating of the glaze and a fresh pour solves it. Also, if you like your glaze thicker, just add a bit more chocolate—if you prefer it thinner, warm it gently with a splash of cream. It’s all about what works for you. And trust me, even after a couple of days, the flavor still hits just right—richer, more intense, almost like a fine wine of desserts.
Frequently Asked Questions
Final Thoughts
Honestly, this cherry chocolate cake has become my pièce de résistance. It’s the kind of dessert that feels like a special event—even if you whip it up on a Tuesday. The combination of moist sponge, juicy cherries, and rich chocolate glaze hits all the right notes—sweet, tart, bitter, and velvety all at once. I love how versatile it is: make it with fresh cherries in the summer, or opt for preserved ones when they’re out of season. Plus, it’s forgiving enough for bakers of all levels—just keep an eye on your bake time, and don’t overmix the batter. This cake’s smell alone will make everyone gather in the kitchen, and the first slice is always met with “Wow!” I keep dreaming up new variations—maybe adding orange zest or a splash of bourbon next time—because baking, like life, is all about experimenting and enjoying the sweetest moments. I hope you try this soon. Let me know how it turns out—your family and friends are in for a real treat. Happy baking, and don’t forget to share your photos—you know I love seeing your creations!
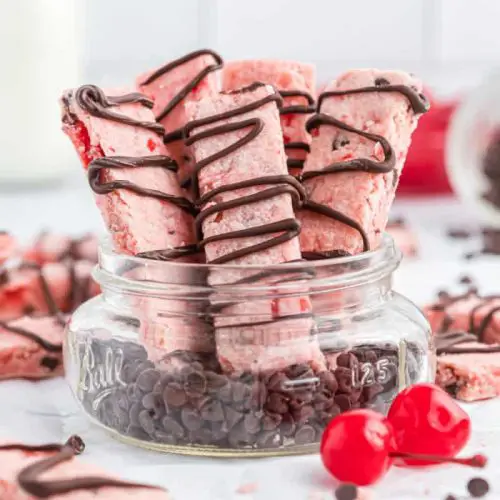
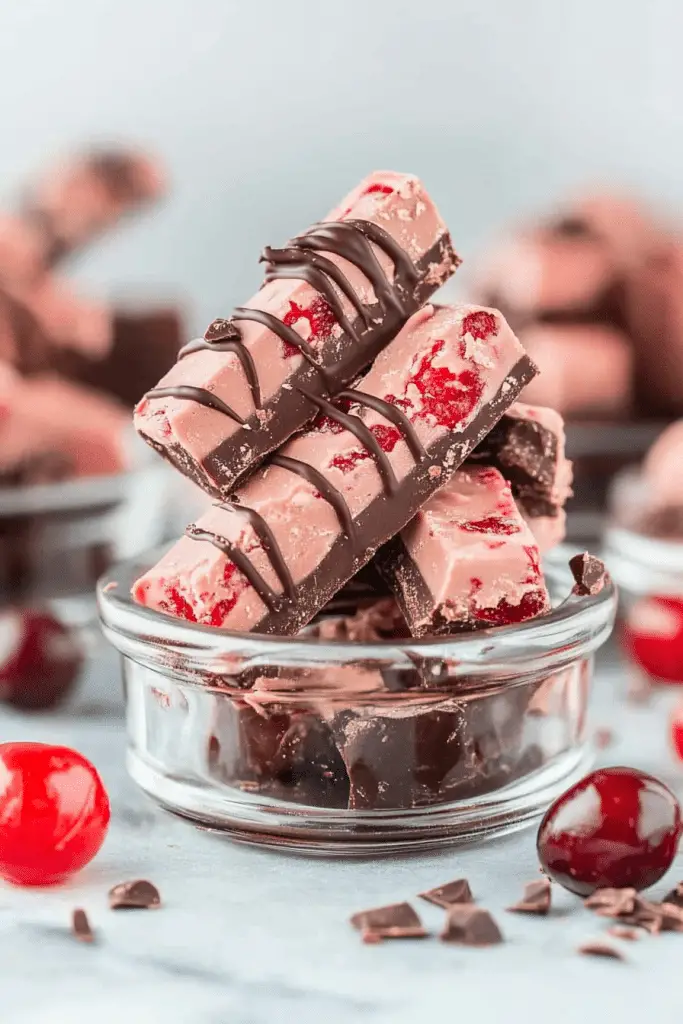
cherry chocolate
Ingredients
Main Ingredients
- 1.5 cups all-purpose flour
- 0.75 cups unsalted butter
- 0.5 cups powdered sugar
- 0.25 cups maraschino cherry juice
- 0.25 cups chopped maraschino cherries
- 0.5 cups mini chocolate chips
Instructions
Preparation Steps
- In a mixing bowl, beat softened butter with powdered sugar until creamy. Add cherry juice and chopped cherries, mix well. Stir in flour and chocolate chips until combined. Press dough into a baking pan lined with parchment paper. Bake at 350°F for 15 minutes. Let cool, then cut into squares. Melt a small portion of chocolate chips, drizzle over cookies for decoration.
Notes
Featured Comments
“Impressed! Clear steps and spot on results. Perfect for busy nights.”
“New favorite here — restaurant-level. crowd-pleaser was spot on.”
“Super easy and turned out amazing! My family asked for seconds. Saving this one.”
“This sweet treat was absolutely loved — the bright really stands out. Thanks!”
“Made it tonight and wow — perfect for busy nights! Will definitely make Luscious Cherry Chocolate Shortbread Cookies again.”
“Packed with flavor and so simple. Exactly what I wanted from Luscious Cherry Chocolate Shortbread Cookies.”


