

Oh, these maple cookies! If there’s one thing that instantly transports me back to cozy autumn afternoons in my grandma’s kitchen, it’s the warm, sweet scent of these baking. There’s just something so incredibly comforting about a perfectly chewy, slightly crisp maple cookie, isn’t there? They’re not as fussy as some fancier desserts, but they pack a flavor punch that rivals anything you’d find in a bakery. Honestly, I’ve made dozens of cookies in my life, from delicate shortbread to robust Chocolate Chip, but these maple cookies? They hold a special place in my heart. They’re the kind of treat that makes a gloomy day feel brighter and a happy occasion even sweeter. If you’ve ever loved a good oatmeal cookie but wished for something a little more sophisticated, or if you’re just a devoted maple enthusiast like me, you’re going to adore this recipe. It’s simple, satisfying, and oh-so-delicious.
What are maple cookies?
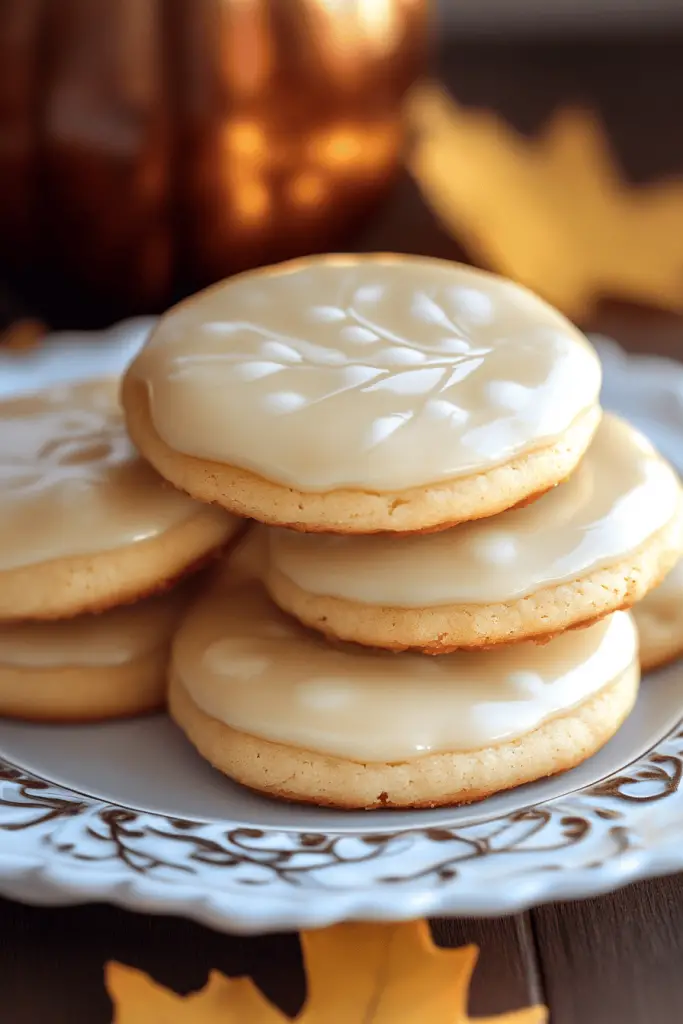
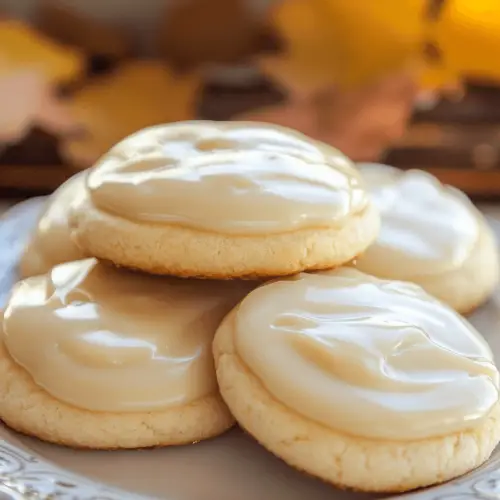
So, what exactly are these little delights? Think of them as a wonderfully warm hug from your oven. They’re essentially a drop cookie, meaning you scoop them onto a baking sheet rather than rolling and cutting them, which is a big win for me on busy days! The magic really comes from the pure maple syrup, which gives them a deep, rich sweetness and a distinct flavor that’s worlds away from plain sugar. We also add a touch of cinnamon, which just sings alongside the maple. The texture is usually a beautiful balance – slightly crisp on the edges from the bake time, but wonderfully soft and chewy in the center. They’re not overly complicated; it’s the quality of the ingredients, especially that lovely maple syrup, that makes them shine. They’re the kind of cookies that don’t need a fancy frosting to be amazing, though a simple glaze is pretty darn irresistible.
How do you make maple cookies?
Quick Overview
The process is wonderfully straightforward! You’ll start by mixing your dry ingredients, then your wet ingredients, bring them together, and scoop. A little swirl of maple goodness in the center before baking adds an extra layer of indulgence. They bake up quickly, and then it’s just a matter of letting them cool before you dig in or add that optional drizzle. It’s genuinely one of the easiest Cookie Recipes that yields incredibly satisfying results. You’ll be amazed at how quickly you can have a batch of these warm, fragrant cookies ready to enjoy.
Ingredients
For the Main Batter:
Here’s what you’ll need to create that perfect cookie base. I always recommend using good quality butter; it really does make a difference in both flavor and texture. For the flour, all-purpose is perfect here, and make sure to measure it correctly – spoon it into your measuring cup and level it off, rather than scooping directly from the bag. This prevents dense cookies! A touch of baking soda gives them that lovely lift and chew, and a pinch of salt is crucial for balancing the sweetness.
- 1 cup (2 sticks) unsalted butter, softened
- 1 ½ cups granulated sugar
- ½ cup pure maple syrup (Grade A Dark or Amber is ideal for flavor)
- 2 large eggs
- 1 teaspoon Vanilla Extract
- 2 ½ cups all-purpose flour
- 1 teaspoon baking soda
- ½ teaspoon ground cinnamon
- ¼ teaspoon salt
For the Filling:
This is where we amp up that maple flavor! It’s a simple mixture that gets swirled into the Cookie Dough. I find that using a slightly thicker maple syrup here can be nice as it holds its shape a bit better before baking, but any pure maple syrup will work wonderfully. Make sure your brown sugar is fresh and not hardened, as that will give you the best texture.
- ½ cup packed light brown sugar
- ¼ cup pure maple syrup
- 2 tablespoons unsalted butter, melted
- 1 teaspoon ground cinnamon
For the Glaze:
This is completely optional, but highly recommended if you’re feeling a little extra! It adds another layer of sweetness and a pretty finish. You can adjust the consistency by adding more or less powdered sugar. If you want a thinner glaze, add a tiny bit more maple syrup or a splash of milk.
- 1 cup powdered sugar
- 2-3 tablespoons pure maple syrup
- 1 tablespoon milk or cream (optional, for thinning)
Step-by-Step Instructions
Step 1: Preheat & Prep Pan
First things first, let’s get our oven ready. Preheat it to 375°F (190°C). While the oven heats up, line your baking sheets with parchment paper. This is my absolute favorite trick for baking cookies – it prevents sticking like a dream and makes cleanup so much easier. If you don’t have parchment paper, you can lightly grease your baking sheets, but parchment is really the way to go.
Step 2: Mix Dry Ingredients
In a medium bowl, whisk together the all-purpose flour, baking soda, ground cinnamon, and salt. Give it a good whisk to ensure everything is evenly distributed. This step is important because it ensures your leavening agent (baking soda) and spices are mixed throughout the flour, which will lead to consistent cookies every time. Don’t skip this!
Step 3: Mix Wet Ingredients
In a large bowl, cream together the softened butter and granulated sugar until light and fluffy. This usually takes a few minutes with an electric mixer. Then, gradually beat in the ½ cup of maple syrup until well combined. Next, add the eggs, one at a time, beating well after each addition, and finally, stir in the vanilla extract. You want this mixture to be smooth and creamy.
Step 4: Combine
Now, it’s time to bring the wet and dry ingredients together. Gradually add the dry ingredients to the wet ingredients, mixing on low speed (or by hand with a spatula) until just combined. Be careful not to overmix here! Overmixing can develop the gluten in the flour too much, leading to tough cookies. Stop mixing as soon as you no longer see streaks of dry flour. The dough will be soft and a little sticky.
Step 5: Prepare Filling
While your cookie dough is chilling slightly (or even while you’re prepping the batter), quickly whip up the filling. In a small bowl, combine the ½ cup packed brown sugar, ¼ cup maple syrup, melted butter, and 1 teaspoon cinnamon. Stir until it forms a thick, paste-like consistency. This is where you get that extra burst of maple flavor.
Step 6: Layer & Swirl
Now for the fun part! Drop rounded tablespoons of cookie dough onto your prepared baking sheets, leaving about 2 inches between each cookie to allow for spreading. Then, take about a teaspoon of the maple filling and dollop it onto the center of each cookie. Using a toothpick or the back of a spoon, gently swirl the filling into the cookie dough. You don’t want to mix it all in; just create pretty swirls. This step makes them look as good as they taste!
Step 7: Bake
Pop those baking sheets into your preheated oven. Bake for 9-12 minutes, or until the edges are lightly golden brown and the centers look set but not overbaked. The exact time will depend on your oven, so keep an eye on them. You want them to be slightly underdone in the very center, as they’ll continue to cook a bit on the hot baking sheet after you take them out.
Step 8: Cool & Glaze
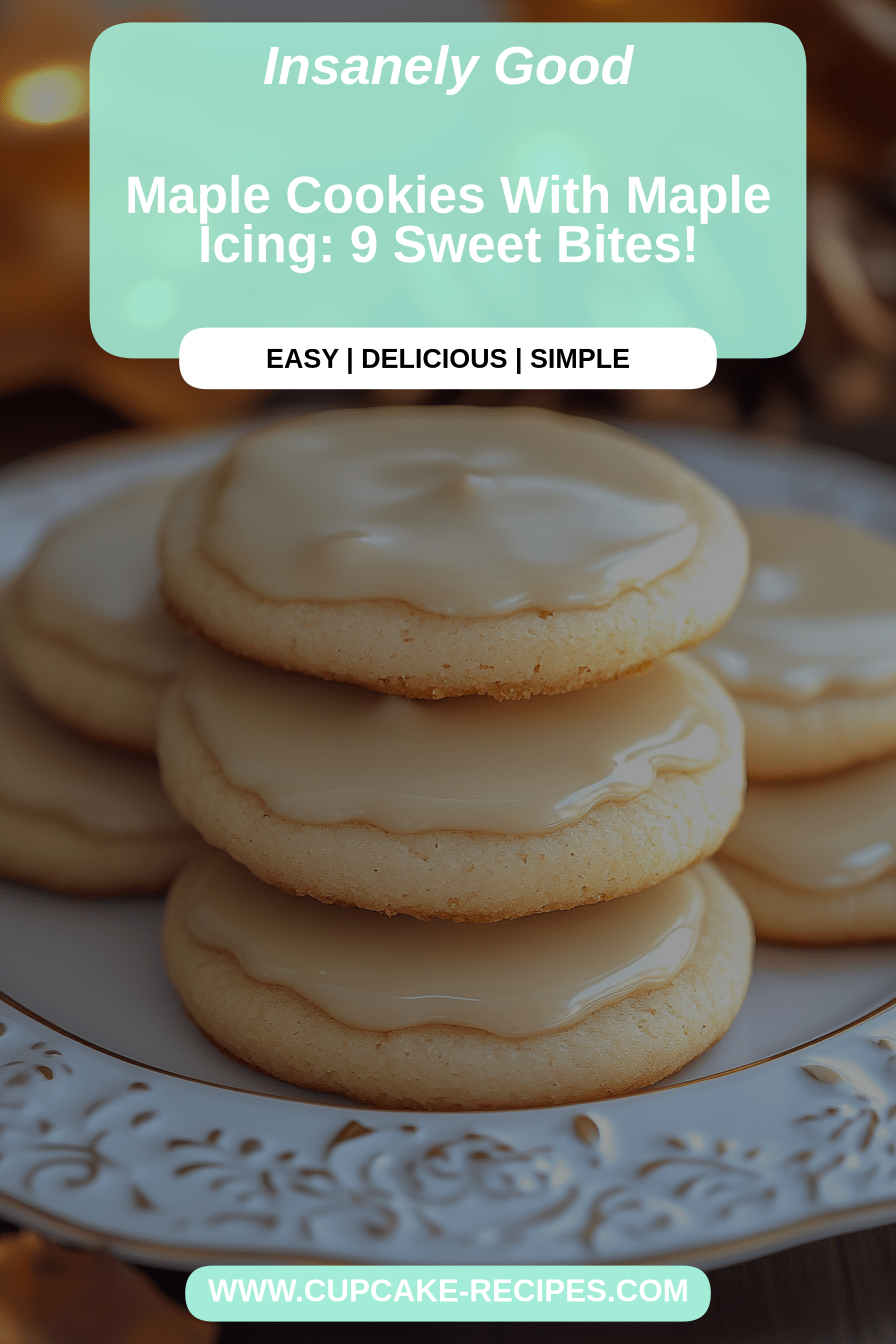
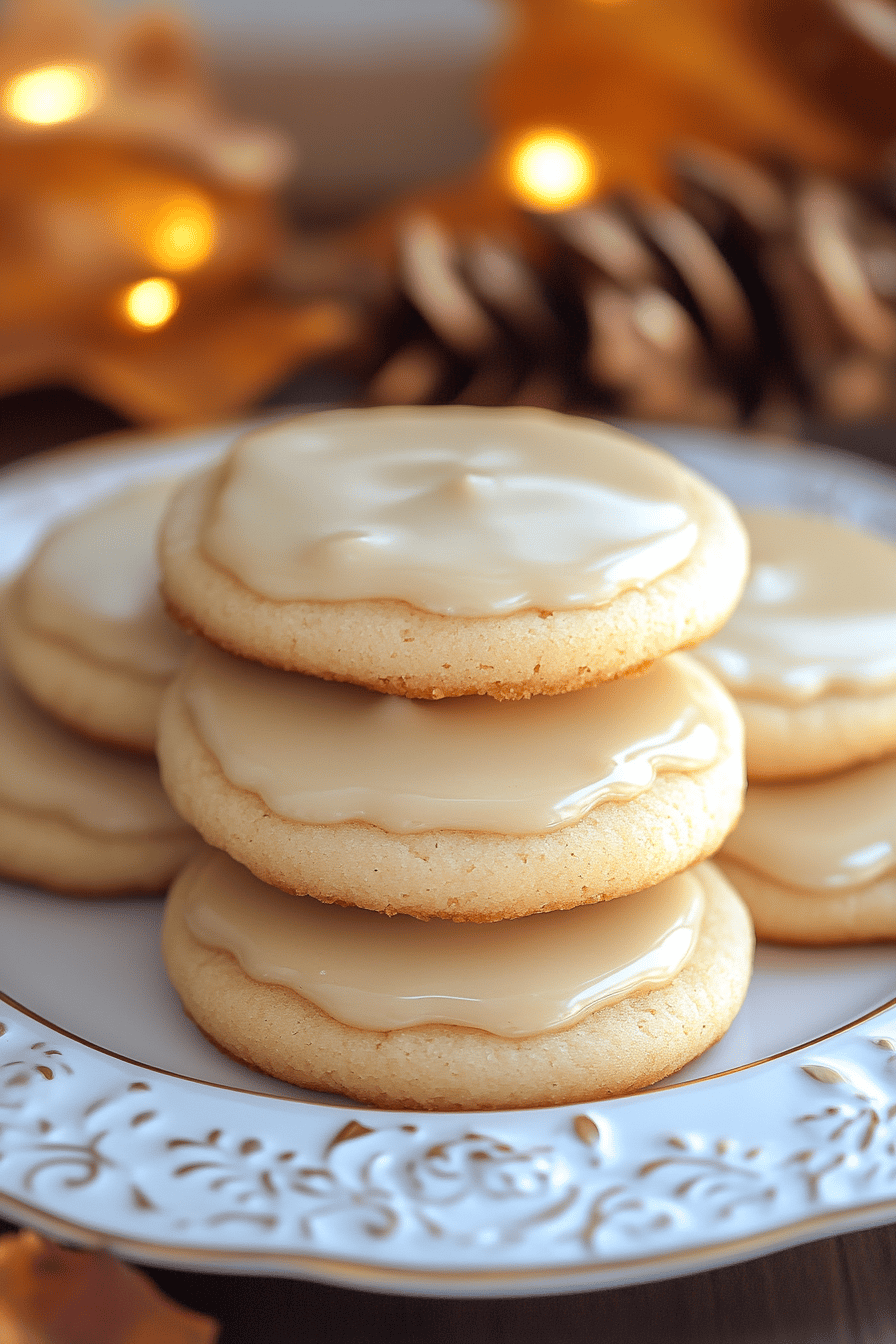
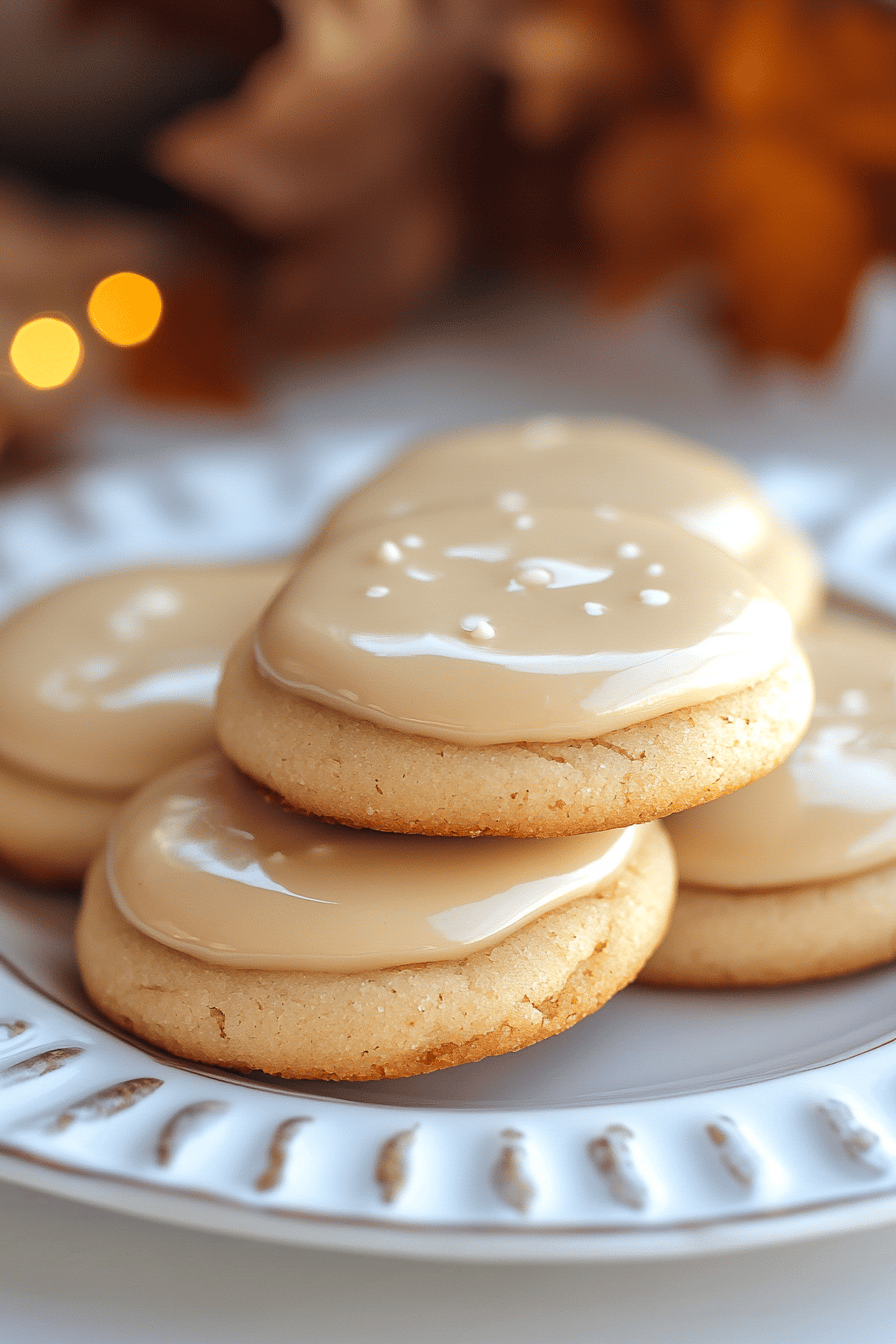
Let the cookies cool on the baking sheets for about 5 minutes before carefully transferring them to a wire rack to cool completely. This is crucial for them to firm up properly. Once they’re completely cool, you can whip up the glaze by whisking together the powdered sugar and 2 tablespoons of maple syrup. Add more maple syrup or a splash of milk if you want it thinner. Drizzle the glaze over the cooled cookies using a fork or a spoon. Let the glaze set before serving.
Step 9: Slice & Serve
Once the glaze is set (or if you skipped the glaze), your delicious maple cookies are ready to be enjoyed! They’re perfect served at room temperature. I love to arrange them on a pretty platter. They look extra inviting when they’re still slightly warm, but they’re also fantastic cooled.
What to Serve It With
These maple cookies are so versatile, you can enjoy them at almost any time of day and with just about anything! For a cozy breakfast, they’re a delightful companion to a strong cup of coffee or a mug of hot tea. I like to arrange a couple on a small plate next to my morning brew for a little treat. For a lovely brunch spread, they add a touch of sweetness and elegance. Serve them alongside fresh fruit, yogurt parfaits, or even some mini quiches. They also make a wonderful end to a meal as a simple dessert. I often pair them with a scoop of vanilla bean ice cream or a small glass of milk for the kids. And for those moments when you just need a little comfort food, they’re perfect for a cozy snack with a glass of cold milk. Honestly, my family devours these so quickly, I often have to hide a few for myself!
Top Tips for Perfecting Your Maple Cookies
Over the years, I’ve picked up a few tricks that I think really help make these maple cookies absolutely perfect. First, when it comes to the butter, make sure it’s truly softened, not melted. Softened butter creams better with the sugar, creating that essential airy texture in the batter, which leads to a chewier cookie. If your butter is too cold, it won’t cream properly, and if it’s too warm, your cookies might spread too much. For the maple syrup, don’t skimp on quality! Using pure maple syrup makes a world of difference in flavor. If you can get your hands on a darker grade, it often has a more robust maple flavor that really shines through in baking. I’ve also found that letting the cookie dough rest in the fridge for about 30 minutes before scooping can help prevent excessive spreading and deepen the flavors even more, especially if you have the time. It’s not strictly necessary, but it’s a nice little enhancement. When you’re mixing the wet and dry ingredients, remember the golden rule: don’t overmix. Just mix until the flour disappears. A few little streaks are okay, as they’ll get mixed in during the scooping process. Overmixing is the quickest way to tough, dense cookies. For the swirling technique, don’t try to be too perfect. A rustic swirl looks more appealing and authentic, in my opinion! You want to see distinct ribbons of the maple filling, not have it completely blended into the dough. If your glaze is too thick, a tiny splash of milk or even a bit more maple syrup will thin it out beautifully. If it’s too thin, just whisk in a little more powdered sugar, a tablespoon at a time, until you reach your desired consistency. And a final little tip that’s saved me more than once: if your cookies are baking too quickly on the bottom, you can place an empty baking sheet on the rack below. This creates a buffer and helps prevent burning.
Storing and Reheating Tips
These maple cookies are best enjoyed fresh, but they store surprisingly well, which is great because sometimes I like to make a double batch! At room temperature, I’ve found they stay perfectly delicious for about 3-4 days when stored in an airtight container. Make sure they’ve cooled completely before putting them in the container, or they might get a bit soggy. If you’re planning to glaze them, I usually add the glaze just before serving or the day I plan to eat them, as sometimes the glaze can make them a bit softer if stored for too long. For longer storage, you can keep them in the refrigerator for up to a week. They might firm up a bit more in the fridge, so if you want to enjoy them soft again, you can gently warm them in a low oven (around 250°F or 120°C) for just a few minutes until they’re soft again. If you want to freeze them, which is a fantastic idea for having them on hand whenever a craving strikes, I recommend freezing them *before* glazing. Place them in a single layer on a baking sheet and freeze until solid. Then, transfer them to a freezer-safe bag or container. They’ll keep well for up to 2-3 months. To thaw, simply bring them out to room temperature for a few hours. If you’re glazing them, do that after they’ve thawed.
Frequently Asked Questions
Final Thoughts
I truly hope you give these maple cookies a try! They’re more than just a recipe for me; they’re a source of comfort and happy memories. They have that wonderful ability to make any day feel a little bit brighter and sweeter, and I think everyone needs a cookie like that in their repertoire. They’re proof that sometimes, the simplest ingredients can create the most magical results. If you’re looking for other comforting bakes, you might also love my classic oatmeal raisin cookies or my surprisingly easy banana bread recipe. Both are family favorites that bring smiles all around. I can’t wait to hear what you think of these maple cookies! Please leave a comment below and let me know how yours turned out, or if you tried any fun variations. Your feedback always inspires me! Happy baking, everyone!
maple cookies
Ingredients
Main Ingredients
- 0.75 cup unsalted butter softened
- 1 cup granulated sugar
- 1 large egg
- 1 teaspoon vanilla extract
- 2 cups all-purpose flour
- 0.5 teaspoon baking soda
- 0.25 teaspoon salt
- 0.5 cup maple syrup
Maple Glaze
- 1 cup powdered sugar
- 2 tablespoon maple syrup
- 1 tablespoon milk
Instructions
Preparation Steps
- Preheat oven to 375°F (190°C). Line baking sheets with parchment paper.
- In a large bowl, cream together the softened butter and granulated sugar until light and fluffy.
- Beat in the egg and vanilla extract until well combined.
- In a separate bowl, whisk together the flour, baking soda, and salt.
- Gradually add the dry ingredients to the wet ingredients, mixing until just combined.
- Stir in the maple syrup until the dough is smooth.
- Drop rounded tablespoons of dough onto the prepared baking sheets, about 2 inches apart.
- Bake for 8-10 minutes, or until the edges are lightly golden.
- Let the cookies cool on the baking sheets for a few minutes before transferring them to a wire rack to cool completely.
- While the cookies are cooling, prepare the glaze. In a small bowl, whisk together the powdered sugar, maple syrup, and milk until smooth and drizzly.
- Drizzle the glaze over the cooled cookies.
Notes
Featured Comments
“Impressed! Clear steps and creamy results. Perfect for busy nights.”
“New favorite here — super easy. crowd-pleaser was spot on.”
“Super easy and turned out amazing! My family asked for seconds. Saving this one.”
“This sweet treat was absolutely loved — the bright really stands out. Thanks!”
“Made it tonight and wow — comforting! Will definitely make maple cookies again.”
“Packed with flavor and so simple. Exactly what I wanted from maple cookies.”


