


Oh, my goodness, where do I even begin with these Marry Me Cookies? If there’s one recipe that truly embodies pure, unadulterated joy in cookie form, it’s this one. I still remember the first time I tasted them – it was at a friend’s potluck years ago, and I swear, my life changed in that moment. They were these perfectly soft, slightly chewy cookies with this incredible swirl of sweet, tangy goodness baked right in. Forget your average Chocolate Chip; these are in a whole other league! They’re that special kind of treat that makes you want to propose to the baker, hence the name, I suppose! I’ve been making them ever since, and they are my absolute go-to for holidays, bake sales, or honestly, just a Tuesday when I need a little pick-me-up. They’re seriously that good, and the best part? They’re not as complicated as you might think!
What are Marry Me Cookies?
So, what exactly *are* these magical Marry Me Cookies? Think of them as the ultimate hybrid dessert. They’re essentially a soft, buttery Sugar cookie base that’s been taken to the next level with a generous swirl of a rich, jammy filling and often a luscious glaze on top. The name is just too perfect, isn’t it? It implies something so irresistible, so desirable, that you just have to commit! The magic really lies in that signature swirl. It’s not just jam thrown on top; it’s incorporated into the dough in a way that creates these beautiful ribbons of flavor and texture. It’s like the cookie is giving you a sweet hug from the inside out. They’re not overly sweet, but they have this wonderful balance of buttery dough and bright fruitiness that just sings. If you love a good sugar cookie but crave something a bit more exciting, these are your answer.
How do I make Marry Me Cookies?
Quick Overview
Making these Marry Me Cookies is a delightful journey that starts with creaming butter and sugar, incorporates simple dry ingredients, and then gets a beautiful swirl of jam before baking to golden perfection. The key is to not overmix the dough, and to get that swirl just right for visual appeal and flavor distribution. They come together quicker than you might expect, and the aroma that fills your kitchen as they bake is simply intoxicating. You’ll be amazed at how these humble ingredients transform into something so special. It’s a truly rewarding baking experience that yields spectacular results.
Ingredients
For the Main Batter:
This is where the foundation of our delicious Marry Me Cookies is built. Using good quality, unsalted butter is key here for the best flavor and texture. Make sure it’s softened to room temperature – not melted, but soft enough that your finger leaves an indentation easily. This allows it to cream properly with the sugar, creating that light and airy base that’s crucial for a tender cookie. All-purpose flour is perfectly fine for this recipe. I always sift my flour, even though it’s an extra step, because it really does help prevent a dense cookie. For the sugar, a combination of granulated and brown sugar gives us that perfect balance of sweetness and a slight chew. And of course, pure Vanilla Extract is non-negotiable for that classic, comforting flavor. A little salt is essential to balance out the sweetness and enhance all the other flavors.
For the Filling:
The heart of the Marry Me Cookie! I’m a huge fan of good quality raspberry jam for its bright, slightly tart flavor that cuts through the richness of the cookie beautifully. You want a jam that’s not too runny, but not so stiff that it’s hard to swirl. If your jam is a little firm, I sometimes warm it up *very* gently for a few seconds in the microwave or on the stovetop to make it more pliable. Other great options include strawberry jam, cherry preserves, or even apricot. For a citrusy twist, a good quality lemon curd is absolutely divine in the center. The key is to have enough of it to create those lovely ribbons throughout the cookie.
For the Glaze:
This is totally optional but highly recommended if you want that extra touch of sweetness and polish. It’s a simple mixture of powdered sugar and a liquid – usually milk or a bit of lemon juice for a tangier kick. The goal is a pourable but not watery consistency. If it’s too thick, add milk or lemon juice a tiny bit at a time until it’s just right. If it’s too thin, add a bit more powdered sugar. This glaze adds a beautiful finish and ties all the flavors together. Sometimes, I’ll even add a drop of food coloring for fun, especially for holidays!
Step-by-Step Instructions
Step 1: Preheat & Prep Pan
First things first, let’s get our oven fired up to 350 degrees Fahrenheit (175 degrees Celsius). This is a pretty standard temperature for most cookies and gives us a nice, even bake. While the oven is preheating, grab your baking sheets and line them with parchment paper. Trust me on this one – parchment paper is a baker’s best friend. It prevents sticking, makes cleanup a breeze, and helps the cookies bake more evenly without burning on the bottom. You want to give yourself enough space on the baking sheets so the cookies don’t spread into each other. I usually leave about 2 inches between each cookie.
Step 2: Mix Dry Ingredients
In a medium bowl, whisk together your all-purpose flour, baking powder, and salt. Whisking them together thoroughly ensures that the leavening agent (baking powder) is evenly distributed throughout the flour. This is super important for getting cookies that rise nicely and have a good texture. If your baking powder clumps up, you can even give it a quick sift with the flour. It’s a small step, but it really makes a difference in the final outcome, preventing pockets of too much or too little rise.
Step 3: Mix Wet Ingredients
Now, in a larger bowl, cream together your softened unsalted butter and granulated and brown sugars. Use an electric mixer (handheld or stand mixer) for this. Beat them together until the mixture is light, fluffy, and pale yellow. This process, called creaming, incorporates air into the dough, which is crucial for a tender cookie. Next, beat in the eggs, one at a time, making sure each is fully incorporated before adding the next. Finally, stir in the vanilla extract. The mixture should look smooth and slightly glossy.
Step 4: Combine
Gradually add the dry ingredients to the wet ingredients. Mix on low speed or stir by hand until just combined. This is where you have to be careful not to overmix! Overmixing develops the gluten in the flour too much, which can lead to tough cookies. You want to stop mixing as soon as you no longer see streaks of dry flour. The dough should be soft but hold its shape. It might seem a little soft, but that’s exactly what we want for a chewy cookie.
Step 5: Prepare Filling
If you haven’t already, make sure your jam is ready to go. If it’s a bit stiff, give it a quick stir or a very gentle warm-up as I mentioned before. You want it to be a consistency that you can easily drizzle or dollop into the Cookie Dough. Having it ready means you can add it without delay once the dough is formed, which helps keep everything cold and ensures the best texture.
Step 6: Layer & Swirl
Now for the fun part! Scoop rounded tablespoons of dough onto your prepared baking sheets. Don’t flatten them; just leave them as little mounds. Then, take about a teaspoon of your prepared jam and dollop it onto the center of each cookie mound. Using a toothpick or the tip of a knife, gently swirl the jam into the dough. You don’t want to overdo it – just a few swirls will create those beautiful ribbons. The goal is to see streaks of jam running through the cookie, not to mix it in completely. This creates pockets of intense flavor.
Step 7: Bake
Bake the cookies in your preheated oven for about 10-12 minutes, or until the edges are lightly golden brown and the centers look set but not overly browned. Keep an eye on them, as oven temperatures can vary. They’ll continue to set up a bit as they cool on the baking sheet. I usually check for doneness by gently pressing the center; it should feel slightly firm. If you’re unsure, you can always pull one out to check. The aroma in your kitchen at this point is just heavenly!
Step 8: Cool & Glaze
Let the cookies cool on the baking sheets for about 5 minutes. This is important because they are quite delicate when they first come out of the oven. After 5 minutes, carefully transfer them to a wire rack to cool completely. Once they are completely cool, you can drizzle them with your prepared glaze, if you’re using it. Let the glaze set for about 15-30 minutes before storing or serving. This ensures the glaze is firm and won’t smudge.
Step 9: Slice & Serve
These Marry Me Cookies are best served at room temperature. They are wonderful on their own, but they are also fantastic with a cup of coffee or a cold glass of milk. The swirl of jam makes them visually appealing, so they look gorgeous on a platter. You can serve them whole, or if you’ve made them a bit larger, they’re also lovely cut in half. Enjoy the delightful burst of flavors with every bite!
What to Serve It With
These Marry Me Cookies are so wonderfully versatile, they fit into almost any occasion! For a casual
For Breakfast:
a warm cup of coffee or a creamy latte is the absolute perfect pairing. Their sweet, slightly fruity nature makes them a delightful treat to have with your morning brew. I sometimes even pack a couple in my husband’s lunchbox, and he always calls me to say how much he enjoyed that little surprise. They’re not too sweet for the morning, offering just a hint of indulgence.
For a lovely
For Brunch:
these cookies are simply elegant. Arrange them on a pretty tiered stand alongside fresh fruit salad, mini quiches, and perhaps some mimosas. The swirl of jam adds such a beautiful pop of color, and they complement lighter brunch fare wonderfully. They feel a little bit special without being fussy. You could even serve them with a dollop of fresh whipped cream on the side for an extra touch of luxury.
When serving
As Dessert:
, they can stand on their own or be paired with something creamy. A scoop of vanilla bean ice cream alongside a warm Marry Me Cookie is pure bliss. They also make a fantastic addition to a dessert board, perhaps with some cheese and fruit. After a hearty meal, these provide that perfect sweet ending without being too heavy or complicated to prepare.
And for those
For Cozy Snacks:
moments, whether it’s an afternoon slump or a late-night craving, these cookies are your best friend. They’re comforting, satisfying, and just plain delicious. Pair them with a glass of milk, hot chocolate, or even a cup of herbal tea. My kids, bless their hearts, will happily demolish a whole batch while watching a movie. They’re the ultimate comfort food in cookie form, perfect for sharing or keeping all to yourself!
Top Tips for Perfecting Your Marry Me Cookies
I’ve made these Marry Me Cookies more times than I can count, and over the years, I’ve picked up a few tricks that I think make all the difference. Let’s dive into some of my favorite tips to ensure your cookies are absolutely perfect.
Zucchini Prep: While this recipe doesn’t *use* zucchini, the name “Marry Me Cookies” is often associated with a popular cookie that *does* incorporate it. However, the version I’m sharing today is a delightful jam-swirled sugar cookie. If you were to make a zucchini-based version, the key is always to squeeze out as much moisture as possible from the grated zucchini. This is crucial to avoid soggy cookies. Use a fine grater for a smoother texture, and remember that fresher zucchini yields better results.
Mixing Advice: This is probably the most common pitfall with cookies: overmixing. Once you add the dry ingredients to the wet, mix *just* until combined. Seriously, stop when you don’t see any more dry flour. Overmixing develops the gluten in the flour, which leads to tough, dense cookies instead of the tender, melt-in-your-mouth texture we’re aiming for. I often finish mixing by hand with a spatula for better control.
Swirl Customization: Don’t be afraid to get creative with your swirls! You don’t need a perfectly uniform pattern. Random, artistic swirls are often the prettiest. For more defined swirls, use a toothpick or a small paring knife to gently drag the jam into the dough a few times. If you want more of a marbled effect, use less jam and swirl more extensively. For bolder color and flavor, consider using a brighter, more intensely colored jam like a good quality sour cherry or even a blackberry jam.
Ingredient Swaps: I’ve found that good quality butter is really non-negotiable for the best flavor. However, for the jam filling, feel free to experiment! Strawberry, blueberry, or even apricot jam work beautifully. For a citrusy twist, a vibrant lemon curd or lime curd is absolutely divine. Just ensure your chosen filling isn’t too watery, as this can make the cookies spread too much. If you’re feeling adventurous, you can even add a tablespoon or two of finely chopped nuts or chocolate chips to the cookie dough itself for extra texture and flavor.
Baking Tips: Ovens can be tricky! I always recommend using an oven thermometer to ensure your oven is accurately preheated to 350°F (175°C). Baking on parchment paper is a lifesaver for even cooking and easy cleanup. I usually bake these on the middle rack of my oven. To test for doneness, the edges should be lightly golden brown, and the centers should look set but still have a slight softness. They will firm up as they cool. If you’re unsure, you can carefully lift one cookie with a spatula; if it holds its shape without looking doughy underneath, it’s likely ready.
Glaze Variations: The glaze is optional, but it adds that extra professional finish. For a classic glaze, whisk powdered sugar with a little milk or water until smooth and pourable. If you want a tangier flavor, use lemon juice or even a splash of orange juice instead of milk. You can also add a drop of vanilla extract to the glaze. For a richer glaze, you can use a bit of heavy cream. Aim for a consistency that slowly drizzles off a spoon; if it’s too thin, add more powdered sugar; if it’s too thick, add liquid a tiny bit at a time.
Storing and Reheating Tips
One of the things I absolutely adore about these Marry Me Cookies is how well they store. They tend to stay wonderfully soft and delicious for days, which is a huge plus for busy households like mine!
Room Temperature: Once the cookies are completely cooled and any glaze has set, you can store them in an airtight container at room temperature. They’ll stay fresh and delicious for about 3-4 days. I usually just stack them in a single layer in a cookie tin or a container with a good seal. The key is to keep them protected from the air to maintain their softness. If they’re not glazed, you can even place a slice of bread in the container to help keep them extra moist, though honestly, they’re usually soft enough on their own.
Refrigerator Storage: While I rarely need to refrigerate these, if you live in a very warm climate or want them to last a bit longer, you can store them in the refrigerator. Place them in an airtight container, and they should keep well for up to a week. They might firm up a little in the fridge, so I often let them sit out at room temperature for about 15-20 minutes before enjoying them, especially if they’ve been glazed.
Freezer Instructions: These cookies freeze beautifully, which is fantastic for making ahead of time! You can freeze the baked and cooled cookies (un-glazed is best for freezing). Wrap them tightly in plastic wrap, then place them in a freezer-safe bag or container. They’ll keep in the freezer for up to 2-3 months. To thaw, simply transfer the frozen cookies to a plate and let them come to room temperature, which usually takes a couple of hours. If you glazed them before freezing, the glaze might become a little sticky upon thawing; you can always add a fresh drizzle of glaze once they’re thawed.
Glaze Timing Advice: For the best results, I always recommend adding the glaze *after* the cookies have completely cooled and *just before* serving or storing at room temperature. If you glaze them and then put them in an airtight container immediately, the moisture from the cookie can make the glaze a bit gummy. Letting the glaze set at room temperature for about 30 minutes is ideal before boxing them up. If you are freezing, it’s definitely better to freeze them un-glazed and add the glaze after thawing.
Frequently Asked Questions
Final Thoughts
I truly hope you give these Marry Me Cookies a try. They are more than just a recipe to me; they’re a little piece of happiness that I love to share. The way the sweet dough melts in your mouth and then that burst of fruity jam comes through is just pure magic. They’re proof that you don’t need to be a professional baker to create something truly special and impressive. Whether you’re making them for a special occasion, a family gathering, or just because you deserve a treat, I promise they will bring smiles all around. They’re consistently a crowd-pleaser, and I can’t wait to hear how much you and your loved ones enjoy them. If you loved these, you might also enjoy my recipes for Soft & Chewy Oatmeal Raisin Cookies or my Classic Chocolate Chip Cookies – they’re other family favorites! Happy baking, and please, do let me know in the comments how your Marry Me Cookies turn out! I love seeing your creations!
Marry Me Cookies
Ingredients
Main Ingredients
- 1 cup unsalted butter softened
- 0.75 cup granulated sugar
- 0.75 cup packed brown sugar
- 2 large eggs
- 1 teaspoon vanilla extract
- 3 cups all-purpose flour
- 1 teaspoon baking soda
- 0.5 teaspoon salt
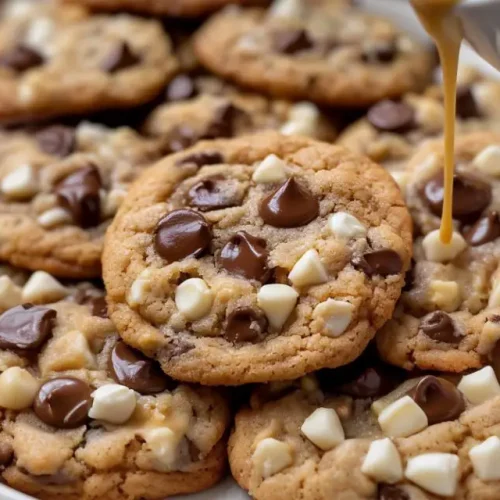
- 1 cup white chocolate chips
- 1 cup semi-sweet chocolate chips
Instructions
Preparation Steps
- Preheat oven to 375°F (190°C). Line baking sheets with parchment paper.
- In a large bowl, cream together the softened butter, granulated sugar, and brown sugar until light and fluffy.1 cup unsalted butter
- Beat in the eggs one at a time, then stir in the vanilla extract.1 cup unsalted butter
- In a separate medium bowl, whisk together the flour, baking soda, and salt.1 cup unsalted butter
- Gradually add the dry ingredients to the wet ingredients, mixing until just combined.
- Stir in the white chocolate chips and semi-sweet chocolate chips.1 cup unsalted butter
- Drop rounded tablespoons of dough onto the prepared baking sheets.
- Bake for 10-12 minutes, or until the edges are golden brown and the centers are still slightly soft.
- Let the cookies cool on the baking sheets for a few minutes before transferring them to a wire rack to cool completely.
Notes
Featured Comments
“Impressed! Clear steps and creamy results. Perfect for busy nights.”
“New favorite here — super easy. crowd-pleaser was spot on.”
“Super easy and turned out amazing! My family asked for seconds. Saving this one.”
“This sweet treat was absolutely loved — the balanced really stands out. Thanks!”
“Made it tonight and wow — creamy! Will definitely make Marry Me Cookies again.”
“Packed with flavor and so simple. Exactly what I wanted from Marry Me Cookies.”


