

Have you ever had that moment where you’re craving something sweet, but the idea of baking a whole batch of cookies feels a little too much? Been there. That’s when I turn to my all-time favorite treat — puppy chow. I’ve loved this recipe since I was a kid, sneaking bites off the kitchen counter while Mom wasn’t looking. It’s a magical mix of crunchy, sweet, and downright addictive. Honestly, it’s kind of like a party in your mouth—think of it as a grown-up’s way to enjoy childhood comfort food in a single handful. Whenever I bring a batch to family gatherings or movie nights, it disappears in minutes. My kids ask for this all the time, and honestly, it’s become my go-to on busy nights when I want something quick and satisfying. Trust me on this one: once you make puppy chow, it’ll become your new best friend too.
What is a puppy chow?
Puppy chow, also known as Muddy Buddies in some circles, is essentially a crunchy, sweet snack made of coated cereal — most often Chex or similar rice squares. The magic happens when you mix the cereal with a rich, buttery chocolate mixture, then toss it in powdered sugar to give it that snow-dusted look and melt-in-your-mouth texture. Think of it as a sophisticated upgrade of traditional cereal treats, but way simpler and perfect for sharing. The name “puppy chow” probably comes from how it looks—like bits of dirt or crumbs—so it’s got a fun, playful vibe that makes it a hit with kids and adults alike. What I love most about this is how it’s essentially one giant snack that you can toss together in minutes, making it perfect for when you need a quick party treat or just a little pick-me-up.
How do I make a Puppy Chow?
Quick Overview
Making puppy chow is surprisingly easy, especially when you break it down into a few simple steps. First, you melt together the chocolate, peanut butter, and butter until smooth and glossy. Then, you pour this luscious mixture over crispy cereal in a giant bowl, gently tossing so every piece gets coated in that chocolaty goodness. Next, you transfer the coated cereal into a large bag or a big mixing bowl with powdered sugar, and toss again to coat everything in a snowy layer of sweetness. Once that’s done, just spread it out on a baking sheet or large plate to cool and set — and voila! You’ve got a plate full of irresistible puppy chow ready to devour. It’s a quick process, but the payoff is huge—crispy, sweet, and a bit addictive. Plus, the cleanup is minimal, which I always appreciate after a busy day.
Ingredients
For the main coating:
- 9 cups of rice Chex or similar crispy cereal — I always go for Chex; it’s crunchy and holds the coating perfectly
- 1 cup creamy peanut butter — natural works great, but the kind you love to spoon straight from the jar is fine too
- 1 cup unsalted butter — makes the chocolate mixture rich and smooth
- 2 cups semi-sweet chocolate chips — I tested this with milk chocolate, and it turned out just as delicious, so feel free to swap based on your preference
For the Coating & Toss:
- 1 teaspoon vanilla extract — just a splash brightens everything up
- 1 ½ cups powdered sugar — sifted if your sugar is lumpy, to give that perfect snowy look
Optional Add-ins:
- Mini M&Ms, sprinkles, or crushed pretzels for an extra crunch and fun colors
- A pinch of sea salt on top before serving to balance the sweetness
Step-by-Step Instructions
Step 1: Preheat & Prep Pan
No real preheating needed here! Just grab a large mixing bowl, a baking sheet or large platter, and an extra-large zip-top bag or clean large mixing bowl for tossing. I usually line my baking sheet with parchment if I plan to let it sit for a while. Keep everything within reach so you’re not scrambling mid-process. Trust me, this step makes life easier.
Step 2: Mix Dry Ingredients
Skip this step—because we’re mixing directly in the bowl with the cereal. Just keep your Chex ready. This is more about the coating mixture, which is next.
Step 3: Mix Wet Ingredients
In a medium saucepan over low heat, melt the butter, chocolate chips, and peanut butter together. Stir constantly — I’ve learned the hard way that burning chocolate is no fun. When it’s smooth and glossy, add the vanilla and take it off the heat. This smells heavenly — like a warm chocolate hug.
Step 4: Combine
Pour that luscious chocolate mixture over the cereal in your giant bowl. Gently fold using a spatula or wooden spoon—try not to crush the cereal, but make sure each piece gets coated. If your mixture cools too quickly, pop it back on the stovetop for a few seconds to loosen it up again—lesson learned the hard way!
Step 5: Prepare Filling
Pour the powdered sugar into a large Ziploc bag or big bowl. Add the coated cereal in batches. Seal or cover, then toss gently to coat evenly in that snowy sugar. The best part? Watching the cereal turn into tiny white clouds—so satisfying.
Step 6: Layer & Swirl
Once coated, spread the cereal on your prepared baking sheet or large plate. I love doing a quick swirl or gentle press to make sure the coating sticks well. Sometimes I sprinkle a little extra sea salt on top at this stage — adds an unexpected pop of flavor.
Step 7: Bake
Honestly, no baking required here! Just let it sit at room temperature or in the fridge if you want it to cool faster—about 30 minutes should do the trick. If you want a softer texture, you can even refrigerate it before serving, but I prefer it crunchy right out of the bowl.
Step 8: Cool & Glaze
Once cooled and set, you’re ready for the best part—adding a drizzle of melted white or milk chocolate on top if you like. Or just leave it as-is for a simple, rustic look. The smell alone will make everyone gather around the kitchen.
Step 9: Slice & Serve
This one’s a finger food. Serve it in bowls, or scoop it right out of your favorite container. It’s great for game days, movie nights, or just satisfying a sweet craving at midnight. I’ve even tucked some into small treat bags for party favors — always a hit!
What to Serve It With
This puppy chow is such a versatile treat. For breakfast, it pairs just fine with strong coffee or a big glass of milk—those crunchy bites are the perfect start to a busy morning. When hosting brunch, I love presenting it in a clear jar with a festive ribbon, alongside a fruit platter or a batch of cinnamon scones. It’s fun to serve alongside a selection of teas or hot chocolate, especially on cozy winter mornings.
As a dessert, puppy chow shines—set it out on a pretty cake stand, add a few extra sprinkles or mini marshmallows for that extra flair. I’ve made it for potlucks and it’s always the first to go. Kids love it because it looks playful, and grown-ups appreciate how easy it is to share without any fuss. When we’re just hanging out at home, I love tossing in some mini M&Ms or a sprinkle of sea salt on top to elevate the flavor. It’s one of those snacks that feels special, even though it takes minimal effort. Plus, it’s a great way to satisfy that sweet tooth without turning on the oven or whipping up complicated desserts.
Top Tips for Perfecting Your Puppy Chow
Over the years, I’ve picked up a few tricks for making sure my puppy chow turns out absolutely perfect every time. First, when preparing the chocolate mixture, I always melt the chocolate chips with the peanut butter and butter over low heat. If you rush the melting or turn the heat too high, it can seize up and become lumpy—trust me, I’ve been there. Patience is key. Once melted, I always give it a quick stir to ensure everything’s smoothly combined.
When coating the cereal, I find that gently folding the mixture in rather than stirring vigorously helps keep the cereal crispy. Overmixing can crush the cereal or make it soggy—nobody wants that. My secret is to pour the coating over about half the cereal at a time, fold gently, then add the rest. That way, every piece gets coated without getting smashed.
For the powdered sugar coating, I like to sift the sugar first—it keeps the final coating light and fluffy without clumps. Toss the coated cereal in a large Ziploc bag, seal it, and give it a good shake. I’ve tested various ratios of sugar—between 1 ½ to 2 cups—and I find that 1 ½ cups hits just right in terms of sweetness without making the snack too sugary. Everyone has their preferred level of sweetness, so don’t be afraid to tweak it.
If you want to customize the flavor, try adding a pinch of cinnamon or a splash of peppermint extract to the chocolate coating. It’s amazing how a little change can make the recipe feel new again. And if you’re looking to make it healthier, substituting dark chocolate or using less sugar still keeps it delicious—just be ready for a slightly different texture.
A tip I learned after making this a thousand times is to store the puppy chow in an airtight container. I like glass jars or plastic containers with a good seal. It stays fresh for about a week, but honestly, it often disappears faster than that! If I need to save some for later, I pop it in the freezer. Just make sure to let it thaw a few minutes before snacking. Freezing actually helps keep it crispy longer, which is a bonus.
Storing and Reheating Tips
This snack is pretty hardy, but a few simple storage tips can keep it tasting fresh. If you’re serving it the same day, keep it in an airtight container at room temperature—usually safe for up to 3-4 days. Just be sure to store it away from direct sunlight or humidity, which can make the chocolate melt or the powdered sugar clump.
For longer storage, refrigerate it in a sealed container—up to a week, no problem. If you want to hold it even longer, the freezer is your friend. I double-wrap it in plastic wrap before placing it in a freezer-safe container for up to 3 months. To serve, just let it thaw at room temperature for a few minutes or give it a quick stir if you notice any clumping.
If you like to add a glaze or drizzle on top for extra flair, I recommend doing it right before serving. The moisture can make the powdered sugar coating soggy if stored with the glaze already on. Once topped, a quick chill in the fridge helps set the glaze and keeps everything perfect.
Frequently Asked Questions
Final Thoughts
If you’re looking for a snack that’s easy to whip up, totally customizable, and utterly delicious, puppy chow is the way to go. It’s one of those recipes that feels like a warm hug—comforting, fun, and impossible to resist. I love how it’s perfect for everything from family movie nights to tailgate parties, and trust me, once you make it, you’ll see why everyone falls for that crunchy, chocolatey magic. Whether you keep it classic or add your personal twist, this recipe always gets rave reviews. So grab your ingredients, channel your inner baker, and get ready for the sweetest, crunchiest snack you’ll make all year. Happy baking! And I’d love to hear how yours turns out—drop a comment, share your ideas, or just tell me when you can’t stop nibbling. Enjoy!
Puppy Chow
Ingredients
Main Ingredients
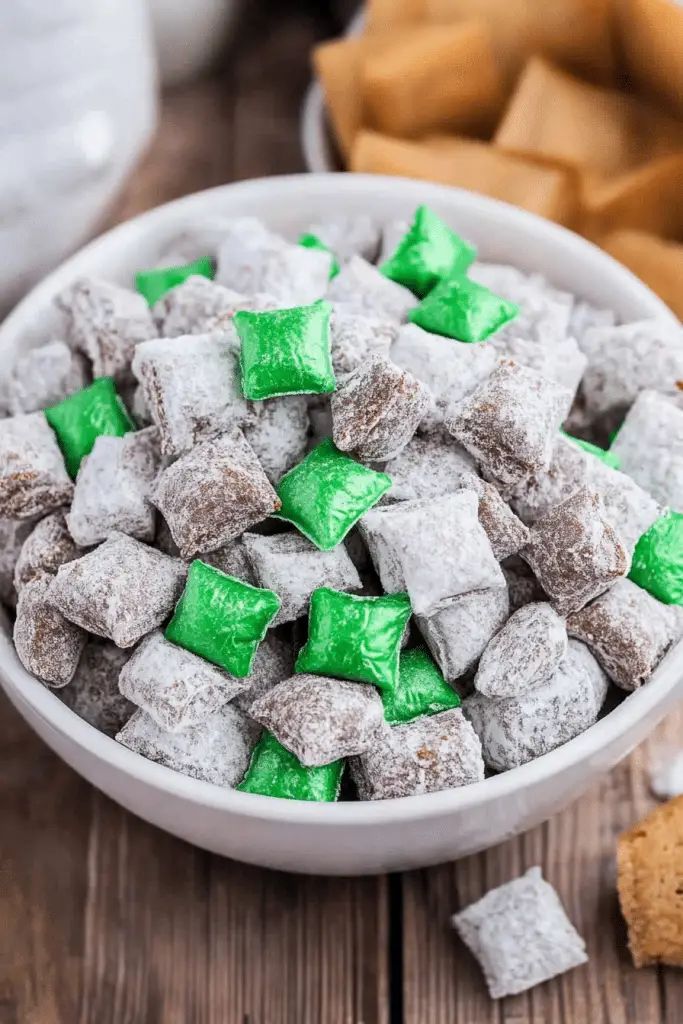
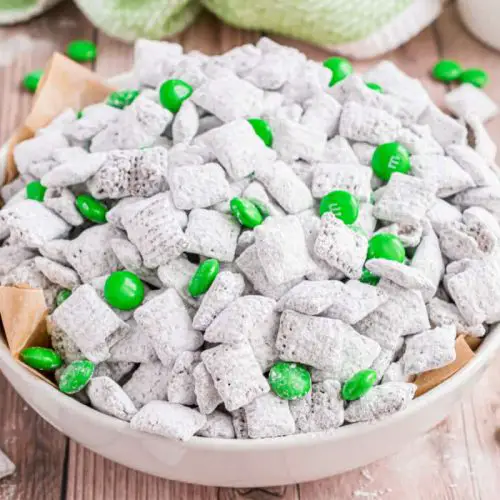
- 16 oz Ghirardelli chocolate wafers
- 0.5 cup chopped Andes mint candy
- 2 cups powdered sugar
- 10 cups Rice Chex cereal
- 8 oz Mint M&M candies
Instructions
Preparation Steps
- In microwave, melt chocolate wafers with mint candy together for one minute, stir and continue melting in 30 second intervals until smooth. Mine took a total of 2 minutes.
- In a large mixing bowl, combine cereal with melted chocolate. Fold with a large wooden spoon until all cereal is coated.
- In a large gallon-sized ziplock bag, add powdered sugar. Spoon in chocolate cereal mixture. Seal bag and shake until powdered sugar coats all the cereal completely. Pour onto a large piece of wax paper and let set for about 20 minutes. Mix in candies with chex and store in an airtight container. Enjoy!
Notes
Featured Comments
“Impressed! Clear steps and restaurant-level results. Perfect for busy nights.”
“New favorite here — restaurant-level. crowd-pleaser was spot on.”
“Super easy and turned out amazing! My family asked for seconds. Saving this one.”
“This sweet treat was absolutely loved — the bright really stands out. Thanks!”
“Made it tonight and wow — super easy! Will definitely make Minty Puppy Chow Recipe: Easy Sweet Treat again.”
“Packed with flavor and so simple. Exactly what I wanted from Minty Puppy Chow Recipe: Easy Sweet Treat.”


