


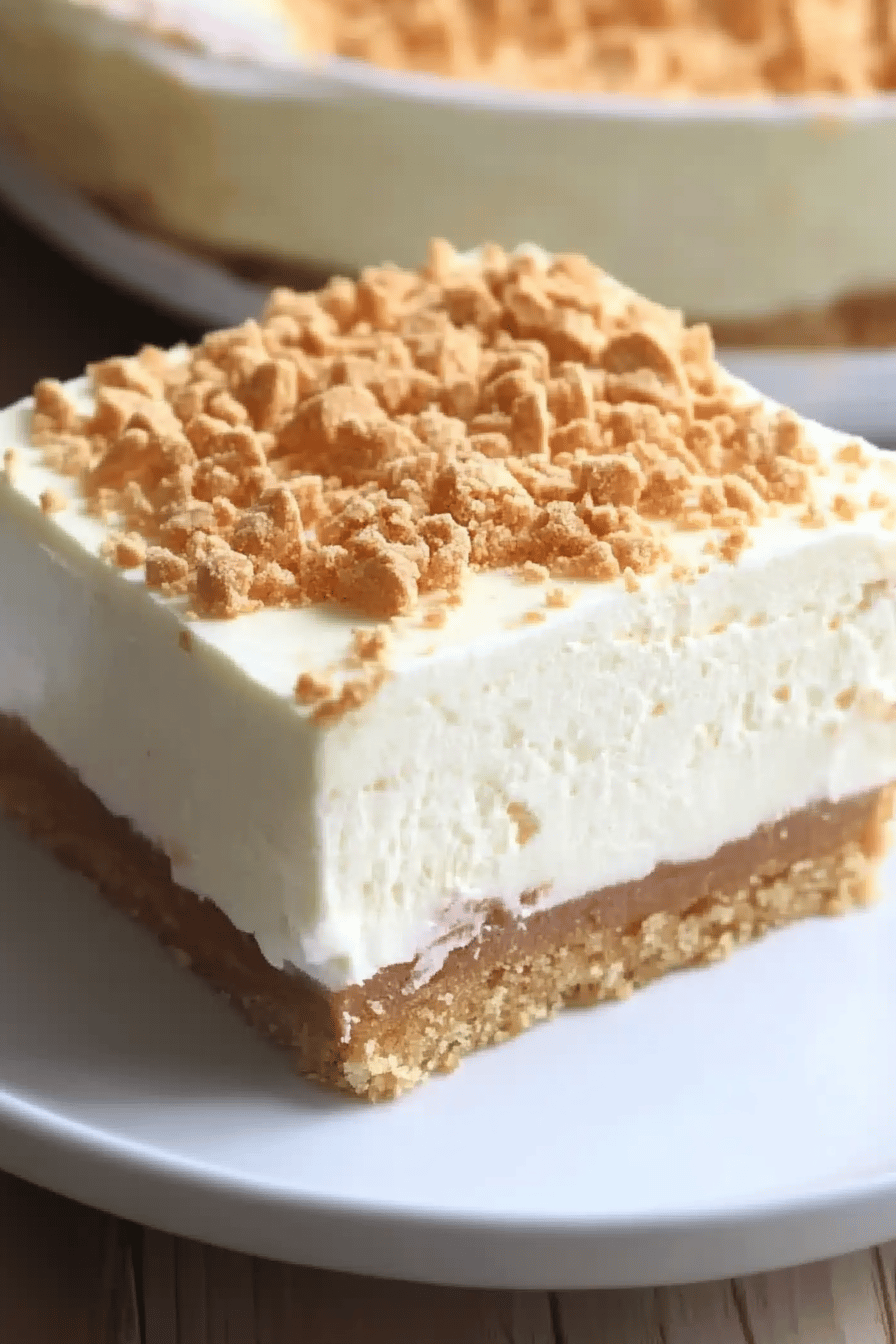
Imagine indulging in a dessert so creamy and delicious that it feels like a guilty pleasure, yet you didn’t spend hours baking in the kitchen. That’s the magic of a no-bake cheesecake, a delightful treat that’s as simple as it is satisfying. This no-bake wonder has been a staple in many households, bringing smiles with every bite. Get ready to learn How to make a dessert that’s perfect for any occasion without even turning on the oven.
When I first learned to make this cake, it was during a summer visit to my grandmother’s house. Her kitchen was always filled with the aroma of fresh ingredients, and her infectious laughter was a melody of its own. We spent many warm afternoons experimenting with flavors, but it was the simplicity and elegance of this particular dish that captured my heart. One taste, and I was hooked—its creamy texture and sweet-tart flavor a perfect representation of summer.
Ingredients Notes
This recipe is all about simplicity, relying on straightforward ingredients you likely already have at home or can easily find in any grocery store. For the base, graham crackers are a traditional choice, but feel free to experiment with different cookies for a unique spin. Cream cheese is the heart of the cake—make sure it’s softened to room temperature for easier mixing. Consider opting for full-fat cream cheese for the richest flavor, though low-fat versions work too if you’re watching calories. The sweetness usually comes from sugar, but honey or powdered sugar are excellent alternatives that dissolve easily without heat. Lastly, don’t forget the Vanilla Extract; it may seem like a small component, but it significantly enhances the overall flavor profile.
Recipe Steps
Step 1
Begin by preparing the crust. Crush the graham crackers into fine crumbs, either by using a food processor or placing them in a sealed bag and rolling over them with a rolling pin. Mix the crumbs with melted butter and a pinch of sugar, ensuring they’re evenly coated. Press the mixture into the bottom of a springform pan, creating an even layer. Place the crust in the refrigerator to set while you prepare the filling.
Step 2
For the creamy filling, combine softened Cream Cheese and granulated sugar in a large mixing bowl. Beat them together using an electric mixer on medium speed until the mixture is smooth and creamy. This step is crucial as it determines the ultimate texture of your cake, so take your time to ensure any lumps are fully beaten out.
Step 3
Next, gently fold in Whipped Cream into the cream cheese mixture. It’s important to fold and not stir vigorously, as you want to keep the whipped cream light and airy to maintain a fluffy texture. If you like a flavor boost, now’s the time to add a splash of vanilla extract or lemon zest for a refreshing twist.
Step 4
Once your filling is ready, pour it over the chilled crust in the pan. Use a spatula to smooth out the top, ensuring a level and even surface. This will not only make the dessert look professional but will help in achieving consistent texture throughout when serving. Place the filled pan in the refrigerator and allow it to set for at least four hours, or until firm. Overnight is preferable for the best consistency.
Step 5
The waiting is the hardest part, but trust me, it’s worth it! Once the cake is fully set, carefully remove it from the pan. Garnish with your choice of fresh berries, chocolate shavings, or a drizzle of caramel sauce to add extra flavor and visual appeal. If preparing for an event, keep the cake refrigerated until ready to serve.
Storage Options
After you’ve served this delightful dessert, you may wonder about leftovers. Surprisingly, this dish stores excellently. Cover any uneaten portions with plastic wrap or transfer them to an airtight container before refrigerating. Properly stored, it will stay fresh for up to a week, making it a great make-ahead dessert for busy weeks. If you’re looking to store it longer, you can freeze the cake. To do so, wrap slices individually in aluminum foil or plastic wrap, then place them in a zip-top bag. When you crave a slice, just let it thaw in the fridge for a couple of hours, and it’s ready to indulge.
Variations & Substitutions
The beauty of this recipe lives in its versatility. For a lighter version, consider substituting full-fat Cream Cheese with a light one or use Greek yogurt for a tangy twist. If you’re seeking to make it dairy-free, there are numerous plant-based cream cheese brands available, making it an inclusive dessert.To add a different dimension, try incorporating flavored extracts, such as almond or coconut. You can also mix in melted chocolate or puréed fruit to the filling for a marbled effect. Play with the crust by using other types of cookies or even gluten-free options to cater to dietary preferences without compromising taste and texture.
Serving Suggestions
This dessert shines no matter when or where you serve it. It’s an impressive cake fit for birthdays, holidays, and festive gatherings. Pair it with a glass of bubbly for a holiday party, or enjoy it with a cup of coffee after Sunday dinner. In warmer months, it makes an elegant picnic dessert, perfectly complementing savory dishes. When serving guests, you can top each slice with a spoonful of fresh fruit compote or a light dusting of powdered sugar to add an elegant finishing touch.
Frequently Asked Questions
Can I make this dessert ahead of time? Absolutely! This cheesecake is perfect for prepping in advance as the flavors meld together with time, making it even more flavorful the next day. Just wrap it securely and ensure it stays refrigerated to maintain its freshness.
What if my cheesecake doesn’t set properly? The key to a well-set dessert lies in the chilling time. Ensure it has been chilled for at least four hours, or ideally, overnight. If you’re still having trouble, double-check that you have used full-fat cream cheese, as it’s firmer and thicker than the low-fat versions.
Is it okay to use a non-dairy alternative? Yes, substituting dairy ingredients with vegan-friendly options is a common tweak. There are great plant-based cream cheese and whipped toppings available that mimic the flavor and texture of traditional choices, making it perfect for those with lactose intolerances or dietary restrictions.
How should I cut the cheesecake neatly? Use a sharp knife warmed under hot water and wiped dry before slicing through this dessert. This will result in cleaner cuts. Repeat the process—warming the knife in hot water and drying—between each slice to maintain a neat presentation.
Can I personalize the toppings? By all means, use toppings to personalize it according to your taste preferences or the season. Fresh berries, edible flowers, or nuts work wonderfully. Let your creativity guide you to create a truly signature dessert!
No-Bake Cheesecake
Ingredients
Main Ingredients
- 1.5 cups graham cracker crumbs crushed finely
- 0.5 cups butter melted
- 16 oz cream cheese softened
- 1 cup sugar
- 1 tsp vanilla extract
- 1 cup heavy cream whipped
Instructions
Preparation Steps
- Mix the graham cracker crumbs and melted butter. Press this mixture into the bottom of a springform pan to form the crust.
- In a large bowl, beat the cream cheese, sugar, and vanilla extract until smooth.
- Fold the whipped cream into the cream cheese mixture gently until well combined.
- Spread the filling over the crust in the springform pan and smooth the top.
- Refrigerate for at least 4 hours or until set. Serve cold.
Notes
Featured Comments
“I just made this cheesecake and it’s seriously incredible—so rich and smooth, no oven needed! Perfect for lazy dessert cravings.”
“Impressed! Clear steps and creamy results. Perfect for busy nights.”
“New favorite here — absolutely loved. crowd-pleaser was spot on.”
“Super easy and turned out amazing! My family asked for seconds. Saving this one.”
“This sweet treat was absolutely loved — the cozy really stands out. Thanks!”
“Made it tonight and wow — so flavorful! Will definitely make No-Bake Classic Woolworth Cheesecake: 7 Steps to Indulge! again.”


I just made this cheesecake and it’s seriously incredible—so rich and smooth, no oven needed! Perfect for lazy dessert cravings.