

Like all great family traditions, this one starts with a mug of coffee, a flour-dusted counter, and the comforting scent of something truly cozy filling the house. I always come back to these oatmeal cookies when I want something that feels wholesome but utterly indulgent at the same time. They’re not just cookies; they’re little memories baked into a chewy, caramel-tlecked bite. Think of them as the kinder, heartier cousin to classic Chocolate Chip Cookies: not as sweet, with a warm toasty edge from the oats, and a texture that stays soft and springy even after a night in a tin. This particular version is a two-in-one dream: chewy oatmeal cookies stuffed with a creamy vanilla filling and finished with a light glaze. It’s a favorite for weekend baking, after-school treats, or a playful dessert to share with friends over coffee. I’ve learned a trick or two along the way, like how chilling the dough tightens those edges just enough to hold their shape, and how a pinch of cinnamon makes the oats sing. Trust me, you’ll reach for this recipe again and again.
What is Oatmeal Cookies?
oatmeal cookies are the cozy, rustic cousins of the traditional cookie line-up. They rely on rolled oats for chew, a touch of flour to bind, brown sugar for that caramel-kissed sweetness, and butter to bring everything together in a soft, tender crumb. The name itself screams comfort: oats are the star, making each bite a little heartier and more substantial than a plain sugar cookie. In my kitchen, they’re often a way to sneak a little extra fiber into a treat without feeling like you’re sacrificing flavor. This recipe leans into that comforting vibe but pops in a playful twist—a creamy filling that turns them into sandwich cookies, plus a glaze for a glossy finish. It’s essentially a simple batter plus a fluffy filling and a sparkle of glaze—perfect for bakers who love a little project with big payoff. The result is a treat that’s indulgent without tipping into dessert-for-drowning-sorrows territory. It tastes like Sunday morning in cookie form, and that’s exactly what I’m after whenever I bake these.
How do I make Oatmeal Cookies?
Quick Overview
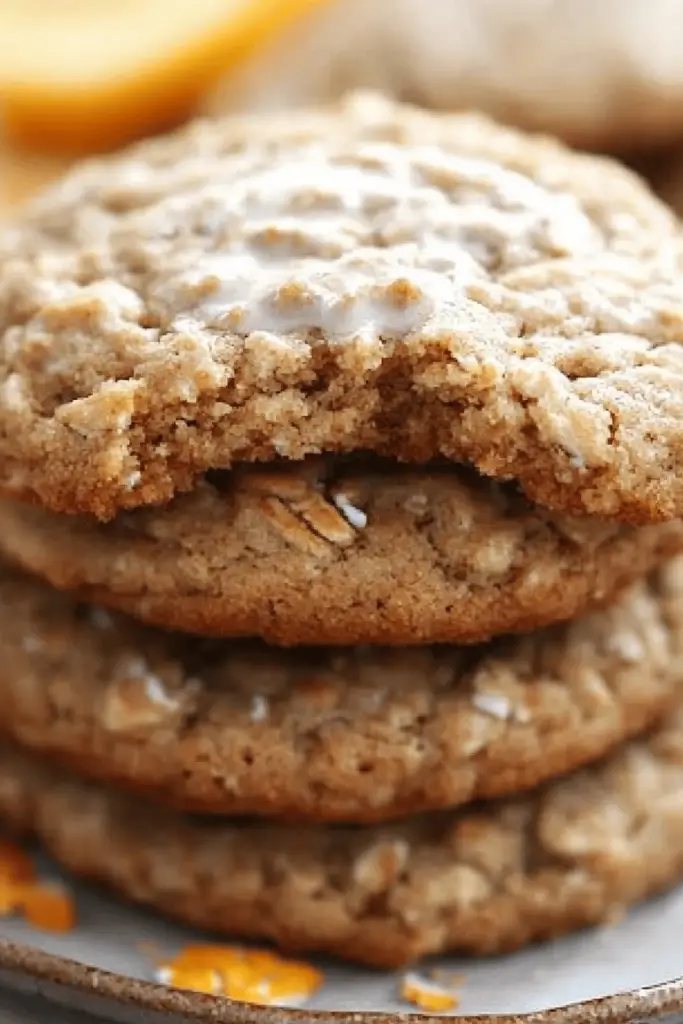
This version is a classic two-in-one: chewy oatmeal cookies with a creamy vanilla filling that turns them into sandwich cookies, finished with a light glaze for a glossy touch. The method is straightforward: make a hearty oat-based batter, whip up a tangy-sweet filling, bake the cookies to just-crackle around the edges, then pair and fill. It’s forgiving, which is perfect for bakers who want to improvise with mix-ins. If you’re pressed for time, you can bake the cookies in advance and assemble later; the filling and glaze can be made while the cookies cool. Trust me, this combo is a lifesaver on busy nights or when friends drop by unannounced — you’ll have something fancy enough to serve with coffee but simple enough to whip up in a pinch.
Ingredients
For the Main Batter:
– 1 cup unsalted butter, softened to room temperature
– 1 cup brown sugar, packed
– 1/2 cup granulated sugar
– 2 large eggs
– 2 teaspoons Vanilla Extract
– 1 1/2 cups old-fashioned rolled oats
– 1 cup all-purpose flour
– 1/2 teaspoon baking soda
– 1/2 teaspoon ground cinnamon (optional but recommended)
– 1/4 teaspoon salt
– 1 cup chocolate chips or raisins or a mix-ins of your choice (optional)
For the Filling:
– 8 ounces cream cheese, softened
– 1/4 cup unsalted butter, softened
– 1 cup powdered sugar, sifted
– 1 teaspoon vanilla extract
– Pinch of salt
For the Glaze:
– 1 cup powdered sugar
– 2–3 tablespoons milk or dairy-free milk (adjust for drizzling consistency)
– 1/2 teaspoon vanilla extract or maple extract
– Optional: 1 tablespoon cocoa powder for a chocolate glaze or a splash of lemon juice for brightness
Step-by-Step Instructions
Step 1: Preheat & Prep Pan
Heat your oven to 350°F (175°C). Line two baking sheets with parchment or silicone mats. A clean sheet means cookies that bake evenly and don’t spread into a greasy mess. If you’re new to this, give the sheets a quick wipe between batches to keep them from sticking.
Step 2: Mix Dry Ingredients
In a medium bowl, whisk together the flour, oats, baking soda, cinnamon, and salt. Distribute the oats evenly so every bite has that chewy bite; if you’re using mix-ins, toss them with the dry ingredients so they don’t sink to the bottom.
Step 3: Mix Wet Ingredients
In a large bowl, beat the butter and sugars until pale and fluffy, about 2–3 minutes. Beat in eggs one at a time, then add vanilla. If your butter is too soft, your cookies may spread; a cooler room gives you a thicker, chewy center.
Step 4: Combine
Fold the dry ingredients into the wet just until barely combined. A few floury streaks are fine—overmixing will toughen the dough. If it seems dry, add a tablespoon or two of milk to bring it together.
Step 5: Prepare Filling
While the batter rests, beat together the cream cheese and butter until smooth. Add powdered sugar, vanilla, and salt; beat until creamy and light. If you’re not filling right away, refrigerate the filling to keep it stable; bring it back to room temp before piping.
Step 6: Layer & Swirl
Scoop the batter onto the prepared sheets, spacing about 2 inches apart. Bake until the edges are set and lightly browned, about 10–12 minutes. Let the cookies rest on the sheet for 5 minutes before transferring to a rack. Once cool, pipe or spread a generous amount of filling on the flat side of a cookie, then sandwich with another cookie. If you want a pretty swirl on top, pipe a thin ring of filling around the edge and drizzle glaze in a circular pattern toward the center.
Step 7: Bake
Bake one sheet at a time, rotating halfway if your oven favors one side. Bake time can vary slightly with size and oven temperament; you’re aiming for centers that look just set but still soft. For extra-chewy centers, pull them as soon as the edges turn golden and the centers are barely set.
Step 8: Cool & Glaze
Let cookies cool completely before glazing. Whisk the glaze ingredients until smooth for a pourable, not-too-runny consistency. Drizzle or spread a thin layer over one side of each sandwich, then let the glaze set for a few minutes before stacking. A chocolate glaze delivers a glossy finish, while a vanilla glaze keeps things classic and bright.
Step 9: Slice & Serve
Once glazed, give the cookies a few minutes to set, then pair and press into sandwiches. Slice them in half if you want the clean, elegant presentation. These oatmeal cookies stay soft and flavorful for about three days in an airtight container. If you’re stacking them for a party, keep the assembled sandwiches unglazed until just before serving for the freshest texture.
What to Serve It With
These oatmeal cookies are versatile enough to shine at a number of moments. Here are a few of my favorite ways to enjoy them and some little rituals that make them extra special.
For Breakfast: A strong coffee or a creamy latte, and maybe a small bowl of yogurt with a sprinkle of extra oats. The cookies’ warmth pairs beautifully with cold milk or a frothy cappuccino. The smell of toffeeish butter and cinnamon makes mornings feel like a tiny celebration.
For Brunch: Serve a couple on a dessert plate with fresh berries and a dollop of whipped cream. A light maple drizzle and a sprinkle of citrus zest can elevate them for a more formal brunch vibe.
As Dessert: A warm cookie with a scoop of vanilla ice cream and a quick berry compote on the side feels like a little personal “chef’s kiss.” The filling adds a little tang and creaminess that contrasts nicely with the cookie’s chewy bite.
For Cozy Snacks: On a rainy afternoon, they’re perfect with tea or hot chocolate. My kids love breaking apart the sandwich to discover the creamy center, and I love watching their eyes light up when they bite through the glaze’s glossy surface. It’s a small moment, but it’s just enough sweetness to make the day feel kind.
Top Tips for Perfecting Your Oatmeal Cookies
Here are a few hard-won tricks that keep this recipe reliable and downright satisfying.
Oats Prep: Old-fashioned oats give the best chew. Toast them lightly in a dry skillet for 2–3 minutes until they smell nutty. This elevates their flavor and keeps them from tasting bland. If you’re adding dried fruit, pat it dry so it won’t shed moisture into the dough.
Mixing Advice: Cream butter and sugars until pale and fluffy, then add eggs one at a time. Don’t overmix after the flour goes in—the gluten development will make the cookies tougher. A quick chill of 20–30 minutes helps the dough stay manageable and enhances shape, especially if you’re piping the filling or layering cookies.
Swirl Customization: If you want a pretty top, sprinkle a few extra oats or chips in a swirl pattern before baking. For color, tint a portion of the glaze with a drop of food-safe coloring and swirl lightly for a playful look that still reads as homemade.
Ingredient Swaps: For a deeper flavor, substitute half the flour with whole-wheat or spelt flour. To make this vegan, use vegan butter and plant-based cream cheese for the filling. Chopped nuts or seeds add crunch and nutrition without compromising texture.
Baking Tips: Oven temperature varies; check around minute 9–10 and rotate your sheet if your oven is uneven. For chewy cookies, pull them when just set and slightly soft in the center. If you prefer crisper edges, bake a few minutes longer and let them rest on the sheet to dry out a touch.
Glaze Variations: A lemon glaze brightens things up, maple glaze adds warmth, and chocolate glaze is pure indulgence. If the glaze is too thick, whisk in a splash more milk; if too thin, add a touch more sugar. A light drizzle is all you need to finish.
[Lessons learned from years of baking, and tweaks I keep coming back to—these little adjustments have saved me more times than I can count.]
Storing and Reheating Tips
Let’s keep these beauties fresh and tasty for as long as possible.
Room Temperature: Store baked cookies in an airtight container for up to 3–4 days. If you’re layering sandwiches, keep the filling separate until ready to serve to prevent sogginess. Dough can be chilled for up to 3 days if you want to bake in batches.
Refrigerator Storage: Baked cookies last about a week in the fridge. Use airtight containers and consider adding a slice of bread to absorb moisture, which helps keep texture. Filling can be stored separately up to 5 days; bring to room temp before use.
Freezer Instructions: Freeze unbaked dough balls up to 3 months; bake from frozen, adding 2–3 minutes to the bake time. Baked cookies freeze well for 2–3 months. Assemble sandwiches after thawing for the freshest texture, or freeze them already assembled and glaze when you’re ready to serve.
Glaze Timing Advice: Glaze best when cookies are completely cooled. If freezing, glaze after thawing to maintain gloss and brightness. For longer storage, a touch of corn syrup in the glaze can help keep it glossy, but skip it if you want a quick-drying finish.
Frequently Asked Questions
Final Thoughts
Oatmeal cookies have carved a warm, timeless space in my kitchen. They’re simple enough to whip up on a weeknight, yet special enough to feel like a gift when you share them with friends. I love the way the oats lend a hearty bite, the filling adds a playful indulgence, and the glaze gives a glossy finishing touch that makes the whole plate feel a little more festive. If you’re looking for a comforting bake that travels well and satisfies both kids and grown-ups, these are your go-to. I’m always experimenting with add-ins, from crisp apple bits to dark chocolate nibs, and I’d love to hear what you swap in to make them your own. Drop a comment below with your favorite mix-ins or glaze flavor—I’ll be cheering you on from my kitchen. Happy baking, friend, and may your kitchen always smell like warm cookies and good company!

oatmeal cookies
Ingredients
Main Ingredients
- 1 cup unsalted butter softened
- 1 cup packed brown sugar
- 0.5 cup granulated sugar
- 2 large eggs
- 1 teaspoon vanilla extract
- 1.5 cup all-purpose flour
- 1 teaspoon baking soda
- 0.5 teaspoon salt
- 3 cup rolled oats
- 1 cup chocolate chips optional
Instructions
Preparation Steps
- Preheat your oven to 350°F (175°C). Line baking sheets with parchment paper.
- In a large bowl, cream together the softened butter, brown sugar, and granulated sugar until light and fluffy.1 cup unsalted butter
- Beat in the eggs one at a time, then stir in the vanilla extract.1 cup unsalted butter
- In a separate medium bowl, whisk together the flour, baking soda, and salt.1 cup unsalted butter
- Gradually add the dry ingredients to the wet ingredients, mixing until just combined.1 cup unsalted butter
- Stir in the rolled oats and chocolate chips (if using).1 cup unsalted butter
- Drop rounded tablespoons of dough onto the prepared baking sheets.
- Bake for 10-12 minutes, or until the edges are golden brown and the centers are still slightly soft.
- Let the cookies cool on the baking sheets for a few minutes before transferring them to a wire rack to cool completely.
Notes
Featured Comments
“I love how this tradition feels so warm and familiar—like a hug in cookie form!”
“Love this recipe—the cozy kitchen vibes and coffee setup sound perfect for a weekend treat!”
“Impressed! Clear steps and super easy results. Perfect for busy nights.”
“New favorite here — spot on. crowd-pleaser was spot on.”
“Super easy and turned out amazing! My family asked for seconds. Saving this one.”
“This sweet treat was absolutely loved — the buttery really stands out. Thanks!”


Love this recipe—the cozy kitchen vibes and coffee setup sound perfect for a weekend treat!
I love how this tradition feels so warm and familiar—like a hug in cookie form!