

What is fudge? What’s the best old-fashioned fudge recipe you’ve ever had? Your grandma’s kitchen, the kind where the rich, chocolatey aroma fills every corner of the house. What makes your mouth water before you even see it? What is the kind of thing that’s infinitely better than anything you can buy at the store? Think of it as the chocolate equivalent of a warm hug on chilly days. What is better than a perfect Chocolate Chip Cookie? My memories of making fudge are always surrounded by loved ones and full of laughter. Doesn’t get any better!
What is Old Fashioned Fudge?
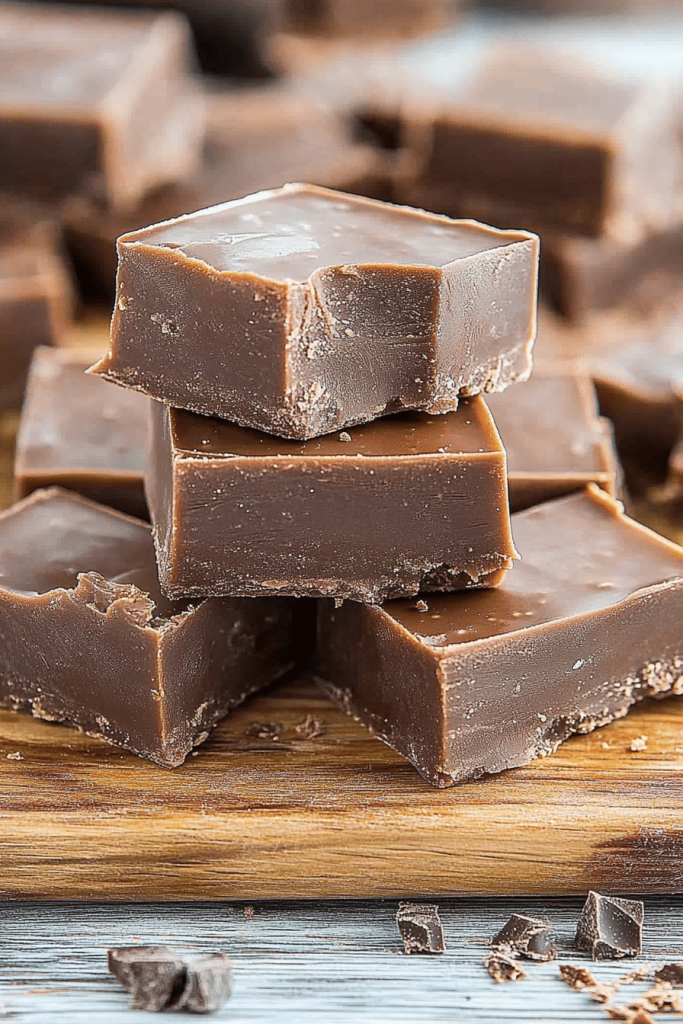
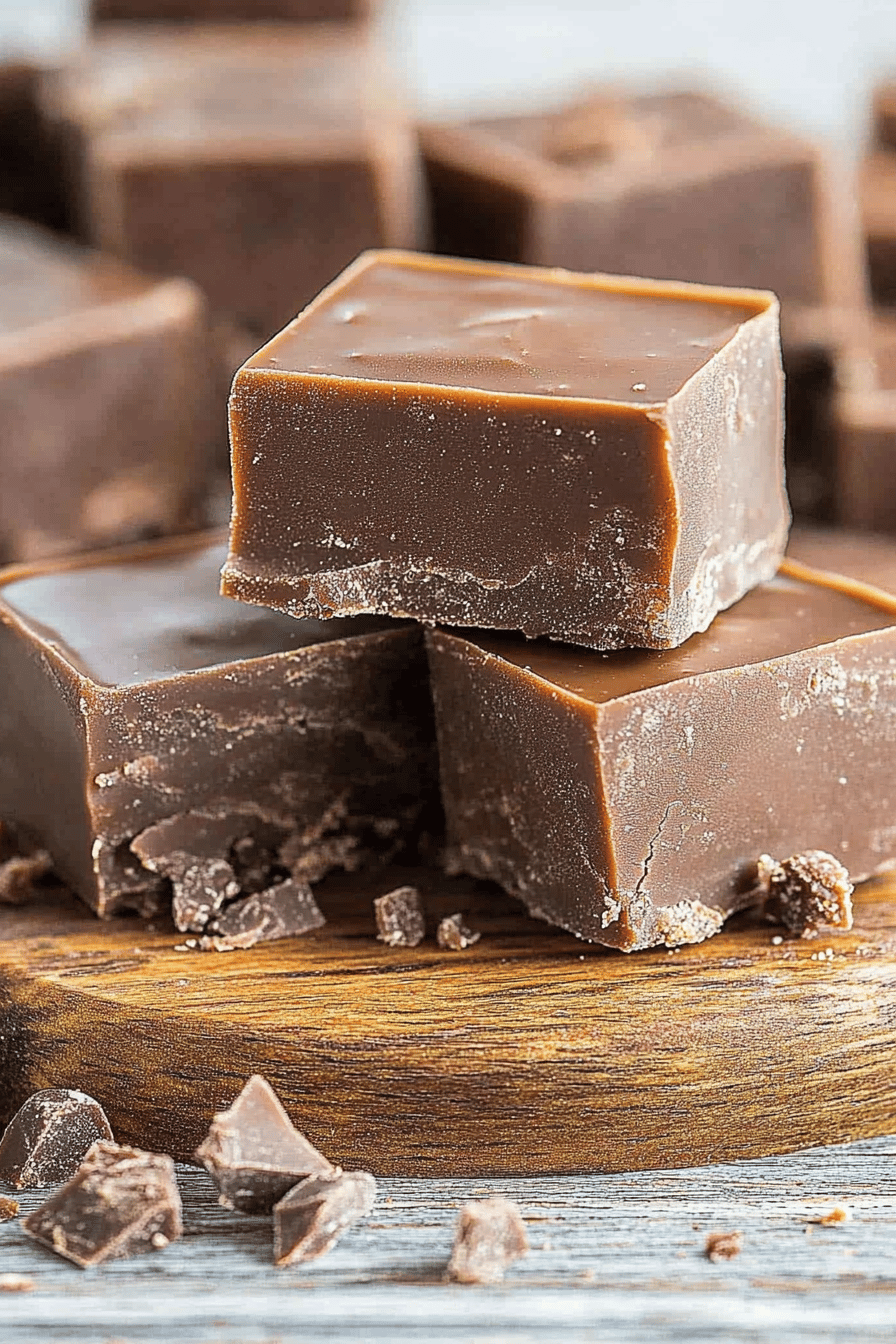
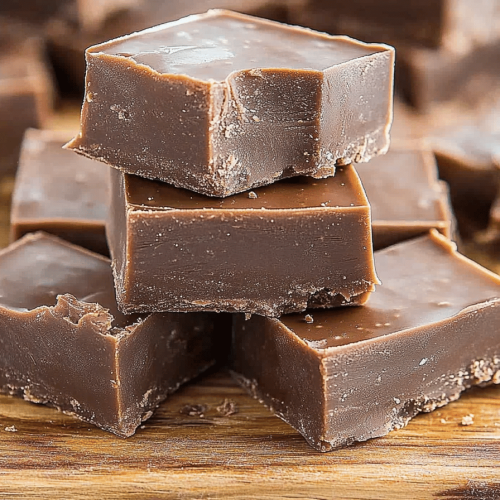
Old-fashioned fudge isn’t just candy; it’s a piece of history. What is a confection made of sugar, butter, milk and cream? ), and chocolate, cooked to a precise temperature and then beaten until it achieves that perfect, golden brown color. What is a creamy The texture, that’s the key! Think of it as a denser, richer cousin to chocolate fondant, but with an uniquely grainy (in the best way) texture. ), melt-in-your- The name “fudge” is thought to have originated from a batch of caramels that failed or failed, but it is not known. What is the best thing about this recipe? Is it more than just a sweet treat? What is a connection to the past? Is it the taste of holidays with family and the magic of a sweet treat?
How do I make old-fashioned fudge?
Quick Overview
How do I make this fudge? What is the best way to cook the ingredients to the right temperature, then beat the mixture until it thickens. Is it possible to lose gloss? I know it sounds intimidating, but trust me, it’s not as hard as it seems. Once you have mastered the technique for this **old-fashioned fudge recipe**, you will have the recipe. Secret weapon of every holiday season! I know you will love this fudgy classic.
Ingredients
For the Fudge:
- 2 cups granulated sugar: Good ol’ white sugar! Don’t substitute this one.
- 1 cup (2 sticks) unsalted butter: I always use high-quality butter for the best flavor. What is the best European butter?
- 2/3 cup whole milk: Full fat is the way to go. It makes for a creamier fudge. I’ve tried it with almond milk, and it worked surprisingly well in a pinch!
- 1/4 teaspoon salt: Balances the sweetness.
- I prefer 70% cacao. I’ve never had a dark chocolate before.
- 1 teaspoon vanilla extract: Pure Vanilla extract is essential for that classic fudge flavor. Imitation just won’t cut it here.
- What is my secret weapon? 1 cup marshmallow creme.. Is there a creaminess to this cream?
Optional Mix-In
- 1 cup chopped nuts (walnuts, pecans or almonds): 1 tsp. How do you toast nuts?
- 1/2 cup dried cranberries: Adds a touch of tartness that complements the chocolate.

How do I follow step
Step 1: Prep Your Pan
Line an 8×8 inch square pan with parchment paper, leaving some overhang on the sides. This will make it super easy to remove the fudge later. Trust me, this is a step you don’t want to skip! And I always give it a light spritz with cooking spray too to make SURE it comes out easily. My fudge pan is a well-loved piece of equipment in my kitchen!
Step 2: Combine Ingredients in a Heavy-Bottomed Saucepan.
In a heavy bottomed saucepan, combine the sugar, butter, milk, and salt. Stir well. The heavy-bottomed pan is important to prevent scorching. It really makes a difference! I learned this the hard way by ruining a perfectly good batch of fudge because of the wrong pan. I use my dutch oven for this **old-fashioned fudge recipe**. I’ve never had an easier time making fudge!
Step 3: Cook to the Soft-Ball Stage
Cook over medium heat, stirring constantly, until the sugar is dissolved and the mixture comes to a boil. When boiling, stop stirring and insert a candy thermometer. Cook until the mixture reaches the soft-ball stage (235-240°F or 112-115°C). This is the most crucial step! If you don’t have a candy thermometer, you can test for the soft-ball stage by dropping small balls. How much of the mixture should I put into a bowl of cold water? Is it necessary to form a soft ball? I always double check with the water test even when I use my thermometer, just to be sure.
Step 4: Remove From Heat
Remove the saucepan from the heat and add the chopped chocolate and Vanilla Extract. Let it sit for a minute or two to allow the chocolate to melt, then stir until smooth and glossy. I always chop the chocolate very finely to help it melt quickly. How do you make a smooth fudge?
Step 5: Add Marshmallow Creme and Mix-Ins (Optional) (optional) to
Stir in the marshmallow creme until fully incorporated. If using dried cranberries, add them now and stir to combine. I find that using a silicone spatula helps to mix everything together evenly. If you’re using dried cranberries, try soaking them in warm water for a few minutes beforehand to prevent them from sticking to your skin.
Step 6: Beat Until Thickened
Where does magic happen? With a wooden spoon or stand mixer, beat the fudge mixture until it thickens and loses its gloss. This can take anywhere from 5-10 minutes. When a flower starts to lose its shine and becomes difficult to stir, you’ll know it’s ready. I always set a timer to make sure I beat it for the right amount of time.
Step 7: Pour Into Prepared Pan
Quickly pour the fudge mixture into the prepared pan and spread it evenly. Work fast, because the fudge will start to set up quickly. I use an offset spatula to smooth the top. This is also your chance to add any decorations like sea salt or sprinkles.
Step 8: Chill Until Firm
Refrigerate the fudge for at least 2 hours, or until it is firm. I usually let it chill overnight for the best results. If you’re in a hurry, you can pop it in the freezer for about an hour, but be careful not to freeze.
Step 9: Cut and Serve
Once the fudge is firm, lift it out of the pan using the parchment paper overhang. Cut it into squares and serve. Can you store leftovers in an airtight container at room temperature? I like to use a warm knife for cutting clean, even squares. What makes a difference in presentation?
What should I serve it with?
What are some of the best old-fashioned fudge recipes? When it comes to pairings. What are some of my favorite ways to enjoy it?
What are some of the Best Holiday desserts?Cut the fudge into small squares and arrange it on a dessert platter along with other holiday treats. What are some of the best candied nuts, peppermint bark and cookies? How does it add a touch of elegance to any holiday spread? I like to serve fudge with hot chocolate.
As a Thoughtful Homemade Gift:Package the fudge in a decorative tin or box and give it as an gift to friends, family, or coworkers. What is the best way to show someone you care? I always include a handwritten note with the recipe, so they can make it themselves! A little bit of love goes a long way!
For a Cozy Night In:What is better fudge with hot coffee? The rich chocolate flavor pairs perfectly with the warmth of the beverage, creating a comforting and refreshing experience. What a satisfying treat I like to crumble a little fudge over Ice Cream for an extra-indulgent treat. I love it!
To Brighten a Regular Weekday:Sometimes, you just need a little something to get through the day. What’s a good pick-me-up? I keep a stash in the refrigerator for those moments when I need ‘a little bit of joy’! What is your favorite old-fashioned fudge recipe?
How do I make a good old-fashioned fudge?
I’ve learned a few tricks that can make all the difference when it comes to making money. How do you make old-fashioned fudge? How do I achieve fudge perfection?
Use a Heavy-Bottomed Saucepan:
This is crucial for preventing the fudge from scorching. A heavy-bottomed saucepan distributes heat evenly and helps to ensure that the fudge cooks properly.
Stir Constantly at First:
Stirring constantly until the sugar is dissolved helps to prevent it from crystallizing. Once the mixture comes to a boil, stop stirring and let the candy thermometer do its job.
Monitor the Temperature Carefully:
The soft-ball stage is key to achieving the perfect fudge texture. If the mixture doesn’t reach the soft-ball stage, the fudge may be too soft. And if it goes beyond, you could end up with the fudge becoming too hard or grainy. It is important that the temperature is right!
Don’t Skip the Beating Step:
Beating the fudge until it thickens and loses its gloss is essential for creating that creamy, melt-in-your-mouth texture. I sometimes use my stand mixer, but a wooden spoon works just as well.
Work Quickly:
Once you start beating the fudge, it will start to set up quickly. Have your prepared pan ready to go, so you can pour the fudge in and spread it evenly before it becomes too stiff.
Add a Pinch of Sea Salt:
A sprinkle of sea salt on top of the fudge adds a touch of sophistication and enhances the chocolate flavor. It’s a simple way to elevate the presentation. This is my favorite addition!
Let It Chill Completely:
Resist the temptation to cut into the fudge before it has fully chilled. Letting it chill completely allows it to firm up properly and makes it easier to cut into clean squares.
Customize With Your Favorite Mix-Ins:
Don’t be afraid to experiment with different mix-ins! Nuts, dried fruit, Peanut Butter swirls, and even a touch of spice can add a unique twist to your fudge. Get creative and have fun with it!
Storing and Reheating Tips
To keep this **old-fashioned fudge recipe** tasting its best, here are some Tips for storing and reheating:
Room Temperature:
Store the fudge in an airtight container at room temperature for up to a week. Keep it away from direct sunlight or heat, as this can cause it to melt. I like to line the container with parchment paper to prevent the fudge from sticking.
Refrigerator Storage:
For longer storage, keep the fudge in an airtight container in the refrigerator for up to two weeks. Let it come to room temperature before serving for the best flavor and texture. This is great if it is warmer where you live!
Freezer Instructions:
To freeze the fudge, wrap it tightly in plastic wrap and then place it in a freezer-safe bag or container. It can be stored in the freezer for up to two months. Thaw it in the refrigerator overnight before serving. This can be a great make-ahead treat for the holidays!
Frequently Asked Questions
Final Thoughts
So there you have it – my family’s favorite **old-fashioned fudge recipe**! This isn’t just a dessert, it’s an experience. From the rich aroma that fills your kitchen to the satisfyingly sweet and creamy texture that melts in your mouth, this fudge is a true indulgence. And while it might seem a little intimidating at first, trust me, it’s easier than you think, and the results are well worth the effort. If you loved this recipe, I know you’ll also enjoy my classic Peanut Butter Fudge recipe or my decadent chocolate truffle recipe. These are all perfect for sharing with loved ones or enjoying all by yourself on a cozy night in. Happy baking! I can’t wait to hear how your fudge turns out. Share your variations and photos in the comments below, and don’t forget to rate the recipe if you loved it!
Old-Fashioned Fudge Recipe: 7 Steps to Creamy Perfection!
Ingredients
Main Ingredients
- 3 cups Granulated Sugar
- 0.75 cup Unsweetened Cocoa Powder
- 1.5 cups Whole Milk
- 0.5 cup Unsalted Butter Cut into pieces
- 0.25 teaspoon Salt
- 1 teaspoon Vanilla Extract
Instructions
Preparation Steps
- In a heavy-bottomed saucepan, combine sugar, cocoa powder, milk, butter, and salt.
- Cook over medium heat, stirring constantly, until the mixture comes to a rolling boil.
- Continue to cook, without stirring, until a candy thermometer reaches 234°F (soft-ball stage).
- Remove from heat and add vanilla extract. Do not stir.
- Let the mixture cool undisturbed for about 5 minutes.
- Using a wooden spoon, beat the mixture vigorously until it thickens and loses its glossy sheen. This may take several minutes.
- Quickly pour the fudge into a buttered 8x8 inch pan. Let it cool completely before cutting into squares.
Notes
Featured Comments
“Impressed! Clear steps and comforting results. Perfect for busy nights.”
“New favorite here — perfect for busy nights. crowd-pleaser was spot on.”
“Super easy and turned out amazing! My family asked for seconds. Saving this one.”
“This sweet treat was absolutely loved — the cozy really stands out. Thanks!”
“Made it tonight and wow — crowd-pleaser! Will definitely make Old-Fashioned Fudge Recipe: 7 Steps to Creamy Perfection! again.”
“Packed with flavor and so simple. Exactly what I wanted from Old-Fashioned Fudge Recipe: 7 Steps to Creamy Perfection!.”


