Oh, you are going to LOVE this. Seriously, I’ve been wanting to share my Oreo earthquake Cake Recipe with you for ages. It’s one of those recipes that’s become a total staple in my house, especially when I need a guaranteed crowd-pleaser that doesn’t require me to be a master baker. You know those nights when you’re just craving something decadent, something that feels a little bit special, but you also want to get it in the oven without a fuss? This is your answer. It’s similar to a rich chocolate cake, but with this incredible surprise texture and that unmistakable Oreo magic swirled throughout. My kids practically inhale it, and honestly, so do I. It’s just pure, unadulterated comfort in every single bite.
What is an Oreo Earthquake Cake?
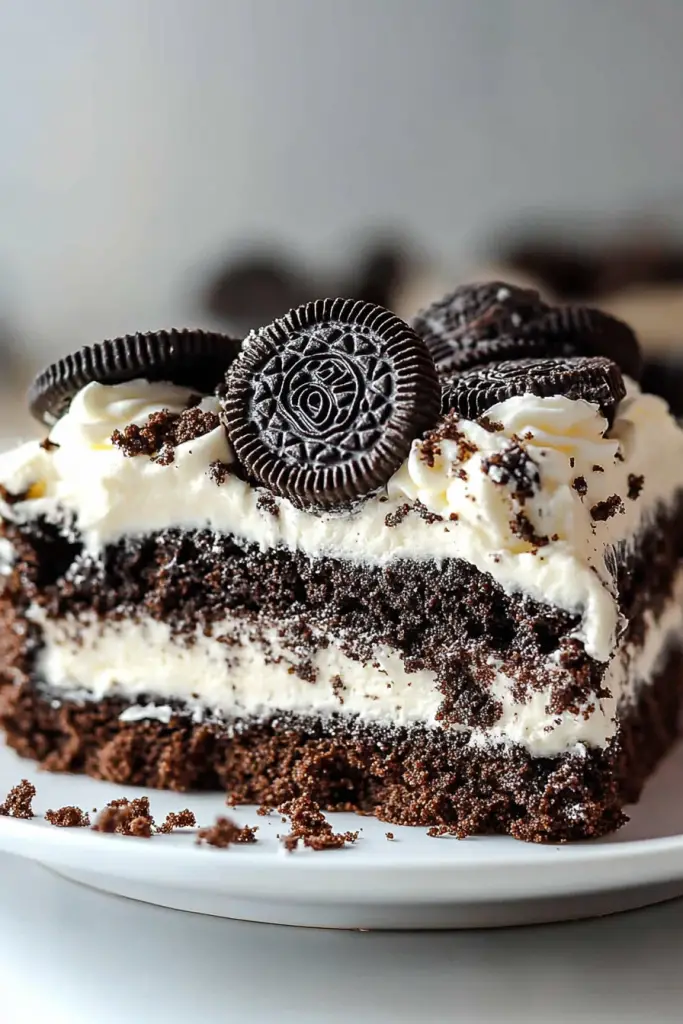
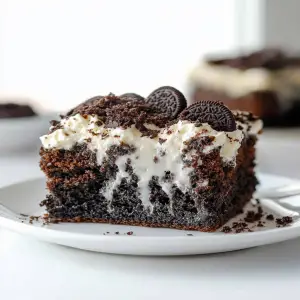
So, what exactly is this “Oreo earthquake cake” I’m raving about? Think of it as the most delicious geological event to ever happen in your kitchen! It’s essentially a deeply moist, fudgy chocolate cake base that gets an amazing “earthquake” effect from chunks of Oreos and a gooey chocolatey filling baked right into it. The name comes from the way the Oreos and the filling sort of… erupt and swirl through the cake batter as it bakes, creating these pockets of intense chocolatey goodness and delightful cookie bits. It’s not a perfectly smooth cake; it’s meant to be a little rustic, a little wild, and utterly spectacular. It’s less about precise technique and more about pure, unadulterated flavor that just happens to look stunning with its marbled effect.
How do you make an Oreo Earthquake Cake?
Quick Overview
Making this Oreo earthquake cake is surprisingly straightforward. You’ll mix up a simple, moist chocolate cake batter, prepare a quick, luscious chocolate filling, and then layer it all together with crushed Oreos. The magic happens in the oven as these elements swirl and bake into a spectacular, marbled masterpiece. It’s the perfect balance of effort and reward, delivering an impressive dessert with minimal stress. You’ll be amazed at how professional it looks and tastes, all without a hitch.
Ingredients
For the Main Batter:
You’ll need all-purpose flour – about 2 cups should do the trick. I always sift mine, just to ensure a lighter texture, though if you’re in a rush, it’s not the end of the world. Granulated sugar for sweetness, around 1 ¾ cups. Unsweetened cocoa powder is essential for that deep chocolate flavor – ½ cup of a good quality one makes a huge difference. Baking soda and baking powder for leavening, usually 1 ½ teaspoons and 1 teaspoon respectively. Don’t forget a pinch of salt to balance everything out, about ½ teaspoon. For the wet ingredients, you’ll need 2 large eggs, at room temperature if possible, as they incorporate better. Vegetable oil, about ½ cup, keeps the cake incredibly moist. Buttermilk is my secret weapon here, ½ cup; it adds a lovely tang and tenderizes the crumb. If you don’t have buttermilk, a little trick is to add 1 tablespoon of lemon juice or white vinegar to regular milk and let it sit for 5 minutes. And for that extra boost of flavor, ½ teaspoon of Vanilla Extract. Finally, hot water or hot brewed coffee, 1 cup. The hot liquid blooms the cocoa powder, intensifying the chocolate flavor like nothing else!
For the Filling:
This is where the “earthquake” really starts to happen! You’ll need about 1 cup of semi-sweet chocolate chips. I like to use a mix of semi-sweet and milk chocolate chips sometimes for extra depth. You’ll also need a couple of tablespoons of softened unsalted butter to make it extra rich and creamy. A splash of milk or heavy cream, maybe 2-3 tablespoons, will help it reach that perfect pourable consistency. And of course, the star: about 24-30 Oreo cookies, roughly chopped or even pulsed a few times in a food processor. I find roughly chopping them gives you delightful little pockets of cookie goodness.
For the Glaze:
This is optional, but highly recommended for that extra touch of indulgence! You’ll need about 1 cup of powdered sugar. A tablespoon or two of melted unsalted butter for richness. A splash of milk or cream, starting with 2 tablespoons, to get the desired consistency. And a little more vanilla extract, about ½ teaspoon, for flavor. You can also add a tablespoon of unsweetened cocoa powder here if you want a chocolate glaze, or even a little espresso powder to enhance the chocolate.
Step-by-Step Instructions
Step 1: Preheat & Prep Pan
First things first, let’s get your oven ready. Preheat it to 350 degrees Fahrenheit (175 degrees Celsius). This is a pretty standard temperature for most cakes, and it ensures even baking. While the oven is heating up, grab a 9×13 inch baking pan. I like to grease it really well with butter or non-stick spray and then dust it lightly with cocoa powder instead of flour. This prevents any white residue on the finished cake and gives it an extra chocolatey edge. You can also line the bottom with parchment paper if you’re worried about sticking – it makes lifting the cake out so much easier!
Step 2: Mix Dry Ingredients
In a large mixing bowl, whisk together your all-purpose flour, granulated sugar, unsweetened cocoa powder, baking soda, baking powder, and salt. Whisking them together really well ensures everything is evenly distributed, which is key for a consistent bake. You don’t want pockets of leavening agents or clumps of cocoa. I usually do this by hand with a whisk, making sure to break up any lumps of cocoa powder. This step sets the foundation for our perfectly textured cake.
Step 3: Mix Wet Ingredients
In a separate medium bowl, whisk together your eggs, vegetable oil, buttermilk, and vanilla extract. Give them a good whisk until everything is nicely combined and the mixture is a uniform pale yellow. Making sure your eggs and buttermilk are at room temperature helps them emulsify better with the oil, leading to a smoother batter.
Step 4: Combine
Now, pour the wet ingredients into the dry ingredients. Mix them together until they’re just combined. Don’t overmix here; you’ll see some streaks of flour, and that’s perfectly okay. The key is to stop mixing as soon as you don’t see large pockets of dry flour. Overmixing can develop the gluten too much, resulting in a tougher cake, and we definitely don’t want that! Lastly, carefully pour in the hot water or hot coffee. The batter will become quite thin, almost like soup. This is exactly what you want! Whisk gently until everything is incorporated. This hot liquid helps to deepen the chocolate flavor and create an incredibly moist crumb.
Step 5: Prepare Filling
While your batter is resting for a moment, let’s get the filling ready. In a small bowl, combine the semi-sweet chocolate chips and softened butter. You can melt this mixture in the microwave in 30-second increments, stirring in between, until it’s smooth and melted. Or, you can melt it gently over a double boiler. Once melted, stir in the splash of milk or cream until it’s a thick, pourable consistency. Now, stir in your roughly chopped Oreo cookies. Make sure they’re evenly distributed throughout the chocolate mixture. This is the heart of our earthquake!
Step 6: Layer & Swirl
Pour about half of your chocolate cake batter into the prepared baking pan. Spread it out evenly. Now, dollop spoonfuls of your Oreo filling mixture all over the batter. Don’t worry about making it perfect; you want some areas to have more filling than others. Next, pour the remaining cake batter over the filling. Gently spread it to cover most of the filling, but it’s okay if some peeks through. Now for the fun part: take a knife or a skewer and gently swirl it through the batter and filling. Don’t over-swirl! You just want to create beautiful marbled patterns, not completely mix everything together. Think of creating little “fault lines” like an actual earthquake. This is where the visual magic happens.
Step 7: Bake
Carefully place the pan into your preheated oven. Bake for about 30-40 minutes. The baking time can vary depending on your oven, so keep an eye on it. You’ll know it’s done when a toothpick inserted into the center of the cake comes out with moist crumbs attached, but not wet batter. If you see pure wet batter, give it a few more minutes. If it comes out completely clean, it might be slightly overbaked, but it’ll still be delicious. For this cake, a little bit of moist crumb is perfectly acceptable.
Step 8: Cool & Glaze
Once baked, carefully remove the cake from the oven. Let it cool in the pan on a wire rack for at least 15-20 minutes. This is really important! It allows the cake to set up properly, preventing it from falling apart when you cut into it or add the glaze. While the cake is cooling, you can whip up the glaze if you’re using one. In a small bowl, whisk together the powdered sugar, melted butter, vanilla extract, and enough milk or cream to reach a drizzly consistency. Once the cake has cooled sufficiently, drizzle the glaze over the top. You can make it as thick or as thin as you like. If you want a chocolate glaze, just add a tablespoon or two of cocoa powder to the mix.
Step 9: Slice & Serve
After the glaze has set a little (or if you skipped the glaze), it’s time to serve! I find this cake is best served slightly warm or at room temperature. Use a sharp knife to cut it into squares. The swirl pattern should be beautifully visible. If you want to take it to the next level, serve it with a scoop of vanilla Ice Cream or a dollop of whipped cream. It’s incredibly satisfying and makes for a fantastic dessert any time of year.
What to Serve It With
This Oreo earthquake cake is so wonderfully versatile, it fits into pretty much any meal or occasion! For a truly indulgent breakfast, I love to have a small, warm slice with a strong cup of black coffee. The richness of the cake cuts through the bitterness of the coffee perfectly, and it just feels like such a treat to start the day. It’s definitely a weekend kind of breakfast! If you’re planning a brunch spread, this cake is a showstopper. I’ll cut it into slightly smaller squares and arrange them on a pretty platter alongside fresh berries and maybe some whipped cream. It looks so impressive and guests always rave about it. As a dessert, well, it’s a no-brainer! Serve it warm with a scoop of good vanilla bean Ice Cream – the contrast of the warm, fudgy cake and cold, creamy ice cream is just heavenly. A drizzle of extra chocolate sauce wouldn’t hurt either! And for those cozy snack times, it’s perfect on its own. My kids love it after school with a tall glass of cold milk. It’s that comforting, familiar taste of Oreos and chocolate that just hits the spot. My family tradition is to always have a slice after Sunday dinner, and it’s become something everyone looks forward to.
Top Tips for Perfecting Your Oreo Earthquake Cake
Over the years, I’ve picked up a few tricks that really make this Oreo earthquake cake shine. First, when you’re preparing your ingredients, make sure your eggs and buttermilk are at room temperature. This truly helps everything emulsify better, leading to a smoother batter and a more tender cake crumb. Don’t skimp on the hot liquid! Whether it’s water or coffee, this step is crucial for blooming the cocoa powder and deepening that rich chocolate flavor. If you’re using coffee, you won’t taste coffee, I promise – it just amplifies the chocolate! When it comes to mixing, remember: don’t overdo it. Mix the wet and dry ingredients until *just* combined. A few streaks of flour are fine. Overmixing develops the gluten and can make your cake tough, and we want this to be incredibly tender. For the Oreo filling, I find that roughly chopping the cookies yields the best results. You get distinct pieces of cookie throughout the cake, which is exactly what makes it an “earthquake.” If you chop them too finely, they can almost disappear into the cake. When you’re swirling, be gentle! The goal is to create beautiful marbled patterns, not to completely blend the batter and filling. A few gentle passes with a knife or skewer is all you need. Trust me, a little swirl goes a long way for visual appeal. For baking, every oven is a little different, so my advice is to start checking for doneness around the 30-minute mark. A toothpick should come out with moist crumbs, not wet batter. A little bit of moistness is good for this cake; it ensures it stays fudgy and not dry. If you’re making ingredient swaps, I’ve had success using oil instead of butter in the batter for extra moisture, and unsweetened applesauce can sometimes be used as a partial fat substitute, though it might alter the texture slightly. For the glaze, consistency is key. Start with less liquid and add it gradually until you reach a nice drizzly texture. Too much liquid and it’ll just run off; too little and it’ll be too thick to spread. If you want a thicker glaze, just add more powdered sugar. And finally, if you can resist, let the cake cool for at least 15-20 minutes before slicing. This really allows it to set up, making for cleaner slices and a better texture. I’ve learned these little lessons through trial and error, and they’ve made this already-great recipe even better!
Storing and Reheating Tips
This Oreo earthquake cake is wonderful because it keeps well, making it perfect for leftovers (if you actually have any!). At room temperature, it will stay fresh for about 2-3 days, especially if it’s covered tightly with plastic wrap or stored in an airtight container. I usually find it’s best eaten within the first two days, as the texture is at its prime. If you’ve already glazed it, keeping it at room temperature is usually best to prevent the glaze from getting too sticky or messy. For longer storage, your refrigerator is your friend. You can keep it covered in the fridge for up to 5 days. Just be aware that the cake might firm up a bit in the cold. To reheat, I like to take a slice out of the fridge about 30 minutes before I want to eat it, letting it come back to room temperature. Alternatively, you can pop a slice in the microwave for about 10-15 seconds, just to take the chill off and soften it up. If you’re looking for long-term storage, freezing is a great option. You can freeze the un-glazed cake, wrapped tightly in plastic wrap and then in a layer of aluminum foil, for up to 3 months. Thaw it overnight in the refrigerator, then let it come to room temperature. If you want to add glaze after thawing, that’s perfectly fine too. For the glaze, it’s usually best to add it just before serving if you’ve stored the cake in the fridge or freezer, as it can get a bit soft otherwise. If you’re taking it to a potluck or need to store it for a bit before serving, I’d recommend glazing it just before you leave or once you arrive at your destination. This ensures the glaze looks its best!
Frequently Asked Questions
Final Thoughts
So there you have it – my absolute favorite Oreo earthquake cake! It’s the kind of recipe that makes baking feel effortless and rewarding, delivering a dessert that’s both incredibly delicious and visually stunning. It’s that perfect blend of rich chocolate, satisfying cookie crunch, and that delightful “earthquake” swirl that just makes everything better. I truly believe this recipe is a keeper, one that you’ll find yourself turning to again and again, for lazy weekend afternoons, spontaneous celebrations, or just when that chocolate craving hits hard. If you love this cake, you might also enjoy my Fudgy Brownies or my Classic Chocolate Chip Cookies – they’re also simple, delicious, and always a hit in my kitchen. I can’t wait to hear what you think of this Oreo earthquake cake! Please leave a comment below and let me know how yours turned out, or if you tried any fun variations. Happy baking!
Oreo Earthquake Cake
Ingredients
Cake Batter
- 2 cups all-purpose flour
- 2 cups granulated sugar
- 0.75 cup unsweetened cocoa powder
- 2 teaspoons baking soda
- 1 teaspoon baking powder
- 1 teaspoon salt
- 2 large eggs
- 1 cup buttermilk
- 0.5 cup vegetable oil
- 2 teaspoons vanilla extract
- 1 cup hot water
Cream Cheese Swirl
- 8 ounces cream cheese softened
- 0.5 cup granulated sugar
- 1 large egg
- 1 teaspoon vanilla extract
Oreo Crumble
- 24 Oreo cookies crushed
Instructions
Preparation Steps
- Preheat your oven to 350°F (175°C). Grease and flour a 9x13 inch baking pan.
- In a large bowl, whisk together the flour, sugar, cocoa powder, baking soda, baking powder, and salt.
- In a separate bowl, whisk together the eggs, buttermilk, oil, and vanilla extract.
- Add the wet ingredients to the dry ingredients and mix until just combined. Stir in the hot water until the batter is smooth.
- For the cream cheese swirl, beat together the softened cream cheese and sugar until smooth. Beat in the egg and vanilla extract until combined.
- Pour half of the chocolate cake batter into the prepared baking pan.
- Dollop spoonfuls of the cream cheese mixture over the batter. Sprinkle half of the crushed Oreos over the cream cheese.
- Pour the remaining chocolate cake batter over the cream cheese and Oreos. Dollop the remaining cream cheese mixture and sprinkle the remaining crushed Oreos on top.
- Gently swirl the cream cheese into the batter with a knife or skewer to create the earthquake effect.
- Bake for 30-35 minutes, or until a wooden skewer inserted into the center comes out with moist crumbs attached.
- Let the cake cool in the pan for 10 minutes before inverting it onto a wire rack to cool completely.
Notes
Featured Comments
“Impressed! Clear steps and restaurant-level results. Perfect for busy nights.”
“New favorite here — spot on. crowd-pleaser was spot on.”
“Super easy and turned out amazing! My family asked for seconds. Saving this one.”
“This sweet treat was absolutely loved — the buttery really stands out. Thanks!”
“Made it tonight and wow — absolutely loved! Will definitely make Oreo earthquake cake again.”
“Packed with flavor and so simple. Exactly what I wanted from Oreo earthquake cake.”