You know those days? The ones where you *need* something sweet, something decadent, something that feels like a warm hug in cake form? For me, that craving always leads me straight to my trusty Oreo earthquake cake. It’s not just a cake; it’s a nostalgic trip back to my childhood, a guaranteed crowd-pleaser for literally any gathering, and honestly, it’s my secret weapon on busy weeknights when a full-blown baking project seems impossible. This isn’t just another chocolate cake; it’s an experience. Imagine the most moist, fudgy chocolate cake you’ve ever had, but then picture it studded with crumbles of crushed Oreos and swirled with a creamy, rich filling that just melts in your mouth. It’s the kind of dessert that makes your eyes roll back in delight. If you’ve ever loved a dense chocolate brownie or a super moist chocolate cupcake, this Oreo earthquake cake is going to be your new obsession. It’s a little bit of magic, baked right into a pan.
What is an Oreo Earthquake Cake?
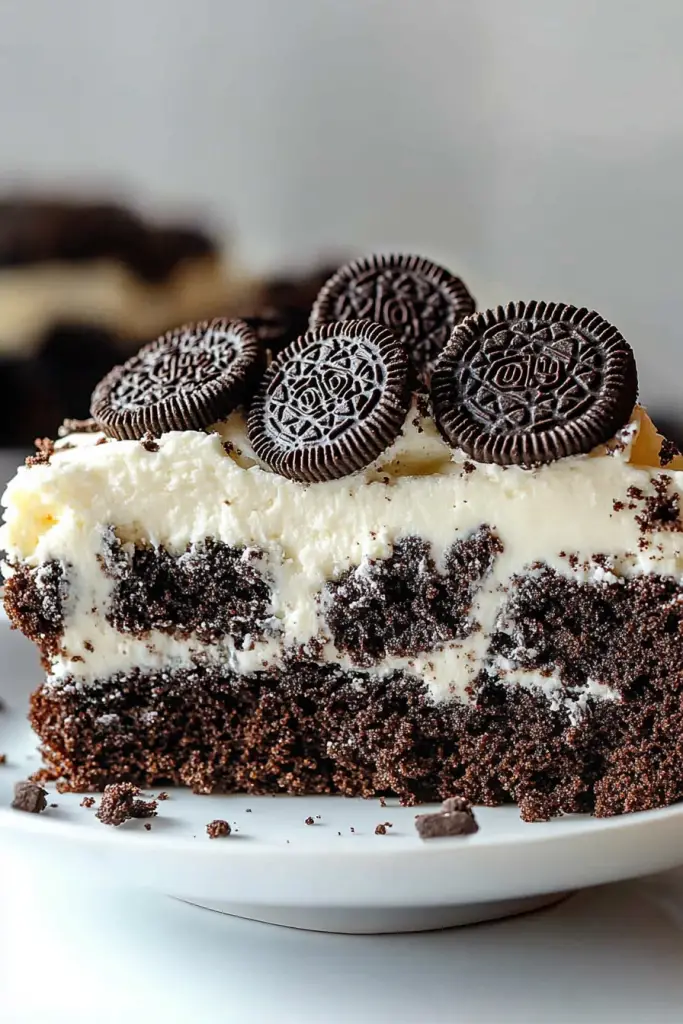
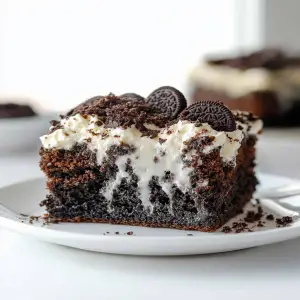
So, what exactly *is* this magical Oreo Earthquake Cake? The name itself gives you a pretty good hint, doesn’t it? Think of it like this: you start with a wonderfully rich and moist chocolate cake batter – the kind that’s almost fudgy. Then, we go wild! We’re talking about dropping dollops of a luscious Cream Cheese or a creamy chocolate filling right into the batter, and then, the pièce de résistance, we generously scatter crushed Oreo cookies all over the place. As it bakes, everything sort of… well, *quakes* and swirls together, creating these incredible pockets of intense chocolatey goodness and creamy, dreamy swirls, all studded with those irresistible Oreo bits. It’s not a perfectly uniform cake; it’s beautifully chaotic, with different textures and flavors mingling together in every bite. It’s essentially a chocolate lover’s paradise where Oreos and a decadent chocolate cake have a delicious, dramatic reunion.
How do you make an Oreo Earthquake Cake?
Quick Overview
Making this Oreo earthquake cake is surprisingly straightforward. You’ll whisk together a rich chocolate cake batter, prepare a simple yet decadent filling, and then assemble it all by layering and swirling. The beauty is in the imperfection; the more it looks like an “earthquake” happened in your pan, the better! It’s a recipe that encourages a little bit of happy chaos in the kitchen. The result is a moist, fudgy cake with pockets of creamy goodness and crunchy Oreo bits that’s perfect for any occasion.
Ingredients
For the Main Batter:
- 2 cups all-purpose flour
- 2 cups granulated sugar
- 3/4 cup unsweetened cocoa powder (Dutch-processed is great for a deeper flavor!)
- 2 teaspoons baking soda
- 1 teaspoon baking powder
- 1 teaspoon salt
- 1 cup buttermilk (or 1 cup milk + 1 tbsp lemon juice or vinegar, let sit for 5 mins)
- 1/2 cup vegetable oil (or other neutral oil)
- 2 large eggs, at room temperature
- 1 teaspoon vanilla extract
- 1 cup hot water or hot brewed coffee (coffee enhances the chocolate flavor beautifully!)
Tip: Using buttermilk makes the cake incredibly tender. If you don’t have any, the milk and vinegar trick works wonders! And don’t skip the hot liquid – it blooms the cocoa powder for maximum chocolate impact.
For the Filling:
- 8 ounces cream cheese, softened
- 1/2 cup granulated sugar
- 1 large egg
- 1 teaspoon vanilla extract
- 1 cup crushed Oreo cookies (about 10-12 cookies, roughly chopped)
Variation: If you’re a serious chocolate fiend, you can swap the Cream Cheese for melted semi-sweet chocolate chips folded into the cream cheese mixture for an extra chocolatey swirl!
For the Glaze:
- 1 cup powdered sugar
- 2-3 tablespoons milk (or cream for richer glaze)
- 1/2 teaspoon vanilla extract
- 1/4 cup crushed Oreo cookies (for topping)
Tip: The consistency of the glaze is key. Start with less milk and add more until it’s pourable but not too thin.
Step-by-Step Instructions
Step 1: Preheat & Prep Pan
First things first, let’s get our oven all warmed up. Preheat it to 350°F (175°C). Grab a 9×13 inch baking pan and grease it really well. I like to use butter or cooking spray, and then I dust it with a little cocoa powder instead of flour. This helps prevent any white streaks on our beautiful dark cake. Set that aside.
Step 2: Mix Dry Ingredients
In a large mixing bowl, whisk together the all-purpose flour, granulated sugar, unsweetened cocoa powder, baking soda, baking powder, and salt. Give it a good whisk to make sure everything is evenly distributed and there are no lumps of cocoa powder. This ensures all the leavening agents and flavor are spread out throughout the cake.
Step 3: Mix Wet Ingredients
In a separate medium bowl, whisk together the buttermilk, vegetable oil, eggs, and Vanilla Extract until well combined. Make sure your eggs are at room temperature; they incorporate much better this way.
Step 4: Combine
Pour the wet ingredients into the dry ingredients. Mix on low speed with an electric mixer, or by hand with a whisk, until *just* combined. Don’t overmix here! We don’t want to develop the gluten too much, which can make the cake tough. Then, carefully pour in the hot water or hot coffee. The batter will be quite thin at this stage – don’t worry, that’s exactly what we want for a super moist cake. Mix until everything is smooth. This thin batter is a hallmark of a truly moist chocolate cake!
Step 5: Prepare Filling
While the batter is resting for a minute, let’s whip up the filling. In a medium bowl, beat the softened cream cheese with the 1/2 cup of sugar until it’s smooth and creamy. Beat in the egg and vanilla extract until everything is well combined. Finally, gently fold in the roughly crushed Oreo cookies. You want some nice chunks in there for texture.
Step 6: Layer & Swirl
Pour about half of the chocolate cake batter into your prepared baking pan. Dollop spoonfuls of the cream cheese-Oreo filling evenly over the batter. Now, pour the remaining chocolate cake batter over the top of the filling. Don’t worry about covering it perfectly; some of the filling peeking through is part of the “earthquake” effect! Now for the fun part: take a knife or a skewer and gently swirl through the batter and filling, creating those gorgeous marble patterns. Don’t over-swirl, or you’ll lose the distinct pockets of filling.
Step 7: Bake
Pop the pan into your preheated oven. Bake for 30-35 minutes, or until a wooden skewer or toothpick inserted into the center of the cake comes out with moist crumbs attached, not wet batter. Keep an eye on it, as oven temperatures can vary. Overbaking is the enemy of moist cake!
Step 8: Cool & Glaze
Once baked, let the cake cool in the pan on a wire rack for at least 15-20 minutes. This is crucial! If you try to glaze it too soon, the glaze will just melt away. While the cake is cooling, whisk together the powdered sugar, 2 tablespoons of milk, and vanilla extract in a small bowl until smooth. Add more milk, a teaspoon at a time, if needed, to reach a pourable consistency. Once the cake has cooled slightly, drizzle or spread the glaze over the top. Immediately sprinkle the remaining crushed Oreos over the wet glaze so they stick. It looks so pretty!
Step 9: Slice & Serve
Let the cake cool a bit more before slicing. I find it’s best served warm or at room temperature. Use a sharp knife for clean slices. The swirls and Oreo bits make it look so inviting. Enjoy every decadent bite!
What to Serve It With
This Oreo earthquake cake is a showstopper on its own, but it can also be dressed up or down depending on the occasion. For a casual breakfast or brunch, a simple dusting of powdered sugar or a drizzle of the glaze is perfect. It pairs beautifully with a hot cup of coffee or a cold glass of milk. If you’re serving it as a dessert after a meal, elevate it by pairing it with a scoop of good quality vanilla bean ice cream – the contrast of warm cake and cold ice cream is pure bliss! A dollop of whipped cream or a few fresh berries can also add a lovely touch. My family loves it with a glass of chocolate milk, especially the kids; it’s their absolute favorite treat. For a more elegant brunch, consider serving it with a side of fresh fruit salad or a light yogurt parfait to balance the richness. It’s also fantastic for potlucks or bake sales because it travels well and everyone always asks for the recipe!
Top Tips for Perfecting Your Oreo Earthquake Cake
Over the years, I’ve picked up a few tricks that make this Oreo earthquake cake consistently amazing. First, and I can’t stress this enough, don’t overmix the batter. Once the wet and dry ingredients are just combined, stop. Overmixing develops gluten, which leads to a tougher cake. I learned this the hard way many years ago! For the filling, ensure your cream cheese is truly softened. Cold cream cheese will result in lumps, and nobody wants that in their creamy swirl. If you find your crushed Oreos sinking to the bottom, it might be because your batter is too thin, or you’re adding them too early. A good tip is to lightly coat the crushed Oreos in a tablespoon of the dry flour mixture before adding them to the filling; this can help them suspend better. When you’re swirling, less is more. You want distinct pockets of filling and Oreo, not a muddy mess. Gentle, shallow swirls are best. For baking, trust your toothpick test, but also know your oven. If your cake is browning too quickly on top, you can loosely tent it with aluminum foil for the last 10-15 minutes of baking. Regarding ingredient swaps, I’ve found that using a good quality Dutch-processed cocoa powder really deepens the chocolate flavor, making it even more luxurious. And if you want to experiment with the filling, try adding a teaspoon of espresso powder to the cream cheese mixture; it intensifies the chocolate without making it taste like coffee!
Storing and Reheating Tips
This Oreo earthquake cake is wonderfully forgiving when it comes to storage. If you’ve got leftovers (which is rare in my house!), you can store the unfrosted cake, well-wrapped in plastic wrap or in an airtight container, at room temperature for up to 3 days. The moisture in the cake helps keep it fresh. If you’ve already glazed it, it’s best to store it covered at room temperature for 1-2 days. For longer storage, the refrigerator is your friend. Wrapped tightly, it will keep well for about a week. Just let it come back to room temperature for about 30 minutes before serving, as it can get a bit firm when cold. Reheating is simple: a few seconds in the microwave can revive that wonderfully gooey texture, or you can warm individual slices gently in a low oven (around 300°F or 150°C) for about 5-10 minutes until warmed through. If you plan to freeze the cake (unfrosted is best), wrap it securely in a double layer of plastic wrap, then a layer of aluminum foil, and it should keep its deliciousness for up to 3 months. Thaw it overnight in the refrigerator, then let it sit at room temperature before glazing and serving.
Frequently Asked Questions
Final Thoughts
This Oreo earthquake cake is more than just a recipe to me; it’s a comfort, a celebration, and a delicious adventure all rolled into one. It’s that perfect blend of familiar chocolate cake and the irresistible crunch of Oreos, all brought together with a luscious swirl that makes each bite a surprise. It’s the kind of cake that makes people ask for seconds (and thirds!), and it’s surprisingly easy to whip up, even for novice bakers. I truly believe everyone needs a go-to recipe that brings joy and a little bit of indulgence without a fuss, and this is mine. If you’re a chocolate lover, or if you have a soft spot for Oreos, you absolutely have to give this a try. I promise, it’ll become a favorite in your kitchen too! Don’t forget to let me know how yours turns out in the comments below, and I’d love to hear about any fun variations you come up with! Happy baking, my friends!
Oreo Earthquake Cake
Ingredients
Cake Batter
- 1.5 cup all-purpose flour
- 2 cup granulated sugar
- 0.75 cup unsweetened cocoa powder
- 1.5 teaspoon baking soda
- 1 teaspoon baking powder
- 1 teaspoon salt
- 2 large eggs
- 1 cup milk
- 0.5 cup vegetable oil
- 1 teaspoon vanilla extract
- 1 cup boiling water
Oreo Filling
- 24 whole Oreo cookies crushed
- 4 ounce cream cheese softened
- 0.25 cup powdered sugar
Optional Frosting
- 1 cup buttercream frosting
Instructions
Preparation Steps
- Preheat your oven to 350°F (175°C). Grease and flour a 9x13 inch baking pan.
- In a large bowl, whisk together the flour, sugar, cocoa powder, baking soda, baking powder, and salt.
- In a separate bowl, beat the eggs, milk, vegetable oil, and vanilla extract.
- Add the wet ingredients to the dry ingredients and mix until just combined. Do not overmix.
- Carefully stir in the boiling water. The batter will be thin.
- In a small bowl, combine the softened cream cheese and powdered sugar. Mix until smooth.
- Pour half of the cake batter into the prepared baking pan.
- Drop spoonfuls of the cream cheese mixture evenly over the batter. Sprinkle half of the crushed Oreos over the cream cheese.
- Pour the remaining cake batter over the top. Sprinkle the rest of the crushed Oreos over the batter.
- Bake for 30-35 minutes, or until a wooden skewer inserted into the center comes out clean.
- Let the cake cool in the pan for 10 minutes before inverting it onto a wire rack to cool completely.
- Once cooled, frost with your favorite buttercream frosting, if desired.
Notes
Featured Comments
“Impressed! Clear steps and family favorite results. Perfect for busy nights.”
“New favorite here — restaurant-level. crowd-pleaser was spot on.”
“Super easy and turned out amazing! My family asked for seconds. Saving this one.”
“This sweet treat was absolutely loved — the cozy really stands out. Thanks!”
“Made it tonight and wow — family favorite! Will definitely make Oreo earthquake cake again.”
“Packed with flavor and so simple. Exactly what I wanted from Oreo earthquake cake.”