

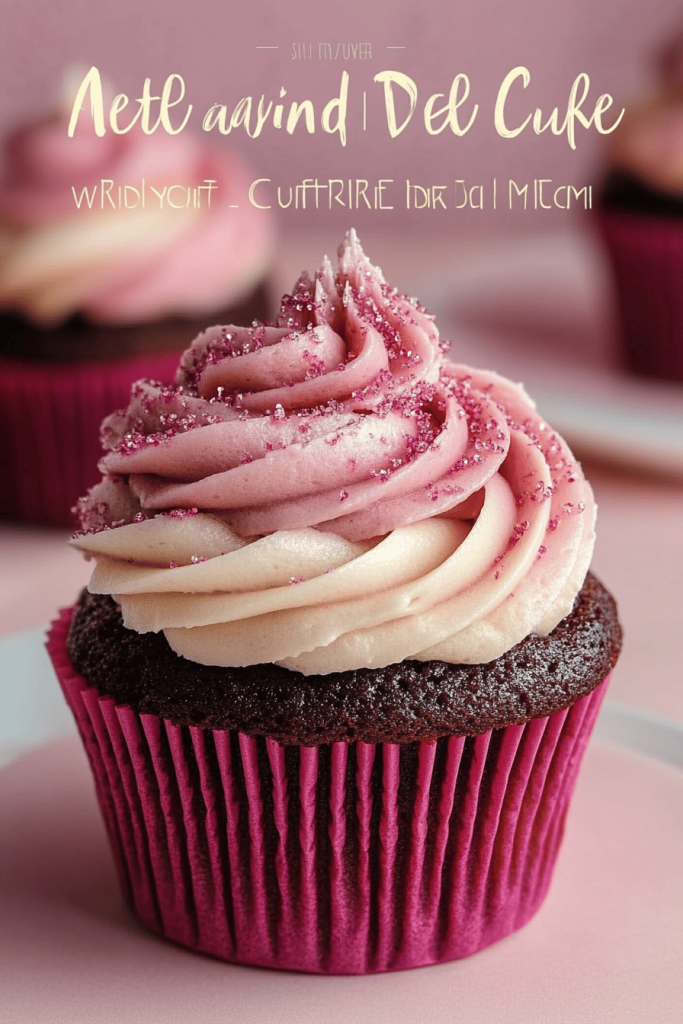
The first time I bitten into a bite-sized sunshine, it was pink, tart, and somehow impossibly cheerful. Pink lemonade cupcakes became my little summer ritual—a memory you can taste. I’m not exaggerating when I say these little cakes smell like lemon-scented windowsills and the soft warmth of a kitchen that’s been loved all afternoon. They’re not just dessert; they’re a sip of summer that you can hold in your hand. The flavor is bright, but not aggressive, and the way the pink hue deepens as they bake feels almost cinematic. I’ve made these countless times for family gatherings, and they disappear in minutes at my house—my kids ask for seconds before the frosting is even fully set. If you’ve ever baked lemony cupcakes and wished for a touch more whimsy, this is the recipe that checks all the boxes: easy, joyful, crowd-pleasing, and deeply comforting. Think of it as the lemon cupcake you already adore, only prettier, and a little bit extra happy on top.

What is Pink Lemonade Cupcake?
Pink lemonade cupcakes are essentially Lemon Cupcakes with a rosy twist. Think of it as a celebration of brightness: tender vanilla cake, kissed with lemon zest, and finished with a light pink glaze or frosting that hints at berry sweetness. The name itself comes from the color you achieve with a touch of pink food color or a wash of strawberry puree folded into the batter. It’s practically a portable lemonade stand in cupcake form—juicy, sunny, and just a little fancy. I love how the pink hue feels playful for birthdays, picnics, or any time you want a cheerful bake that still feels like home. This version includes a playful strawberry-cream filling tucked inside and a glossy pink glaze that makes the tops glisten when you plate them. It’s all about balance: tart lemon, soft crumb, and that kiss of sweetness from the glaze. It’s essentially a lemon cake that got a charming pink makeover, and I’m here for every bright, citrusy bite.
How to Make Pink Lemonade Cupcakes
Quick Overview
This recipe comes together in three simple acts: bake the soft, lemony cupcakes; layer in a tangy, bright filling; and crown with a glossy pink glaze that tastes like summer in a kiss. The method is forgiving—stir until just combined, fill the liners halfway so they rise nicely, and keep an eye on the bake time. You’ll love how the batter comes together quickly, how the filling practically steals the show, and how the glaze blooms over the tops with that perfect, mirror-like shine. It’s a process that feels like a treat you can finish in the time you’d normally spend catching up on a favorite show. Trust me on this one: the result is a cupcake that looks as celebratory as it tastes, and you’ll find yourself making it for friends, neighbors, and every coffee chat that happens to roll around.
Ingredients
For the Main Batter:
– 1 3/4 cups (210 g) all-purpose flour
– 1 cup (200 g) granulated sugar
– 1/2 cup (115 g) unsalted butter, softened
– 2 large eggs
– 1/2 cup (120 ml) whole milk (or almond milk for a lighter note; I’ve tested and it’s lovely)
– 1/4 cup (60 ml) pink lemonade concentrate, or 3–4 tbsp fresh lemon juice plus 1–2 tbsp strawberry purée
– 1 1/2 tsp Vanilla Extract
– 1 1/2 tsp lemon zest
– 1 1/2 tsp baking powder
– Pinch of salt
For the Filling:
– 1/3 cup lemon curd or your favorite lemon jam, plus a splash of cream or yogurt if you like a creamier filling
– Optional: a few raspberries or chopped strawberries for extra brightness
For the Glaze:
– 1 cup (125 g) confectioners’ sugar, sifted
– 2–3 tbsp pink lemonade or lemon juice, plus a tiny splash of cream to loosen as needed
– 1–2 drops pink gel food coloring (or a tiny bit of beet juice for natural color)
Step-by-Step Instructions
Step 1: Preheat & Prep Pan
Preheat your oven to 350°F (175°C). Line a 12-cup muffin tin with paper liners or lightly spray with nonstick spray. If you want a little extra height and a softer crust, fill the liners about halfway before chilling the batter for ten minutes—you’ll see a taller, bakery-like rise.
Step 2: Mix Dry Ingredients
In a medium bowl, whisk together the flour, baking powder, and salt. This is the moment you’ll notice the lemon zest catching the light and filling the room with a bright citrusy aroma. Don’t overmix here; you’re aiming for all the dry bits evenly distributed so the batter stays tender.
Step 3: Mix Wet Ingredients
In a separate large bowl, beat the butter and sugar until it’s light and fluffy—about 2–3 minutes with an electric mixer. Add the eggs one at a time, beating well after each addition. Stir in the vanilla, lemon zest, and pink lemonade concentrate (or lemon juice plus purée). The batter will look glossy and a touch pale pink, which is exactly what you want.
Step 4: Combine
Alternate adding the dry ingredients with the milk, starting and ending with the dry. Mix just until combined; a few streaks of flour are better than a tough, overworked batter. You want a light, airy crumb that rises well in the oven.
Step 5: Prepare Filling
If you’re filling, spoon a small amount of lemon curd into a piping bag or a plastic bag with the corner snipped. You can also use a small spoon to drop a dab into the center of each cupcake after about 6 minutes of baking, then cover with a bit more batter to seal it in. The goal is a bright surprise of lemon in every bite, not a molten center. If you prefer to skip filling, you’ll still get a delightful lemony aroma in every bite and a pretty marble effect from the glaze alone.
Step 6: Layer & Swirl
Fill each liner about halfway with batter. If you’re filling, pipe or spoon a little filling in the center and cover with more batter. For a swirl look, you can color a small portion of batter with a drop of pink food coloring and spoon a touch of the pink into the center of each cup, then swirl with a toothpick to create a pretty marbled effect. This is where you’ll see the cupcakes start to look festive and a touch playful.
Step 7: Bake
Bake for 18–22 minutes, or until the tops spring back lightly to the touch and a toothpick comes out with a few moist crumbs. If you notice the edges browning too quickly, tent with a little foil in the last 5 minutes. Let the cupcakes cool in the pan for 5 minutes, then transfer to a rack to finish cooling completely before glazing.
Step 8: Cool & Glaze
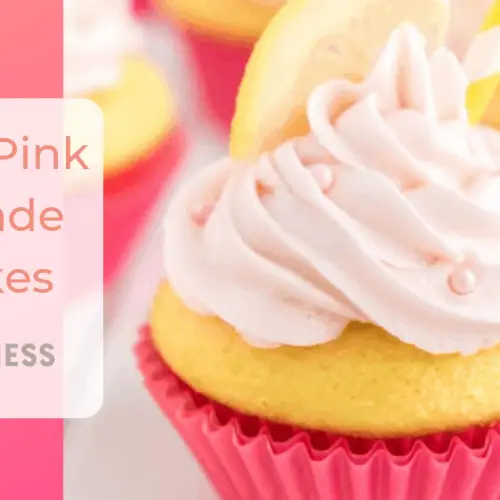
Cool completely before applying the glaze. Whisk together the confectioners’ sugar with lemon juice and a touch of cream to loosen into a smooth, pourable paste. Add pink gel coloring a drop at a time until you reach your preferred shade of pink. Drizzle or pour over the tops, letting it cascade down the sides for a glossy finish. If you want a more opaque, deeply pink finish, you can tint a second small portion of glaze and pipe a delicate edge around the cupcake tops. The glaze should set within 10–15 minutes, revealing a soft shine that makes the cupcakes look as good as they taste.
Step 9: Slice & Serve
When you’re ready to serve, you can add a final flourish: a tiny lemon curl, a single berry, or a small mint leaf for color. These little toppings make a big impact on presentation. I love pairing them with a hot cup of coffee or a cold glass of iced tea on a sunny afternoon. The first bite is tart and bright, followed by the soft sweetness of the cake and that pretty pink glow from the glaze. My family lingers over these, and I never tire of watching their faces light up with every bite.
What to Serve It With
Pairing ideas that elevate pink lemonade cupcakes into a memorable moment.
For Breakfast: A bright, citrusy muffin-like vibe—serve with a strong cup of coffee or a citrus-y tea. The zing of lemon is a cheerful way to start the day, especially when you’re grabbing a quick bite before the morning scramble. You can also plate them with a dollop of Whipped Cream and a few raspberries for a celebratory brunch look.
For Brunch: Set out a small buffet of citrusy sweets with a few savory bites. A bowl of yogurt with berries and a drizzle of honey makes a perfect counterpoint to the sweetness of the cupcakes. Add a pitcher of lemonade for a cohesive theme and a sprinkle of edible flowers for a party-ready presentation.
As Dessert: They’re ideal with a scoop of vanilla bean Ice Cream or a light mascarpone cream. The tartness from the lemon lifts the richness of the dairy, while the pink glaze ties the plate together in a pretty, party-ready way. I’ve served them after seafood dinners and the balance feels absolutely perfect.
For Cozy Snacks: Stash a few in the fridge for late-night cravings. A chilled cupcake with a warm mug of tea can be a comforting treat after the kids are asleep but the kitchen is still humming with quiet, cozy energy. The fridge-cold frosting offers a slightly different texture that’s fun to explore close to bedtime.
Top Tips for Perfecting Your Pink Lemonade Cupcakes
These tips come from years of tweaking and tasting with family around the table. If you’ve ever felt unsure about lemon-based bakes, these little nudges will help you nail the texture and flavor every time.
Flavor Prep: Fresh lemon zest smells like sunshine—don’t skip it. If you’re using pink lemonade concentrate, taste the batter before adding the concentrate. You’ll likely want a touch more lemon zest or a splash of vanilla to round the sharp citrus notes.
Mixing Advice: Overmixing is the thief of moist cupcakes. Mix the batter just until you don’t see dry flour anymore, then stop. If you whisk too aggressively, the gluten tightens and the crumb becomes denser. Gentle folding after adding dry to wet helps preserve a light crumb.
Swirl Customization: If you want a more dramatic swirl, reserve a small portion of pink-tinted batter and drop it in with a toothpick after the batter is spooned into the liners. A gentle swirl makes the pink look like sunrise ribbons across the top and the flavor is still evenly distributed.
Ingredient Swaps: To make them dairy-free, use coconut or almond milk and replace butter with a neutral oil or a dairy-free butter substitute. For gluten-free versions, use a 1:1 gluten-free flour blend with a touch more baking powder. The key is a little extra moisture in the batter to keep the crumb light.
Baking Tips: If your oven runs hot, drop the temperature by 25 degrees for the first 5–7 minutes, then return to 350°F (175°C). This helps prevent doming and ensures even baking. Use a light touch with the toothpick test; you want a few moist crumbs for a tender cupcake, not a dry crumb.
Glaze Variations: For a glossy, mirror-like glaze, add a teaspoon of light corn syrup to the glaze and let it rest for 5 minutes before using. If you want a deeper color, a small amount of beet juice or pomegranate molasses can intensify the pink without over-sweetening. If you like a thinner glaze for drizzle, add a bit more lemon juice and a splash of milk to reach your desired consistency.
Lessons learned: I once added too much glaze at once and watched the color pool into the frosting; the top looked brilliant, but the bottom got a little soggy. A light hand and multiple thin coats cure that problem. My kids actually ask for seconds when they see the glaze catching the light—the visual payoff matters, and so does the texture you end up with on the bite.
Storing and Reheating Tips
Storage is easy, and these cupcakes taste almost as good the next day as they do right out of the oven—though I won’t pretend I don’t sneak one straight from the bakery paper while cleaning up the kitchen at midnight. Here’s how to keep them fresh and tasty longer.
Room Temperature: If you’re serving within a day, store cupcakes in an airtight container at room temperature for up to 24 hours. Keep the glaze from pooling by not stacking the tops too tightly; a single layer works best for the first day.
Refrigerator Storage: For day two or three, refrigerate in an airtight container. If the glaze looks a bit tacky after refrigeration, let the cupcakes come to room temperature for about 20 minutes before serving to restore the shine and softness of the crumb.
Freezer Instructions: Cupcakes freeze well unglazed or with glaze. Wrap each cupcake tightly in plastic wrap and place in a freezer bag for up to 2–3 months. Thaw in the fridge overnight and re-glaze to refresh the finish. If you’re freezing the filled version, freeze before baking or after baking but before glazing to preserve moisture.
Glaze Timing Advice: If you’re freezing, delay the glaze until after you thaw. Frozen frosting can crack a little upon thawing if applied before freezing. If you do glaze after thawing, you can reheat the glaze briefly to loosen and reapply for a fresh, glossy finish.
Frequently Asked Questions
Final Thoughts
I’ve learned that pink lemonade cupcakes aren’t just a pretty face—they’re an approachable gateway to happier baking. They work for birthdays, teacher gifts, or a simple “let’s celebrate the little moments” kind of night. The lemon keeps things bright; the pink glaze adds whimsy; and the filling gives you a pleasant surprise with every bite. If you’re looking for a dessert that feels special but won’t keep you stuck in the kitchen all afternoon, this is it. I love how adaptable they are—gluten-free, dairy-free, or just as-is—and how they taste like a memory you can recreate on a busy weeknight. So go ahead, bake a batch, and share them with your favorite people. Happy baking! And if you try variations or a new glaze, please drop a note in the comments—I’d love to hear how yours turned out.
Pink Lemonade Cupcakes
Ingredients
Cupcakes
- 1 box Lemon cake mix (Betty Crocker recommended)
- 1 cup Buttermilk
- Oil called for in the cake mix
- 4 Eggs
Frosting
- 0.5 cup Butter (at room temperature)
- 0.33 cup Pink lemonade concentrate (undiluted, at room temperature)
- 1 tablespoon Vanilla extract
- 1 dash Salt
- 5.5 cups Powdered sugar
Instructions
Preparation Steps
- For the cupcakes: Preheat oven to 350 degrees F. Mix together the cake mix, oil as instructed on the box, buttermilk, and eggs.
- Line cupcake tins and fill each cup about 3/4 full. This recipe yields approximately 18 cupcakes.
- Bake for 12-15 minutes, or until cupcakes are cooked through and spring back when lightly touched.
- For the frosting: Add the butter, pink lemonade concentrate, vanilla extract, and salt to the bowl of a stand mixer. Mix on medium speed with the whisk attachment until combined.
- Increase the speed to high and mix for 3-5 minutes until the mixture is light and fluffy, stopping to scrape down the sides as needed.
- Add half of the powdered sugar. Mix on low speed until combined, then increase speed to medium and whip for 1 to 2 minutes.
- The frosting should have a medium consistency, perfect for piping. If too thick, add a little more lemonade concentrate. If too thin, add 1/4 cup of powdered sugar at a time and whip to combine until sturdy.
- Once cupcakes are completely cooled, pipe frosting onto them using your favorite tip (M1 tip recommended).
- Garnish as desired.
Notes
Featured Comments
“Impressed! Clear steps and absolutely loved results. Perfect for busy nights.”
“New favorite here — restaurant-level. crowd-pleaser was spot on.”
“Super easy and turned out amazing! My family asked for seconds. Saving this one.”
“This sweet treat was absolutely loved — the bright really stands out. Thanks!”
“Made it tonight and wow — perfect for busy nights! Will definitely make pink lemonade cupcakes again.”
“Packed with flavor and so simple. Exactly what I wanted from pink lemonade cupcakes.”


